I recommend you always delete or disable old VAR versions of Decal Maker when updating.
Saving the final blended texture is intentionally disabled. Only a single Decal Layer at a time can be saved out via the Move UI. Unless approved by MeshVR I will not allow saving the final blended decal layer. The issues from reusing and sharing others work is a can of worms I do not want to deal with.
See End of post for a tutorial overview of the UI/buttons
Ever wanted to have a tan line and tattoos at the same time? Tired of opening Photoshop to merge textures for use in VAM. Well here is the plugin for you.
Decal Maker allows you to merge multiple textures into one texture that is applied in game. It works on Decals, Specular, Gloss and Normal textures.
What Decal Maker does:
WARNING:
Use of triggers in Beta 11 have much less of an overall FPS impact. Still be aware that it will impact FPS somewhat.
A stellar example of using Variable Triggers to smoothly transition between characters using Decal Maker and Timeline by DreamDealer
RC4: Built in Texture Editing

Texture scripting via trigger
Features:
Prefab system, this is for Creators who want to have similar "decals" in a package.
For example a variety of Eye shadows or lipsticks to be displayed and selected in an organized manner.
Prefabs are presets named with a specific format CREATOR_Type of Item_Item Name and then saved into the Prefabs folder inside the presets folder.
To Use Prefabs click the prefab button and Select from the list of "Items Types" then select the specific item.
Prefabs are applied and removed automatically and will bake seamlessly with normal presets or manual Decal Panels.
Decal panels can now be Re-Ordered, via the arrows on each panel
New Panels can be opened via the plus icon
Panel can be removed with the X icon
Normal, specular and gloss texture support.
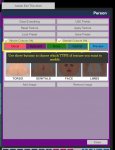
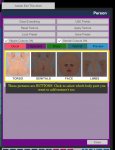
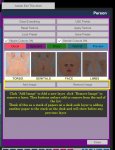
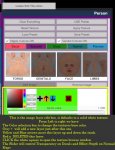
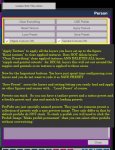
UI Tutorial Video clip and Images
Saving the final blended texture is intentionally disabled. Only a single Decal Layer at a time can be saved out via the Move UI. Unless approved by MeshVR I will not allow saving the final blended decal layer. The issues from reusing and sharing others work is a can of worms I do not want to deal with.
See End of post for a tutorial overview of the UI/buttons
Ever wanted to have a tan line and tattoos at the same time? Tired of opening Photoshop to merge textures for use in VAM. Well here is the plugin for you.
Decal Maker allows you to merge multiple textures into one texture that is applied in game. It works on Decals, Specular, Gloss and Normal textures.
What Decal Maker does:
- Blends multiple layers into a combined image that VAM can use.
- Individual Color and Alpha's for each layer.
- Move, Rotate and Scale Decal textures.
- Script via triggers to change the above settings
- Save Presets that can be loaded on other figures and stack together.
- Blend multiple skin textures to add detail and provide variety.
- Add multiple Tanlines
- Add Tattoos.
- Blend between textures smoothly with Timeline
WARNING:
Use of triggers in Beta 11 have much less of an overall FPS impact. Still be aware that it will impact FPS somewhat.
A stellar example of using Variable Triggers to smoothly transition between characters using Decal Maker and Timeline by DreamDealer
RC4: Built in Texture Editing
Texture scripting via trigger
Features:
Prefab system, this is for Creators who want to have similar "decals" in a package.
For example a variety of Eye shadows or lipsticks to be displayed and selected in an organized manner.
Prefabs are presets named with a specific format CREATOR_Type of Item_Item Name and then saved into the Prefabs folder inside the presets folder.
To Use Prefabs click the prefab button and Select from the list of "Items Types" then select the specific item.
Prefabs are applied and removed automatically and will bake seamlessly with normal presets or manual Decal Panels.
Decal panels can now be Re-Ordered, via the arrows on each panel
New Panels can be opened via the plus icon
Panel can be removed with the X icon
Normal, specular and gloss texture support.
UI Tutorial Video clip and Images


