This is a Mini Tutorial for my IdlePoser plugin. I wrote this for a discussion thread. I decided I might as well make it a resource so it can be found.
IdlePoser is an extremely powerful animation plugin that is using an alternative approach than Acid Bubbles Timeline. Instead of setting up "animations" you setup poses (called "States") and how to transition between them. The power comes from the fact that poses can be relative to other bodyparts or even other characters. It's most suited if you want to achieve random non-looping idle animation. Usually you would combine multiple IdlePoser on the same character, controlling different bodyparts independently.
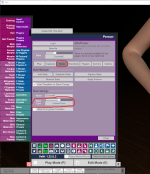
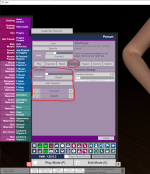
When using ControlPoints you need to adding transitions controlling how you exactly you get from State1 to State2:
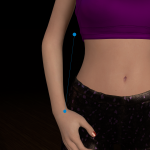
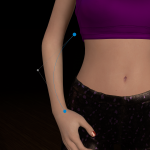
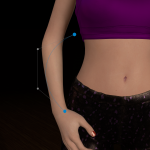
Example animation for a hand:
The length of the animation is the sum of the "Transition Duration" values of all the States and ControlPoints involved in the animation.
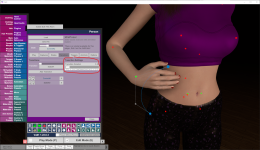
I guess it becomes more clear with an image....different colors for different groups:
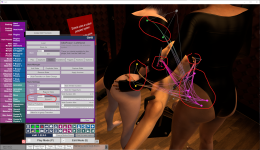
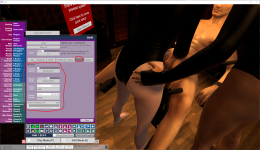
A common setup would be to have multiple IdlePoser on the same character, each controlling different parts of the body. Each of them would operate more or less independently. This creates a lot of random animation variations, achieving that non-looping life-like effect we are looking for with comparatively little setup.
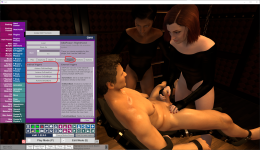
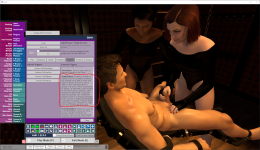
Example for a chain of animations:

 hub.virtamate.com
IdlePoser is an extremely powerful animation plugin that is using an alternative approach than Acid Bubbles Timeline. Instead of setting up "animations" you setup poses (called "States") and how to transition between them. The power comes from the fact that poses can be relative to other bodyparts or even other characters. It's most suited if you want to achieve random non-looping idle animation. Usually you would combine multiple IdlePoser on the same character, controlling different bodyparts independently.
Let's start with some poses...
- Add IdlePoser to your character:

- Go to the "Captures" tab. Setup which control nodes you want to be controlled by the plugin. You can also capture morphs, like fingers, etc.

- Go to the "States" tab. Bring your character into your desired pose. Then press "Add State". Basically each "State" is a "Pose" in this plugin. You should give each state some reasonable name in the "Name" field. You will need the name later to trigger the various poses.

- Use the "State" dropdown menu to switch between the various states (=poses)

- Want to change a State/Pose later? Select the State you like to change from the drop down, then adjust your character pose, then press the "Capture State" button in the "States" tab.
- Optional: If you just wanna switch between poses, add a button or something else that can trigger things to your scene. Have it trigger "SwitchState" with the name of the state/pose you set above.

Now let's do some animation...
Transitions
In the "Transitions" tab you control how to get from one state/pose to another. Optionally you can add one or two states in-between with their "State Type" set to be a "Control Point". Instead of going in a straight line the transition would then end up being a curve.

When using ControlPoints you need to adding transitions controlling how you exactly you get from State1 to State2:
- Transition from State1 to ControlPoint1
- Transition from ControlPoint1 to ControlPoint2
- Transition from ControlPoint2 to State2


Example animation for a hand:
The length of the animation is the sum of the "Transition Duration" values of all the States and ControlPoints involved in the animation.

Debug Visualization
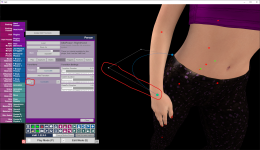
In the "Options" tab you can enable to draw the paths of animations and also the transitions. It will help you with more complex setups.
Play/Pause Animation
As soon as you have setup transitions, IdlePoser might already automatically switch between States at random, following the available transitions. Note that this only happens as long as IdlePoser is on the "Play" tab and the "Animation Paused" checkbox is off. All the other tabs make IdlePoser pause animation, so you can work without having to hurry. After a scene is loaded, IdlePoser goes automatically to the "Play" tab.
Wait Duration
How long IdlePoser waits for each state is controlled in the "States" tab. See "Wait Duration Min/Max", you can also set "Wait Infinite Duration", if you want to control things externally from buttons, etc.
State Groups
By default a "Regular State" is assigned to the "None" group. However, it can be assigned to one of 12 StateGroups, indicated by letters A to L. Usually these groups are used to indicate "minor variants" of a state. A usual setup would be to setup one common "Control Point" for each group, allowing to setup animations between groups quickly.I guess it becomes more clear with an image....different colors for different groups:

How is the next state picked?
When IdlePoser decides it's time to transition to another State, it searches for other States of type "Regular State" following the transitions you have setup, starting at the current State. The target state has to meet certain criteria:- Target state is not further than 2 ControlPoints away. This limit can be helpful in certain situations, allowing easier setups.
- Usually, if the current state is in a StateGroup (not "None"), the target state needs to be in a different StateGroup. You can also enable the "Allow for in-group Transition" checkbox for all states and ControlPoints along the way to disable this in-group restriction. It can be useful in some situations.
- StateGroup of the target State needs to match current StateMask. See section "Advanced Stuff". By default all groups are allowed.
- Use of "Intermediate Points" can extend the search distance. See section "Advanced Stuff".
Anchors
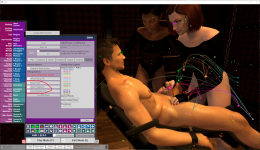
This is where the real power of IdlePoser is! Via the "Anchors" tab you can make a state/pose relative to some other body part or even other character/atom. For each control node for each State you can setup what it is anchored to. E.g. here the hand of the right girls is "anchored" to the other girls ass. So even if the left girl moves (within reason) the hand will stay attached while right girl is in this state. Since it's setup for each state (even the control points), you can smoothly in and out of anchoring.
A common setup would be to have multiple IdlePoser on the same character, each controlling different parts of the body. Each of them would operate more or less independently. This creates a lot of random animation variations, achieving that non-looping life-like effect we are looking for with comparatively little setup.
Advanced Stuff
Triggers
You can trigger things in your scene when entering or exiting a state. Because changing states is an animation (that takes time) there is a separate trigger when beginning end ending that animation to give you more control.
StateMask
Using the "SetStateMask" external trigger you can restrict which state groups an IdlePoser instance is allowed to use. If we are in a State that is no longer allowed, it causes is an immediate transition to an still allowed state. There is some description here:
TriggerSync
If "Wait for TriggerSync" is enabled for a State, it will, after its duration finished, wait for this external trigger to be called before transitioning to the next state. Use it to synchronize multiple IdlePoser or synchronize with other things in your scene. A common example would be a central LogicBricks StateMachine for your scene taking control using SetStateMask and/or TriggerSync.Intermediate Points
This "State Type" is similar to the "Regular State". However, they are intended as an intermediate step of reaching a regular state. You can also have multiple of these in a chain. Often used for things like foot steps.Example for a chain of animations:
- StateA -> ControlPointA -> ControlPointB1 -> IntermediatePointB
- IntermediatePointB -> ControlPointB2 -> ControlPointC1 -> IntermediatePointC
- IntermediatePointC -> ControlPointC2 -> ControlPointD -> StateD
One-Way Transitions
Transitions that can only be passed in one direction. Use the little checkboxes on each transition in the "Transitions" tab. In the DebugVisualization these are displayed as fading from red to grey:
Best-Practices / Tips&Tricks
Play/Pause IdlePoser
IdlePoser play animation only when it's in the "Play" tab. While working, it's best to keep the IdlePosers in your scene on another tab, so they are paused.Saving a Scene
Before saving a scene (for release to players) you want to pause all IdlePosers by setting them all to any tab other than "Play". Then transition each IdlePoser to your desired State using the drop down menu at the top. Now you have all the time in the world to save your scene, including making a nice thumbnail screenshot. When loading your scene later, all IdlePosers will start on the "Play" tab again, meaning they will start playing automatically.Duplicating a State
The "Duplicate State" button on the "States" tab duplicates all settings of the current state, including transitions, triggers, anchors, etc. However it uses the current character pose. Use it to quickly create variants of a state.Copy&Paste parts of a Pose between States
There are two different tools:- Disable "Auto-Transition on State Change" in the "States" tab. This causes to keep the current pose when changing the state using the drop down menu. So, go the other state and press "Capture State" to copy a pose.
- In the "Captures" tab you can control for each captured control or morph whether it's actually updated by IdlePoser. For a partial copy&paste of a pose do the following: Temporarily disable the parts you want to copy over, switch to your other state and press "Capture State".
Using IdlePoser with Gaze plugin
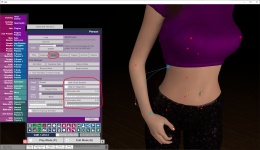
The Gaze plugin (from Life) controls headControl rotation only. You can use it together with IdlePoser by letting IdlePoser only control the headControl position, but not rotation. Just disable the "ROT" checkbox in the "Captures" tab:Using Empty atom as animated Anchor
You can use an Empty atom (or other atom) as Anchor for a pose/state. When you then animate that atom (e.g. via AnimationPattern or LinearAnimation plugin), you can easily achieve things like handjobs and similar animations. Since its just a normal pose/state for IdlePoser, you can transition between various states (e.g. different placed hand/fingers for the handjob) while the atom animation is running seamlessly.IdlePoser is compatible with Keybindings plugin
There is a profile for Acid Bubbles Keybindings plugin that includes hotkeys for IdlePoser. It allows you to switch between the different tabs quick and toggle the debug drawings:MacGruber's Keybindings Profile - Guides -
My profile setup for @Acid Bubbles Keybindings plugin. This is for creators who work mostly from Desktop mode. Obviously I use this in combination with my own PowerHandles plugin. I can't do productive work in VaM without these two plugins...


