![[ForgeLab] Lumen Forge](https://1424104733.rsc.cdn77.org/data/resource_icons/68/68538.jpg?1785906791)


Join the Shadow Venom's Workshop Discord Server!
Check out the Shadow Venom's Workshop community on Discord - hang out with 3253 other members and enjoy free voice and text chat.
 LUMENFORGE
 V1.0
Light is the oldest magic. This is the wand.
Eight plugins. Volumetric light that follows, sweeps, dances and burns.
No Unity, no light budget, no keyframes.
 Made for the VAM community
Part of ForgeLab by Shadow Venom.
 VAM gives you six pixel lights. Six. Spend them and the room goes flat, and here is the part nobody says out loud: none of them are visible. There is no shaft, no haze, no beam you can watch travel across a stage. VAM can light a face. It cannot show you light.
LumenForge makes light you can see.
Eight plugins that generate real volumetric light in code, live. Every one of them is an Empty atom plus a plugin. Nothing to install, nothing to model, nothing to keyframe, and not one of them spends a pixel light unless you ask it to.
They come in two flavours, and they are for two different appetites.
 THE RAY LINE
Light that belongs to the world
Sunlight through a window does not perform for anyone. It is simply what that room looks like.
This line is atmosphere. It makes a scene look photographed rather than rendered, and it asks nothing of you: drop it in, and it works.
 HeroRay : the follow spot
Add an Empty, load the plugin. It builds a moving-head fixture and starts tracking your character. The yoke and the head genuinely swing as it follows, the way a real machine does real work in a real venue.
 Follow a person, follow a joint, or turn tracking off and aim it yourself.
 A fixture body you can see: base, yoke, head, mounted to ceiling, floor or any wall.
 Volumetric haze, bulb glow, lens flare, and live shadows carving through the beam.
- Master OFF means lights out, not struck. The fixture stays hanging on the truss while every bit of its cost is released. Exactly what you want while dressing a set.
It is stage equipment used for a cinematic purpose, which is why it sits at the front of this line rather than the other one.
EnvRay : the room's own lightMoonlight through a window. A dusty shaft from a skylight. Put an Empty at the window, point it into the room, and light comes through.
 Scenery beam : a stage prop made of light. Baked once, frozen, and it consumes zero light slots. Put five of them in a scene and pay nothing.
- Real light ray : when the shaft has to actually illuminate someone, it becomes a distant real spotlight and silhouettes carve live.
 SMART mode : the bake wakes only while a person is inside the beam corridor, then freezes again when they leave. Atmosphere that costs nothing until it matters.
 The window colours the light. Point it at a real surface in your scene and the shaft takes its pattern and its colour from that surface's own texture. A stained-glass window throws stained-glass light. A lattice throws lattice shadows. Light picking up the colour of what it passed through is normally something you only get from path tracing: this reads the texture instead of simulating the photons, and it costs a bake.
- Pattern and colour soften as the shaft travels, on their own blur-per-metre control, which is what stops it reading as a slide projector and starts it reading as light in air.
 CUARay : the window itself casts the light (experimental)
⚠️ Please note that this feature is still experimental, so I wouldn't recommend using it in your production setup just yet. At the moment, EnvRay already provides all of the same functionality and effects, so I'd recommend using that instead.Pick any textured window surface, a CUA building's leaded panes or VAM's own stained glass, and it throws a volumetric shaft whose pattern is anchored to the mesh's own UVs. No alignment dials, and nothing swims when the camera moves. Stained-glass god rays are its signature trick, and it is honestly labelled experimental in its own section below.
If the Ray line is all you ever use, this package has already earned its place.
 THE STAGE LINE
Light that exists to be watched
A beam sweeping across a crowd on the downbeat is not lighting the room. It is performing.
This line is a show, and it is the deep end: 36 pieces of named choreography across the rig and the pyro, riding a formation system with more configurations than you will get through. Everything below is programmable from triggers and Timeline, so a lighting cue is a cue, not a hand-animation job.
 StageLight : one fixture, three lamp types
Spotlight (beam, glow, floor pool, star flare), they can cast light pools onto the floor, ceiling, and walls, even though they aren't actual light sources.
Prism (two counter-rotating rings of beams spinning on the beat)
Laser (a ray fan and a laser sheet opening and closing on a wave).
Switch type at runtime, or from a trigger, mid-show.
 StageLightGroup : one plugin drives the whole truss
Parent a dozen ordinary Empty atoms under one leader and each becomes a lamp. Members carry no plugin at all: twelve lamps cost twelve empty atoms and one plugin, not twelve copies of anything.
 22 named pieces of choreography : Wing Wave, Searchlight, Spiral Bloom, Step Scan, Center Burst, Rainbow Rotate and more. One click each, then refine underneath.
 Four phase channels ride the same formation (motion, opening, color, intensity), so the brightest lamp is also the one opened widest. That alignment is built in, not dialled in.
- Aim the whole rig at one atom and every lamp solves its own angle from where it actually stands. Move the target, move a lamp, the rig follows correctly.
 Set as baseline : dial your rig, save it, and every Look afterwards is layered on top. Pick the baseline again and the whole rig comes home, exactly, every value.
This is not a light. It is an instrument for choreographing light.
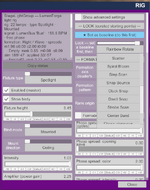
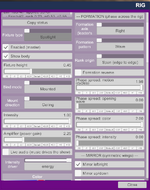
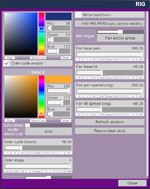
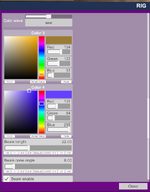
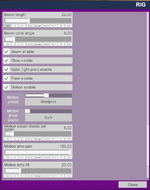
There are two honest ways to use this, and neither is the lesser one.
The easy way : pick a Look. Twenty-two of them, one click each, every one a finished piece of choreography. That is the entire workflow, and plenty of shows never need anything past it.
The other way : every Look is assembled out of an open vocabulary, and the vocabulary is yours as well. Count the switches:
Code:
4 formation axes  ×  6 patterns  ×  2 rank origins  ×  2 (reverse)
                  ×  10 motion presets  ×  3 lamp types
                  ×  8 mirror combinations
=  23,040 distinct configurations
And that is only the switches. Then come the sliders: four phase spreads (motion, opening, colour, intensity), each continuous, each laying its own channel across the rig independently. Set two to the same axis and their peaks lock together by construction. Set them apart and the rig does two things at once. Nobody has enumerated what those do in combination, including me.
The Looks are where you start. What lies past them is down to your imagination.
 EFX ColdSpark : stage pyro on the beat
Cold-spark fountains. Stand one on the floor and it throws a column of gold. Turn the Empty upside down and it becomes a ceiling waterfall with gravity handled for you. The group version drives a whole row, and Fire (wave across rig) sends one wave of fire down the stage from a single cue.
 Rainbow spreads : hue is laid out along the same formation that decides the firing order, so the machine that fires first is also the start of the color ramp. Color and motion read as one gesture instead of two.
 Auto-fire every N beats, or hit it from Timeline. The Fire action always works, whatever else is switched off.
 14 Looks for the row : all together, sweep, center burst, alternate, scatter, ripple, fast chase, near-continuous curtain, and four rainbow variants.
 LumenBus : one ear for the whole scene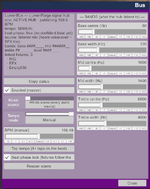
Music-reactive lighting done properly. It analyses the track once and publishes bands and tempo; every fixture in the scene links to it by itself.
Without it, ten rigs run ten separate analyses and ten separate tempo guesses that drift apart from each other. Fixtures that should be dancing together end up merely dancing near each other. With it: one analysis, one tempo, one downbeat, and the whole stage moves as a rig.
THE FIXTURE UNDERNEATHA real moving head, generated in code, that knows which way is up
Every lamp in this package hangs off the same chassis. It is the part you will never configure, which is exactly the point.
HeroRay and every fixture in the Stage line are built on one shared rig: root bolted to the mount plane, yoke panning about the mount axis, head tilting inside the yoke, lens at the end of the barrel. A real two-axis moving head, the same topology as the machine it is imitating. This feature is completely optional, so you can hide it if you want. It all depends on the look you're going for.
 Tell it where it is bolted. That is the whole setup.
One dropdown, six mounts: Ceiling, Floor, Wall +Z, Wall −Z, Wall +X, Wall −X. Pick one and the base re-seats itself, the pan axis re-aligns to the new mount normal, and the rest pose is recomputed.
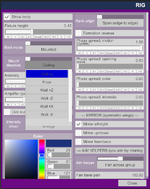
Here is the part that matters: an untouched Empty aims the way a fixture bolted there actually would. Down from a ceiling. Up from the floor. Out from a wall. You rotate the Empty only when you want to deviate from that, not to get there.
The naive version of this reads the Empty's down axis as a world direction, and it falls apart the moment you leave the ceiling: a floor light would shine into the floor until you hand-rotated every single Empty. Here the aim is solved relative to the mount, so switching a twelve-lamp truss from ceiling to floor is one dropdown, not twelve corrections.
 The awkward cases are already handled
 Pan turns about the mount axis, not the world's. A wall-mounted lamp pans across the wall the way a real one does. This is the single thing hand-built rigs get wrong most often, because parenting alone does not give it to you.
 Gimbal lock is guarded, not hoped away. Aim a fixture straight up or straight down and azimuth becomes undefined. The rig holds the last valid yaw through the vertical instead of snapping, so a beam crossing the zenith does not flip.
 Ceiling to floor is a 180° flip, where the roll is mathematically arbitrary. Left alone, the fixture would spin to a random roll. It is pinned explicitly.
- The lens lands on the atom's position, not the base. Turning the visible body on or off never moves the beam by even a millimetre. The atom origin is the light exit point, always.
 Mirroring across a symmetric rig stays exact on every mount. Verified across all six by trace, residual at the solver's numerical floor.
 There is no model. There never was.
The fixture is not an imported mesh, not a CUA, not an asset bundle. It is generated at runtime, in code, from arithmetic.
The head is a lathe: an eight-point silhouette (lens rim, lip, oval bulge, taper, rounded back) revolved around the barrel axis. The base is a cylinder, the yoke arms are boxes, and every proportion is derived from one number, the head radius. Change that, and the whole machine rebuilds itself in correct proportion.
Which means there is nothing to install, nothing to import, nothing to keep in sync, and nothing to break when you move the scene to another machine. Twelve lamps are twelve empty atoms and one plugin. The geometry is a consequence of the numbers, not a file sitting next to them.
Building one of these by hand in VAM is a genuinely hard afternoon: a nested transform chain, a pan axis that has to follow the mount rather than the world, and a body you cannot model in VAM at all. Building twelve of them, and then moving them from the ceiling to the floor, is not an afternoon.
Here it is a dropdown.
Here it is a dropdown.
 WHERE THIS CAME FROM
These plugins were not designed to be sold. They were built to light a show.
They spent the better part of a year inside a working stage-lighting system before any of them became something you could download, and it shows in the rules. Every one of them was forced by something that had to survive a real stage rather than look good in a feature list:
 Off means off, because a blackout has to actually be free.
 A rig is one plugin, because twenty-four copies of a plugin is not something you can save.
- A Look is a complete state, because a look that inherits the last one's leftovers ruins a show.
- A baseline is a full snapshot, because nobody should tune a rig all evening and then find they cannot get back.
This release is those instruments, taken off my own bench and handed over.
 The bench has a name
Spectra Studio is the stage lighting system these plugins grew out of, built specifically for VaM. It's a desktop application where you load your stage, place fixtures, program and preview your lighting show, then bring the finished result into VaM. Your lighting rigs only need to be built once and can be reused across projects, while each show is choreographed to the music.
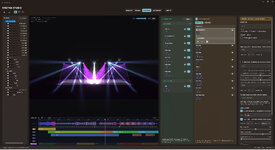
The reason it is worth mentioning here rather than saving for its own announcement: LumenForge is not a spin-off with a separate codebase. The fixtures, the formation system, the signal bus and the beam maths in this package are the same engine, and that is why a package this large arrives at v1.0 already measured and already broken in.
If you're as fascinated by the magic of stage lighting as I am, this might be something worth waiting for.
No date, no promises. It is not finished and I am not announcing it yet. But when people ask where twenty-two pieces of choreography and an eight-hour perf run came from for a first release, this is the honest answer.
 BUILT AROUND MEASUREMENT
Stage lighting is the one thing in VAM that reliably eats a frame budget, so this family was measured rather than guessed. An 8-hour unattended run: a 22-configuration matrix repeated 8 times, then a 7.4 hour soak.
- A full truss of 22 spotlights costs about 1.8% of frame time. That is 0.003 ms a lamp.
 Off means off, measured. Every master switch landed at or below the all-off baseline. Not "almost nothing": the shader variant is gone, the per-frame calls are gone, the memory is released.
 No memory leak. Nine post-collection floor samples across five hours: a fitted drift of -0.4 MB per hour. Flat.
 Lamp type matters about 5x more than lamp count. If a rig runs heavy, change what the lamps ARE before you delete any.
The full method, the honest caveats about the test machine, and a set of practical recipes are in the performance section below. The measuring tool ships inside the package, so you can run the same matrix on your own hardware and check.
 HOW TO USE
 Add an Empty atom (Atom > Misc > Empty). Every fixture lives on one.
- Plugins > Add > pick a `.cslist` from the package. Light appears immediately.
- Aiming is rotating the Empty. Light travels along its DOWN axis, so a fresh Empty already points at the floor. Every fixture in the family aims the same way.
- Want it music-reactive? Add one more Empty with LumenBus, switch Live audio on, and every fixture links itself.
- Building a rig? Put StageLightGroup on an Empty and parent plain Empties under it. Each one becomes a lamp.
No load order to respect, no scene setup to prepare. It just works.
 THE FULL MANUAL, RIGHT HERE
Every plugin, every concept, unfolded. Nobody opens a .var to read a README.
Eight plugins ship in this package, and you do not need all of them.
The first two ask nothing of you: drop HeroRay on an Empty and it lights your character and follows them; drop EnvRay at a window and light comes through it. No stage to build, no rig to plan, no theory to read. If that is all you ever use, the package has already paid for itself.
The rest is there for when you want to build a stage. Open whichever one you are curious about.
Drop it in and it works
Open a scene with a person, add an Empty atom, load HeroRay.cslist. The fixture builds itself and starts tracking the first person it finds.
The Empty atom is where light comes out. Drag it with the gizmo to place the light. Turn Track off and rotate the atom to aim, because light travels along the Empty's DOWN axis (the family rule again), so a new Empty already points at the floor. The pose is never stored in the plugin: cancel tracking and it returns to exactly where you put it.
Fixture body
On by default: the same moving-head body as StageLight (base, yoke, head). While tracking, the yoke and head actually swing, so it reads as a real machine doing a job. Mount direction picks which surface the base sits on (ceiling by default, plus floor and four walls), and Fixture height scales it.
Toggling the body never moves the beam, because the body is grown backwards from the lens.
There are deliberately no motion presets. A follow spot that wanders off on its own has stopped following.
Master OFF means lights out, not struck
All of the light's cost is released while the body stays hanging where it was, which is exactly what you want while dressing a set: visible dark fixtures. Turn Fixture body off too if you want it gone entirely.
Left column is the everyday set (tracking target and joint, cone angle, color, haze, bulb glow and lens flare switches). Right column is the deep end (beam sync, flare detail, shadow configuration), with a ✦ Reset button when you have dialled yourself into a corner. Soft shadows off gives clean skin shadows; on gives a more dramatic silhouette.
Open a scene with a person, add an Empty atom, load HeroRay.cslist. The fixture builds itself and starts tracking the first person it finds.
The Empty atom is where light comes out. Drag it with the gizmo to place the light. Turn Track off and rotate the atom to aim, because light travels along the Empty's DOWN axis (the family rule again), so a new Empty already points at the floor. The pose is never stored in the plugin: cancel tracking and it returns to exactly where you put it.
Fixture body
On by default: the same moving-head body as StageLight (base, yoke, head). While tracking, the yoke and head actually swing, so it reads as a real machine doing a job. Mount direction picks which surface the base sits on (ceiling by default, plus floor and four walls), and Fixture height scales it.
Toggling the body never moves the beam, because the body is grown backwards from the lens.
There are deliberately no motion presets. A follow spot that wanders off on its own has stopped following.
Master OFF means lights out, not struck
All of the light's cost is released while the body stays hanging where it was, which is exactly what you want while dressing a set: visible dark fixtures. Turn Fixture body off too if you want it gone entirely.
Left column is the everyday set (tracking target and joint, cone angle, color, haze, bulb glow and lens flare switches). Right column is the deep end (beam sync, flare detail, shadow configuration), with a ✦ Reset button when you have dialled yourself into a corner. Soft shadows off gives clean skin shadows; on gives a more dramatic silhouette.
Moonlight through a window. A dusty skylight shaft. One plugin, two engines. Loads on Empty atoms only (for CUA or stained-glass window meshes, see CUARay).
Place the Empty at the window so the beam passes through it, and rotate so +Z points the way the light travels, into the room. Add the plugin and a beam appears. Drag or rotate the atom and the bake refreshes by itself 0.3 seconds after you stop.
The baked engine has three update strategies: STATIC bakes once and never runs again, SMART wakes only while a person is inside the beam corridor and freezes again on exit, and LIVE updates every frame.
Letting the window colour the light
Pick a Window surface from your scene and the shaft stops being a plain cone. It takes its pattern from that surface's texture (from the alpha channel, or from luma if the texture has none), and with Colour tint on it takes the colour as well: stained glass throws stained-glass light, a lattice throws lattice shadows, a grimy warehouse pane throws grimy light.
Two controls decide whether it reads as light or as a slide projector: a base blur on the pattern, and a blur per metre that softens it as the shaft travels. Sharp at the glass, diffuse across the room, the way real light behaves in air.
Colour tint lives on the Baked engine, which is the one that costs no light slot anyway.
Place the Empty at the window so the beam passes through it, and rotate so +Z points the way the light travels, into the room. Add the plugin and a beam appears. Drag or rotate the atom and the bake refreshes by itself 0.3 seconds after you stop.
- Scenery beam (baked) : a stage prop made of light. Bake once, freeze, consume zero light slots, re-bake any time (drag the atom, or fire SnapshotDepth / BakeAll from scene logic). Cheapest option, and several instances are fine.
- Real light ray : a distant pseudo-parallel real spotlight. It genuinely lights the room and the person, and silhouettes carve live. Costs one light slot and a live shadowmap.
The baked engine has three update strategies: STATIC bakes once and never runs again, SMART wakes only while a person is inside the beam corridor and freezes again on exit, and LIVE updates every frame.
Letting the window colour the light
Pick a Window surface from your scene and the shaft stops being a plain cone. It takes its pattern from that surface's texture (from the alpha channel, or from luma if the texture has none), and with Colour tint on it takes the colour as well: stained glass throws stained-glass light, a lattice throws lattice shadows, a grimy warehouse pane throws grimy light.
Two controls decide whether it reads as light or as a slide projector: a base blur on the pattern, and a blur per metre that softens it as the shaft travels. Sharp at the glass, diffuse across the room, the way real light behaves in air.
Colour tint lives on the Baked engine, which is the one that costs no light slot anyway.
A real session, ten frames apart, measured rather than eyeballed. If your shaft looks like fog instead of light, one of these four is why. They are independent: each fixes a different thing, and they stack.
The one rule underneath all of it
Volumetric light is read by contrast, not brightness. A beam that is dimmer than the wall behind it cannot look like light, no matter how far you push its intensity: past a point you only blow out the highlight and lose the pattern inside the shaft. Almost always the fix is to darken the background, not to brighten the beam.
1. Give the beam something dark to cross
An open sunset sky is the worst possible backdrop, because it is brighter than anything you can put in front of it. Put geometry between the camera and the sun (a tree, a wall, a truss) and the blown-out area collapses. In the session below it went from 34% of frame to 14%.
Careful though: backlit foliage is itself bright. It trades highlight for midtone, not for shadow, so the picture gets dimmer and flatter at the same time. Which is why step 2 exists.
2. Darken the occluder itself
Whatever you put in the way, pull its own brightness down until it reads closer to a silhouette. That is what buys back the deep shadows step 1 costs you.
3. If you stack a real light and a baked beam, zero the real one's beam
This is the one nobody finds on their own. REAL LIGHT RAY draws a beam too, and by default
On the real instance: uncheck SYNC (the hidden slider appears), then set its Beam intensity to 0. Now the real light does illumination and shadows, the baked one does the visible shaft, and nothing is counted twice. In the session below this single checkbox recovered 63% of the unwanted brightness lift.
4. Turn off Fog softening
What it actually did
Deep shadow went 7.2% to 17.7% across steps 3 and 4 without the picture getting darker overall. That is not exposure, that is stray light being removed.
Where to stop
A real light on its own scored 22.4% deep shadow, but it has no visible shaft. Landing at 17.7% with a shaft is the trade, and it is a good one. Past this point the remaining knobs (Beam intensity, Beam density, Dust brightness) all dim the shaft as well, so you would be trading the feature away for a number.
One thing exposure cannot fix
Thin structures (chain-link, wire mesh, railings) will not throw a patterned shadow if they sit far from the surface the shadow lands on. That is shadowmap resolution, not lighting, and
The one rule underneath all of it
Volumetric light is read by contrast, not brightness. A beam that is dimmer than the wall behind it cannot look like light, no matter how far you push its intensity: past a point you only blow out the highlight and lose the pattern inside the shaft. Almost always the fix is to darken the background, not to brighten the beam.
1. Give the beam something dark to cross
An open sunset sky is the worst possible backdrop, because it is brighter than anything you can put in front of it. Put geometry between the camera and the sun (a tree, a wall, a truss) and the blown-out area collapses. In the session below it went from 34% of frame to 14%.
Careful though: backlit foliage is itself bright. It trades highlight for midtone, not for shadow, so the picture gets dimmer and flatter at the same time. Which is why step 2 exists.
2. Darken the occluder itself
Whatever you put in the way, pull its own brightness down until it reads closer to a silhouette. That is what buys back the deep shadows step 1 costs you.
3. If you stack a real light and a baked beam, zero the real one's beam
This is the one nobody finds on their own. REAL LIGHT RAY draws a beam too, and by default
SYNC beam intensity = light intensity is ON, which also hides the Beam intensity slider. So layering "one real + one baked" to get real shadows and a visible shaft actually gives you two beams. The second one accumulates along the view ray and fills your shadows straight back in.On the real instance: uncheck SYNC (the hidden slider appears), then set its Beam intensity to 0. Now the real light does illumination and shadows, the baked one does the visible shaft, and nothing is counted twice. In the session below this single checkbox recovered 63% of the unwanted brightness lift.
4. Turn off Fog softening
Fog softening (misty beams) is the last toggle in the left column, under the Dust group. It is the only control that spills light outside the shaft without adding anything to the shaft itself, so switching it off is close to free: overall brightness does not move at all, and the deep shadows come back.What it actually did
Code:
                       blown-out   deep shadow   piled in
                       highlights    (the good     midtones
                                       stuff)
start (open sky)          34.5%         11.7%        27.7%
+ occluder in frame       13.9%          9.8%        44.7%
+ occluder darkened       13.2%         11.4%        46.9%
+ real beam zeroed        12.4%         15.6%        43.3%
+ fog softening off       12.5%         17.7%        41.7%
Deep shadow went 7.2% to 17.7% across steps 3 and 4 without the picture getting darker overall. That is not exposure, that is stray light being removed.
Where to stop
A real light on its own scored 22.4% deep shadow, but it has no visible shaft. Landing at 17.7% with a shaft is the trade, and it is a good one. Past this point the remaining knobs (Beam intensity, Beam density, Dust brightness) all dim the shaft as well, so you would be trading the feature away for a number.
One thing exposure cannot fix
Thin structures (chain-link, wire mesh, railings) will not throw a patterned shadow if they sit far from the surface the shadow lands on. That is shadowmap resolution, not lighting, and
Shadow resolution tier already ships at maximum. Two things do work, and they stack: move the caster closer to the surface, and narrow the spot cone so the same shadowmap covers less ground. Leave Soft shadows off while you do it, or you will blur away the very detail you are chasing.What it is
A stage light with a performance-first fake volumetric beam. One plugin, three lamp types, switchable at runtime and drivable from triggers:
All three share 10 motion presets, audio-driven intensity and the color cycle.
Where it goes, and how you aim it
Add it to an Empty atom. The atom's origin is where light comes out.
Aiming is rotating that Empty. The atom's DOWN axis is the direction light travels, so a freshly created Empty already points at the floor. This is a family-wide rule: every LumenForge fixture aims the same way. (The Pan / Tilt offsets under Advanced are fine adjustment, and they are the pair triggers can drive.)
Two bind modes, and what actually separates them
The difference is not "how much freedom you get". It is what the light IS:
Notes
A stage light with a performance-first fake volumetric beam. One plugin, three lamp types, switchable at runtime and drivable from triggers:
- Spotlight : beam + glow + floor pool + star flare, plus an optional real Unity light (C1) when you want actual illumination.
 Prism : an inner and outer ring of beams counter-rotating. Lock the spin to the beat or let audio drive it. The two rings can carry different colors.
 Laser : a ray fan plus a laser sheet, with a spread wave that opens and closes on its own.
All three share 10 motion presets, audio-driven intensity and the color cycle.
Where it goes, and how you aim it
Add it to an Empty atom. The atom's origin is where light comes out.
Aiming is rotating that Empty. The atom's DOWN axis is the direction light travels, so a freshly created Empty already points at the floor. This is a family-wide rule: every LumenForge fixture aims the same way. (The Pan / Tilt offsets under Advanced are fine adjustment, and they are the pair triggers can drive.)
Two bind modes, and what actually separates them
The difference is not "how much freedom you get". It is what the light IS:
- Mounted : a real fixture. The base is bolted to a mounting surface and only the head turns on its yoke. That is why the motion presets live here and nowhere else. The cost: aiming has to be solved into pan and tilt, so it cannot express roll around the beam axis, and pointing straight down the mount axis lands you in the gimbal dead zone.
 Rigid : bolted to the atom. It copies the atom's orientation exactly, roll included. That roll is the only way to spin a laser's fan plane without changing where it points, and there is no singularity so you can animate it freely. The cost: no base, no motion presets.
Notes
- Advanced is a fully open customization surface. The defaults are the tuned factory look, so you can go back by resetting.
 Classic laser green is #20FF40.
 Live audio is off by default. Turn it on and the lamp reacts to music (see LumenBus below for the scene-wide way to do that).
Start with the Look list
22 named pieces of choreography (Wing Wave, Ripple, Pinwheel, Step Scan, Center Burst, Rainbow Rotate and more). Pick one, then refine underneath it. Every Look is a complete choreography state, so switching never inherits leftovers from the one before, and it only moves choreography: your look and colors stay yours.
One plugin, a dozen lamps
Put the leader on an Empty atom, then parent ordinary Empty atoms under it at any depth. Each of those becomes a lamp, and members carry no plugin at all.
Twelve lamps means twelve cheap Empties plus one plugin, not twelve copies of a plugin. That matters more than it sounds: VAM compiles every plugin instance separately and writes all of its parameters into your save, so a large rig built the naive way is expensive twice over.
Formation: where the phase lives in space
Axis (Right / Up / Front / Radial) × pattern (Wave / Center out / Center in / Blocks / Interleave / Random) × reverse × rank origin (Span spreads edge to edge, Leader puts the wave's heart on the leader atom and stays centered even when the two wings hold different lamp counts).
The reference frame is the leader atom's own axes, so rotating the leader redefines which side is which wing.
Four channels ride that formation, each with its own spread: motion · opening wave · color · intensity. Same axis and same pattern means the peaks line up by construction, so the brightest lamp is also the one opened widest. Spread 0 puts that channel in unison.
Three-axis mirroring flips pan and spin direction for the lamps on the negative side.
Aim, three ways
★ Set as baseline
Dial the rig the way you want it, then press it. That saves your baseline and unlocks the Look list.
From then on every Look is layered on your baseline, and picking the baseline again brings the whole rig home. The baseline is a complete snapshot: every knob you touched is in it, colors included. An audition you cannot come back from is the one thing this panel refuses to offer, which is why the Look list stays locked until a baseline exists.
Two ways to use this, and neither is the lesser one
Pick a Look. Twenty-two of them, one click each, every one a finished piece of choreography.
That is the whole workflow if you want it to be.
Or take the vocabulary apart, because every Look is built from the same open one you have:
4 formation axes x 6 patterns x 2 rank origins x 2 (reverse) x 10 motion presets x 3 lamp types
x 8 mirror combinations = 23,040 distinct configurations. That counts only the switches.
The four phase spreads are continuous and independent, so the real space is not countable at all,
and nobody has mapped it, including the person who built it.
The practical method, so the number is useful rather than intimidating: pick the Look nearest to
what you hear in the music, then change one thing. Change the axis and the same dance travels
a different way across the stage. Change the rank origin and the wave starts from the middle instead
of the end. Change the lamp type and the same choreography becomes a laser show.
Uniform by design
One group is one lamp type and one look. Appearance lives in the material, and a shared material makes per-lamp difference impossible rather than merely discouraged. Want two looks on stage? Add a second leader. A group now costs one plugin, so that is cheap.
Real light (C1) is not offered at group level: VAM's pixel light budget is about six, and a rig would eat it in one bite.
22 named pieces of choreography (Wing Wave, Ripple, Pinwheel, Step Scan, Center Burst, Rainbow Rotate and more). Pick one, then refine underneath it. Every Look is a complete choreography state, so switching never inherits leftovers from the one before, and it only moves choreography: your look and colors stay yours.
One plugin, a dozen lamps
Put the leader on an Empty atom, then parent ordinary Empty atoms under it at any depth. Each of those becomes a lamp, and members carry no plugin at all.
Twelve lamps means twelve cheap Empties plus one plugin, not twelve copies of a plugin. That matters more than it sounds: VAM compiles every plugin instance separately and writes all of its parameters into your save, so a large rig built the naive way is expensive twice over.
Formation: where the phase lives in space
Axis (Right / Up / Front / Radial) × pattern (Wave / Center out / Center in / Blocks / Interleave / Random) × reverse × rank origin (Span spreads edge to edge, Leader puts the wave's heart on the leader atom and stays centered even when the two wings hold different lamp counts).
The reference frame is the leader atom's own axes, so rotating the leader redefines which side is which wing.
Four channels ride that formation, each with its own spread: motion · opening wave · color · intensity. Same axis and same pattern means the peaks line up by construction, so the brightest lamp is also the one opened widest. Spread 0 puts that channel in unison.
Three-axis mirroring flips pan and spin direction for the lamps on the negative side.
Aim, three ways
- 🪭 Fan across the group : spread the whole row open.
- Aim at a target atom : every lamp solves its own aim from where it actually stands, so moving the target or moving a lamp swings the whole rig correctly. The status panel reports the solver's residual angle, so you do not have to take my word for it.
 Per-lamp rest pan / tilt : stored by anchor name, so adding, deleting or renaming anchors never shifts somebody else's lamp. There is also a "grab from anchor rotation" button: turn the Empty with VAM's own handles until it looks right, then press once. The plugin reads atom poses and never writes them.
★ Set as baseline
Dial the rig the way you want it, then press it. That saves your baseline and unlocks the Look list.
From then on every Look is layered on your baseline, and picking the baseline again brings the whole rig home. The baseline is a complete snapshot: every knob you touched is in it, colors included. An audition you cannot come back from is the one thing this panel refuses to offer, which is why the Look list stays locked until a baseline exists.
Two ways to use this, and neither is the lesser one
Pick a Look. Twenty-two of them, one click each, every one a finished piece of choreography.
That is the whole workflow if you want it to be.
Or take the vocabulary apart, because every Look is built from the same open one you have:
4 formation axes x 6 patterns x 2 rank origins x 2 (reverse) x 10 motion presets x 3 lamp types
x 8 mirror combinations = 23,040 distinct configurations. That counts only the switches.
The four phase spreads are continuous and independent, so the real space is not countable at all,
and nobody has mapped it, including the person who built it.
The practical method, so the number is useful rather than intimidating: pick the Look nearest to
what you hear in the music, then change one thing. Change the axis and the same dance travels
a different way across the stage. Change the rank origin and the wave starts from the middle instead
of the end. Change the lamp type and the same choreography becomes a laser show.
Uniform by design
One group is one lamp type and one look. Appearance lives in the material, and a shared material makes per-lamp difference impossible rather than merely discouraged. Want two looks on stage? Add a second leader. A group now costs one plugin, so that is cheap.
Real light (C1) is not offered at group level: VAM's pixel light budget is about six, and a rig would eat it in one bite.
What it is
A stage cold-spark gerb. Put it on an Empty atom and the plugin is the machine.
The Empty's UP axis is the jet direction, and the atom's origin is the nozzle. A freshly made Empty standing on the floor throws a vertical column of gold sparks, which is the factory look. Turn the Empty 180 degrees and you get a ceiling-hung waterfall: gravity stays correct automatically because the particles live in world space. The plugin never rewrites the atom's pose, so placement, keyframes and parenting all stay yours.
Rhythm
It fires every N beats (2 by default), and each shot is a sustained burn with a decay, not a single pop. The Fire action always works regardless of the auto-fire switch, which makes it the hit point for CUEs, triggers and Timeline. Drop a LumenBus into the scene and every machine shares one detected tempo and locks to the real downbeat.
Two things worth knowing
Streak style
Velocity (classic) is the shipped look and is accurate at the default narrow jet angle. Open Jet spread wide and its approximation starts to show: the trails read as though they leave a bright knot hanging in mid-air. For a wide fan, switch to Growing (exact nozzle). That is exactly what it is for.
For a row of machines use EFX ColdSparkGroup.
A stage cold-spark gerb. Put it on an Empty atom and the plugin is the machine.
The Empty's UP axis is the jet direction, and the atom's origin is the nozzle. A freshly made Empty standing on the floor throws a vertical column of gold sparks, which is the factory look. Turn the Empty 180 degrees and you get a ceiling-hung waterfall: gravity stays correct automatically because the particles live in world space. The plugin never rewrites the atom's pose, so placement, keyframes and parenting all stay yours.
Rhythm
It fires every N beats (2 by default), and each shot is a sustained burn with a decay, not a single pop. The Fire action always works regardless of the auto-fire switch, which makes it the hit point for CUEs, triggers and Timeline. Drop a LumenBus into the scene and every machine shares one detected tempo and locks to the real downbeat.
Two things worth knowing
 Steady-state density. A 3 second particle life plus a shot every 2 beats means three volleys are in the air at once. A density tuned by looking at one shot runs about 2.5x thicker in practice, which historically ended in a solid pillar of light. The status panel gives you the steady-state estimate against the cap and names the slider to pull if you are over. The factory values are already tuned for steady state.
- Tail compensation (Advanced, default 1). Sparks are drawn as streaks along their velocity, and they are born at full speed, so the streak gets drawn about a meter below the nozzle: it shoots out from under the base. Compensation moves the birth point forward by the same distance so the streak's tail lands back on the nozzle. Leave it at 1. Set it to 0 if you want to see the raw behavior.
Streak style
Velocity (classic) is the shipped look and is accurate at the default narrow jet angle. Open Jet spread wide and its approximation starts to show: the trails read as though they leave a bright knot hanging in mid-air. For a wide fan, switch to Growing (exact nozzle). That is exactly what it is for.
For a row of machines use EFX ColdSparkGroup.
Same idea as the light rig
Leader on an Empty (it renders nothing itself), then point ordinary Empties' Parent Atom at it. Each becomes a machine, and anchors carry no plugin. Anchors are rescanned every second, so adding, deleting, renaming and dragging all follow automatically. Each anchor's UP axis is that machine's jet direction, so turning one 180 degrees hangs it from the ceiling.
Uniform look, differences expressed in timing
The whole row shares appearance and interval. What varies is when each machine fires, which is formation phase. The Look list gives you 14 finished ones: all together, sweep, center burst, alternate, scatter, ripple, fast chase, near-continuous curtain, plus four rainbow variants. Underneath is the raw vocabulary: axis × pattern × rank origin × reverse × phase spread.
Color spread
Hue is laid out along the formation, using the same axis, pattern and origin that decide the firing order. That is deliberate: the machine that fires first is also the one at the start of the color ramp, so a rainbow sweep reads as one gesture instead of color and motion each doing their own thing.
The hue is rotated from your own spark color, keeping its saturation and brightness. Set the rig to deep blue and a rainbow sweep travels the wheel starting from blue: it is not replaced with somebody else's palette. Zero means the whole row on your color, which is the factory setting.
Two actions
Fire (all together) is the unison hit. Fire (wave across rig) sends one wave of fire down the row from a single CUE.
The status panel lists every machine's rank, firing offset in beats and shot count. When a sweep looks wrong, check the numbers before you trust your eyes.
Leader on an Empty (it renders nothing itself), then point ordinary Empties' Parent Atom at it. Each becomes a machine, and anchors carry no plugin. Anchors are rescanned every second, so adding, deleting, renaming and dragging all follow automatically. Each anchor's UP axis is that machine's jet direction, so turning one 180 degrees hangs it from the ceiling.
Uniform look, differences expressed in timing
The whole row shares appearance and interval. What varies is when each machine fires, which is formation phase. The Look list gives you 14 finished ones: all together, sweep, center burst, alternate, scatter, ripple, fast chase, near-continuous curtain, plus four rainbow variants. Underneath is the raw vocabulary: axis × pattern × rank origin × reverse × phase spread.
Color spread
Hue is laid out along the formation, using the same axis, pattern and origin that decide the firing order. That is deliberate: the machine that fires first is also the one at the start of the color ramp, so a rainbow sweep reads as one gesture instead of color and motion each doing their own thing.
The hue is rotated from your own spark color, keeping its saturation and brightness. Set the rig to deep blue and a rainbow sweep travels the wheel starting from blue: it is not replaced with somebody else's palette. Zero means the whole row on your color, which is the factory setting.
Two actions
Fire (all together) is the unison hit. Fire (wave across rig) sends one wave of fire down the row from a single CUE.
The status panel lists every machine's rank, firing offset in beats and shot count. When a sweep looks wrong, check the numbers before you trust your eyes.
What it does
It analyses the music once and publishes four bands (bass / mid / treble / level) plus BPM. Every LumenForge fixture in the scene links to it automatically and reads the result.
It renders nothing, so it can live on any atom. An Empty is tidy, but hanging it off the atom that already owns your music is just as valid. One per scene.
Why one hub beats several local analysers
Every fixture can analyse the music by itself, and one of them doing so costs very little. The catch is that the cost is per copy, and so is the guessing:
The rule, if you read nothing else: Live audio switched on and more than one light or group leader in the scene → add a LumenBus. A single fixture on its own is fine without it.
Tempo
Real-time BPM detection: it locks on by itself, relearns when the track changes or goes quiet, and falls back to your manual value when it is not confident. Tap tempo lets you beat it in by hand (it switches to Manual for you). Beat phase lock is on by default and aligns the whole scene to the real downbeat with a gradual nudge rather than a jump.
Clock sovereignty stays with the fixtures: the hub broadcasts a tempo value and a phase reference, never a beat count, so every fixture integrates its own beats.
Bands you can move
Six sliders set where the three channels listen (bass 80 Hz, mid 1 kHz, treble 6 kHz by default, each with its own width). Those defaults are a pop-mix layout and they are wrong for plenty of music: a track whose kick sits at 50 Hz drives the bass channel weakly, and an electronic mix with most of its energy near 3 kHz has "mid" reading as treble. Move the centre to where your track actually lives.
Volume does not change the lighting
The response is normalised, so turning the music down does not turn the lights down.
With a specific Music source selected, its volume is divided straight back out, exactly and immediately. A scene that fades that source will not fade the lights with it. That is deliberate: fade the lights with the fixtures' own Dimmer, which is what it is for and gives you precise control.
With Whole scene there is no single volume to divide by, so normalisation is left to the peak follower. It reaches the same place but takes a couple of minutes to settle after a big volume change.
Two hubs
The one with the lower atom name wins; the other reports role: IDLE instead of fighting over the wiring. Disable or remove the hub and fixtures fall back to their own analysis within a frame, then pick the hub back up when it returns. The lights never stop.
It analyses the music once and publishes four bands (bass / mid / treble / level) plus BPM. Every LumenForge fixture in the scene links to it automatically and reads the result.
It renders nothing, so it can live on any atom. An Empty is tidy, but hanging it off the atom that already owns your music is just as valid. One per scene.
Why one hub beats several local analysers
Every fixture can analyse the music by itself, and one of them doing so costs very little. The catch is that the cost is per copy, and so is the guessing:
 Ten rigs, no hub : ten spectrum analyses of the same track, and ten independent tempo estimates that drift apart from each other. Fixtures that should be dancing together end up merely dancing near each other.
 Ten rigs, one hub : one analysis, one tempo, and with Beat phase lock on, one downbeat. Everything moves as a rig rather than as ten soloists.
The rule, if you read nothing else: Live audio switched on and more than one light or group leader in the scene → add a LumenBus. A single fixture on its own is fine without it.
Tempo
Real-time BPM detection: it locks on by itself, relearns when the track changes or goes quiet, and falls back to your manual value when it is not confident. Tap tempo lets you beat it in by hand (it switches to Manual for you). Beat phase lock is on by default and aligns the whole scene to the real downbeat with a gradual nudge rather than a jump.
Clock sovereignty stays with the fixtures: the hub broadcasts a tempo value and a phase reference, never a beat count, so every fixture integrates its own beats.
Bands you can move
Six sliders set where the three channels listen (bass 80 Hz, mid 1 kHz, treble 6 kHz by default, each with its own width). Those defaults are a pop-mix layout and they are wrong for plenty of music: a track whose kick sits at 50 Hz drives the bass channel weakly, and an electronic mix with most of its energy near 3 kHz has "mid" reading as treble. Move the centre to where your track actually lives.
Volume does not change the lighting
The response is normalised, so turning the music down does not turn the lights down.
With a specific Music source selected, its volume is divided straight back out, exactly and immediately. A scene that fades that source will not fade the lights with it. That is deliberate: fade the lights with the fixtures' own Dimmer, which is what it is for and gives you precise control.
With Whole scene there is no single volume to divide by, so normalisation is left to the peak follower. It reaches the same place but takes a couple of minutes to settle after a big volume change.
Two hubs
The one with the lower atom name wins; the other reports role: IDLE instead of fighting over the wiring. Disable or remove the hub and fixtures fall back to their own analysis within a frame, then pick the hub back up when it returns. The lights never stop.
Read this first
CUARay works, and its stained-glass shots are field-real, but it is the youngest member of the family and not yet recommended for production scenes: VR is not fully validated (CommandBuffer eye path), the performance matrix is still being charted, and slice stacks have a known dead angle where near-edge-on side views show layering.
For general-purpose light shafts, use EnvRay. It is the recommended default. If you try CUARay anyway, bug reports and screenshots are gold at this stage.
What it does
Pick any textured window surface, a CUA building's leaded panes or VAM's native stained glass, and it emits a volumetric shaft whose pattern is anchored to the mesh's own UVs. No alignment dials, and nothing swims when the camera moves. Stained-glass god rays are its signature trick.
Loads on CustomUnityAsset or Glass-Stained atoms only.
CUARay works, and its stained-glass shots are field-real, but it is the youngest member of the family and not yet recommended for production scenes: VR is not fully validated (CommandBuffer eye path), the performance matrix is still being charted, and slice stacks have a known dead angle where near-edge-on side views show layering.
For general-purpose light shafts, use EnvRay. It is the recommended default. If you try CUARay anyway, bug reports and screenshots are gold at this stage.
What it does
Pick any textured window surface, a CUA building's leaded panes or VAM's native stained glass, and it emits a volumetric shaft whose pattern is anchored to the mesh's own UVs. No alignment dials, and nothing swims when the camera moves. Stained-glass god rays are its signature trick.
Loads on CustomUnityAsset or Glass-Stained atoms only.
The same text ships inside the package as README files, in English, Traditional Chinese, Japanese and Korean.
PERFORMANCE, MEASUREDNot "it runs fine on my machine". Here is the bench, the method, and the numbers that survived it.
Stage lighting is the one thing in VAM that reliably eats a frame budget, so this family was built around measurement rather than vibes. Everything below came off an 8-hour unattended run: a 22-configuration matrix repeated 8 times, then a 7.4 hour soak. If you only want the practical advice, open the last spoiler.
A tool inside the package drives the whole thing by itself: it sets a configuration, lets it settle 4 seconds, samples 10 seconds, writes a row, and moves to the next. 22 configurations, 8 passes, then it hands over to a soak that writes one summary row per minute for the rest of the night.
The honest part. The bench was an RTX 5090, and the scene ran at roughly 290 fps with everything off. At that speed the GPU sat around 42% and nothing was thermally throttled, which means the test was CPU-bound: what you see below is mostly the CPU cost of the lighting, not its GPU cost.
So treat the relative ordering as the portable result and the absolute milliseconds as a lower bound for high-end hardware. On a weaker GPU the picture inverts and the numbers grow. We would rather tell you that than print a flattering number and let you find out.
 Frame TIME is the metric, not FPS. Frame time is linear, so you can add and compare it. FPS cannot be averaged honestly.
- 8 repeats per configuration. The resulting spread per configuration was 0.00 to 0.06 ms, which is what makes a 0.3 ms difference readable at all. One pass cannot tell a real difference from noise, and it cannot see the machine drifting overnight.
 Ablation, not guesswork. Every feature is switched off individually with everything else held fixed, and every step puts the previous toggle back explicitly so a step can never silently inherit the one before it.
 The UI is closed and the camera is parked. VAM's own open panel costs frames; measuring with it open measures the panel.
The honest part. The bench was an RTX 5090, and the scene ran at roughly 290 fps with everything off. At that speed the GPU sat around 42% and nothing was thermally throttled, which means the test was CPU-bound: what you see below is mostly the CPU cost of the lighting, not its GPU cost.
So treat the relative ordering as the portable result and the absolute milliseconds as a lower bound for high-end hardware. On a weaker GPU the picture inverts and the numbers grow. We would rather tell you that than print a flattering number and let you find out.
All figures are frame-time increase over the same scene with every LumenForge master switch off.
The one number worth remembering
Lamp type matters about 5x more than lamp count. Twenty-two spotlights cost less than a quarter of what the same twenty-two cost as prisms or lasers. If a rig is heavy, change what the lamps ARE before you delete any.
And HeroRay is the most expensive single unit in the family: one hero light costs more than twice an entire 22-lamp spotlight truss. It earns it (it is a real volumetric with live shadow work), but budget it as a feature, not as scenery.
Off means off
Every product's master switch was measured in the same run:
All three land at or fractionally below the all-off baseline, which is the measured version of a design rule this family holds to: a switched-off feature costs nothing. Not "almost nothing". The shader variant is gone, the per-frame calls are gone, the memory is released.
That is what makes the master switches usable as blackout in a live scene, and it is why the fixtures stay visible on the truss when their light is off.
- 22 Spotlights, everything on : +1.8%. That is 0.003 ms per lamp. A full truss of spotlights is, on this class of machine, almost free.
- The same 22 lamps as Prism : +8.8%
- The same 22 lamps as Laser : +8.9%
- One HeroRay : +4.0%
- 12 ColdSpark machines firing : +1.1%
 Everything above, all at once, all features on : +9.1%
The one number worth remembering
Lamp type matters about 5x more than lamp count. Twenty-two spotlights cost less than a quarter of what the same twenty-two cost as prisms or lasers. If a rig is heavy, change what the lamps ARE before you delete any.
And HeroRay is the most expensive single unit in the family: one hero light costs more than twice an entire 22-lamp spotlight truss. It earns it (it is a real volumetric with live shadow work), but budget it as a feature, not as scenery.
Off means off
Every product's master switch was measured in the same run:
- StageLightGroup master OFF : -0.7% against the baseline
- EFX ColdSparkGroup master OFF : -0.8%
- HeroRay master OFF : -0.9%
All three land at or fractionally below the all-off baseline, which is the measured version of a design rule this family holds to: a switched-off feature costs nothing. Not "almost nothing". The shader variant is gone, the per-frame calls are gone, the memory is released.
That is what makes the master switches usable as blackout in a live scene, and it is why the fixtures stay visible on the truss when their light is off.
No leak. That is a conclusion, not a hope.
The 7.4 hour soak ran with everything on. Managed memory saw-tooths as any Unity app does, so the number that matters is the floor it returns to after each collection, which is the live set.
Nine floor samples across five hours: a fitted drift of -0.4 MB/hour with a total spread of 14 MB, which is 0.8%. Flat. Nothing accumulates.
VAM stutters roughly every 43 minutes, and it is not this plugin
Something the soak turned up that we think users deserve to know:
In a heavy scene, Mono runs a full garbage collection about every 43 minutes and it stalls for 260 to 300 ms. Nine events, all consistent. In VR that is a noticeable hitch.
This is VAM's own behaviour, not ours (our entire family contributes about 158 bytes per frame to a scene baseline of roughly 600). But if you have ever felt a periodic hitch during a long session and never found a cause, that is very likely what it was.
Long sessions get slower, and a restart fixes it
Over the soak, frame time crept up by about 1% per hour: 3.80 ms at the start, 4.10 ms after 7.4 hours. We chased it down properly instead of guessing:
Conclusion: it accumulates inside the process and clears on restart. If you are eight hours into a build session and it feels sluggish, restart VAM and you get roughly 8% of your frame rate back. Nothing in your scene is wrong.
The 7.4 hour soak ran with everything on. Managed memory saw-tooths as any Unity app does, so the number that matters is the floor it returns to after each collection, which is the live set.
Nine floor samples across five hours: a fitted drift of -0.4 MB/hour with a total spread of 14 MB, which is 0.8%. Flat. Nothing accumulates.
VAM stutters roughly every 43 minutes, and it is not this plugin
Something the soak turned up that we think users deserve to know:
In a heavy scene, Mono runs a full garbage collection about every 43 minutes and it stalls for 260 to 300 ms. Nine events, all consistent. In VR that is a noticeable hitch.
This is VAM's own behaviour, not ours (our entire family contributes about 158 bytes per frame to a scene baseline of roughly 600). But if you have ever felt a periodic hitch during a long session and never found a cause, that is very likely what it was.
Long sessions get slower, and a restart fixes it
Over the soak, frame time crept up by about 1% per hour: 3.80 ms at the start, 4.10 ms after 7.4 hours. We chased it down properly instead of guessing:
- It affects the scene with every LumenForge master switch off, so it is not this family doing work.
- The GPU was not throttled (53 degrees, near full clock, no throttle flags).
- Restarting VAM recovered 74 to 89% of it immediately, which rules out anything thermal, since a restart does not cool a room.
Conclusion: it accumulates inside the process and clears on restart. If you are eight hours into a build session and it feels sluggish, restart VAM and you get roughly 8% of your frame rate back. Nothing in your scene is wrong.
Building a rig
Audio
Sorting against water, glass and clothing
Every fixture has a Render Queue slider covering VAM's full range (-1 to 5000, default 3000). Volumetric light crossing a transparent surface has no globally correct draw order, so this is the author's call, per scene.
Useful landmarks: VAM clothing sits at 2400, the ecosystem's transparent surfaces sit at 3000. If a beam is drawing in front of a semi-transparent dress when it should be behind it, this is the slider, and you should not have to modify the clothing to fix it.
VR
Small things that look like bugs
- Use the group plugin for anything above two lamps. Twelve lamps as twelve separate StageLight plugins means twelve separately compiled plugin instances and twelve full parameter sets written into your save. As a group it is one plugin plus twelve empty atoms, and the empties cost almost nothing.
- Reach for Spotlight first. Prism and Laser are roughly five times the cost. Use them where they are the point, not as the default lamp.
- Budget HeroRay like a character, not like scenery. One is a feature. Four is a decision.
- For window light, prefer EnvRay's baked engine. It consumes zero light slots and can be re-baked whenever you move it. Save the real-light engine for the one shaft that has to actually illuminate someone.
Audio
- Live audio on plus more than one fixture → add a LumenBus. Not mainly for performance: without it, every fixture guesses the tempo separately and they drift apart. A rig that should be dancing together ends up dancing near each other.
- Move the bands to your track. The defaults are a pop-mix layout. If your kick sits at 50 Hz, the bass channel is barely hearing it until you tell it where to listen.
Sorting against water, glass and clothing
Every fixture has a Render Queue slider covering VAM's full range (-1 to 5000, default 3000). Volumetric light crossing a transparent surface has no globally correct draw order, so this is the author's call, per scene.
Useful landmarks: VAM clothing sits at 2400, the ecosystem's transparent surfaces sit at 3000. If a beam is drawing in front of a semi-transparent dress when it should be behind it, this is the slider, and you should not have to modify the clothing to fix it.
VR
- The beams carry over to VR almost unchanged, and the rig runs smooth.
- Sparks read dimmer in a headset. Their punch comes mostly from bloom, and bloom lives in the post-processing chain, which is not the same chain in VR as on a monitor. Raise Boost when dressing for VR, and treat desktop and VR as two different looks rather than expecting one set of numbers to serve both.
Small things that look like bugs
 A one-time hitch the first time you light a scene is shader compilation, not a per-frame cost. It does not come back: the compiled result is cached on disk and survives restarts.
- Fading the music does not fade the lights when a specific Music source is selected. That is deliberate (see the LumenBus details above). Use the fixtures' own Dimmer to fade light.
- 🪭 A brand new rig shows every lamp pointing straight down and a red note in the status panel. That is correct: pan rotates around the beam axis, so a fan spread does nothing until the rig is tilted off that axis. Pick almost any Look and it sets the stance for you, or set Fan base tilt yourself.
The measuring tool ships in the package (tools/PerfMeter.cslist).
Run the matrix on your own machine if you want your own numbers.
Run the matrix on your own machine if you want your own numbers.
HONEST NOTES & LIMITSUp front about the edges, so nothing surprises you.
- These beams are drawn, not simulated. Analytic cones with a volumetric look, tuned to read correctly on a stage rather than to be physically right. That is the trade that makes a 22-lamp truss affordable. (HeroRay is the exception: a real raymarched volume, and priced accordingly.)
- Prism and Laser cost about 5x a Spotlight. Use them where they are the point, not as your default lamp.
- Real light is capped by VAM, not by us. Roughly six pixel lights exist in the whole engine, so it is offered on single fixtures and deliberately not on a rig.
- CUARay is experimental and says so in its own section: VR is not fully validated and slice stacks have a known dead angle. For general light shafts use EnvRay, which is the recommended default.
- Sparks read dimmer in VR than on a monitor, because their punch comes from bloom and the post chain is not the same one. Raise Boost when dressing for VR, and treat the two as separate looks.
- 🪭 A brand new rig points every lamp straight down and shows a red note in the status panel. That is correct, not broken: pan rotates around the beam axis, so a fan does nothing until the rig is tilted off it. Pick almost any Look and it sets the stance for you.
- VAM itself gets slower over a long session, and a full garbage collection stalls it for about a quarter of a second every 43 minutes. We measured it, it is not this plugin, and restarting gives the frame rate back. At least now you know what that hitch was.
 Found something odd? Want a fixture type that is not here? Post in the discussion. This family grew out of building a real show, and it will keep growing on what you report.
 What's new
v1.0
 Initial release. Eight plugins across two lines. Ray : HeroRay (tracking follow spot) · EnvRay (window and environment shafts, baked or real) · CUARay (window-mesh shafts, experimental). Stage : StageLight (spotlight, prism, laser) · StageLightGroup (whole-truss choreography, 22 Looks) · EFX ColdSpark and EFX ColdSparkGroup (cold pyro, 14 Looks with rainbow spreads) · LumenBus (scene-wide audio and tempo).
 Special Thanks
@PluginIdea for creating the original HPVL plugin, which let the VaM community enjoy the visual candy of volumetric lighting for many years.
@Zero Lambda for helping test the project throughout development, providing valuable feedback, and already creating many stunning visual showcases with it.
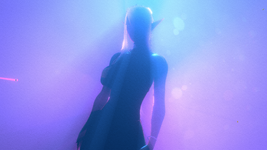
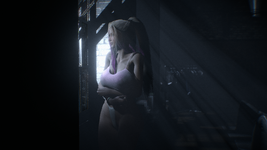
In memory of my best friend, @MonsterShinkai
The moment you walked away, everything I did found a new purpose: to let Noelle's beauty live on.
The moment you walked away, everything I did found a new purpose: to let Noelle's beauty live on.
Made so a VAM scene can finally be lit like a stage,
without spending your six lights or your evening.
without spending your six lights or your evening.






![[ForgeLab] Tail Forge](https://1424104733.rsc.cdn77.org/data/resource_icons/68/68311.jpg?1785112307)
![[Project CRAFT] ASSET CUA STUDIO: Open Source Release](https://1424104733.rsc.cdn77.org/data/resource_icons/67/67353.jpg?1781153072)
![[Project CRAFT] AUDIO CUA STUDIO](https://1424104733.rsc.cdn77.org/data/resource_icons/67/67256.jpg?1781146550)