This plugin renders VR180, VR360 and traditional 2D videos with audio and VR/panorama images inside Virt-A-Mate in stereoscopic 3D and monoscopic view. You can render at very high levels of resolution, quality and frame rate that would be impossible in real time, to create VR videos that play back perfectly smoothly even on less powerful machines or mobile headsets, all while potentially looking better than the native game. Performance is excellent thanks to the LilyRender360 shader potentially rendering out more than 100 frames per minute at 8K resolution!
Further you can export BVH skeleton animations to edit and utilize VaM mocap, behavior and animations externally.
You can also load background images and videos and composite VaM characters directly into them without additional software. Alternatively, you can render with transparency and composite the images in an external editor with more control.

Usage and Hotkeys
Simply add the plugin (.cslist) to the object from which you want to render (such as an Empty). You do not need the shader source files to use the plugin, they are included to enable people to change the plugin functionality if they want. The images will be saved to the "VaM\Saves\VR_Renders" folder. You can leave filename empty to use an automatic timestamp as the filename.
Escape: Cancel Video Render
F9: Take Single Screenshot
F10: Start Playback and Record Video
F11: Record Video
F12: Seek To Beginning
Settings

The VR renderer works by first rendering a cubemap, which is a set of six 90°x90° renders, one in each direction, forming a cube. These 6 rectilinear images are then projected into an equirectangular image that represents the spherical view at that position.
The cubemap resolution determines the render resolution of each of the 6 faces of the cubemap.
A cubemap resolution of around 1/4th of the output resolution's width is usually a good starting point for VR180, but it may be worth it to experiment for best results.
Cubemap MSAA affects the quality of edges and hair, but has no effect on quality beyond that. Because VRAM consumption scales linearly with MSAA level, increased cubemap resolution typically yields better results than increased MSAA at the same memory cost.
An output resolution of 4K is often considered a minimum for decent VR180 footage. However, the increase in resolution is very apparent even up to 8K resolution on current headsets, and possibly beyond that.
You can set the frame rate at which the scene will be played back in VaM, and can record video at the same or lower frame rate by only recording every nth frame.
For flat 2D images and videos you can use supersampling by MacGruber for enhanced quality, which renders the scene at 2x, 3x, 4x etc. resolution and then scales the image down to the target resolution.
Explanation for stereo modes
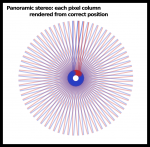
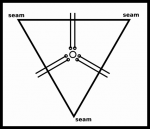

The normal method should be sufficiently accurate for typical VR180 scenes - it works just like most VR180 cameras in real life with the same drawback that the stereo effect is slightly worse towards the edges compared to the front. Panoramic stereo is 15-30 times slower than other methods but produces accurate stereo in every direction, which could be good for 360° stereo in particular. It has low VRAM cost. The triangle and square methods are like having a camera with 3 or 4 sets of eyes, so there will be seams but apart from that you can look in every direction in 360 and get a good stereo effect unlike the normal method.
Performance and memory
I can render about 350 frames per minute at 4K resolution on an RTX 2070 Super in a simple scene, and over 100 at 8K. So even at 8K 60 FPS you can render over a minute of footage in an hour which should be fast enough for almost all use cases. Performance is based primarily on your GPU.
Note that PNG export may be up to 3x slower than JPEG because currently about 70% (JPEG) to 90% (PNG) of computational time is spent encoding images. However, PNG is lossless quality.
Depending on your settings, the plugin may consume several GB of graphics memory, which is estimated in the UI. Note that trying to allocate more VRAM than available may crash VaM or your computer. Mind the VRAM already in use by Windows and other applications (1 GB+), as well as VaM and the scene (2 GB+). You can monitor your VRAM consumption in the Windows Task Manager. An 8 GB GPU should be enough for virtually all use cases, whereas 6 GB should still be enough for most.
Video output with Avidemux or FFmpeg
 www.ffmpeg.org
You can merge the rendered image sequences to videos using Avidemux (GUI) , FFmpeg (command line) or another program of your choice.

Avidemux is probably easiest, you just drag and drop the first image in the sequence (xxx_000000.png) into the Avidemux window, alongside your recorded audio WAV file. You can also combine several different sequences into a single video by dragging in each one (assuming they are the same frame rate). From there you can set your encoding options, add additional audio and also apply various post-processing filters. Set your frame rate under Filters -> Change FPS. Typically you may want to encode in x265 or x264 codec to MP4 muxer, choose your bitrate quality level (CRF), and for very high resolution VR content (4K and above) you may need to set certain options like "IDC Level" (higher) and under tuning "fast decode" to make sure your video looks great but can also play back smoothly without lag.
For FFmpeg, you need to place the exe file into the "Saves\VR_Renders\" folder. Basic command line usage is as follows:
Please refer to external resources for more information on topics like bitrate, quality and codec settings, especially when encoding very high resolution VR videos above 4K.

 gist.github.com
 www.mysterybox.us
Credits
Thanks to MacGruber for his previous work which this plugin builds and heavily relies upon!
Thanks to Élie Michel for his LilyRender360 shader which is responsible for the 15x performance gain compared to a CPU-based implementation!
Thanks to kuler for contributing the correct method to do transparent render in VaM!
Thanks to ragingsimian, morkork, VAMguy, 3115062, Cleo and Vezezepu for improvement suggestions!
License
This plugin is licensed under CC BY-SA.
Uses code from MacGruber's Essentials (SuperShot, SuperResolution, SkyMagicExporter and utility functions), licensed under CC BY-SA.
 hub.virtamate.com
Uses LilyRender360 created by Élie Michel, licensed under MIT License.

 github.com
Further you can export BVH skeleton animations to edit and utilize VaM mocap, behavior and animations externally.
You can also load background images and videos and composite VaM characters directly into them without additional software. Alternatively, you can render with transparency and composite the images in an external editor with more control.

Usage and Hotkeys
Simply add the plugin (.cslist) to the object from which you want to render (such as an Empty). You do not need the shader source files to use the plugin, they are included to enable people to change the plugin functionality if they want. The images will be saved to the "VaM\Saves\VR_Renders" folder. You can leave filename empty to use an automatic timestamp as the filename.
Escape: Cancel Video Render
F9: Take Single Screenshot
F10: Start Playback and Record Video
F11: Record Video
F12: Seek To Beginning
Settings
The VR renderer works by first rendering a cubemap, which is a set of six 90°x90° renders, one in each direction, forming a cube. These 6 rectilinear images are then projected into an equirectangular image that represents the spherical view at that position.
The cubemap resolution determines the render resolution of each of the 6 faces of the cubemap.
A cubemap resolution of around 1/4th of the output resolution's width is usually a good starting point for VR180, but it may be worth it to experiment for best results.
Cubemap MSAA affects the quality of edges and hair, but has no effect on quality beyond that. Because VRAM consumption scales linearly with MSAA level, increased cubemap resolution typically yields better results than increased MSAA at the same memory cost.
An output resolution of 4K is often considered a minimum for decent VR180 footage. However, the increase in resolution is very apparent even up to 8K resolution on current headsets, and possibly beyond that.
You can set the frame rate at which the scene will be played back in VaM, and can record video at the same or lower frame rate by only recording every nth frame.
For flat 2D images and videos you can use supersampling by MacGruber for enhanced quality, which renders the scene at 2x, 3x, 4x etc. resolution and then scales the image down to the target resolution.
Explanation for stereo modes


The normal method should be sufficiently accurate for typical VR180 scenes - it works just like most VR180 cameras in real life with the same drawback that the stereo effect is slightly worse towards the edges compared to the front. Panoramic stereo is 15-30 times slower than other methods but produces accurate stereo in every direction, which could be good for 360° stereo in particular. It has low VRAM cost. The triangle and square methods are like having a camera with 3 or 4 sets of eyes, so there will be seams but apart from that you can look in every direction in 360 and get a good stereo effect unlike the normal method.
Performance and memory
I can render about 350 frames per minute at 4K resolution on an RTX 2070 Super in a simple scene, and over 100 at 8K. So even at 8K 60 FPS you can render over a minute of footage in an hour which should be fast enough for almost all use cases. Performance is based primarily on your GPU.
Note that PNG export may be up to 3x slower than JPEG because currently about 70% (JPEG) to 90% (PNG) of computational time is spent encoding images. However, PNG is lossless quality.
Depending on your settings, the plugin may consume several GB of graphics memory, which is estimated in the UI. Note that trying to allocate more VRAM than available may crash VaM or your computer. Mind the VRAM already in use by Windows and other applications (1 GB+), as well as VaM and the scene (2 GB+). You can monitor your VRAM consumption in the Windows Task Manager. An 8 GB GPU should be enough for virtually all use cases, whereas 6 GB should still be enough for most.
Video output with Avidemux or FFmpeg

Download FFmpeg

Avidemux is probably easiest, you just drag and drop the first image in the sequence (xxx_000000.png) into the Avidemux window, alongside your recorded audio WAV file. You can also combine several different sequences into a single video by dragging in each one (assuming they are the same frame rate). From there you can set your encoding options, add additional audio and also apply various post-processing filters. Set your frame rate under Filters -> Change FPS. Typically you may want to encode in x265 or x264 codec to MP4 muxer, choose your bitrate quality level (CRF), and for very high resolution VR content (4K and above) you may need to set certain options like "IDC Level" (higher) and under tuning "fast decode" to make sure your video looks great but can also play back smoothly without lag.
For FFmpeg, you need to place the exe file into the "Saves\VR_Renders\" folder. Basic command line usage is as follows:
Code:
ffmpeg -framerate 60 -i output8k/output8k_%06d.jpg -i music.mp3 -c:v libx265 -tune:v fastdecode -level:v 6.2 -crf 20 output8k.mp4Please refer to external resources for more information on topics like bitrate, quality and codec settings, especially when encoding very high resolution VR videos above 4K.

FFmpeg cheat sheet for 360 video
FFmpeg cheat sheet for 360 video. GitHub Gist: instantly share code, notes, and snippets.

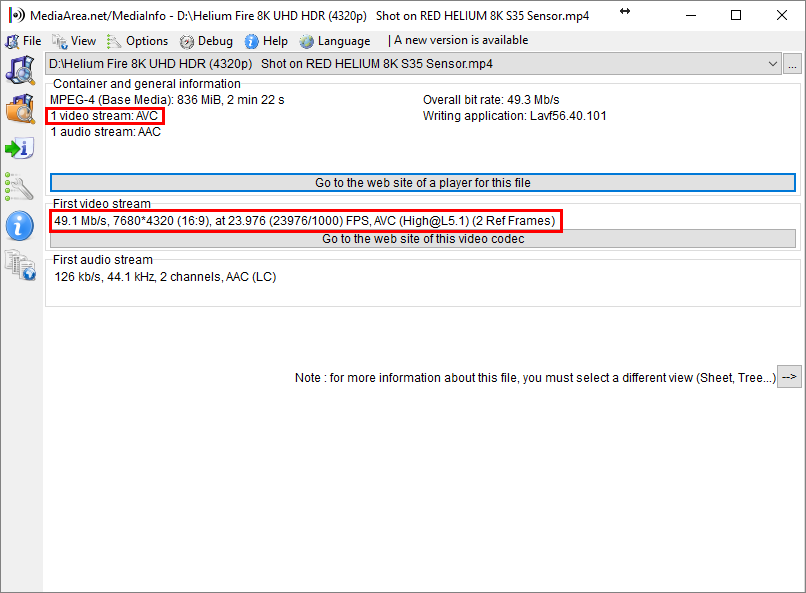
Delivering 8K using AVC/H.264 — Mystery Box
YouTube launched 8K streaming back in 2015 , but the lack of cameras available to content creators meant 8K uploads didn’t start in earnest until late 2016. That’s around the time when we uploaded our first 8K video to YouTube, and while we ran into some interesting problems getting it up
Credits
Thanks to MacGruber for his previous work which this plugin builds and heavily relies upon!
Thanks to Élie Michel for his LilyRender360 shader which is responsible for the 15x performance gain compared to a CPU-based implementation!
Thanks to kuler for contributing the correct method to do transparent render in VaM!
Thanks to ragingsimian, morkork, VAMguy, 3115062, Cleo and Vezezepu for improvement suggestions!
License
This plugin is licensed under CC BY-SA.
Uses code from MacGruber's Essentials (SuperShot, SuperResolution, SkyMagicExporter and utility functions), licensed under CC BY-SA.
MacGruber Essentials - Plugins + Scripts -
Your most essential MacGruber tools in a convenient single VAR package. Note that you can download older versions of this plugin for free from here. AudioReverb Adds an Reverb filter effect to the audio source you place the plugin on. It's...
GitHub - eliemichel/LilyRender360: Lily Render 360 is a tool for rendering a Unity scene into stitch-free equirectangular images
Lily Render 360 is a tool for rendering a Unity scene into stitch-free equirectangular images - GitHub - eliemichel/LilyRender360: Lily Render 360 is a tool for rendering a Unity scene into stitch-...


