


Contains executable files or external scripts. Ensure you trust the creator and apply your own security measures.
This is a VAM script with a separate server running on your computer, designed to make your VAM character feel alive with the help of real AI — not just a chatbot, but an AI agent that can see the scene, talk to you, and perform actions inside VAM!!!
If anything does not launch or work correctly, please let me know! This is my first time packaging a full application into an archive!
This is complex and time-consuming work! This is a kind of harness for your AI. It runs continuously in streaming mode as an agent, makes decisions about performing actions, and keeps working non-stop!
How does it work? The AI can see what is happening in the scene the same way you do! You can also communicate with this AI using your own voice or through chat! The AI can reply to you with messages or with a real voice that is very hard to tell apart from a human one! It can also control any triggers you add to the scene and use them to perform actions: turn lights on or off, launch something, and so on!
I have already connected my script to FuckingReach, but I will upload FuckingReach itself with server-side control later.
How does all of this work? You need to download LM Studio and run any AI model in it. Then my server automatically connects to LM Studio and uses that model. The VAM script connects to the server and sends and receives all the data and actions that the AI wants to perform!
The package already includes a VOSK model that can understand your speech in English. BUT you can download any other model that is better than the basic one I included. You will have to download the voice model yourself, because these models can weigh a couple of gigabytes! There are many of them: some are better, some are worse. In my program, you only need to select the folder where the model is located.
But for the model to start speaking, you also need to provide the path to any WAV or MP3 file. The voice model generates speech and adapts its voice based on that file. It can be any female, male, or any other kind of voice — android, robot, alien, and so on. A couple of spoken phrases, or even just regular female moans for 2–10 or 15 seconds, are enough for the AI to start talking to you in a very sweet and arousing voice!)
The package includes 1 VAR file, which is the VAM script itself that you add to the game. After that, there are 2 folders with the program. You need to download all of them and unpack everything into one single folder! That’s it, you can launch VAMCompanion and play, after downloading and connecting the voice model if needed!
FOR DEVELOPERS!!! THE ARCHIVE INCLUDES THE SOURCE CODE OF THE PROGRAM! TAKE IT AND MODIFY IT HOWEVER YOU WANT, MAKE YOUR SCRIPTS MORE VARIED, AND HELP DEVELOP VIRT-A-MATE WITH AI!
In short, how does it work?! More detailed instructions are below.
The AI model in LM Studio runs continuously as an agent. It takes screenshots by itself when it needs to see something, and it generates phrases by itself. You can write to it or talk to it, and it will definitely see it. Give it time to answer. It can look at screenshots from the scene, perform actions in the game, and after that it will immediately see your message. This happens quickly. Then it can reply to you while doing other actions in parallel. Yes, my server allows the model to perform actions and talk to you at the same time!
Now let’s move on to the actual instructions, which I hope I’ll have time to finish. Because I worked on this for many weeks, sometimes staying up all night while still working on weekdays. So please don’t leave angry comments. This was very difficult work.
------------------------------------------------------------------------------------------------------
------------------------------------------------------------------------------------------------------
A short video demonstrating an example of VAMCompanion in action.
Sorry that the physics in the video occasionally blows the character apart. I am currently testing new features in FuckingReach, and for now some of them can lead to this kind of result. Please ignore it. And sorry for the mistakes in the text in the video, I just really wanted to sleep. Working on this program in the evenings and at night for several weeks really exhausted me. I was literally falling asleep while uploading all of this and writing the instructions.

If anything does not launch or work correctly, please let me know! This is my first time packaging a full application into an archive!
This is complex and time-consuming work! This is a kind of harness for your AI. It runs continuously in streaming mode as an agent, makes decisions about performing actions, and keeps working non-stop!
How does it work? The AI can see what is happening in the scene the same way you do! You can also communicate with this AI using your own voice or through chat! The AI can reply to you with messages or with a real voice that is very hard to tell apart from a human one! It can also control any triggers you add to the scene and use them to perform actions: turn lights on or off, launch something, and so on!
I have already connected my script to FuckingReach, but I will upload FuckingReach itself with server-side control later.
How does all of this work? You need to download LM Studio and run any AI model in it. Then my server automatically connects to LM Studio and uses that model. The VAM script connects to the server and sends and receives all the data and actions that the AI wants to perform!
The package already includes a VOSK model that can understand your speech in English. BUT you can download any other model that is better than the basic one I included. You will have to download the voice model yourself, because these models can weigh a couple of gigabytes! There are many of them: some are better, some are worse. In my program, you only need to select the folder where the model is located.
But for the model to start speaking, you also need to provide the path to any WAV or MP3 file. The voice model generates speech and adapts its voice based on that file. It can be any female, male, or any other kind of voice — android, robot, alien, and so on. A couple of spoken phrases, or even just regular female moans for 2–10 or 15 seconds, are enough for the AI to start talking to you in a very sweet and arousing voice!)
The package includes 1 VAR file, which is the VAM script itself that you add to the game. After that, there are 2 folders with the program. You need to download all of them and unpack everything into one single folder! That’s it, you can launch VAMCompanion and play, after downloading and connecting the voice model if needed!
FOR DEVELOPERS!!! THE ARCHIVE INCLUDES THE SOURCE CODE OF THE PROGRAM! TAKE IT AND MODIFY IT HOWEVER YOU WANT, MAKE YOUR SCRIPTS MORE VARIED, AND HELP DEVELOP VIRT-A-MATE WITH AI!
In short, how does it work?! More detailed instructions are below.
- As I said, the script from VAM connects to the server.
- Launch LM Studio and run the AI model that suits you!
IMPORTANT NOTE: I have an RTX 3090 graphics card with 24 GB of VRAM and 64 GB of RAM. If you have 10–12 GB of GPU memory, keep in mind that VAM will use part of your graphics card memory, and the model in LM Studio will use GPU memory too. If your model does not fit into VRAM, part of its weights will be loaded into regular RAM and processed through the CPU. In that case, the model will run much slower! So if your graphics card has a small amount of memory, use simple smaller models, and you will get faster responses and faster actions! Also keep in mind: if you run a model that is not a vision model, it will not be able to see what is happening in your scene. You will need to disable screenshot processing in advance on the VAMCompanion server, otherwise LM Studio will return an error instead of generating tokens. - After you launch LM Studio with the model, launch VAMCompanion.exe.
- Do not press Start Server yet! Go to Settings, select your model from the menu in the left window, and click Save.
- GO TO THE PROMPT TAB AND SET A ROLEPLAY PROMPT FOR YOUR MODEL! I already saved a prompt there in advance, but you can create any prompt you want for the model to roleplay! BUT do not touch the System Prompt for no reason! It is required for the model mechanics!
- Now click Start Server. But without the script connected in the VAM scene, it still will not work yet!
- Go into Virt-A-Mate and add the script to the character you want the AI to roleplay as.
- Just press the Start button! The second Start Server button lets you start and stop the server from inside the game.
- That’s it) You can play and enjoy)))
The AI model in LM Studio runs continuously as an agent. It takes screenshots by itself when it needs to see something, and it generates phrases by itself. You can write to it or talk to it, and it will definitely see it. Give it time to answer. It can look at screenshots from the scene, perform actions in the game, and after that it will immediately see your message. This happens quickly. Then it can reply to you while doing other actions in parallel. Yes, my server allows the model to perform actions and talk to you at the same time!
Now let’s move on to the actual instructions, which I hope I’ll have time to finish. Because I worked on this for many weeks, sometimes staying up all night while still working on weekdays. So please don’t leave angry comments. This was very difficult work.
------------------------------------------------------------------------------------------------------
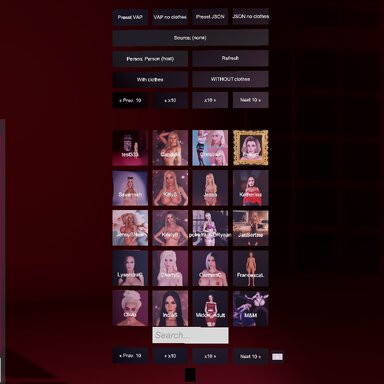
This is a VAM script.

In the main menu, you only need the Start and Start Server buttons.
The Start button connects the script to the VAMCompanion server. You must press it. You can press it before starting the server. The script will connect automatically as soon as you press the Start Server button either in the script or on the server itself.

Here you select the microphone connected to your PC.


Here you choose which cameras will be enabled. There are 4 of them in total. One is placed on the root of the main character that has the script on it, the second one is placed on your character if it is found in the scene, or on the nearest one. The other two cameras are just scene cameras, so the AI model can see the environment better.
You will not be able to move the cameras that are attached to the head inside the scene. But you can adjust them using the settings on the right side of the window. You can place the scene cameras wherever you want; they will appear in the middle of the scene. And if your scene already had these cameras, they will stay in the same place even if you reload the script.
There are 4 cameras in total. I thought about adding one more camera to the scene, but for now I don’t know if a third scene camera is needed.

LM Studio. This menu is no longer used by the server and, for now, is only left here as a legacy from the past) I made it so the model would generate a response after 1 to several seconds within the slider limits, but that is no longer relevant. Now the model decides on its own when to write to you, and rest assured, it will not stay silent unless you give it the role of a mute character)


The Connection section contains the connection to my FuckingReach script, which, as I said, I will release later. There will also be connections to BlowJobRich and MasturbationRich. The checkboxes are needed so the model can control the functions from these scripts. If you uncheck them, it will not control those functions, and control will go back to the automatic behavior that was already used in my scripts before. I will make separate buttons later, where I will place the functions for each of my scripts that the model can control. I can also add an additional connection here to any of your own scripts.


I think everything is clear here. This is audio and lip control.


And one of the important sections is Triggers. This is where you add and connect your own triggers from the scene. Want the AI to turn the lights on and off? Want it to press buttons? Control your scripts in the scene? Basically, you get it
The main thing is to name the trigger properly and give it a description of what it is for. The AI reads all of this, and it gives it a better understanding of what is in the scene and how to use it. In the Triggers field, there is the name of what you connected, and the second field is your description of the trigger and why it is needed.
Now let’s move on to the VAMCompanion server!

Launch LM Studio and load the model.

Before loading the model, make sure to set the Context Length to at least 25,000–27,000. Otherwise, LM Studio may not be able to process requests from my server, especially if forwarding screenshots of what the AI sees to LM Studio is enabled.
Also set Max Concurrent Predictions to 1 before loading the model.

Launch VAMCompanion.exe


Here, select the path to the VOSK model. It is located in the program folder. The path may still be from my PC, so just select it again. The model for transcribing your voice into text is located here: VAMCompanion\vosk-model-small-en-us-0.15, or you can download your own model that will understand speech better, or understand your native language if it is different from English.

This connects the model that will voice the AI’s response, turning text into a real, natural voice.
IMPORTANT! If this function is enabled, the AI understands when the voice file has finished playing, and until that moment it will not write any other phrases. After the voice finishes playing, the AI will be able to answer you again. If you want fast responses and do not need AI voice replies, which will definitely increase the model’s response time, disable this function.
But while the AI’s voice is being generated, it will not stop hearing you or performing actions and your requests. It will simply stay silent until its line has been voiced.

Here you write the Role Prompt for your model. I left my own prompt there as an example. You can create your own.
It is better not to touch the System Prompt right away. Save it separately if you are going to rewrite it for yourself. This is where the mechanics for the AI’s work are described. Do not write the Role Prompt here!
There is also a separate document — Policies.md. The program does not provide access to it. But it exists in the program files. It describes the policies for how the model should behave. This is the most important document that the model uses as the basis for roleplay and for answering you. That is why I did not make it accessible from the program, but you can find it in the program folders. Be very careful if you decide to change it. This document is basically the law for the model on how it should behave in this program and in the game. For the model, it has priority number 0 and is the most important thing, more important than the System Prompt and the Role Prompt. I do not recommend touching this document for no reason if you do not understand what you are doing.
IMPORTANT! The model will roleplay exactly the way you describe it in the role, unless it turns out to be completely stupid! But if you write that it should not listen to you, should ignore your pleas and requests, then that is exactly how it will roleplay, because the policies say that the Role is more important than the user! If you write yourself that it should insult you and behave badly toward you, then that is what you will get! You are responsible for the role prompt you write!
My prompt, which is saved in the program, is provided as an example and is not a recommendation for use! Write the role prompt that you want the model to roleplay. You are responsible for what you write there!

You don’t really need the Diagnostics tab.

Harness is the heart of the program, written in Python! Technologies like this are what ChatGPT, Codex, OpenClo, Claude Code, and other agents use to perform tasks continuously without human involvement. It turns the AI agent into something more than just a chat with one request and one answer. It becomes a working agent that will keep grinding until you turn it off. There is nothing for you to do here if you do not understand what an AI harness is.

The Logs tab. I think it is clear that logs from different systems and their work are written here. You do not really need this tab either).
In the main menu, you only need the Start and Start Server buttons.
The Start button connects the script to the VAMCompanion server. You must press it. You can press it before starting the server. The script will connect automatically as soon as you press the Start Server button either in the script or on the server itself.
Here you select the microphone connected to your PC.
Here you choose which cameras will be enabled. There are 4 of them in total. One is placed on the root of the main character that has the script on it, the second one is placed on your character if it is found in the scene, or on the nearest one. The other two cameras are just scene cameras, so the AI model can see the environment better.
You will not be able to move the cameras that are attached to the head inside the scene. But you can adjust them using the settings on the right side of the window. You can place the scene cameras wherever you want; they will appear in the middle of the scene. And if your scene already had these cameras, they will stay in the same place even if you reload the script.
There are 4 cameras in total. I thought about adding one more camera to the scene, but for now I don’t know if a third scene camera is needed.
LM Studio. This menu is no longer used by the server and, for now, is only left here as a legacy from the past) I made it so the model would generate a response after 1 to several seconds within the slider limits, but that is no longer relevant. Now the model decides on its own when to write to you, and rest assured, it will not stay silent unless you give it the role of a mute character)
The Connection section contains the connection to my FuckingReach script, which, as I said, I will release later. There will also be connections to BlowJobRich and MasturbationRich. The checkboxes are needed so the model can control the functions from these scripts. If you uncheck them, it will not control those functions, and control will go back to the automatic behavior that was already used in my scripts before. I will make separate buttons later, where I will place the functions for each of my scripts that the model can control. I can also add an additional connection here to any of your own scripts.
I think everything is clear here. This is audio and lip control.
And one of the important sections is Triggers. This is where you add and connect your own triggers from the scene. Want the AI to turn the lights on and off? Want it to press buttons? Control your scripts in the scene? Basically, you get it
The main thing is to name the trigger properly and give it a description of what it is for. The AI reads all of this, and it gives it a better understanding of what is in the scene and how to use it. In the Triggers field, there is the name of what you connected, and the second field is your description of the trigger and why it is needed.
Now let’s move on to the VAMCompanion server!
Launch LM Studio and load the model.
- Under number 1, go to this tab.
- Enable the Status: Running toggle so LM Studio works as a server and can accept incoming connections.
- Check that you have the same default IP address.
Before loading the model, make sure to set the Context Length to at least 25,000–27,000. Otherwise, LM Studio may not be able to process requests from my server, especially if forwarding screenshots of what the AI sees to LM Studio is enabled.
Also set Max Concurrent Predictions to 1 before loading the model.
Launch VAMCompanion.exe
- Go to the Settings tab.
- Select the model you launched in LM Studio from the list.
- Click Save settings. The models are loaded automatically from LM Studio, but if you download a new model while the server is running, you will need to restart the server so it appears in the list.
Here, select the path to the VOSK model. It is located in the program folder. The path may still be from my PC, so just select it again. The model for transcribing your voice into text is located here: VAMCompanion\vosk-model-small-en-us-0.15, or you can download your own model that will understand speech better, or understand your native language if it is different from English.
This connects the model that will voice the AI’s response, turning text into a real, natural voice.
- Also download any XTTS voice model if you want the AI to talk to you with a real voice.
- Specify the path to any WAV or MP3 file so the voice model can speak the answers in that voice and understand the intonation.
IMPORTANT! If this function is enabled, the AI understands when the voice file has finished playing, and until that moment it will not write any other phrases. After the voice finishes playing, the AI will be able to answer you again. If you want fast responses and do not need AI voice replies, which will definitely increase the model’s response time, disable this function.
But while the AI’s voice is being generated, it will not stop hearing you or performing actions and your requests. It will simply stay silent until its line has been voiced.
Here you write the Role Prompt for your model. I left my own prompt there as an example. You can create your own.
It is better not to touch the System Prompt right away. Save it separately if you are going to rewrite it for yourself. This is where the mechanics for the AI’s work are described. Do not write the Role Prompt here!
There is also a separate document — Policies.md. The program does not provide access to it. But it exists in the program files. It describes the policies for how the model should behave. This is the most important document that the model uses as the basis for roleplay and for answering you. That is why I did not make it accessible from the program, but you can find it in the program folders. Be very careful if you decide to change it. This document is basically the law for the model on how it should behave in this program and in the game. For the model, it has priority number 0 and is the most important thing, more important than the System Prompt and the Role Prompt. I do not recommend touching this document for no reason if you do not understand what you are doing.
IMPORTANT! The model will roleplay exactly the way you describe it in the role, unless it turns out to be completely stupid! But if you write that it should not listen to you, should ignore your pleas and requests, then that is exactly how it will roleplay, because the policies say that the Role is more important than the user! If you write yourself that it should insult you and behave badly toward you, then that is what you will get! You are responsible for the role prompt you write!
My prompt, which is saved in the program, is provided as an example and is not a recommendation for use! Write the role prompt that you want the model to roleplay. You are responsible for what you write there!
You don’t really need the Diagnostics tab.
Harness is the heart of the program, written in Python! Technologies like this are what ChatGPT, Codex, OpenClo, Claude Code, and other agents use to perform tasks continuously without human involvement. It turns the AI agent into something more than just a chat with one request and one answer. It becomes a working agent that will keep grinding until you turn it off. There is nothing for you to do here if you do not understand what an AI harness is.
The Logs tab. I think it is clear that logs from different systems and their work are written here. You do not really need this tab either).
How can I download the XTTS model?
1.

Go to Hugging Face and paste "coqui/XTTS-v2" into the search bar.
2.

Select this result from the list.
3.

Click “Files and versions”.
4. Create a folder anywhere on your PC, for example, called “XTTS model”
5.

Download each file to your folder one by one by clicking the “Download file” arrow:
config.json
dvae.pth
mel_stats.pth
model.pth
speakers_xtts.pth
vocab.json
6.

Click “Browse” and select the folder on your PC that contains the downloaded XTTS model.
7. Done. Don’t forget to add a WAV or MP3 file with a voice sample that the model will use when replying to you.
1.
Go to Hugging Face and paste "coqui/XTTS-v2" into the search bar.
2.
Select this result from the list.
3.
Click “Files and versions”.
4. Create a folder anywhere on your PC, for example, called “XTTS model”
5.
Download each file to your folder one by one by clicking the “Download file” arrow:
config.json
dvae.pth
mel_stats.pth
model.pth
speakers_xtts.pth
vocab.json
6.
Click “Browse” and select the folder on your PC that contains the downloaded XTTS model.
7. Done. Don’t forget to add a WAV or MP3 file with a voice sample that the model will use when replying to you.
A short video demonstrating an example of VAMCompanion in action.
Sorry that the physics in the video occasionally blows the character apart. I am currently testing new features in FuckingReach, and for now some of them can lead to this kind of result. Please ignore it. And sorry for the mistakes in the text in the video, I just really wanted to sleep. Working on this program in the evenings and at night for several weeks really exhausted me. I was literally falling asleep while uploading all of this and writing the instructions.
Contains executable files or external scripts. Ensure you trust the creator and apply your own security measures.