• Happy Holidays Guest!

    We want to announce that we will be working at reduced staffing for the holidays. Specifically Monday the 23rd until Jan 2nd.

    This will affect approval queue times and responses to support tickets. Please adjust your plans accordingly and enjoy yourselves this holiday season!

  • Hi Guest!

    Please be aware that we have released a critical security patch for VaM. We strongly recommend updating to version 1.22.0.7 using the VaM_Updater found in your installation folder.

    Details about the security patch can be found here.

Are the morph inconsistent between Daz and VaM?

yesplay

New member
Messages
4
Reactions
19
Points
3
I referred to the article on Vam to Blender to Vam and attempted to replicate the entire process mentioned in the article. Each time I imported the OBJ file exported from Blender into Daz,the matching was correct, and the morph appeared to have no issues.
However, every time I generated the DSF morph file from Daz and imported it into VAM, the morph effect was noticeably inconsistent. It appeared smoother in VAM, but it was not accurate.

So, is there any way to make the morph results in VAM identical to Daz3D?

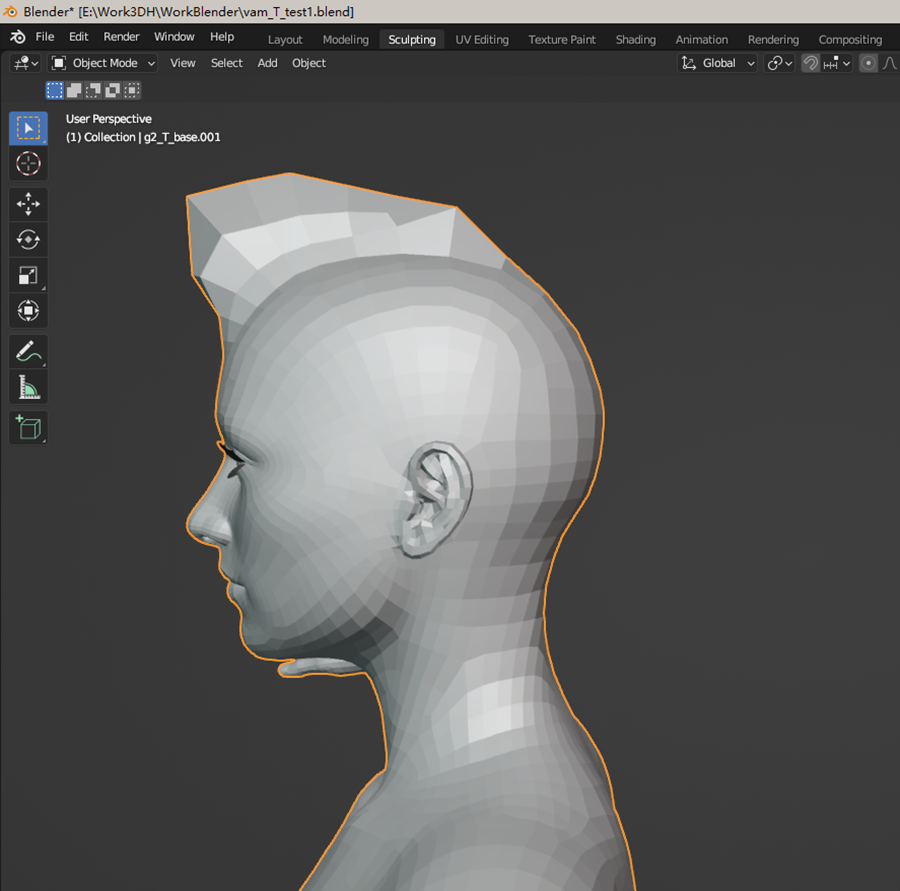
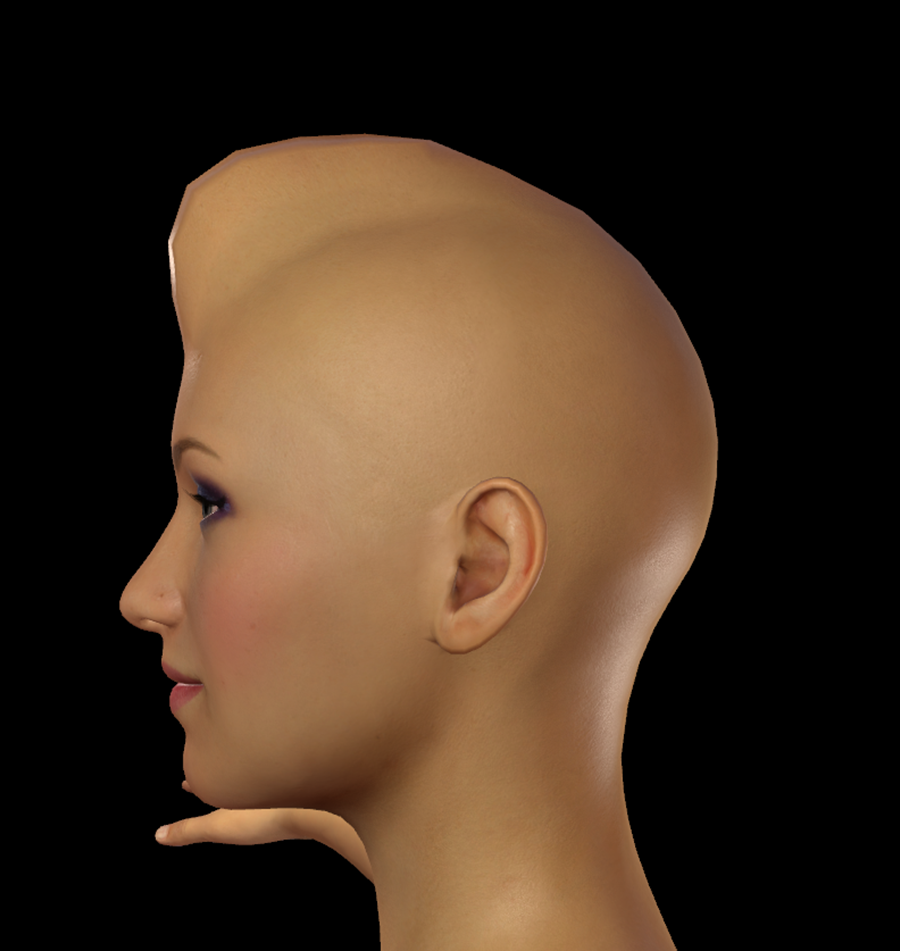
Morph Example 1:daz,blender,vam
It can be seen that Blender and Daz are completely consistent, but Vam is different

1689618804302.png
1689618854188.png
1689618826139.png


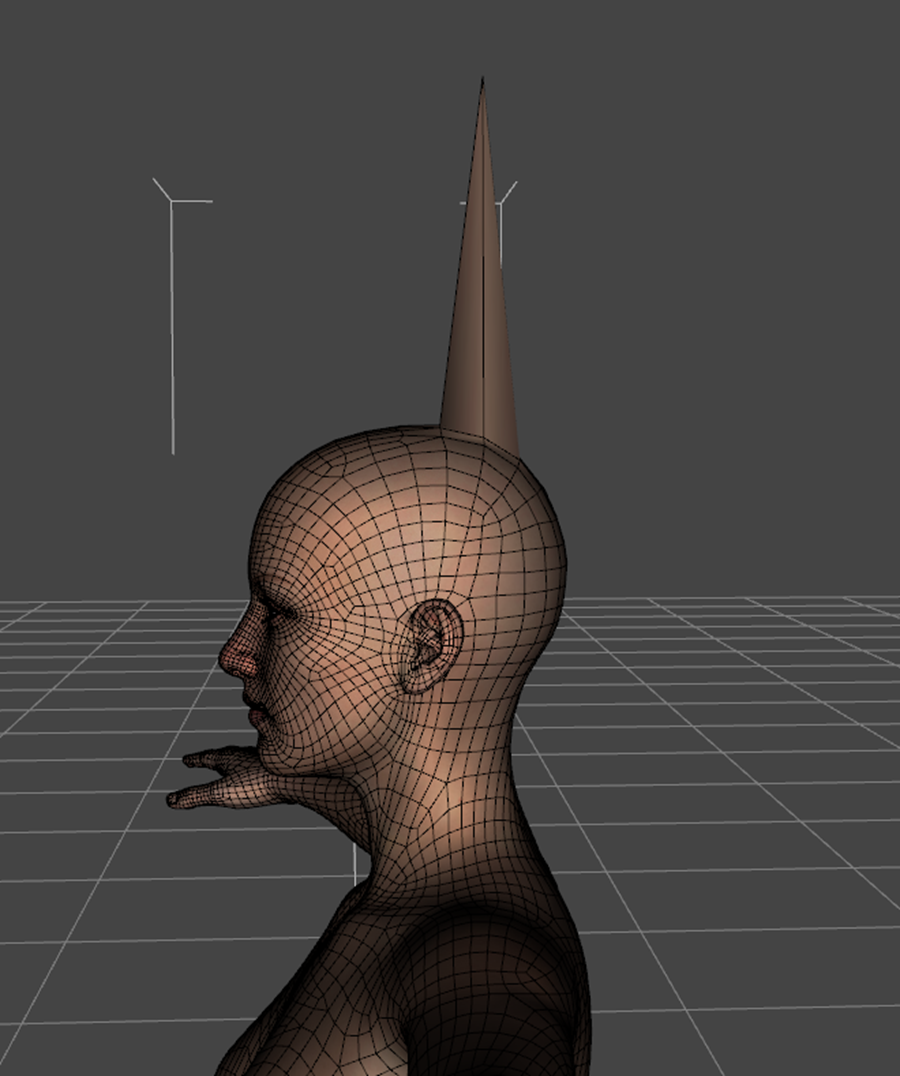
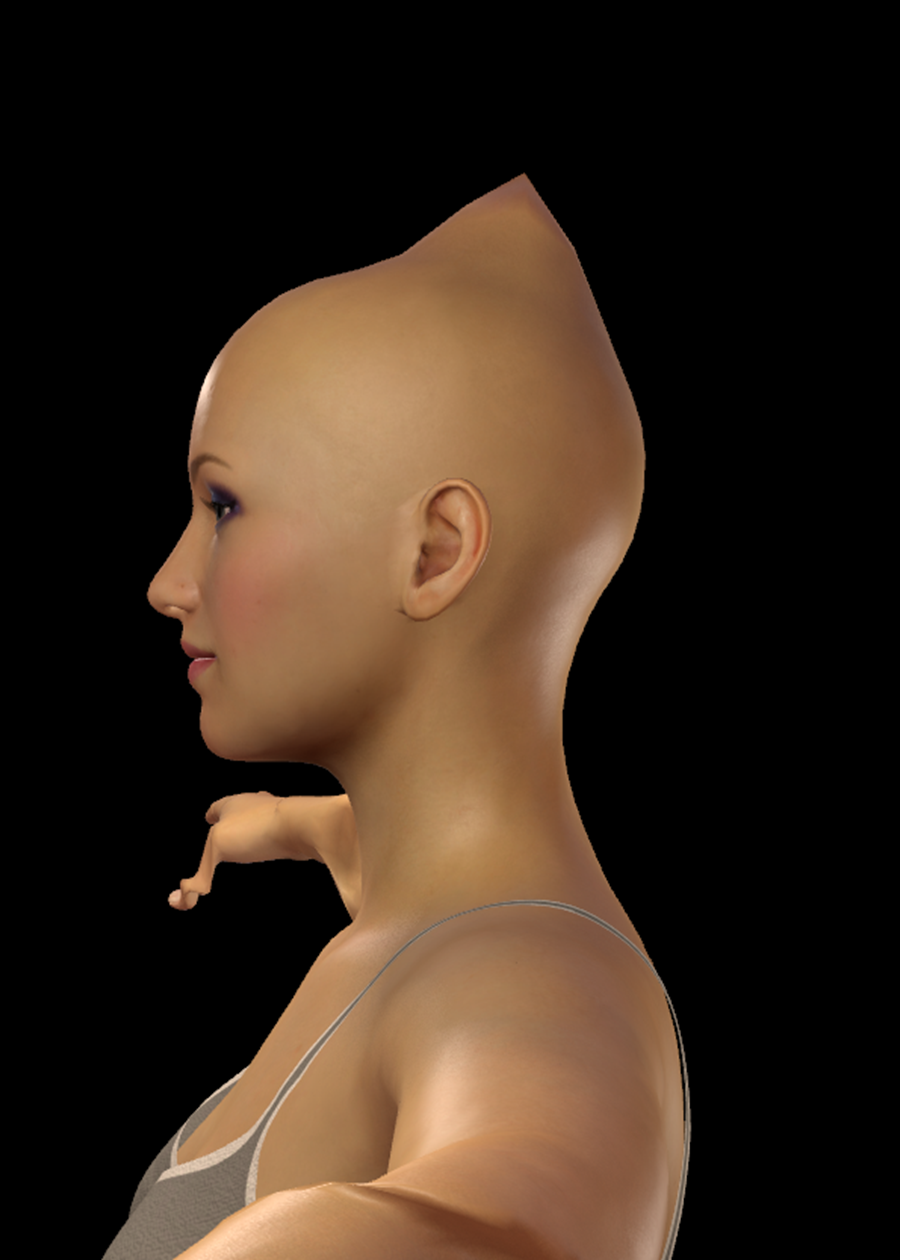
Morph Example2:Only one vertex was edited
daz,vam

1689618889330.png
1689618907231.png
 
Hi. I am just beginning to create morphs. I will probably make a post soon with questions.

What's going on here may have to do with the vam to blender to vam guide's method. The way I have applied that guide's method, it exports an object from VaM which is basically a just a shape when you get it to Daz. It doesn't have the bones and rigging the way the Daz character actually is. What's going on here could be that the figure isn't being rigged so the shape collaborates with the skeleton.

If you use the guide "How to use blender to sculpt" by MalMorality, you start by simply using the Genesis 2 female that exists for you in Daz. This is rigged and has its bone structure, etc. So you send that to Blender, then send it back to Daz, where you can then rig it as described in the guide, then export it to VaM.

I'm only just getting into this process, but that could be what's happening.
 
Ok... read all my replies they address it pretty good i think, and should help you: (These are all me as well trying to get to the very bottom of your query. SO, you can see each reply a light bulb goes off, i should consolidate this... but meh)

I referred to the article on Vam to Blender to Vam and attempted to replicate the entire process mentioned in the article. Each time I imported the OBJ file exported from Blender into Daz,the matching was correct, and the morph appeared to have no issues.
However, every time I generated the DSF morph file from Daz and imported it into VAM, the morph effect was noticeably inconsistent. It appeared smoother in VAM, but it was not accurate.

So, is there any way to make the morph results in VAM identical to Daz3D?

Morph Example 1:daz,blender,vam
It can be seen that Blender and Daz are completely consistent, but Vam is different
Morph Example 1:daz,blender,vam
  • It can be seen that Blender and Daz are completely consistent, but Vam is different --
    • VAM isn't different, it's just applying the equivalent of a 4 level smoothing modifier, which you can apply in Blender and DAZ to see the same result.
    • 1703909211395.png
      try setting to
      1703909230753.png
      , but nobody wants to run it at 0, it's pretty bad looking, not realistic.
Morph Example2:
  • Only one vertex was edited
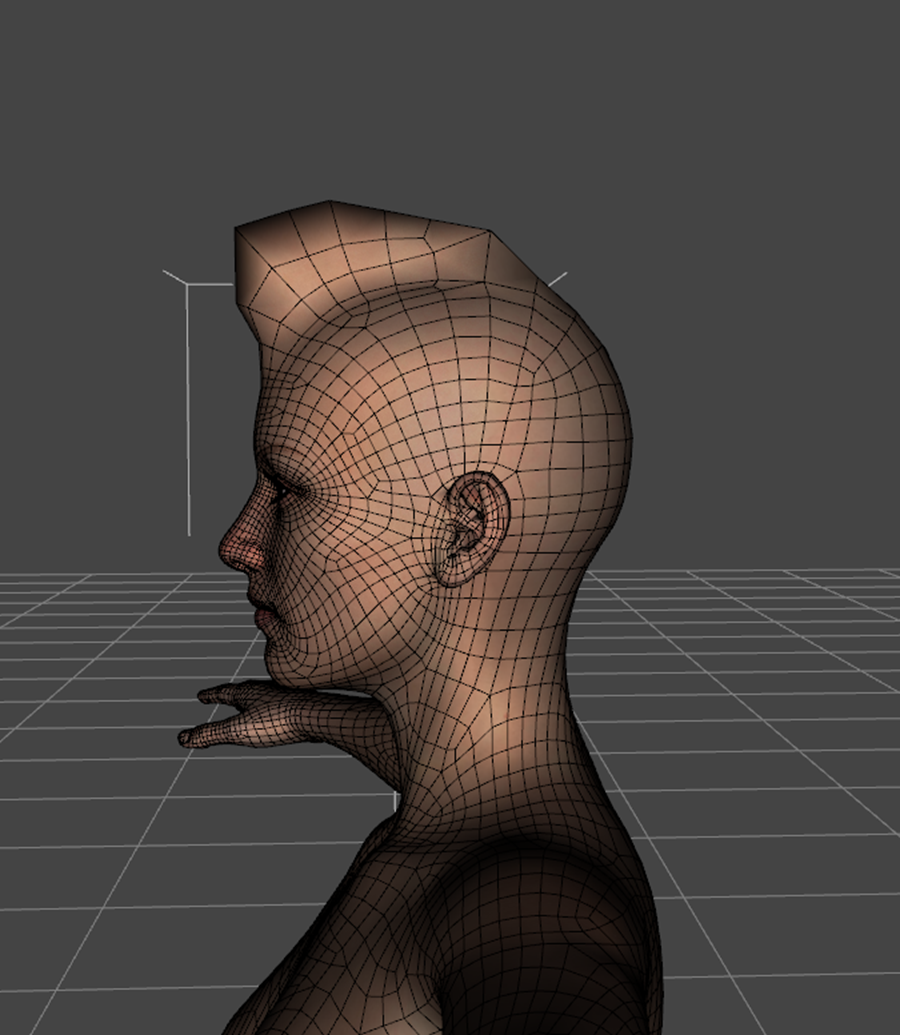
    • VAM is Smoothing all vertices by default, see notes below on why. the smooth between the high point and the base points is calculated with a smoothing modifier, which changes both of them, rounding it out.

With Pulling one vertex... that is an issue, because that will smooth out in VAM, pull more vertexes when you do it, use the Elastic Deform in Sculpt Mode, as it handles post smoothing better by grabbing a smooth set of vertices instead of just one, and since it already is 'smoothing' the distortion upon creation, you'll get better results. Here's my workflow:

Create your morph in blender, or zBrush. Making sure to only use a base resolution, G2F model, no genitals, no subdivisions. Make sure to export it with NO modifiers applied, or used during the creation process. No Smoothing, no Subdivisions, nothing, nada. This will affect your output OBJ if you do. (I put more details outside the scope of your question, just in case if anyone else reads this and wants a basic high level overview of the process, nothing brilliant or anything just a quicky)


1703902927462.png
No Modifiers


After importing, testing and saving the morph support asset in DAZ, browse to the morphs folder, which can be found using the names in:

P:\StudioLibrary(P)\Content\data\DAZ 3D\Genesis 2\Female\Morphs\<Vendor Name:>\<Product Name:>

In this case:

P:\StudioLibrary(P)\Content\data\DAZ 3D\Genesis 2\Female\Morphs\AWWalker\Product

The morph Name Test3C.dsf will be there.

Copy this file to your VAM directory: Just using the same sub paths here for the demo:

<VAMBASEDIR:>\Custom\Atom\Person\Morphs\female\AWWalker\Product

Go to Female Morphs (Or male if you are doing a male morph) and Click Reload Custom Morphs.

Set the smoothing on the Preferences to 0.


You can however see a bit of smoothing when smoothing is applied, it’s subtle here, but there are more than two vertices to work with from tip to base. Smoothing works better like this.

After trying to recreate it like your image depicts, very sharp, single vertices. I definitely isn't handled well in VAM with smoothing. You can't ADD vertices to the model, but you can move them, if you can do it with out disrupting too many, you might be able to pull more of them closer and make use of more, mind you they have to go up the fin more. You are going to loose the original shape of the model, and some expressions are going to go funky when messing with head vertices too much. Your fin tip should be at least 3 vertices across, if not more. Not just one, like you have, it'll smooth out way too much .

Using a single vertex for the morph --- it has less to work with so smoothing between two vertices is way more noticeable. You have to consider this when creating morphs.

Blender - Single Vertex Pull
DAZ STUDIO - Single Vertex Result after import
1703903234625.png
1703903222693.png

VAM Smoothing 4 - Single Vertex
Vam Smoothing 0 - Single Vertex
1703903347158.png
1703903337356.png

You can see how the morph is smoothed out, using elastic deform in blender will already do that for you , and there will be more consistent results as the vertices are already in a smooth position when created. Avoid Low Point count Morphs.
 

Attachments

  • 1703903315928.png
    1703903315928.png
    162.8 KB · Views: 0
Last edited:
my bad, my daz shot had high resolution model enabled, i set it to base resolution and it matches Blender perfectly now, just so you know it was the same effect from product to product. But there's more... i found out how to visual in DAZ what it'll look like in VAM, saving from going all the way to VAM and being disappointed, now you can be disappointed earlier. jk, sorry. Maybe i will write a detailed beginners guide.
1703906647562.png

And add the Object Smoothing to the base resolution model G2F figure,
1703906802225.png

1703906835312.png

and set smoothing to 4, you can see your results project as it would be in VAM. so there you go. I think that will help you alot with morphs.
1703906745344.png


I'm sure if i tinkered around more with blender, i could find the equivalent settings and save the step of importing to daz to see it. But it's not that long of a process to do it in daz. I think the results pretty accurately depict what VAM will do with objects smoothing, and iteration set to 4, sub divisions set to 0.
 
Found it... so yeah, you can completely do this in each step. In Blender, object mode, add the smooth modifier, set the Factor to 1, and repeats to 4. See video. I think this displays the why of your results better. What's even better, if you apply the modifier before you start morphing, you get to work with the end result immediately in blender, instead of applying the smooth at the end. Just make sure to apply the modifier when you export the mesh. Change your brush size as needed, using a small brush tends not to grab as well.

Sorry for all the replies, but at the end of each reply, i had created more questions for myself, and had to know the how and why to help you (and anyone else) better :) This really needs to be put in a nice document.


Ok, here is a full video, from blender to vam to daz and then comparing all three ... i think this puts a nice bow on it. Ignore the 20 seconds or so where i had a brain fart and couldn't find box select in the beginning. it goes much better after that. In the VAM view you can see the original sharp horns are still applied, with their single point vertices, and the new morph, exported as smoothed already together. The single points are still smoothed way too much, and the new morph looks almost identical to the blender version. Now, it's still a low vertices morph, i only used the three rows, so it looks a bit sharp in VAM, but you get the idea.
 
Last edited:
  • VAM isn't different, it's just applying the equivalent of a 4 level smoothing modifier, which you can apply in Blender and DAZ to see the same result.
I just tested it and the problem was solved after I changed the Smooth Passes to 0. This problem has been haunting me for nearly a year, causing my VAM project to be stalled for a year. Now I can finally continue to make it.
Thank you so much!(y)(y)
 
Back
Top Bottom