Hello there!
This is my first guide on the Hub, But I'll make it the best guide for Wrapping!
Before we start you'll need to download 2 things, I'll leave it to you where to install it, But install it in a easy to access/remember place so you can always return to it!
Download/Install steps,
Now the downloads are out of the way, Let's start the guide!
Chapter 1: Getting started!
Launching Wrap3D should bring a menu that looks like this,
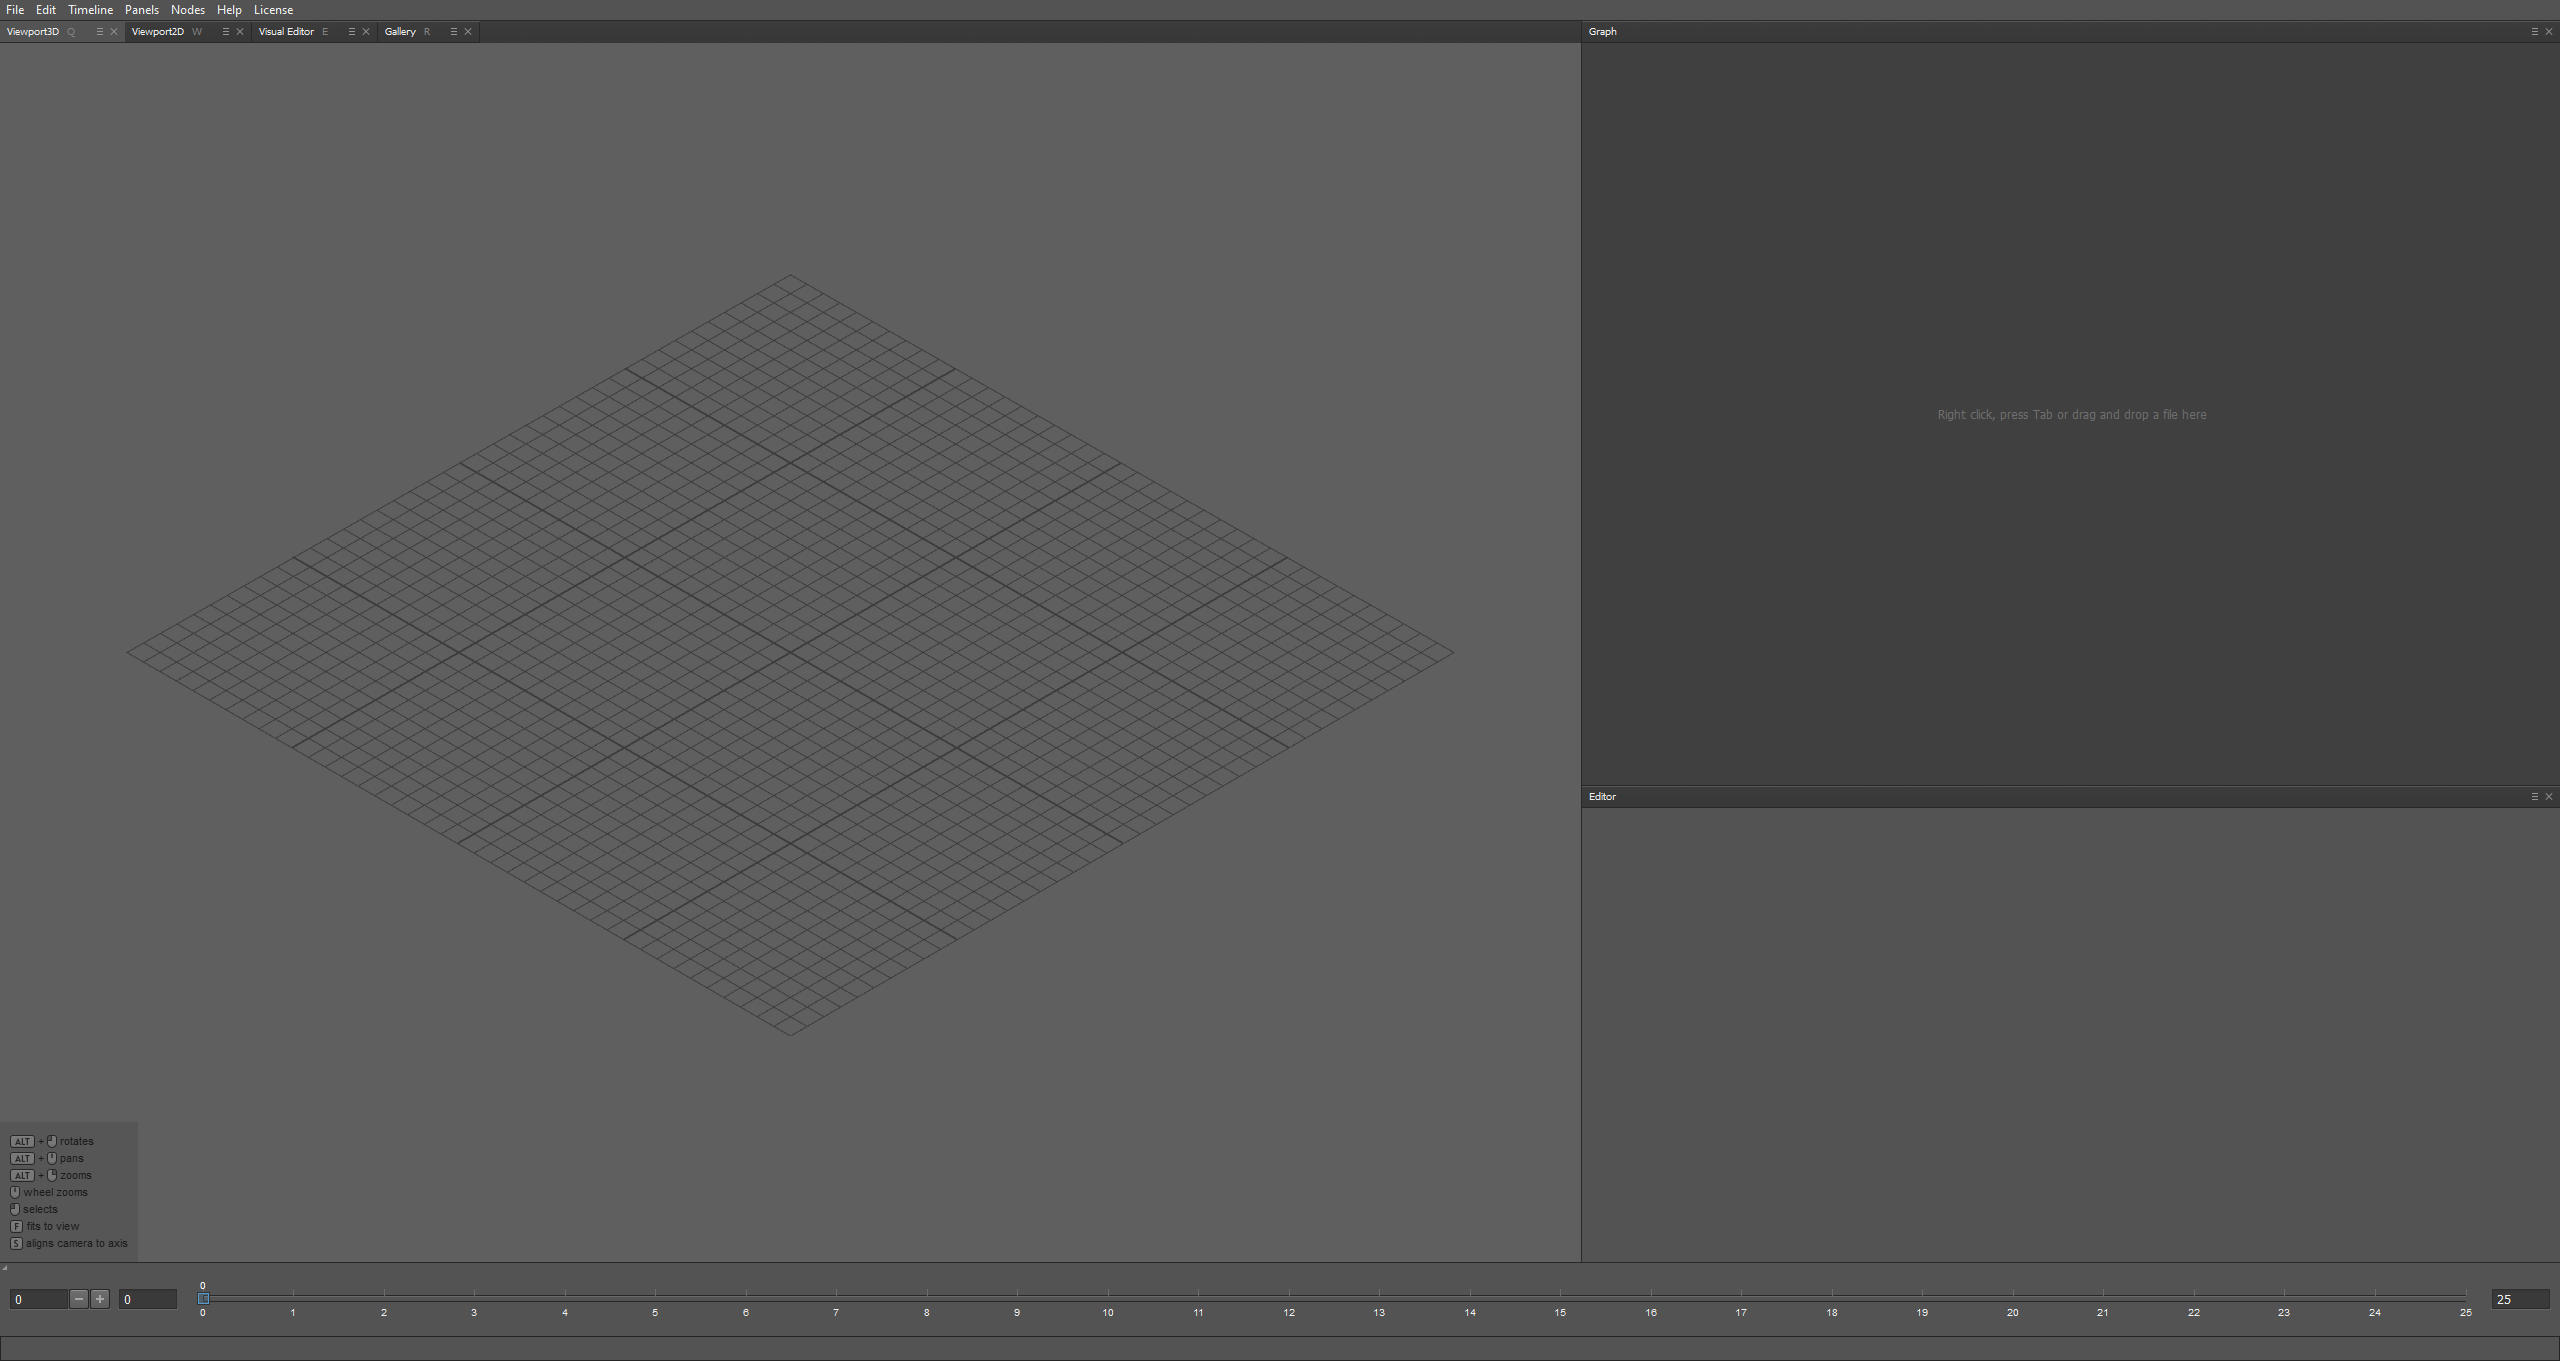
After that we need to load my EABAW template! To do that just Click on File>Load Project then head to where you put EndAllBeAllWrapping.wrap and double-click it.
After loading the project it should look something like this!
Don't touch the top one it's not relevant.
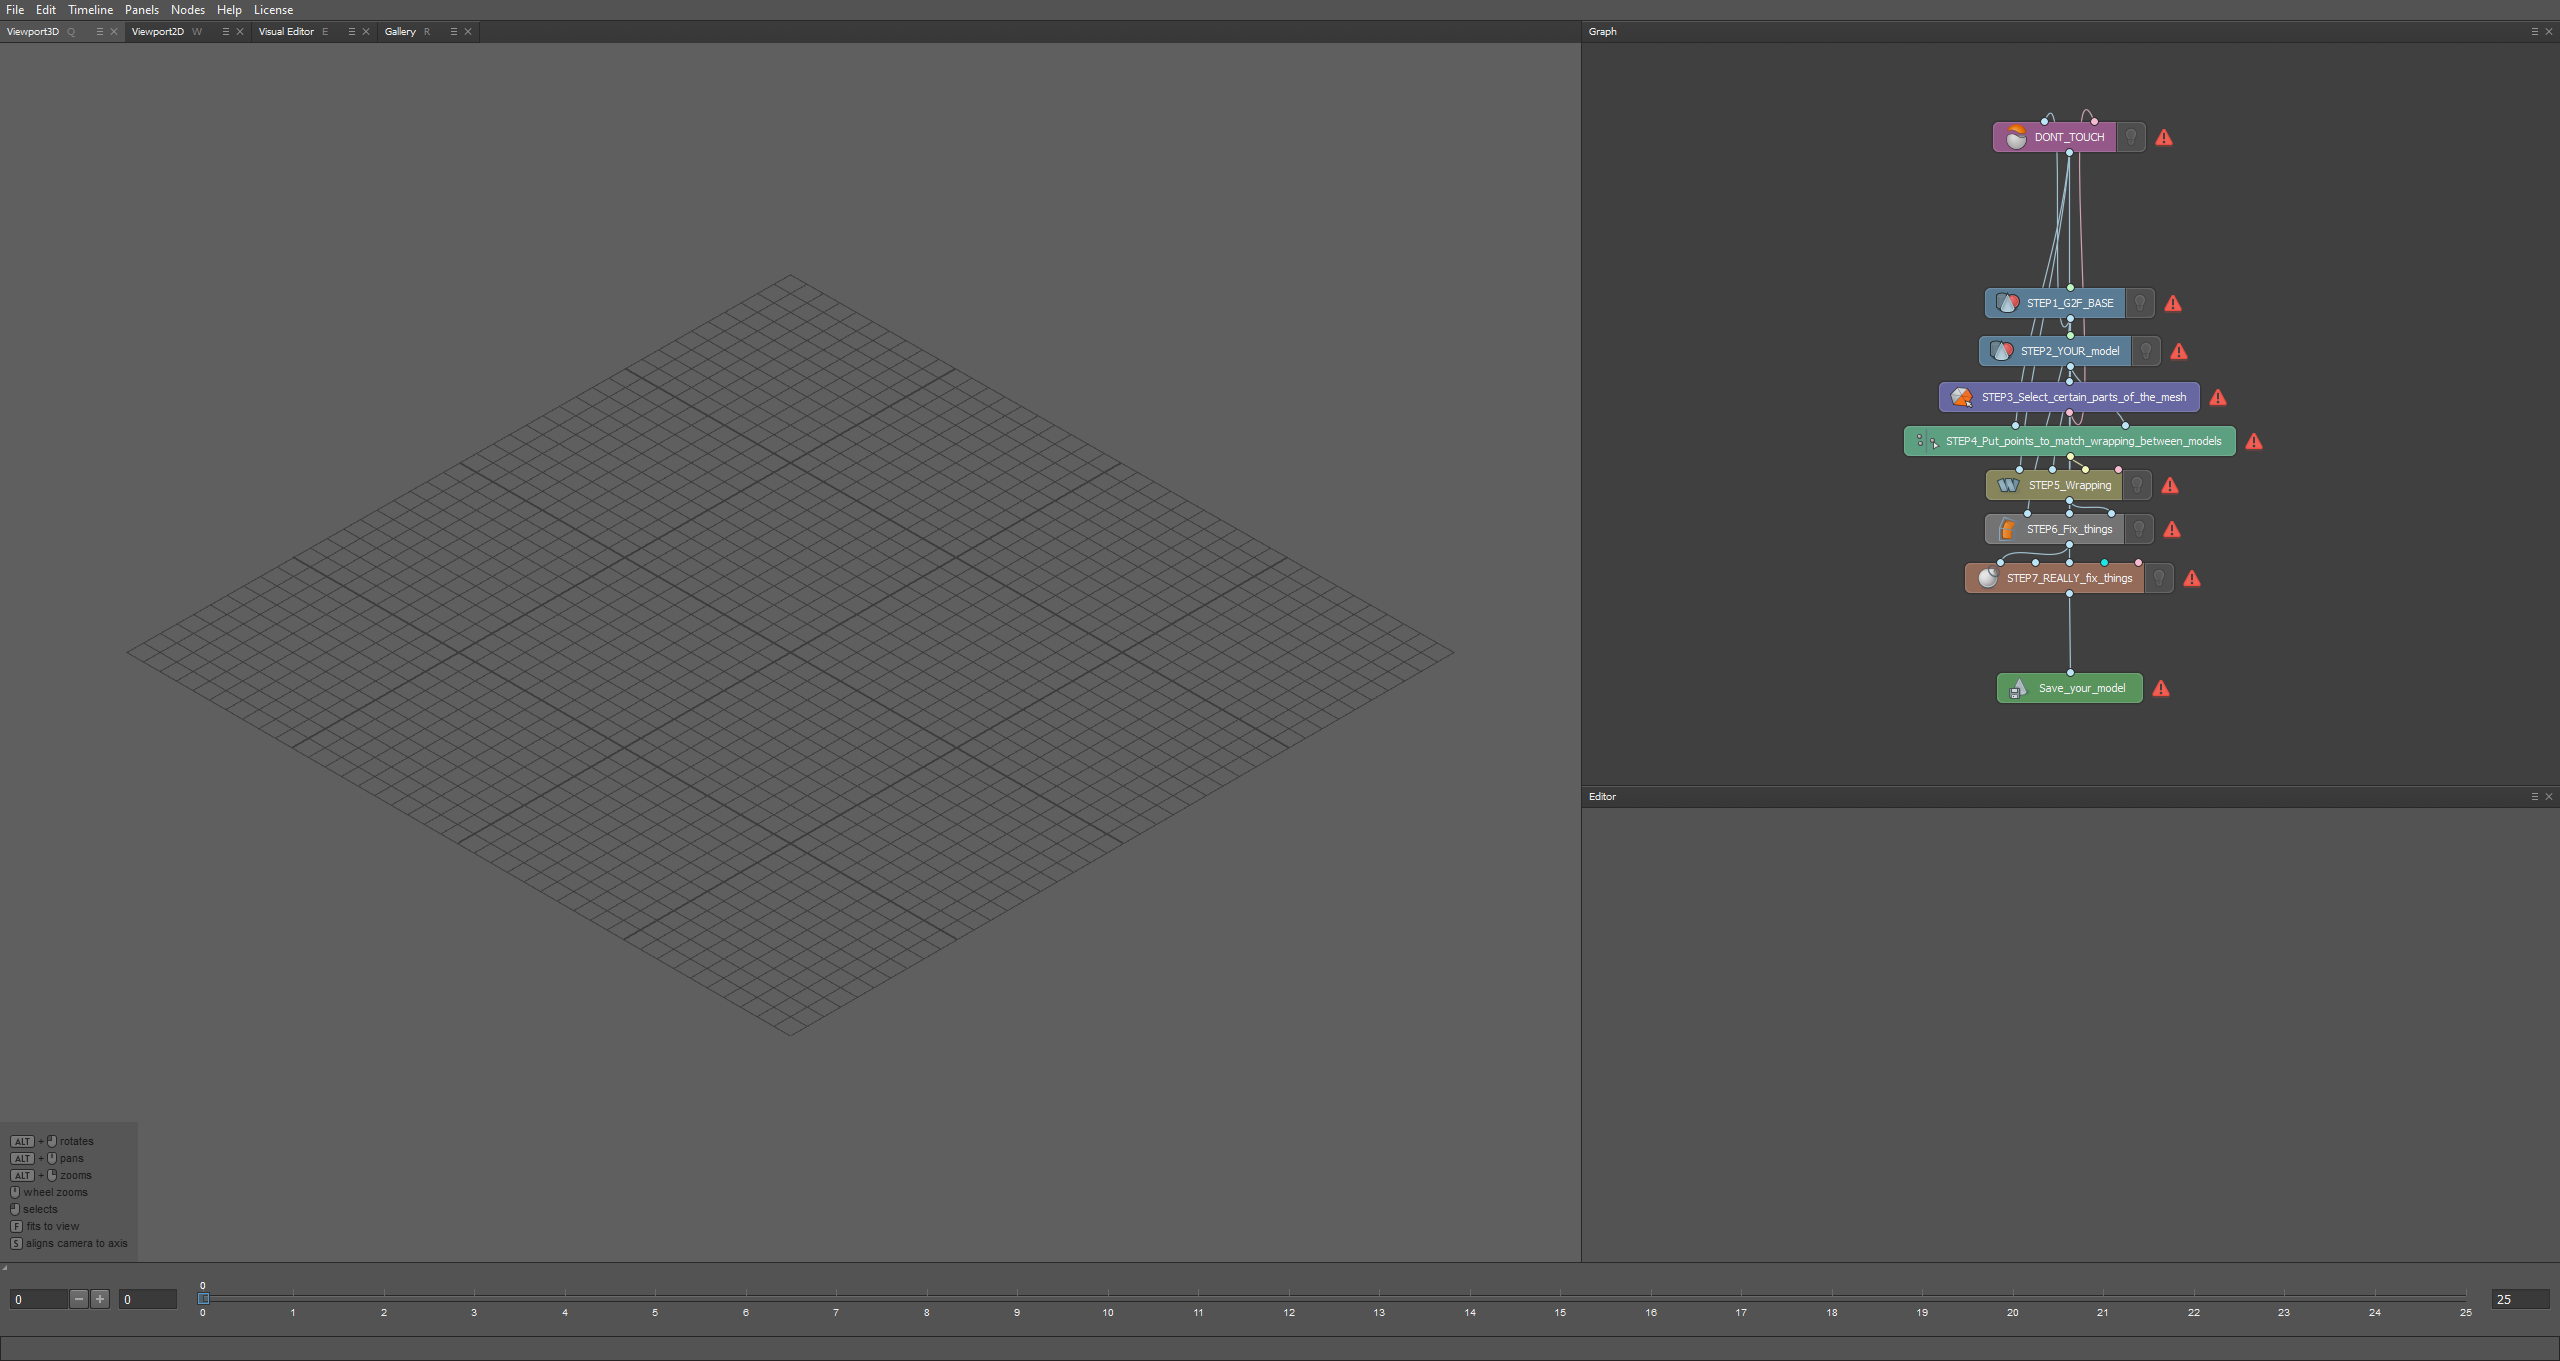
Chapter 1 is done, Onto chapter 2!
Chapter 2: Loading the models!
Clicking on STEP1 should bring a menu like bottom right, after that click on the 3 dots and navigate to G2F_BASE.OBJ
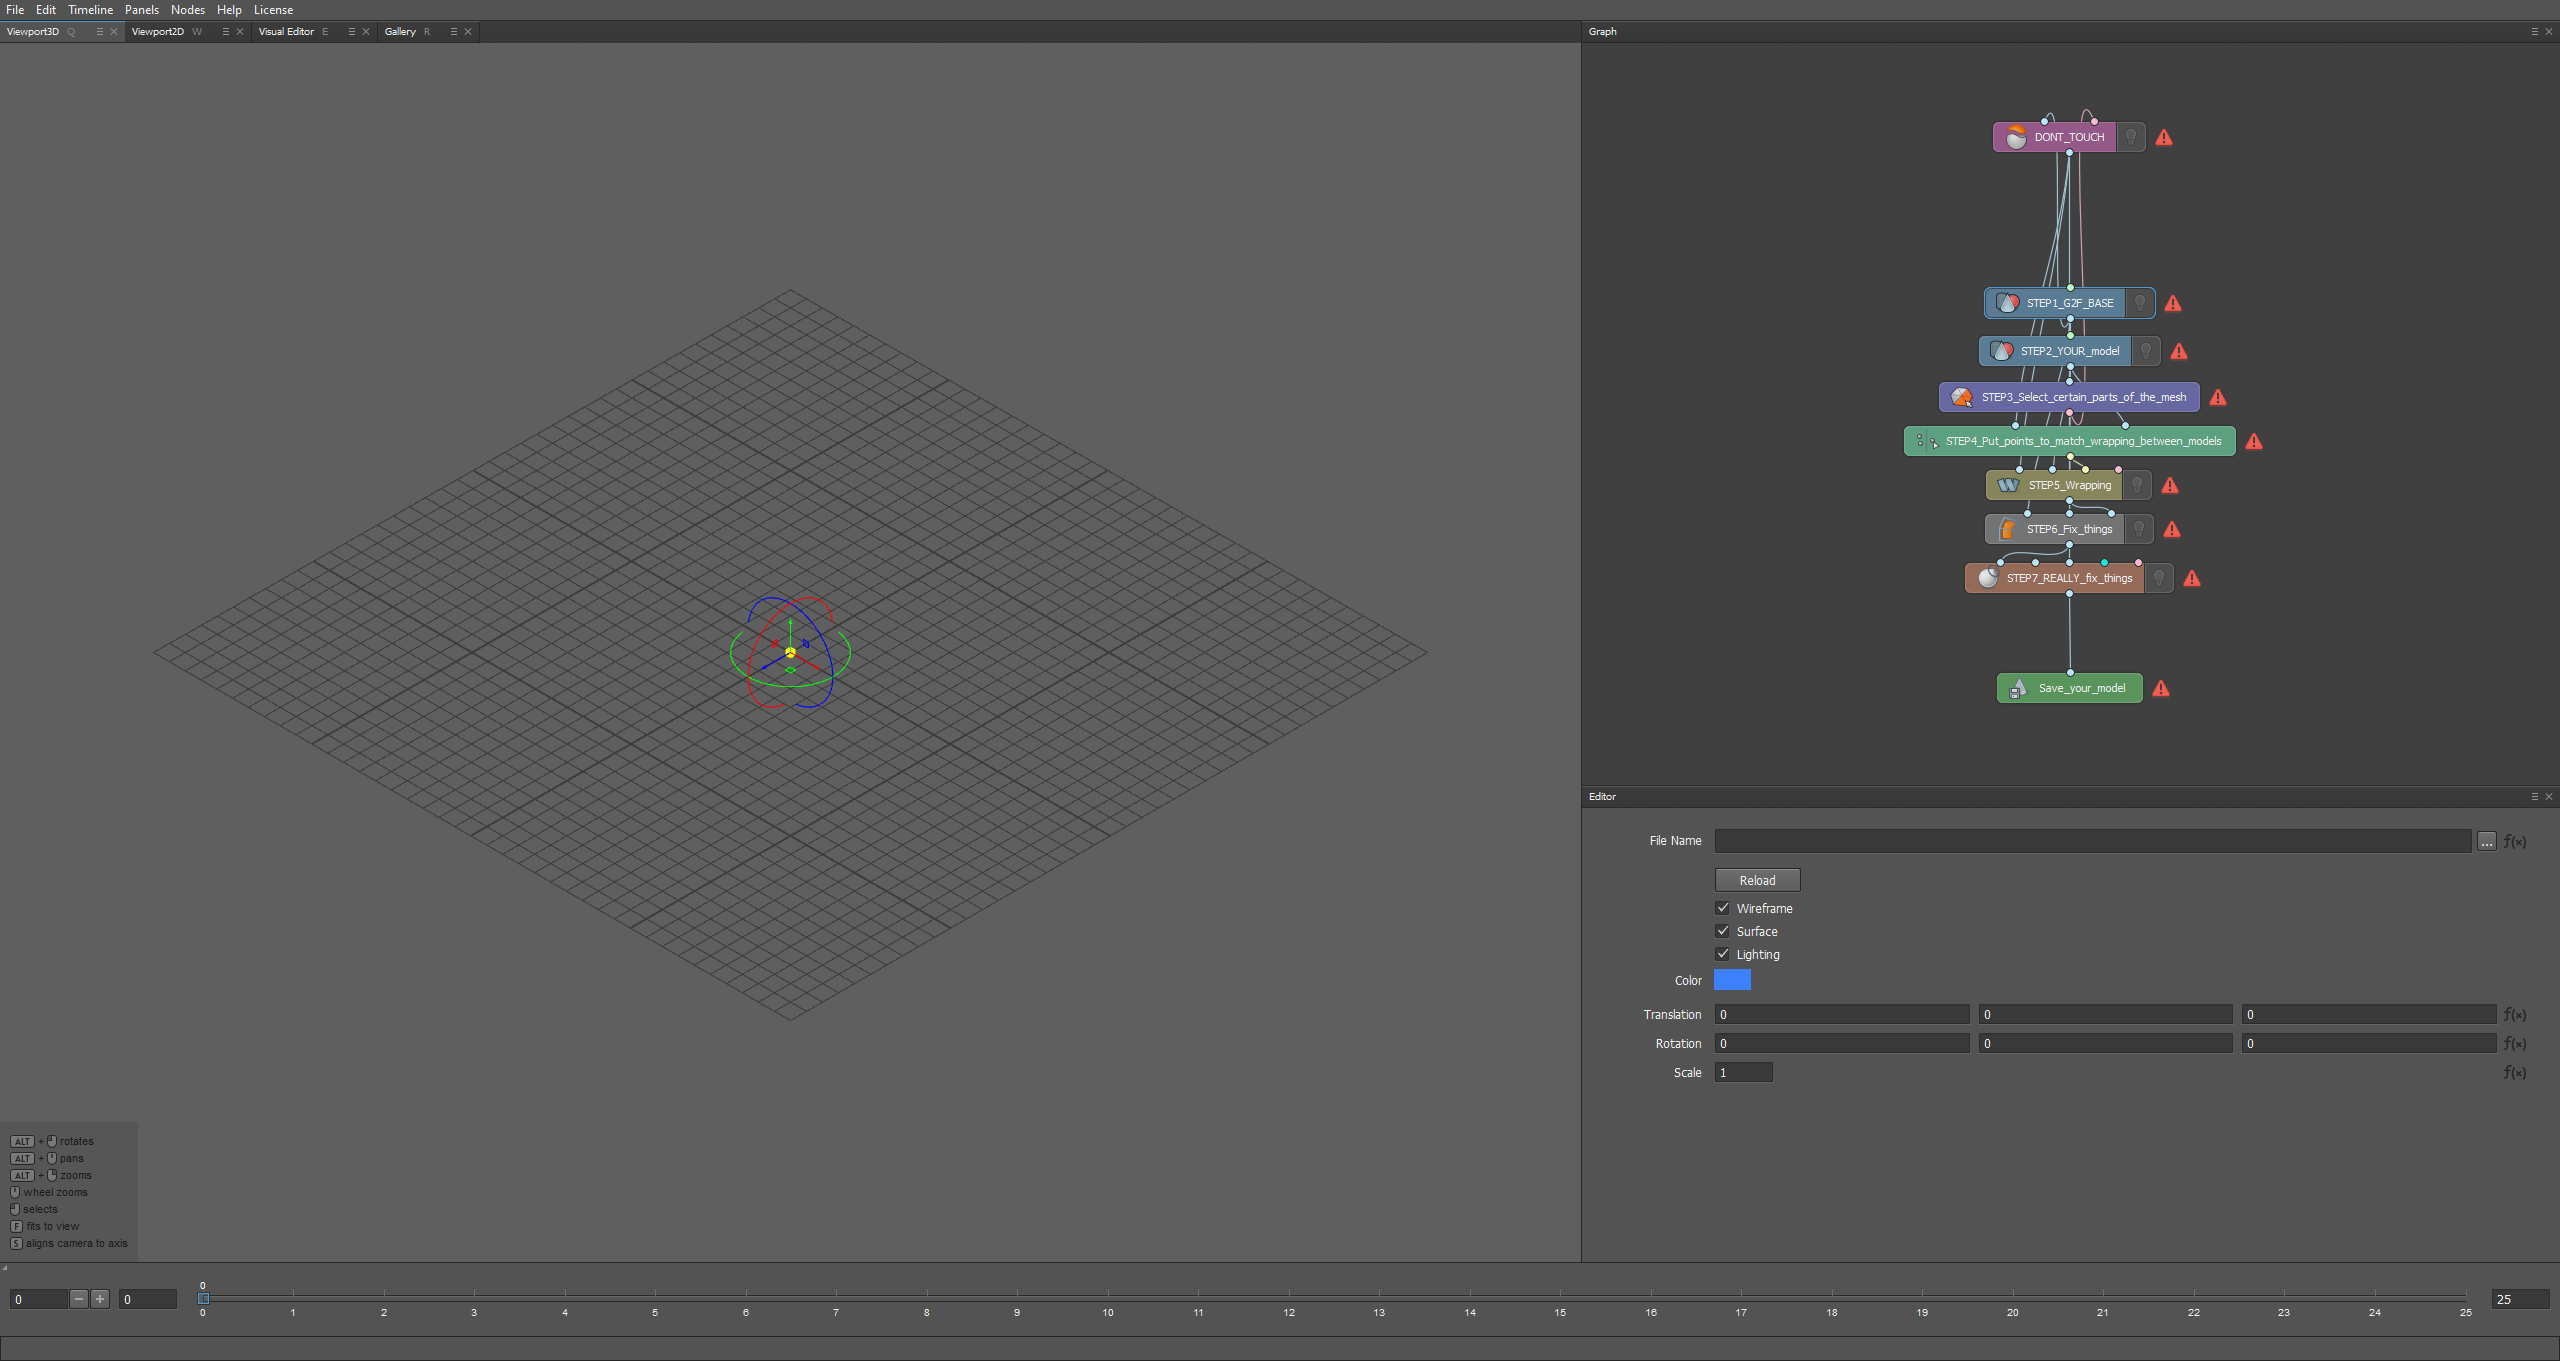
Doing so should bring a G2F character onto the scene, but she won't be visible. To make the model visible you have to click on the little light bulb on the node.
The scale by default will be at 1, Leave it at that!
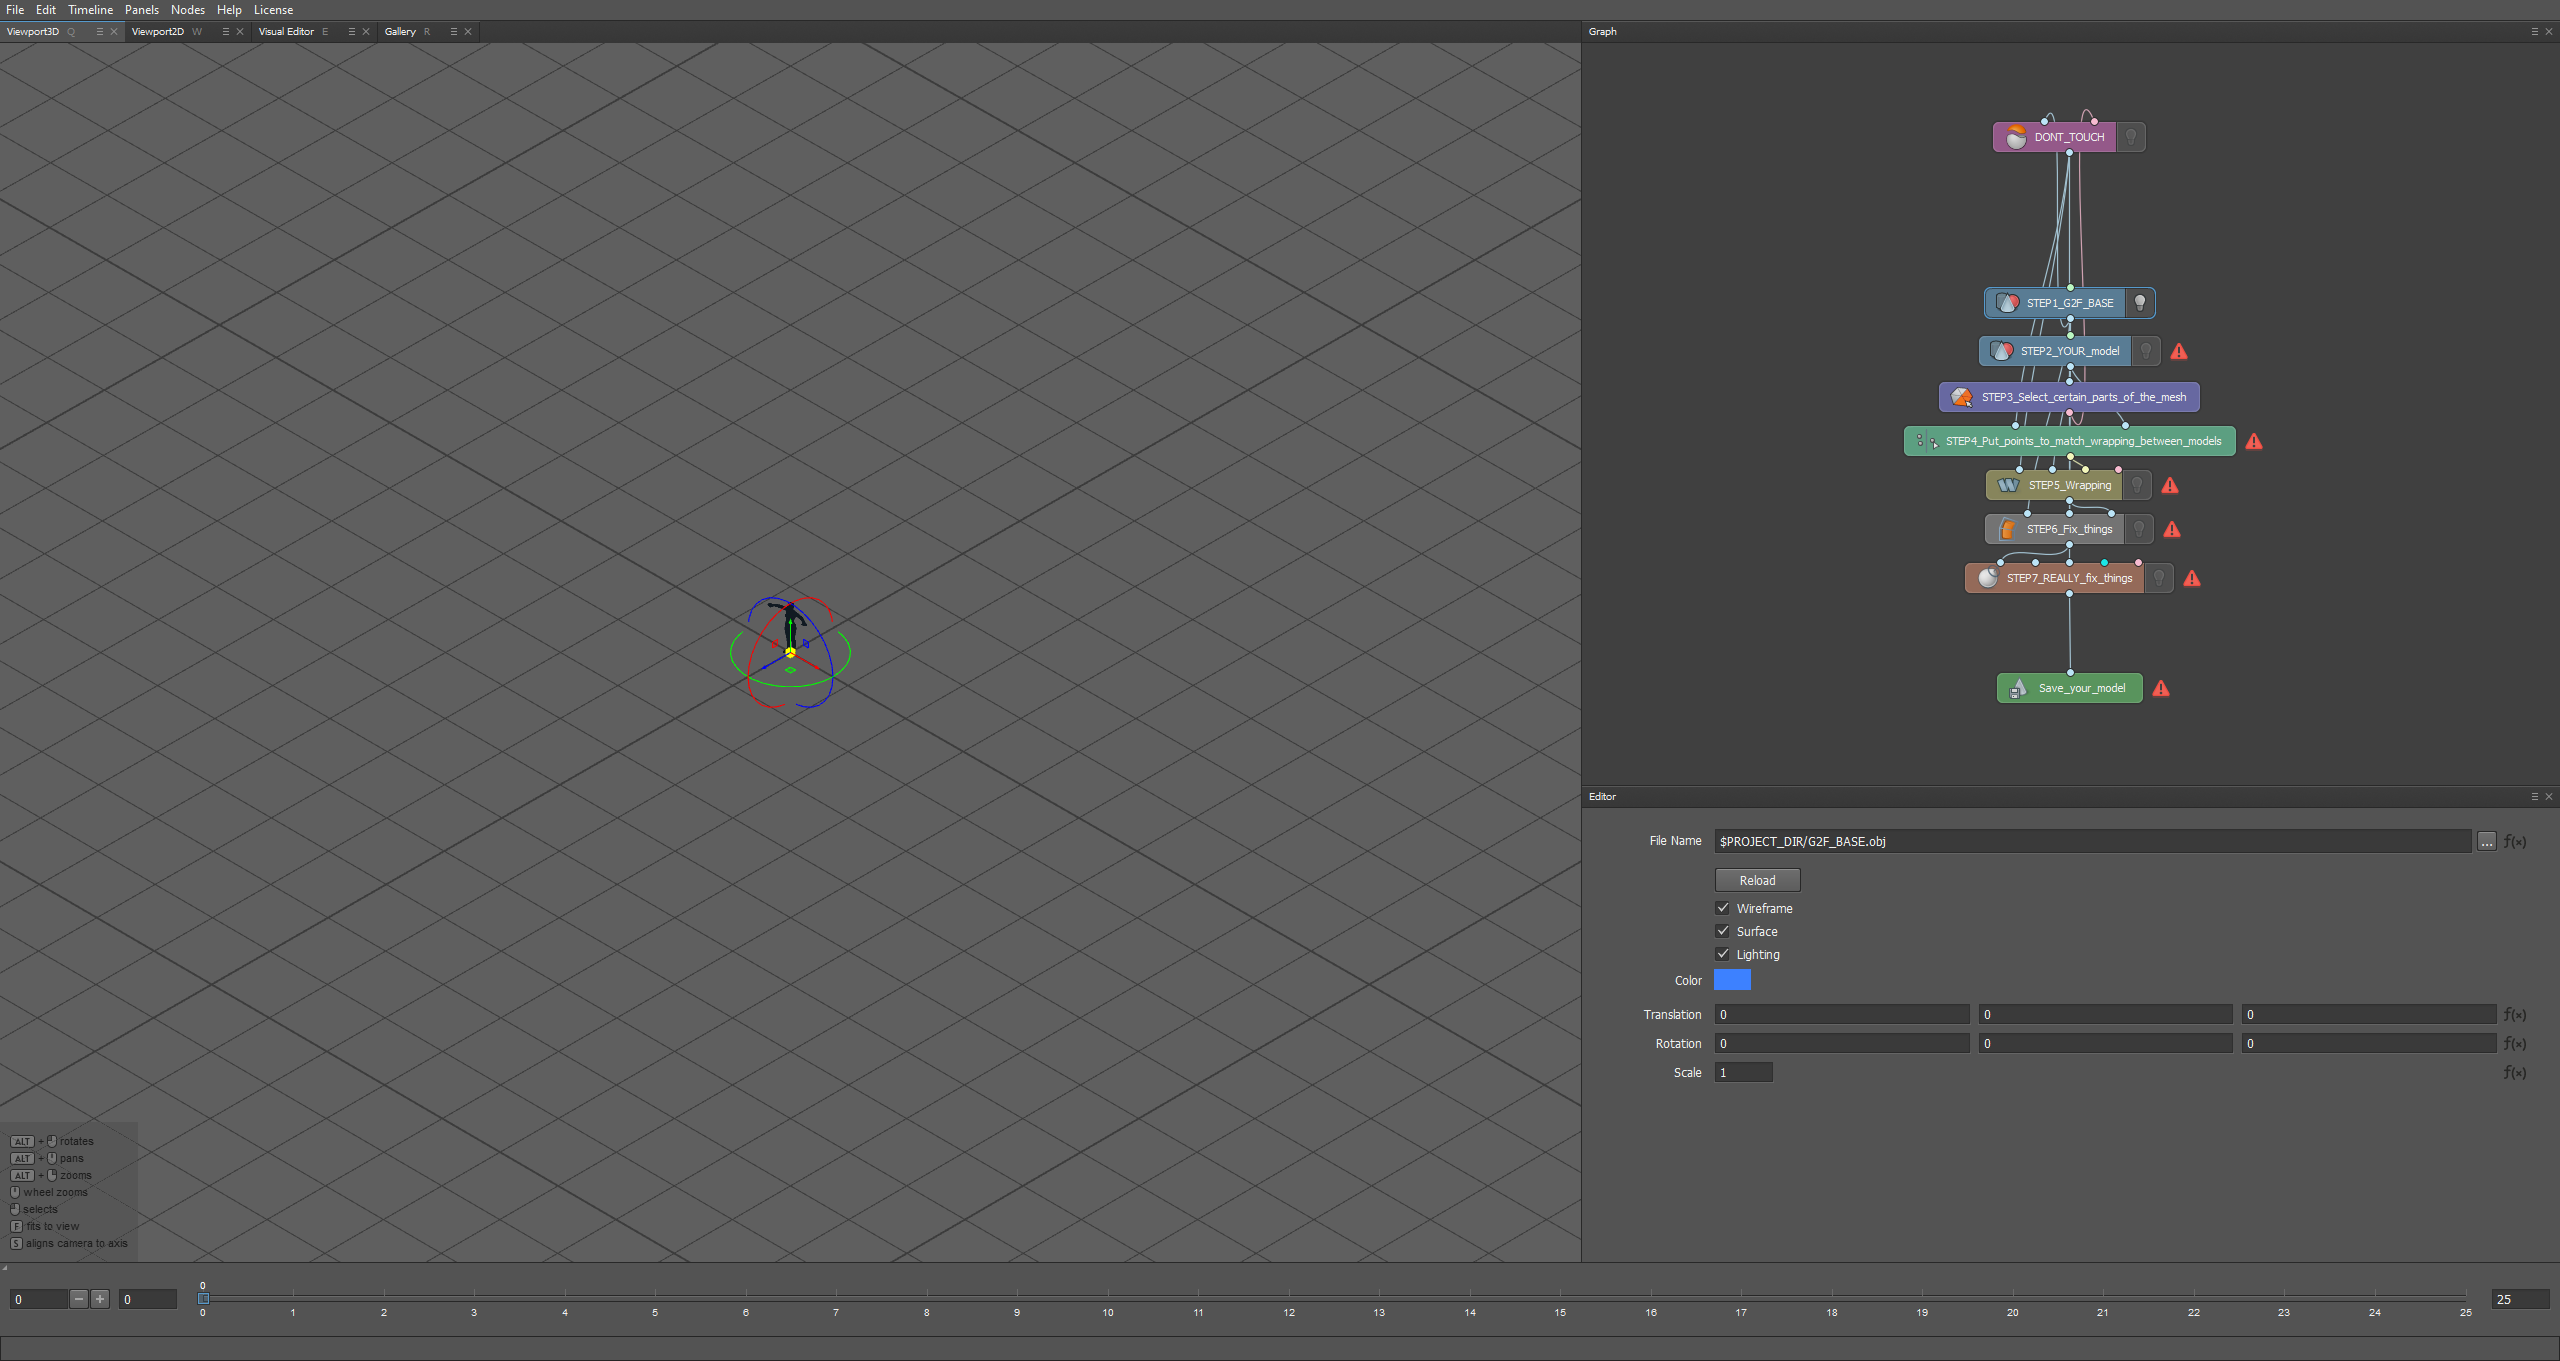
Quick tip navigation controls is at the bottom left!
Chapter 2.1: Now loading the model you want to see in VAM
Click on STEP2 then the 3 dots and navigate to your models .obj double-click it and it should appear! But oh no! my model is massive compared to G2F!
Again do not fret my child! I am here for you! we need to change scale so that OUR model matches G2Fs model, usually 0.4 scale works wonders for me!
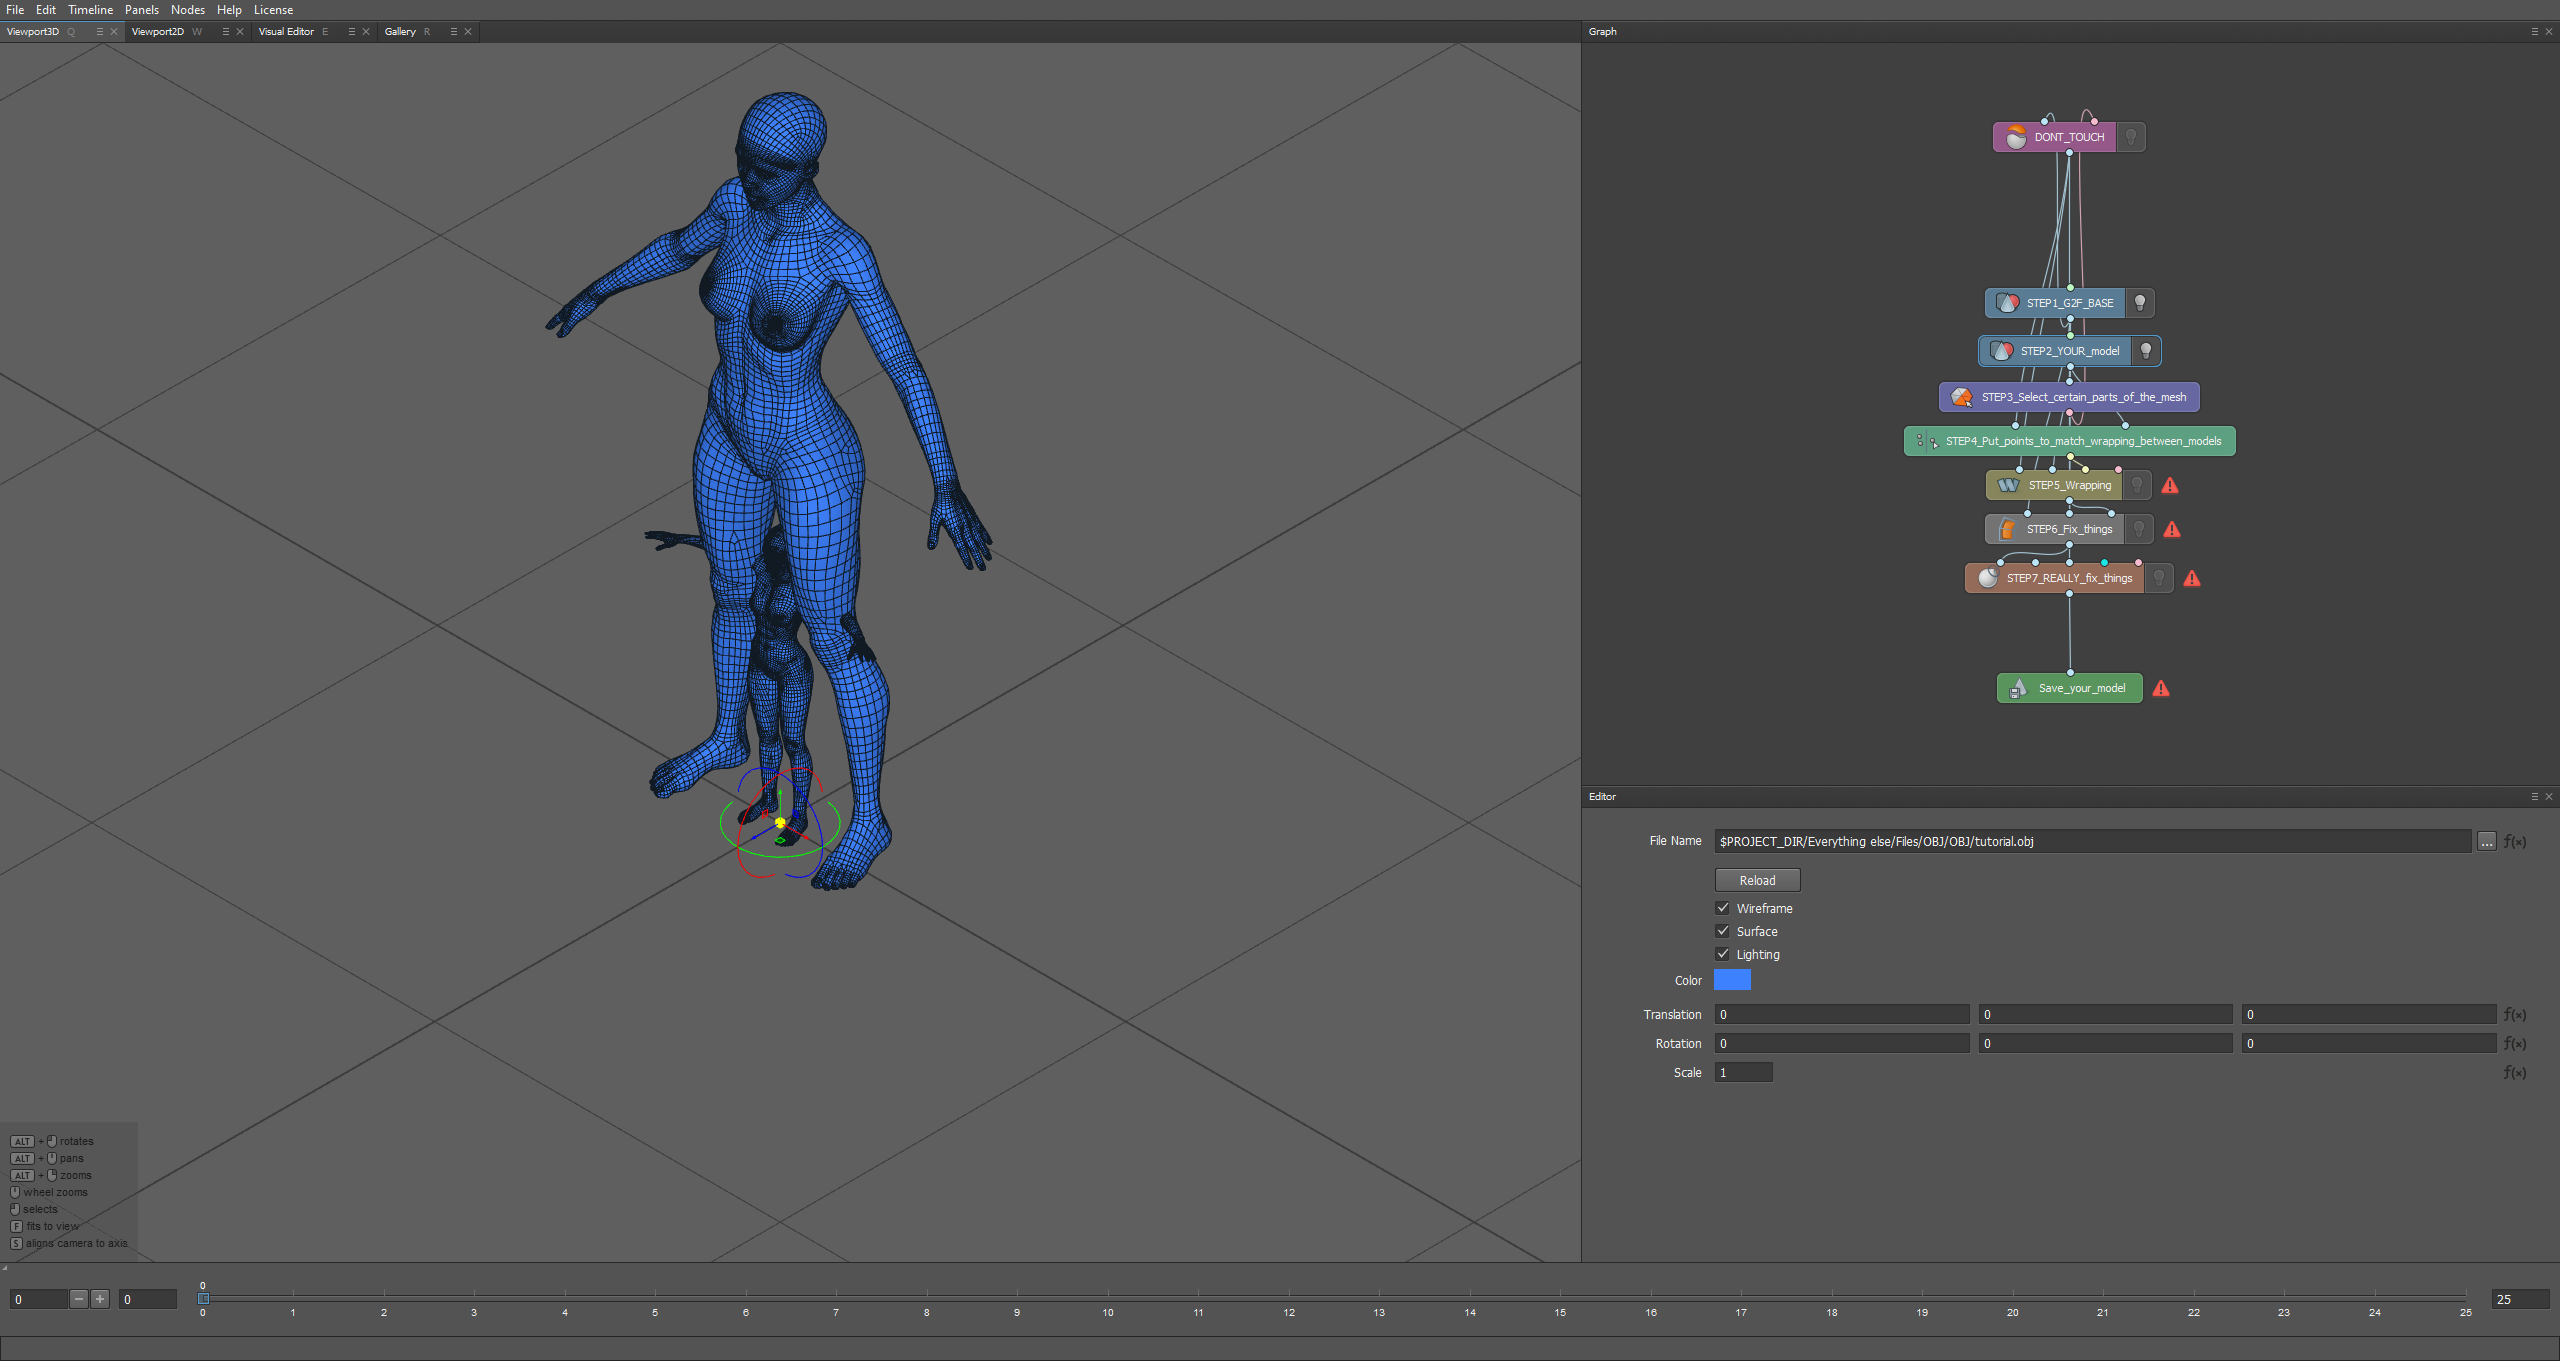
I'm going with 0.4 scale, as it's perfect in this case but you can even use 0.37995...
As you can see the poses are a little bit different, but do not fret my child! That is absolutely fine!
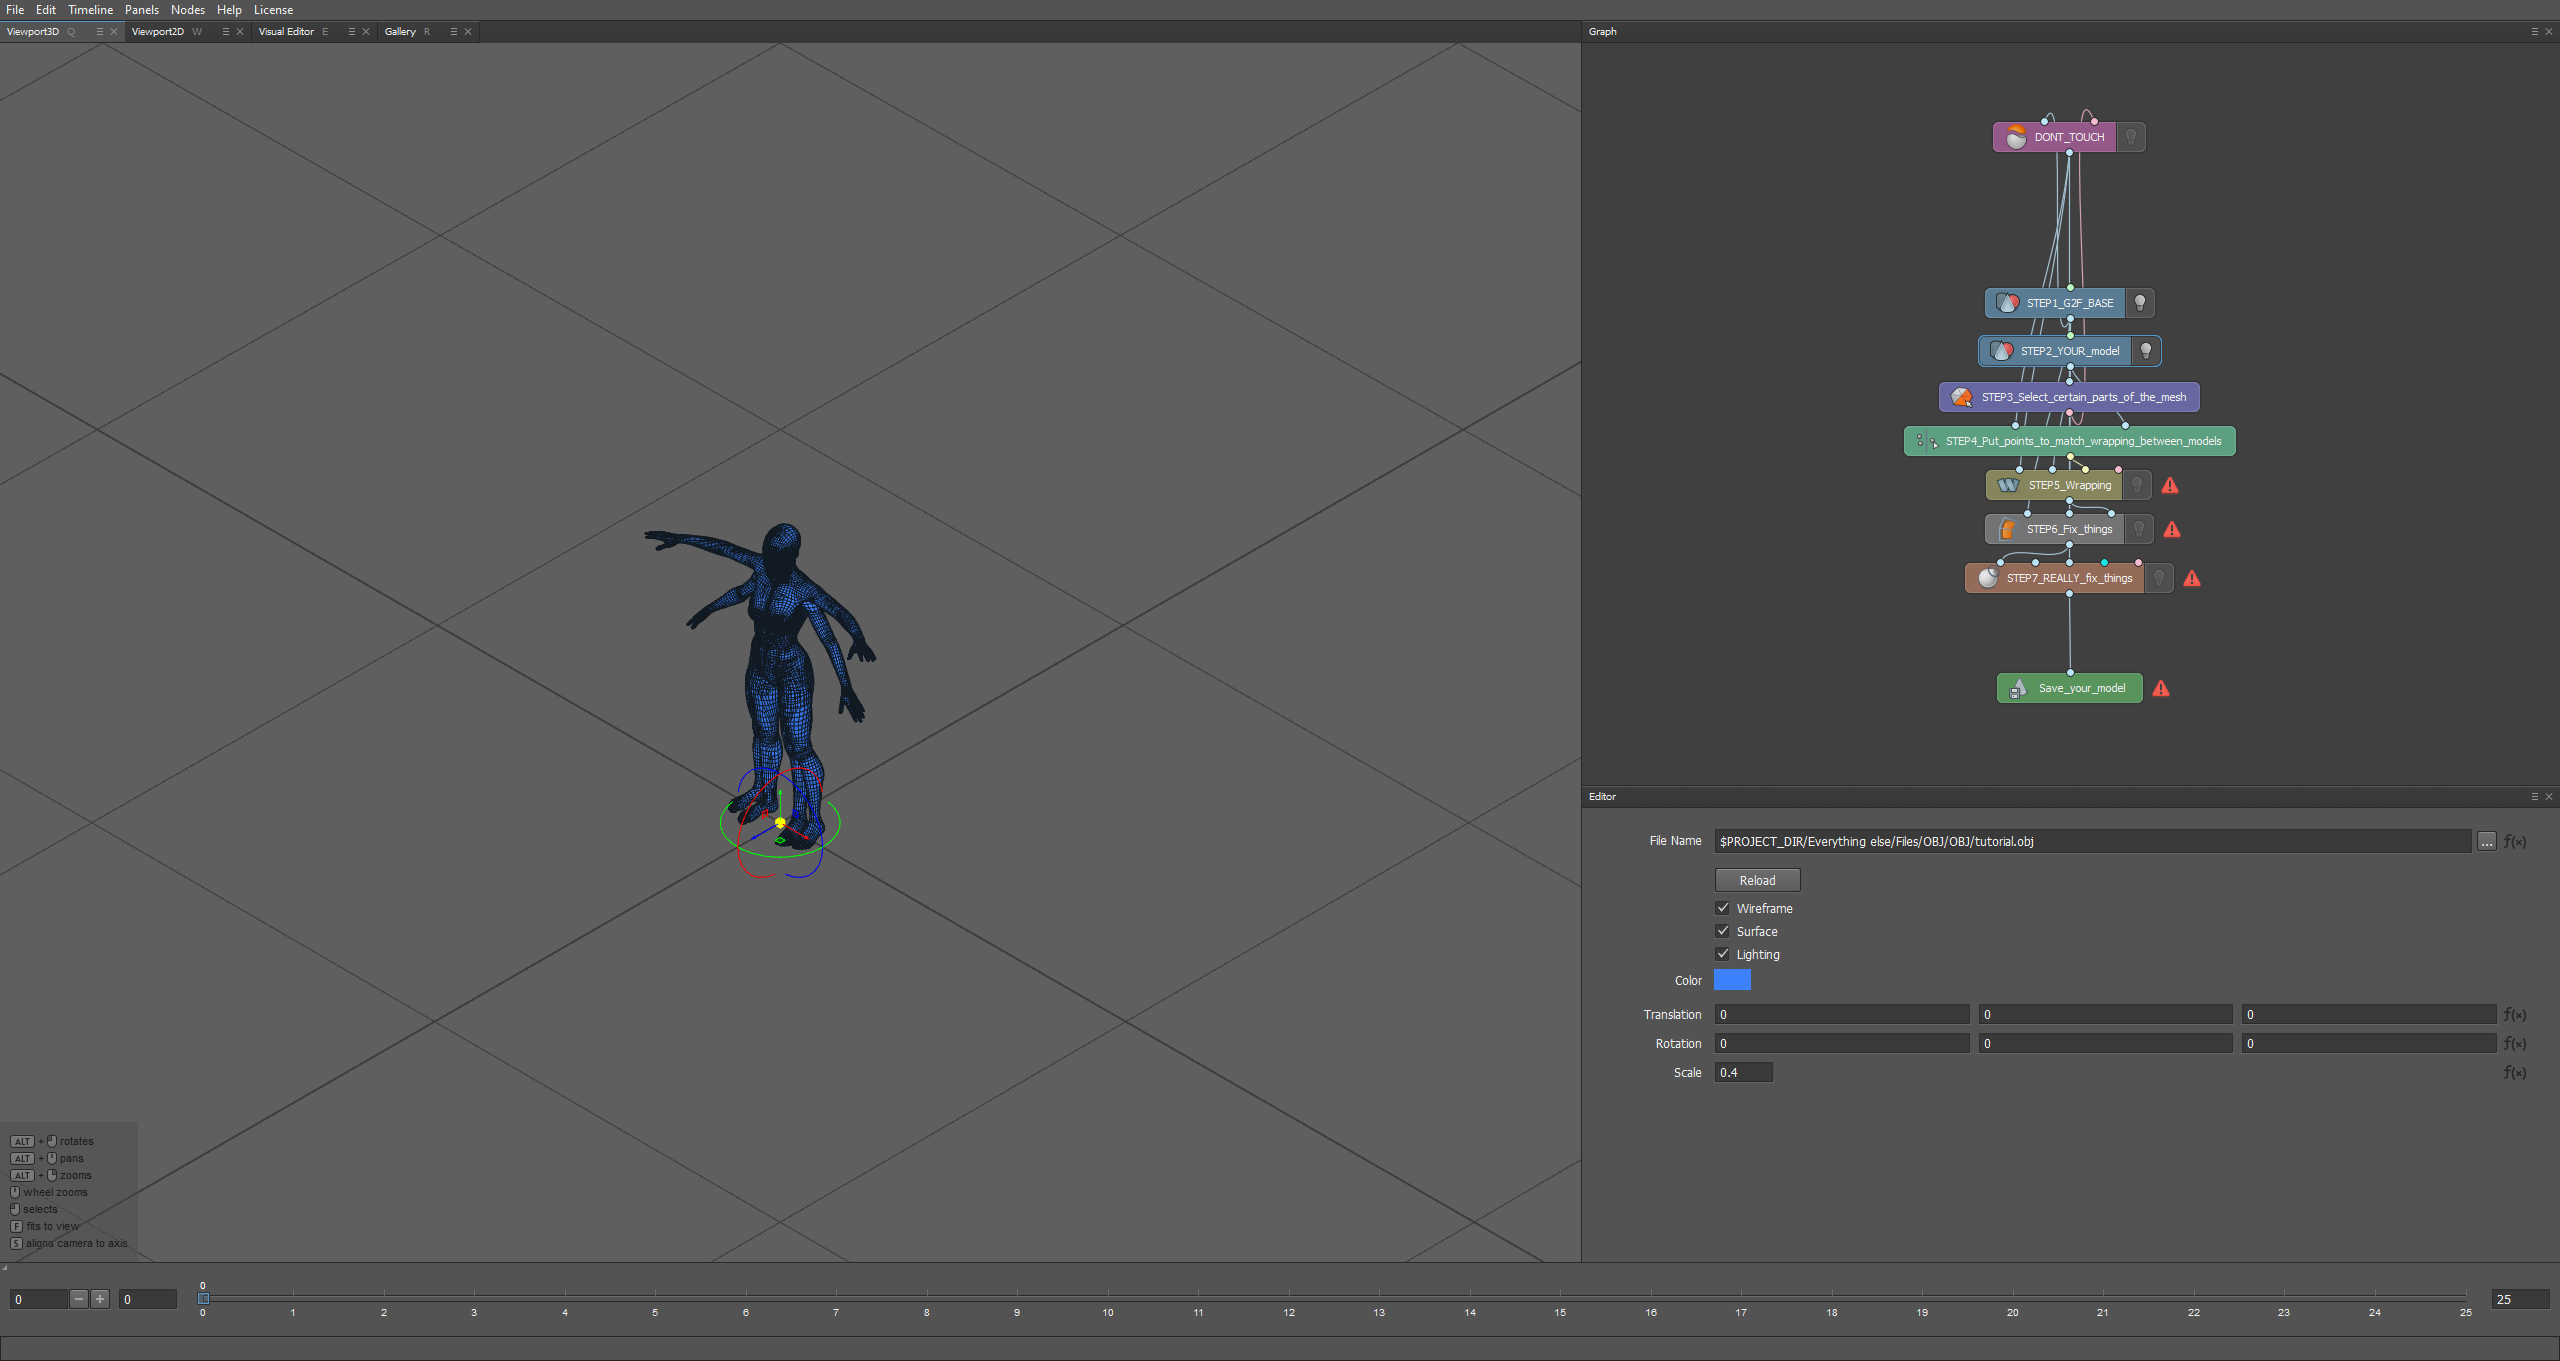
Chapter 2 is done, onto chapter 3!
Chapter 3: Separating meshes from G2F!
Click on STEP3 but, it doesn't do anything... Just kidding my friend if you look up you'll notice Visual Editor lights up!
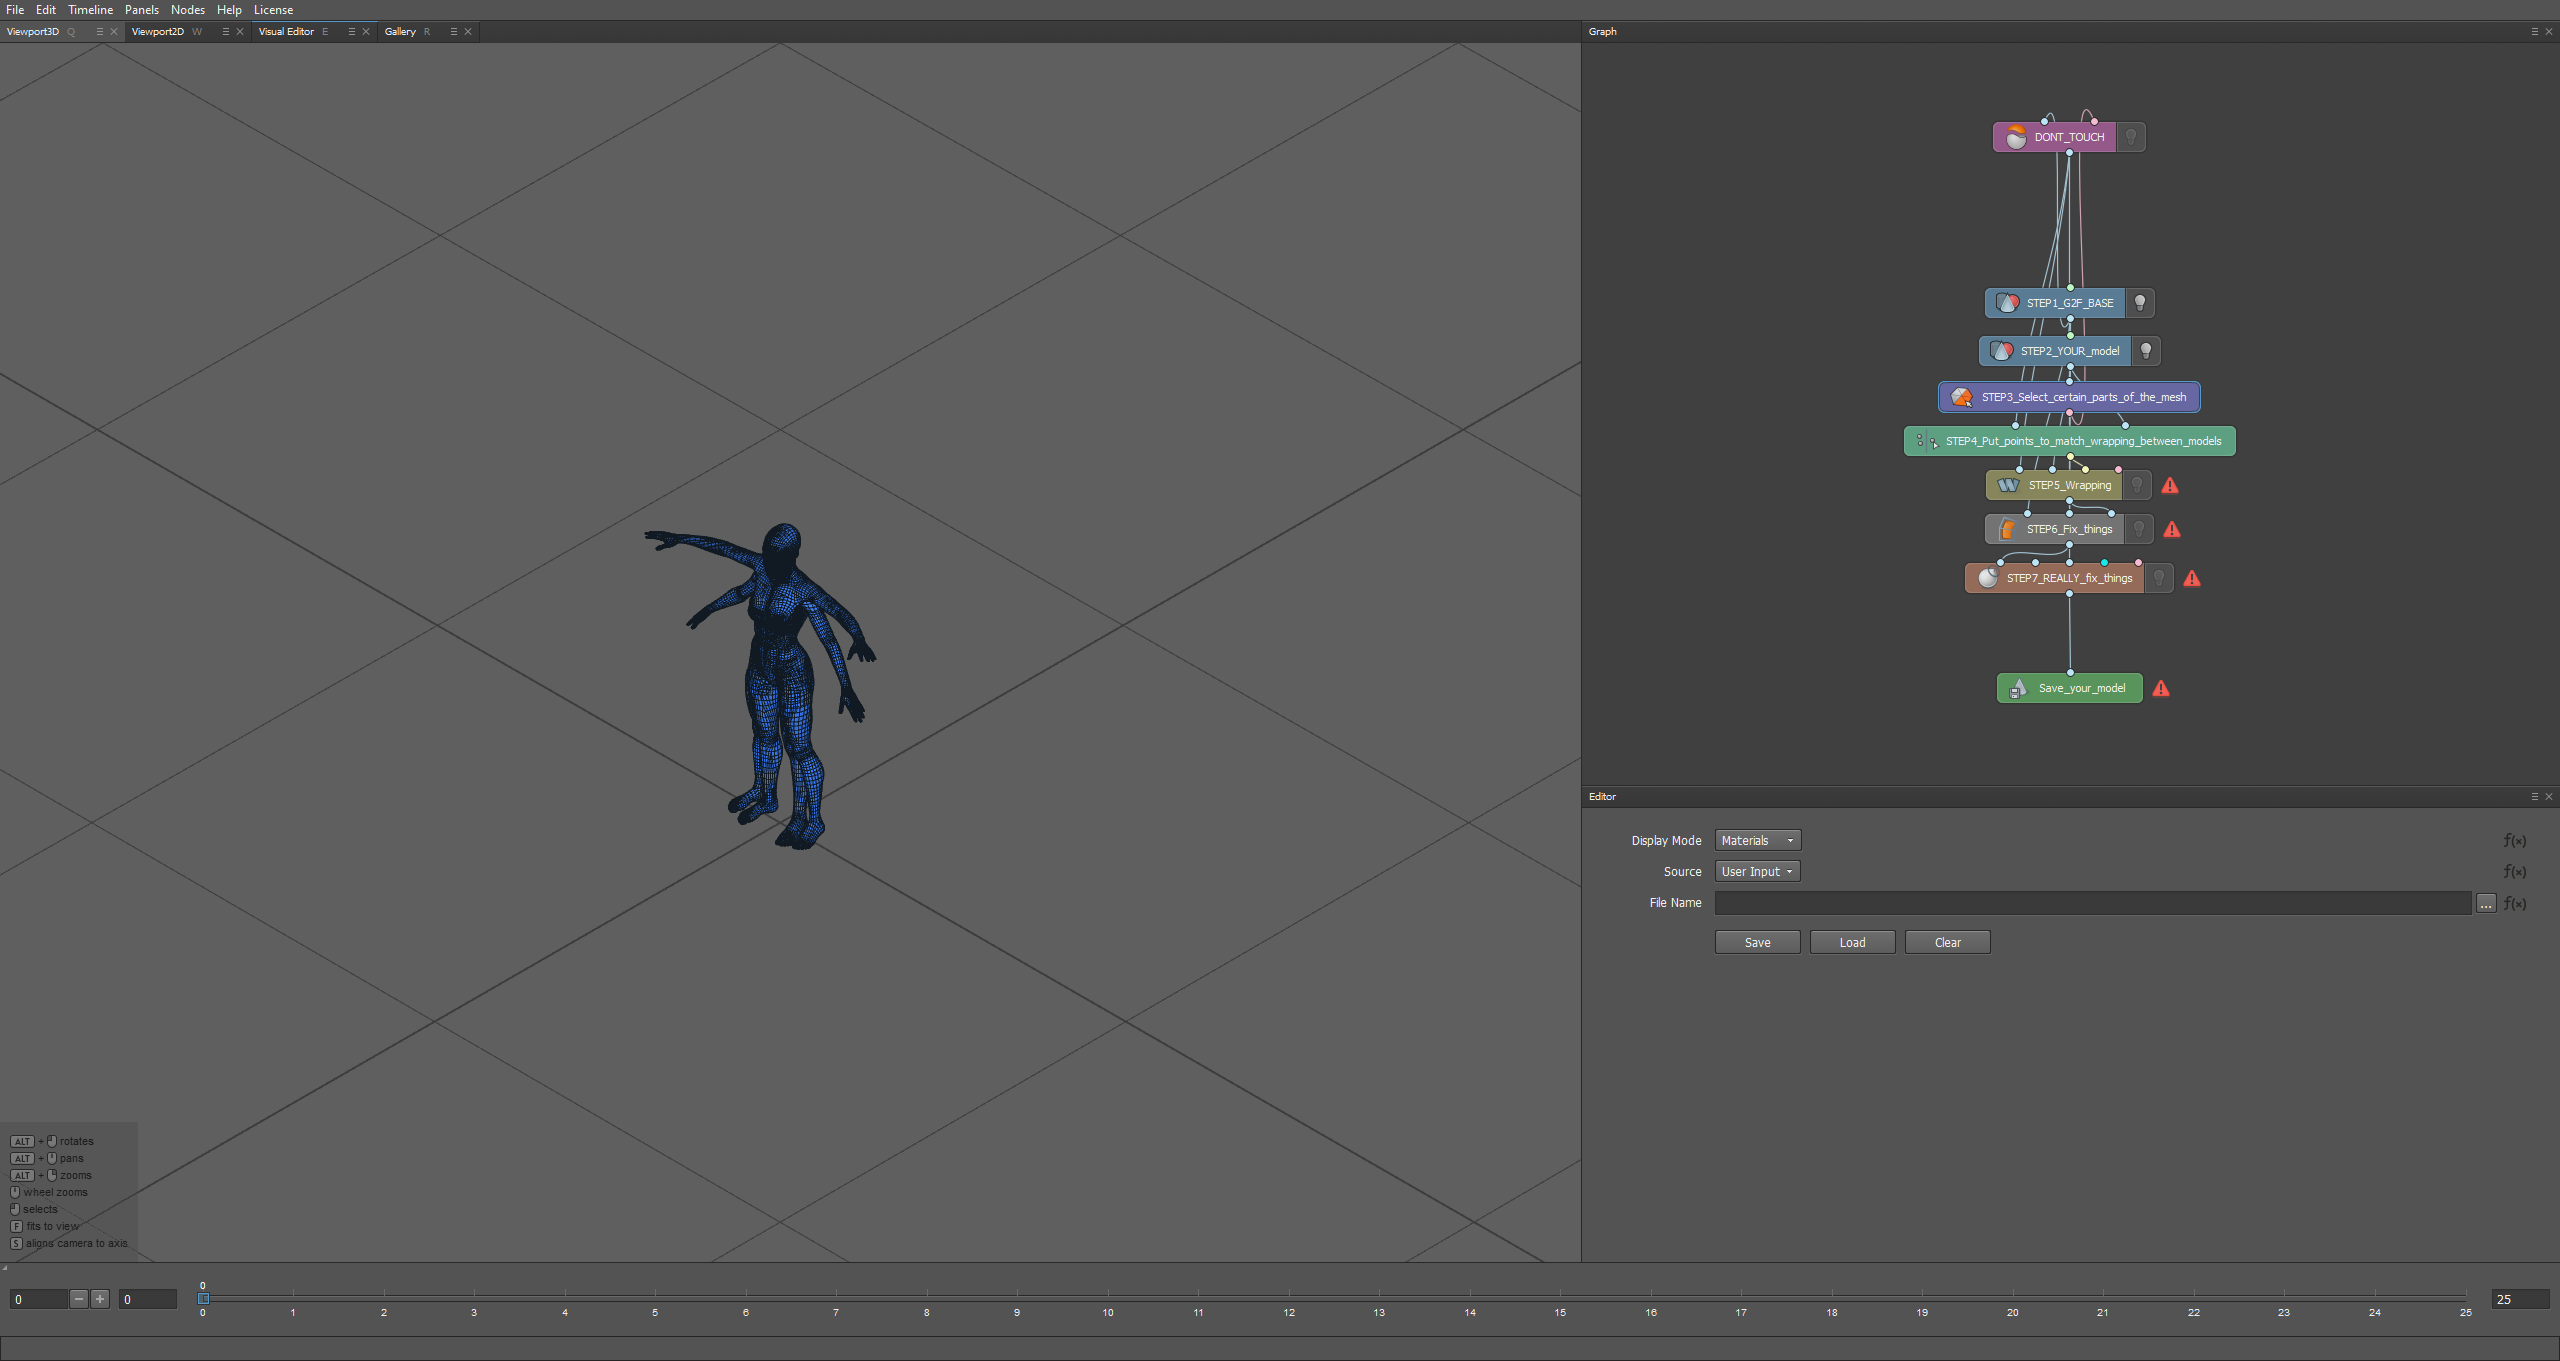
Clicking on it should display something like this!
If everything is done correctly, the model should look like this, mostly red! That means the good parts are already picked for you! Means you're done with STEP3 and skip to Chapter 4!
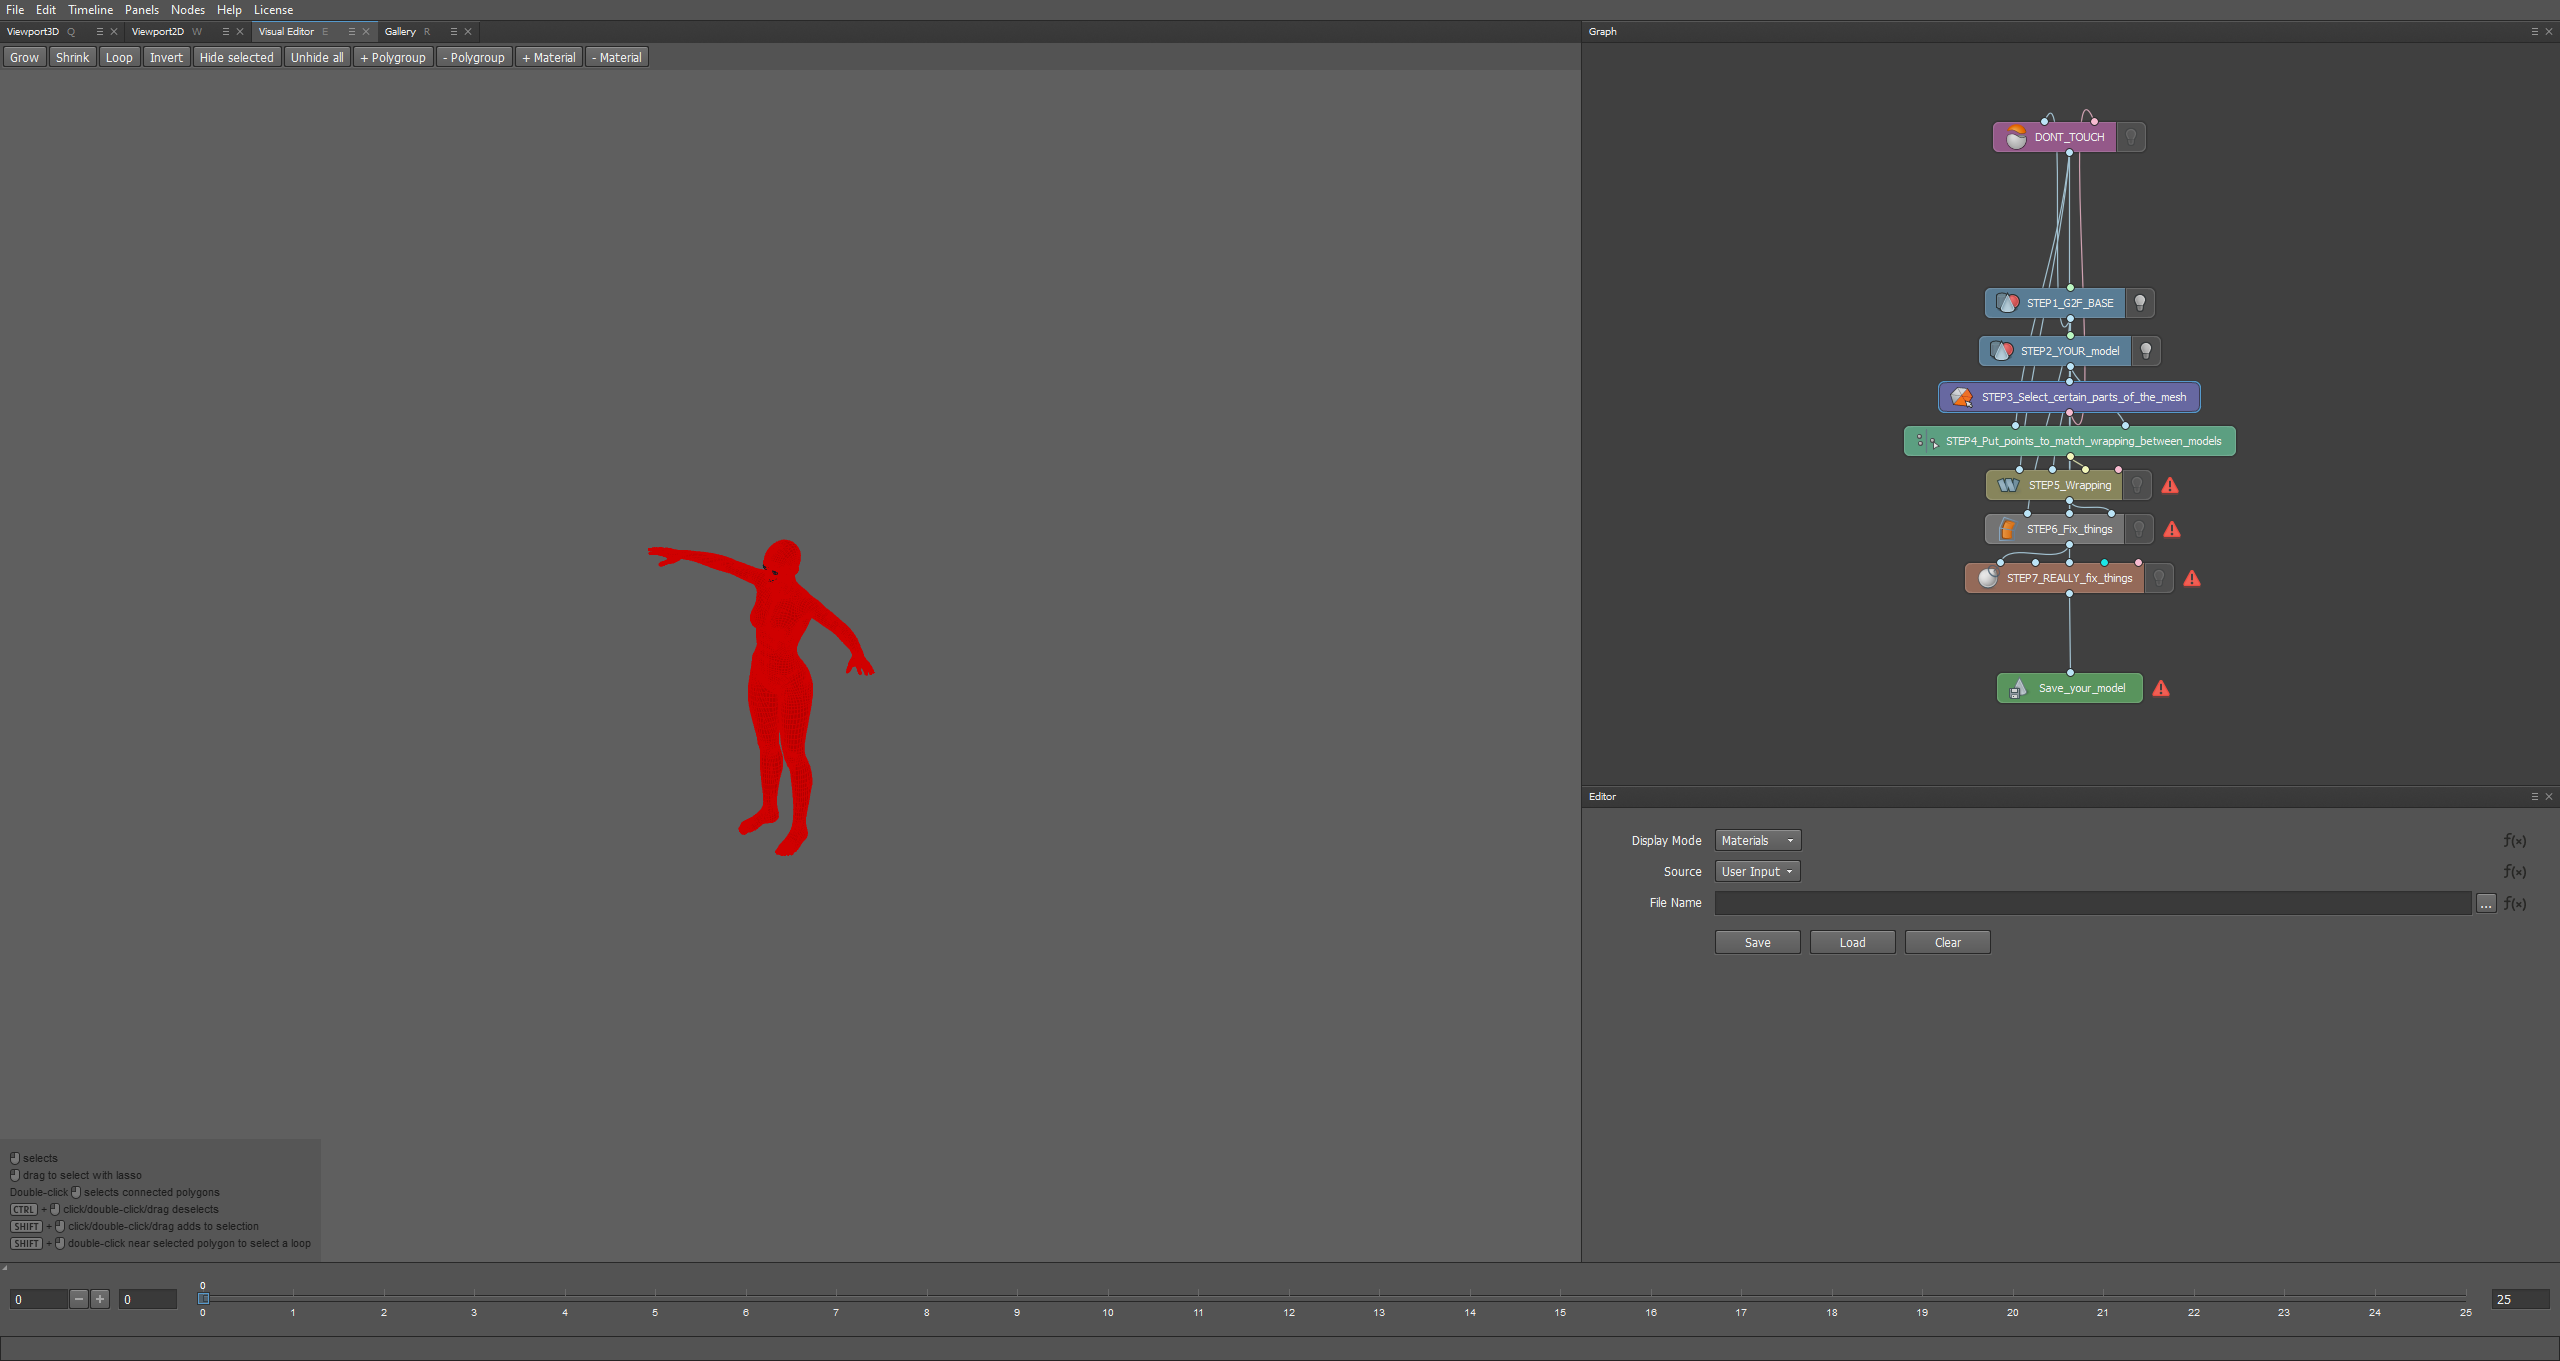
If not and it looks like this, then you fucked something up..
But don't worry my frined! I'm here for you!
First things first try CTRL+Z if it doesn't fix it then try reloading the project and go through the chapters until you reach this step and most importantly don't click on the screen, if you did and the red color disappears that's fine! Just click CTRL+Z to undo, if that doesn't fix it then try the solution down!
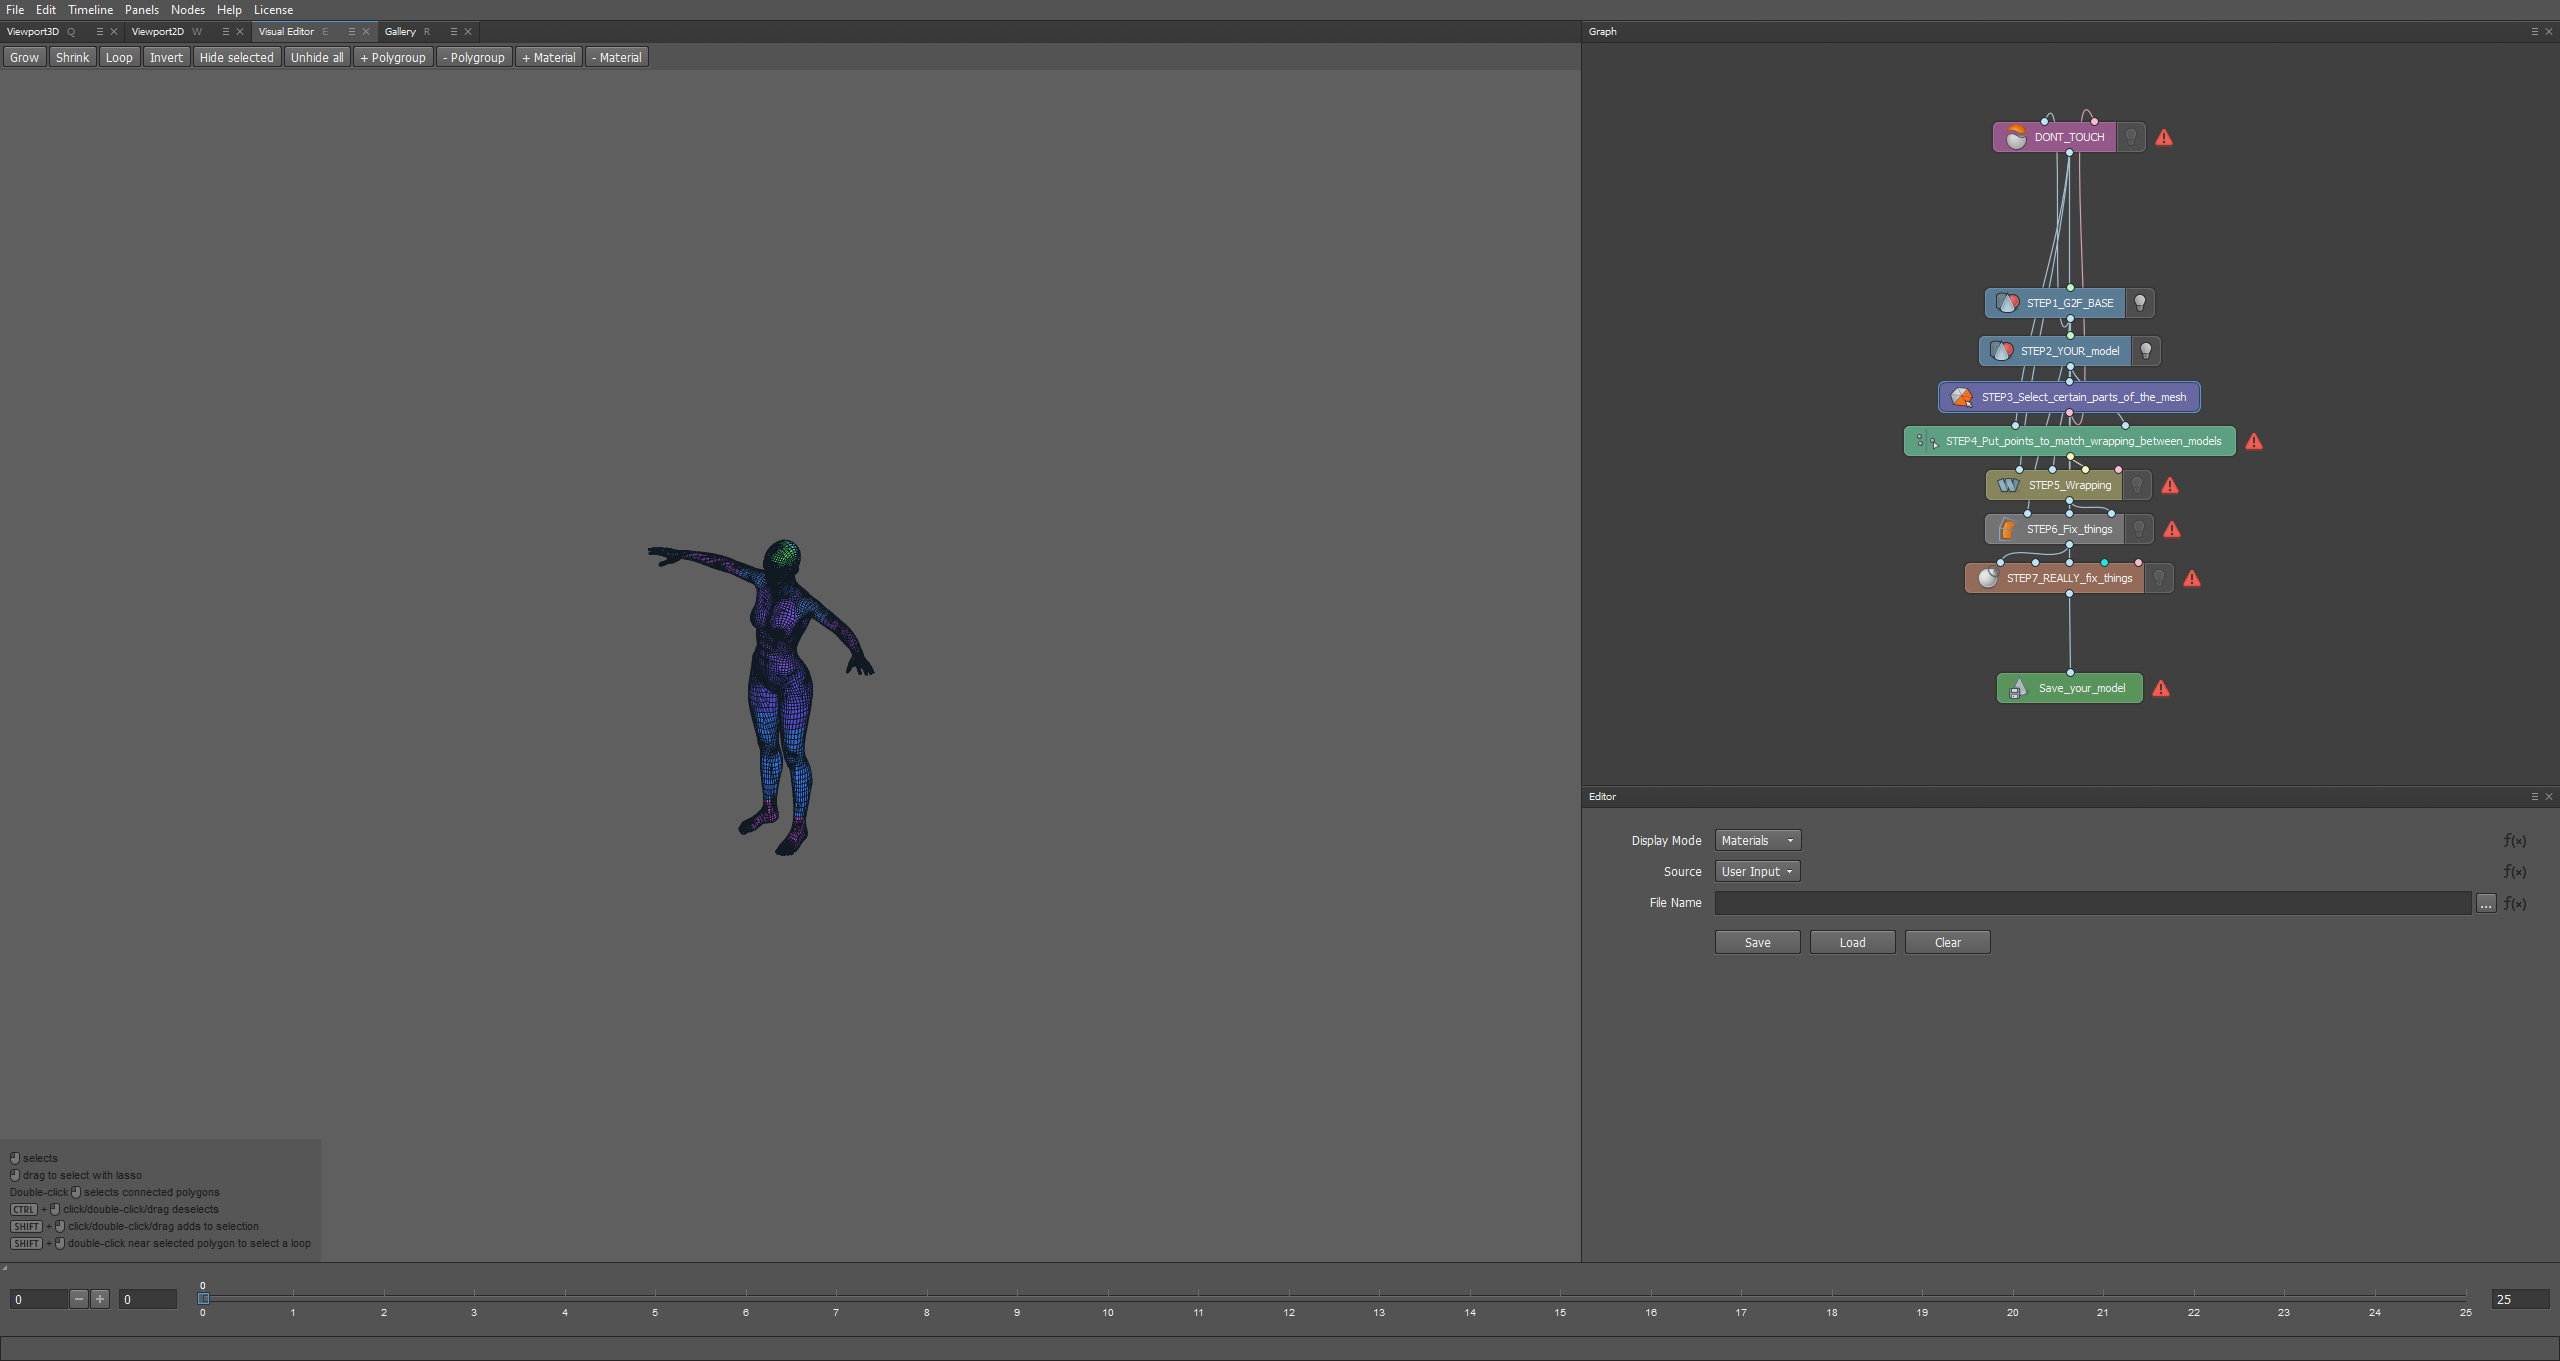
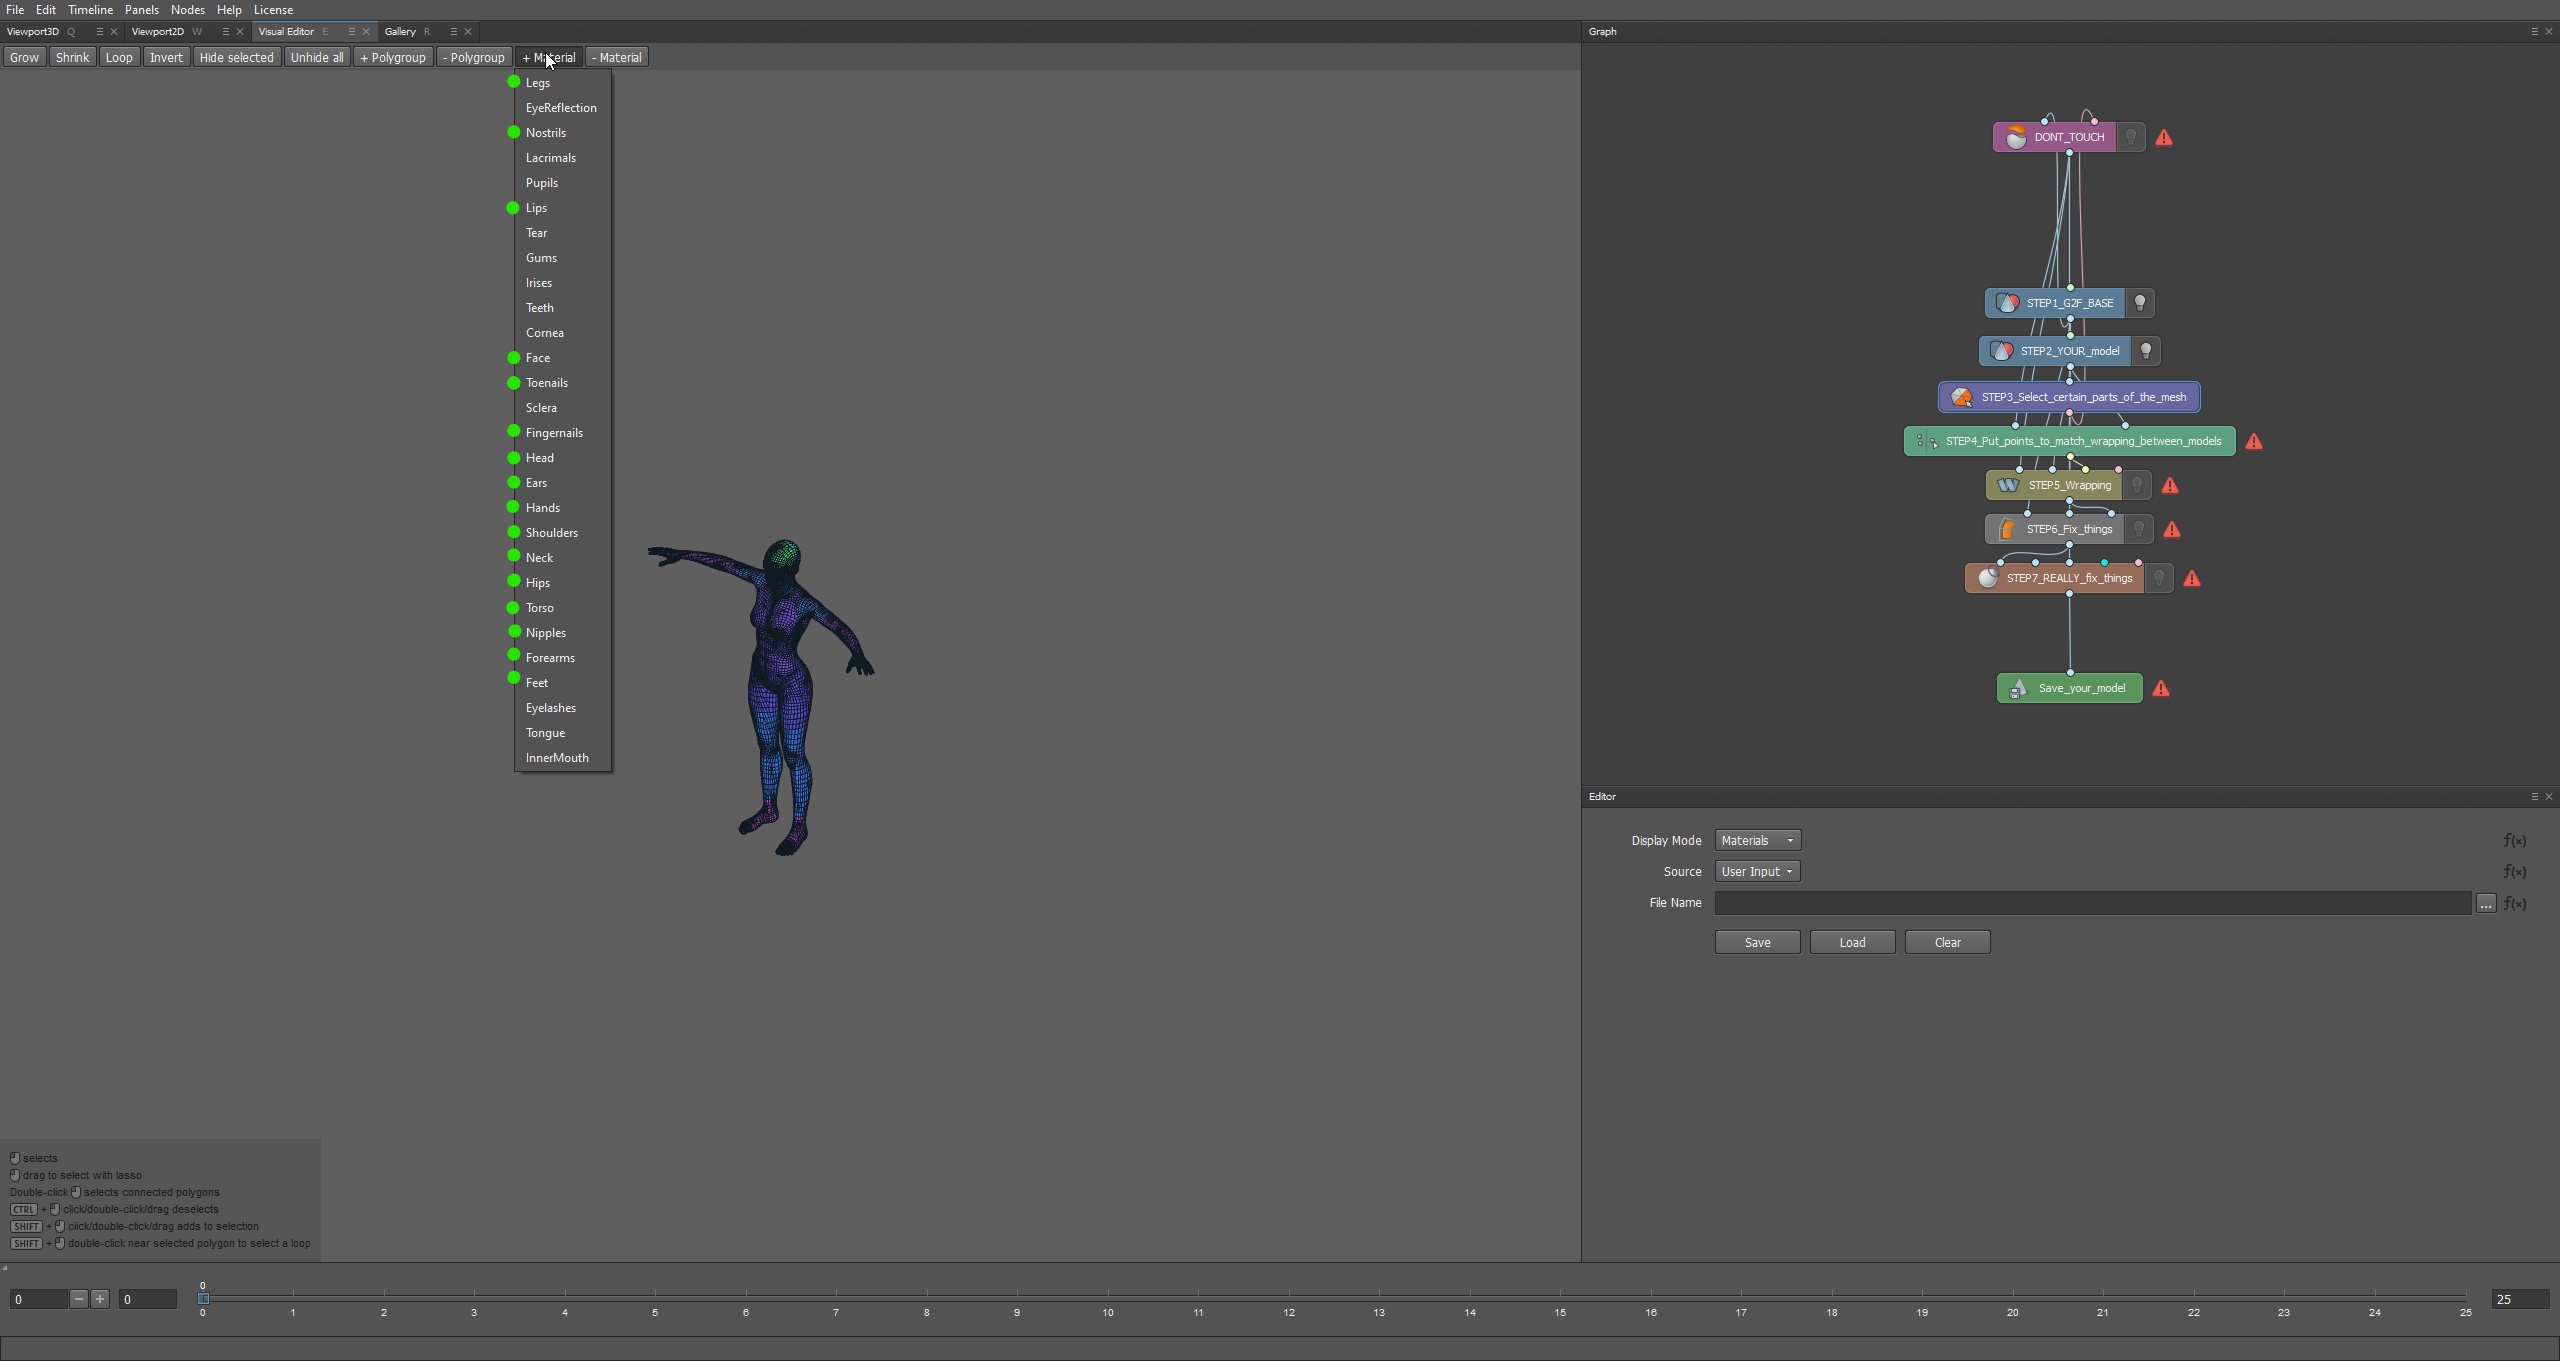
All you have to do is click on +Materials and choose the following,
Doing so will fix the problem (if it ever happened) and now we can move onto Chapter 4!
Chapter 4: The fun part!
Clicking on STEP4 should bring you to a menu like this, If not then go back to Visual editor by clicking {E} or from the tabs up.
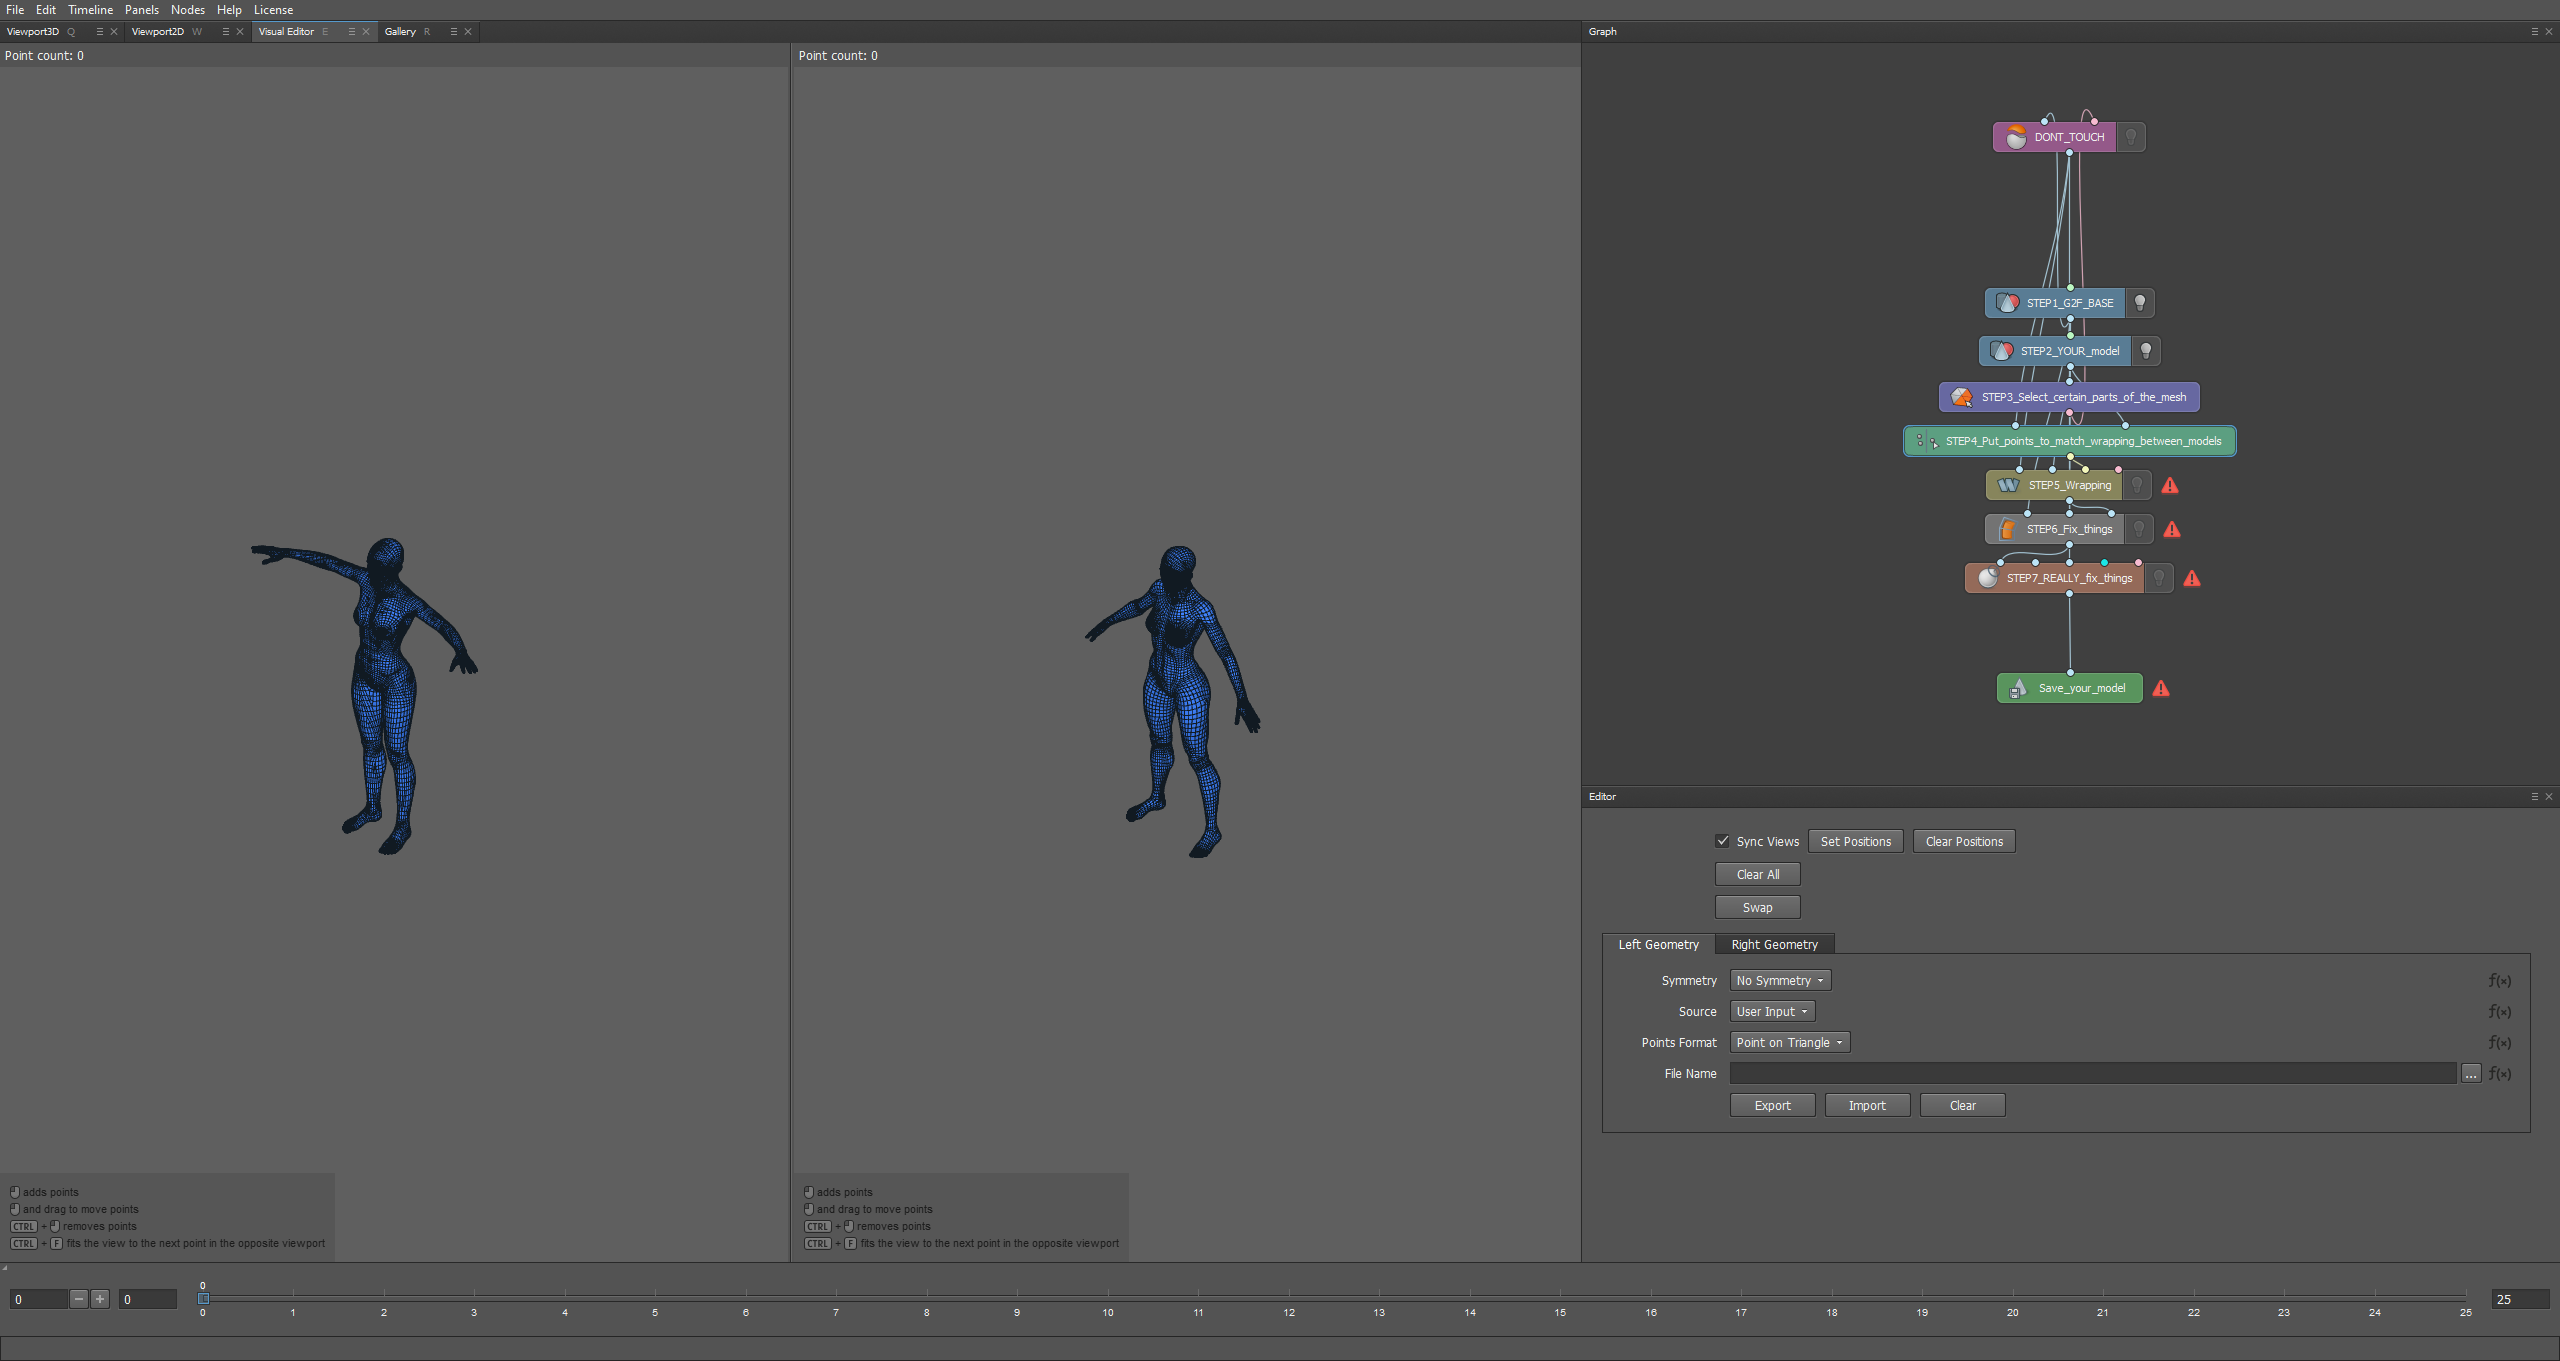
In here we'll put tiny dots on the models to let the program know to match the points, for example try clicking on STEP5 and then click compute, the program will start WRAPPING to it's best ability, but it most likely wont end up looking the best, look down
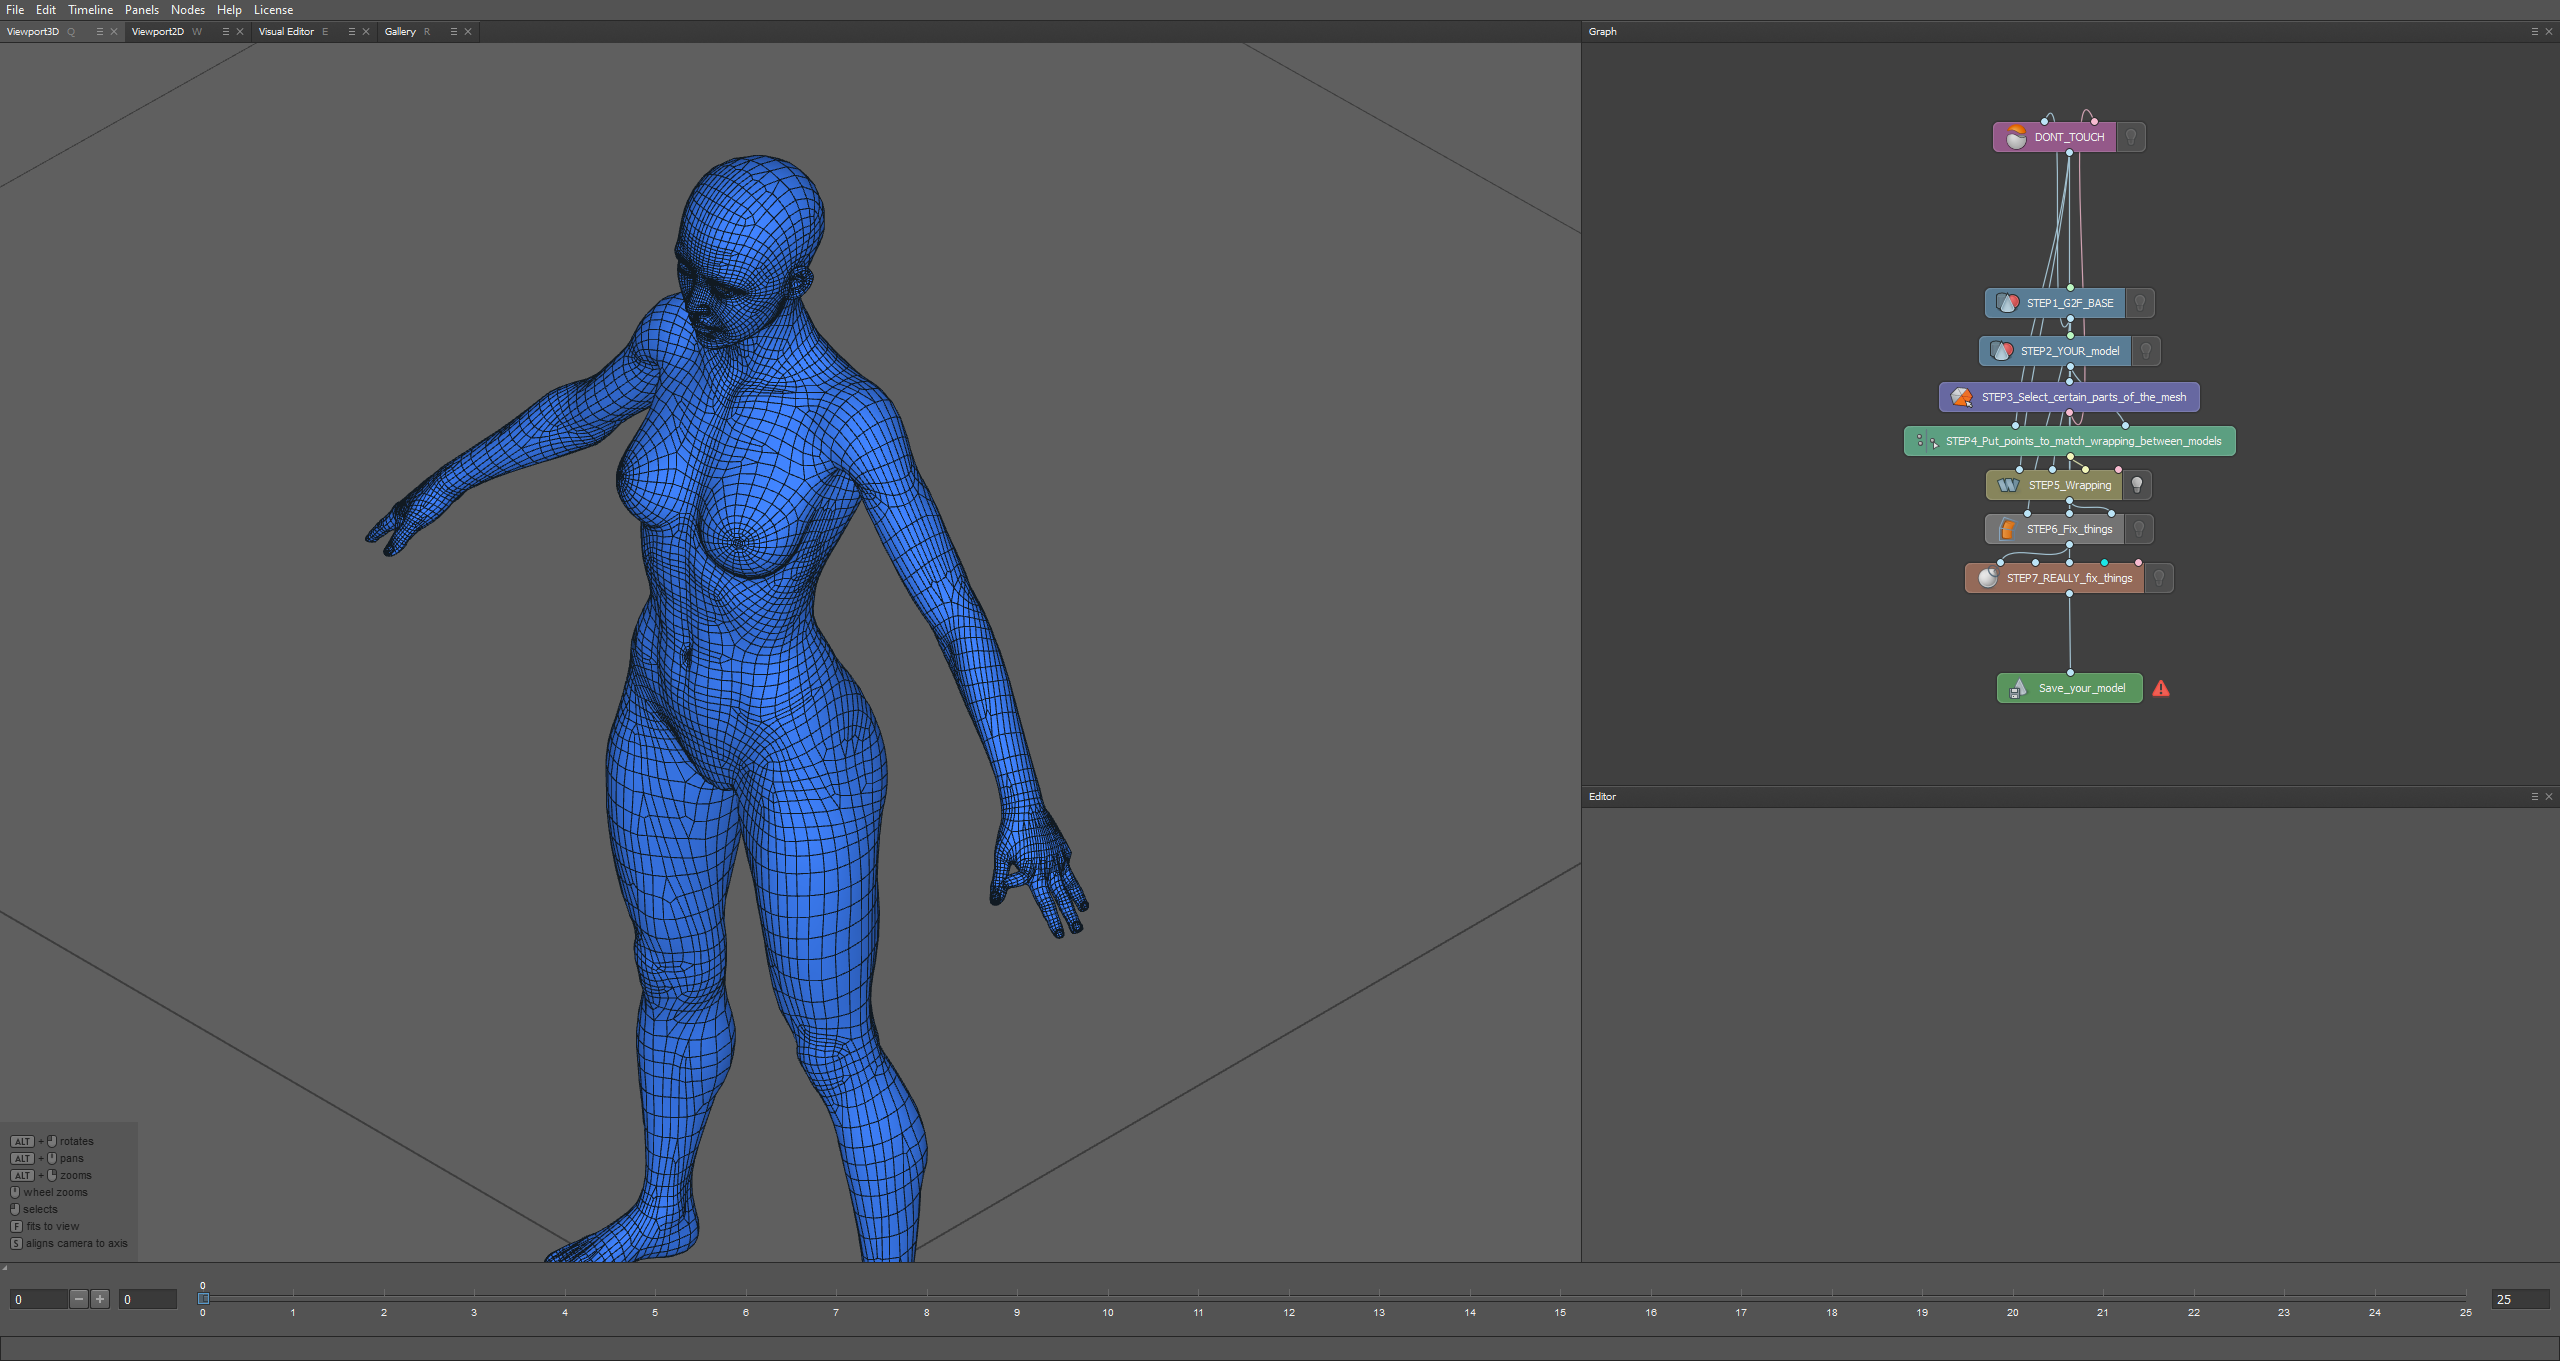
(disable STEP1 and STEP2 lightbulbs and enable STEP5 lightbulb to see results)
As you can see, it mostly looks fine but the fingies are fucked! So we have to tell the program that the pinky goes with the pinky, the ring finger with the ring finger and so on..
And now going back to Visual editor so we can put some dots on those thots! (don't forget to reselect STEP4)
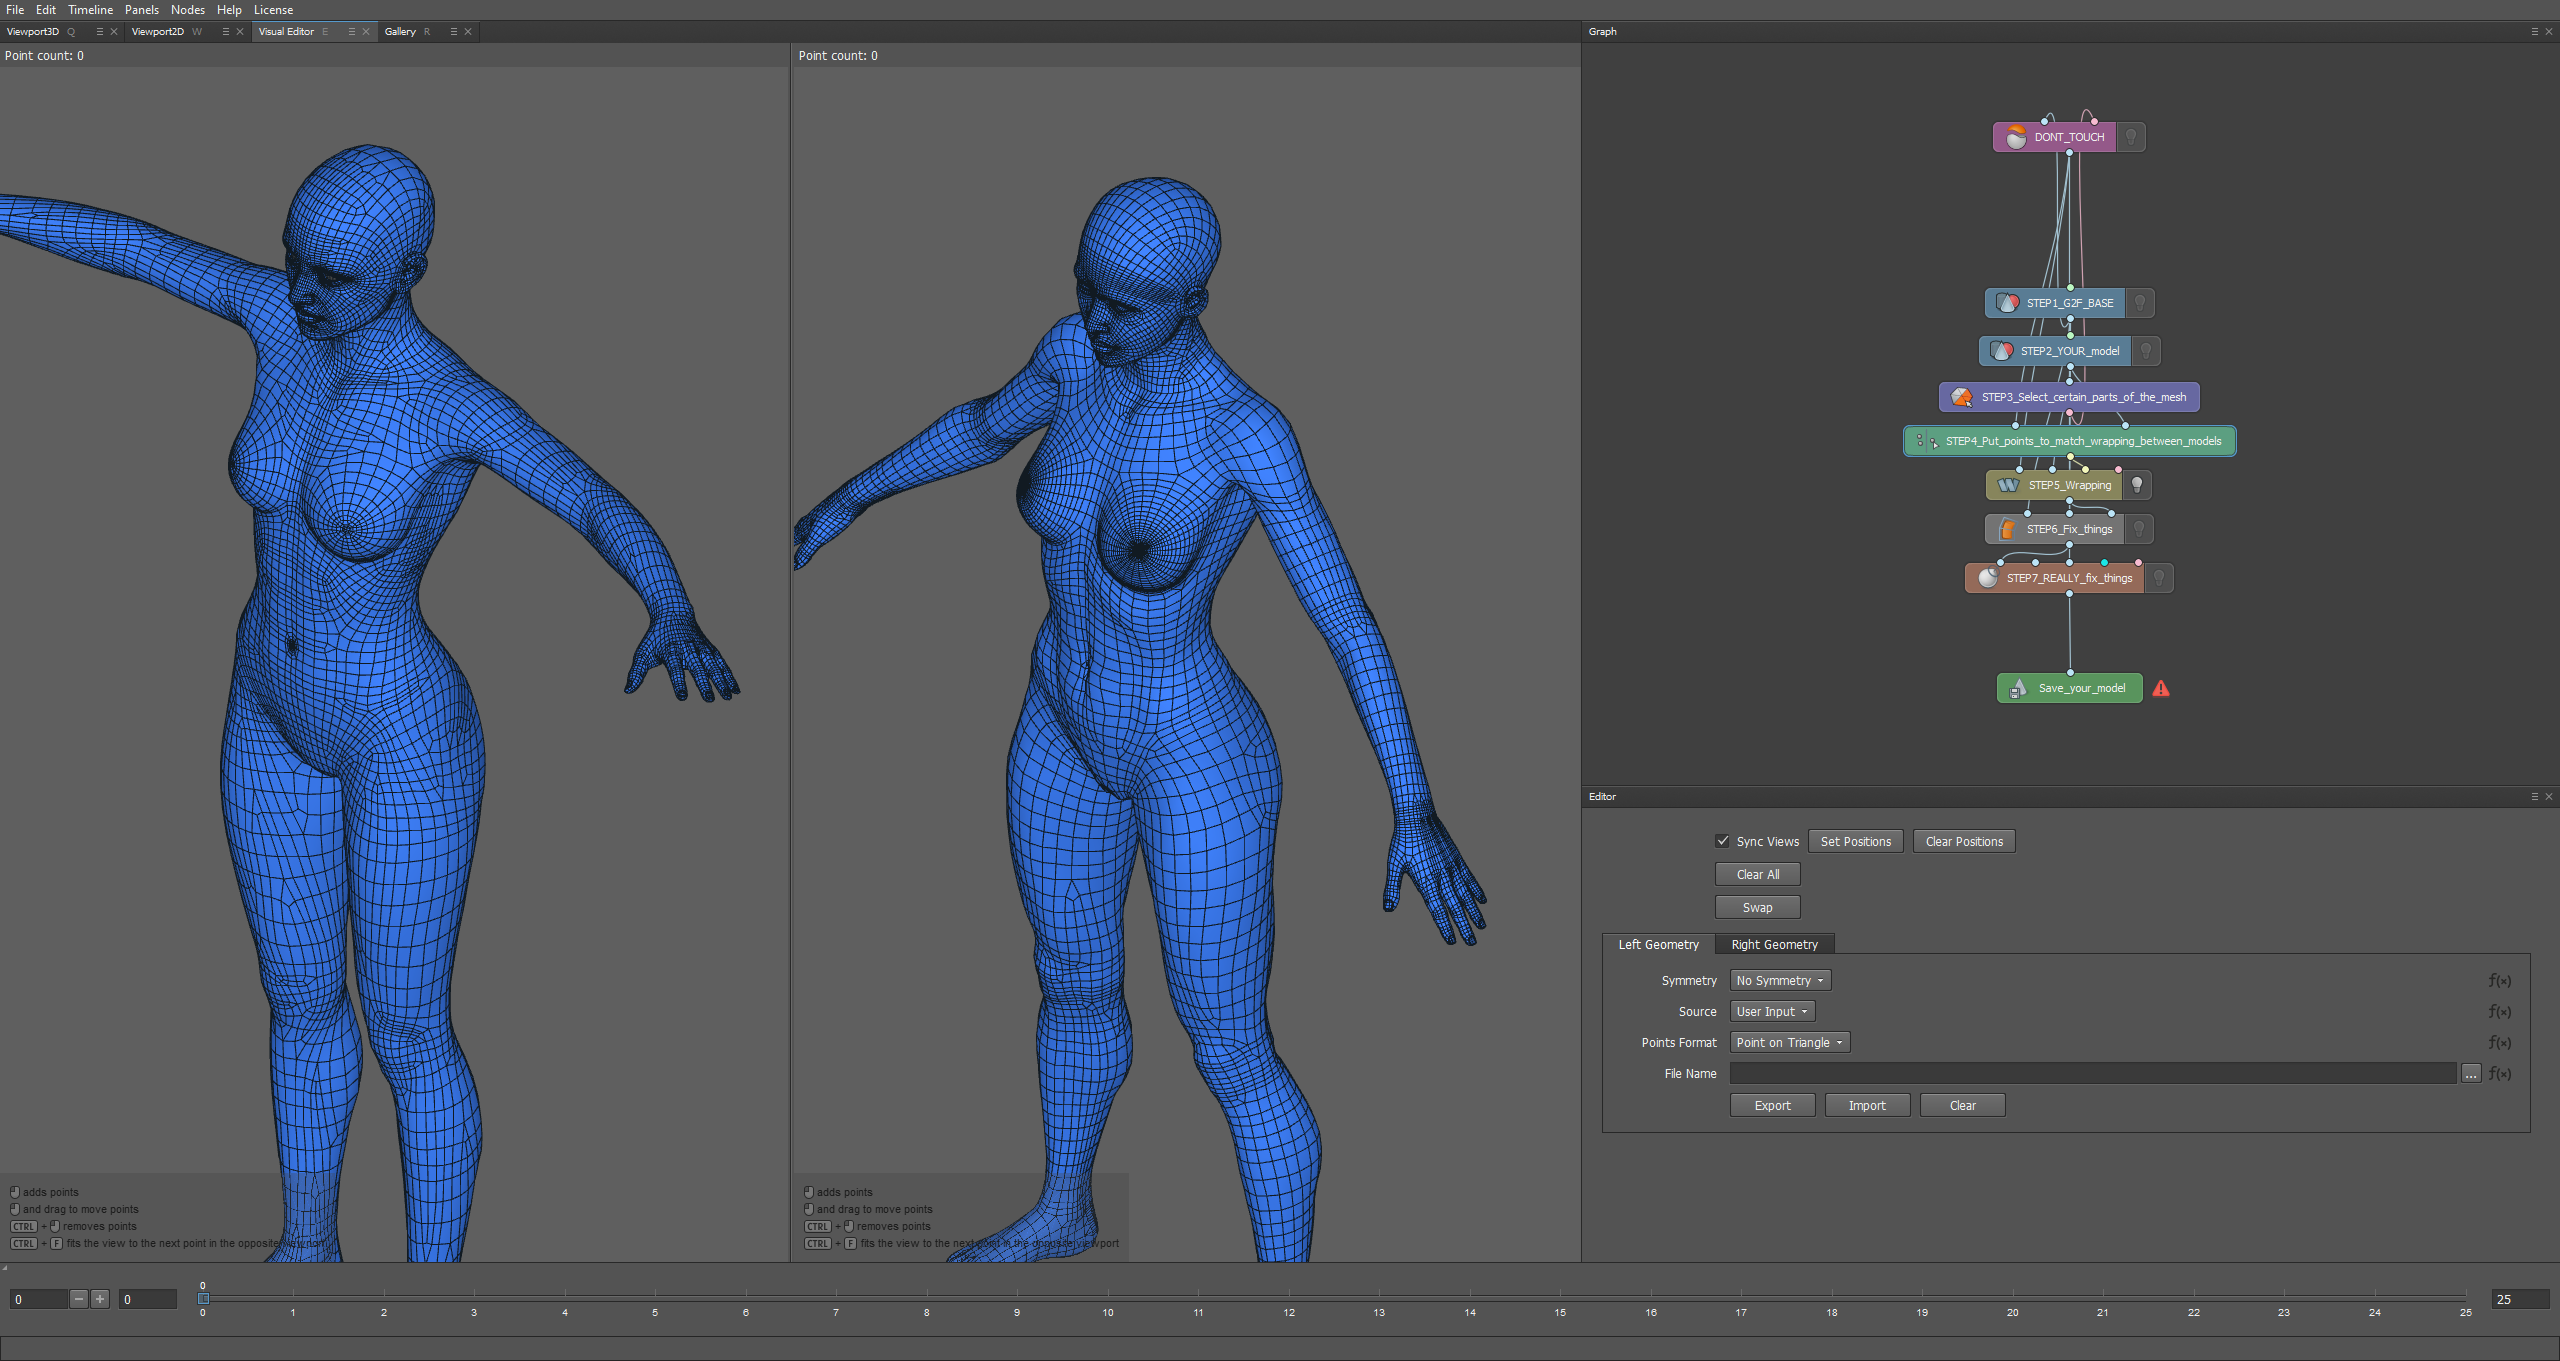
To navigate you have to hold ALT then use the mouse buttons to move around, and again you can see the controls on the bottom left!
Now let's fix the biggest issue, the fingies!
After getting a bit comfortable with the controls let's put the dots on the thots!
G2F left hand done!
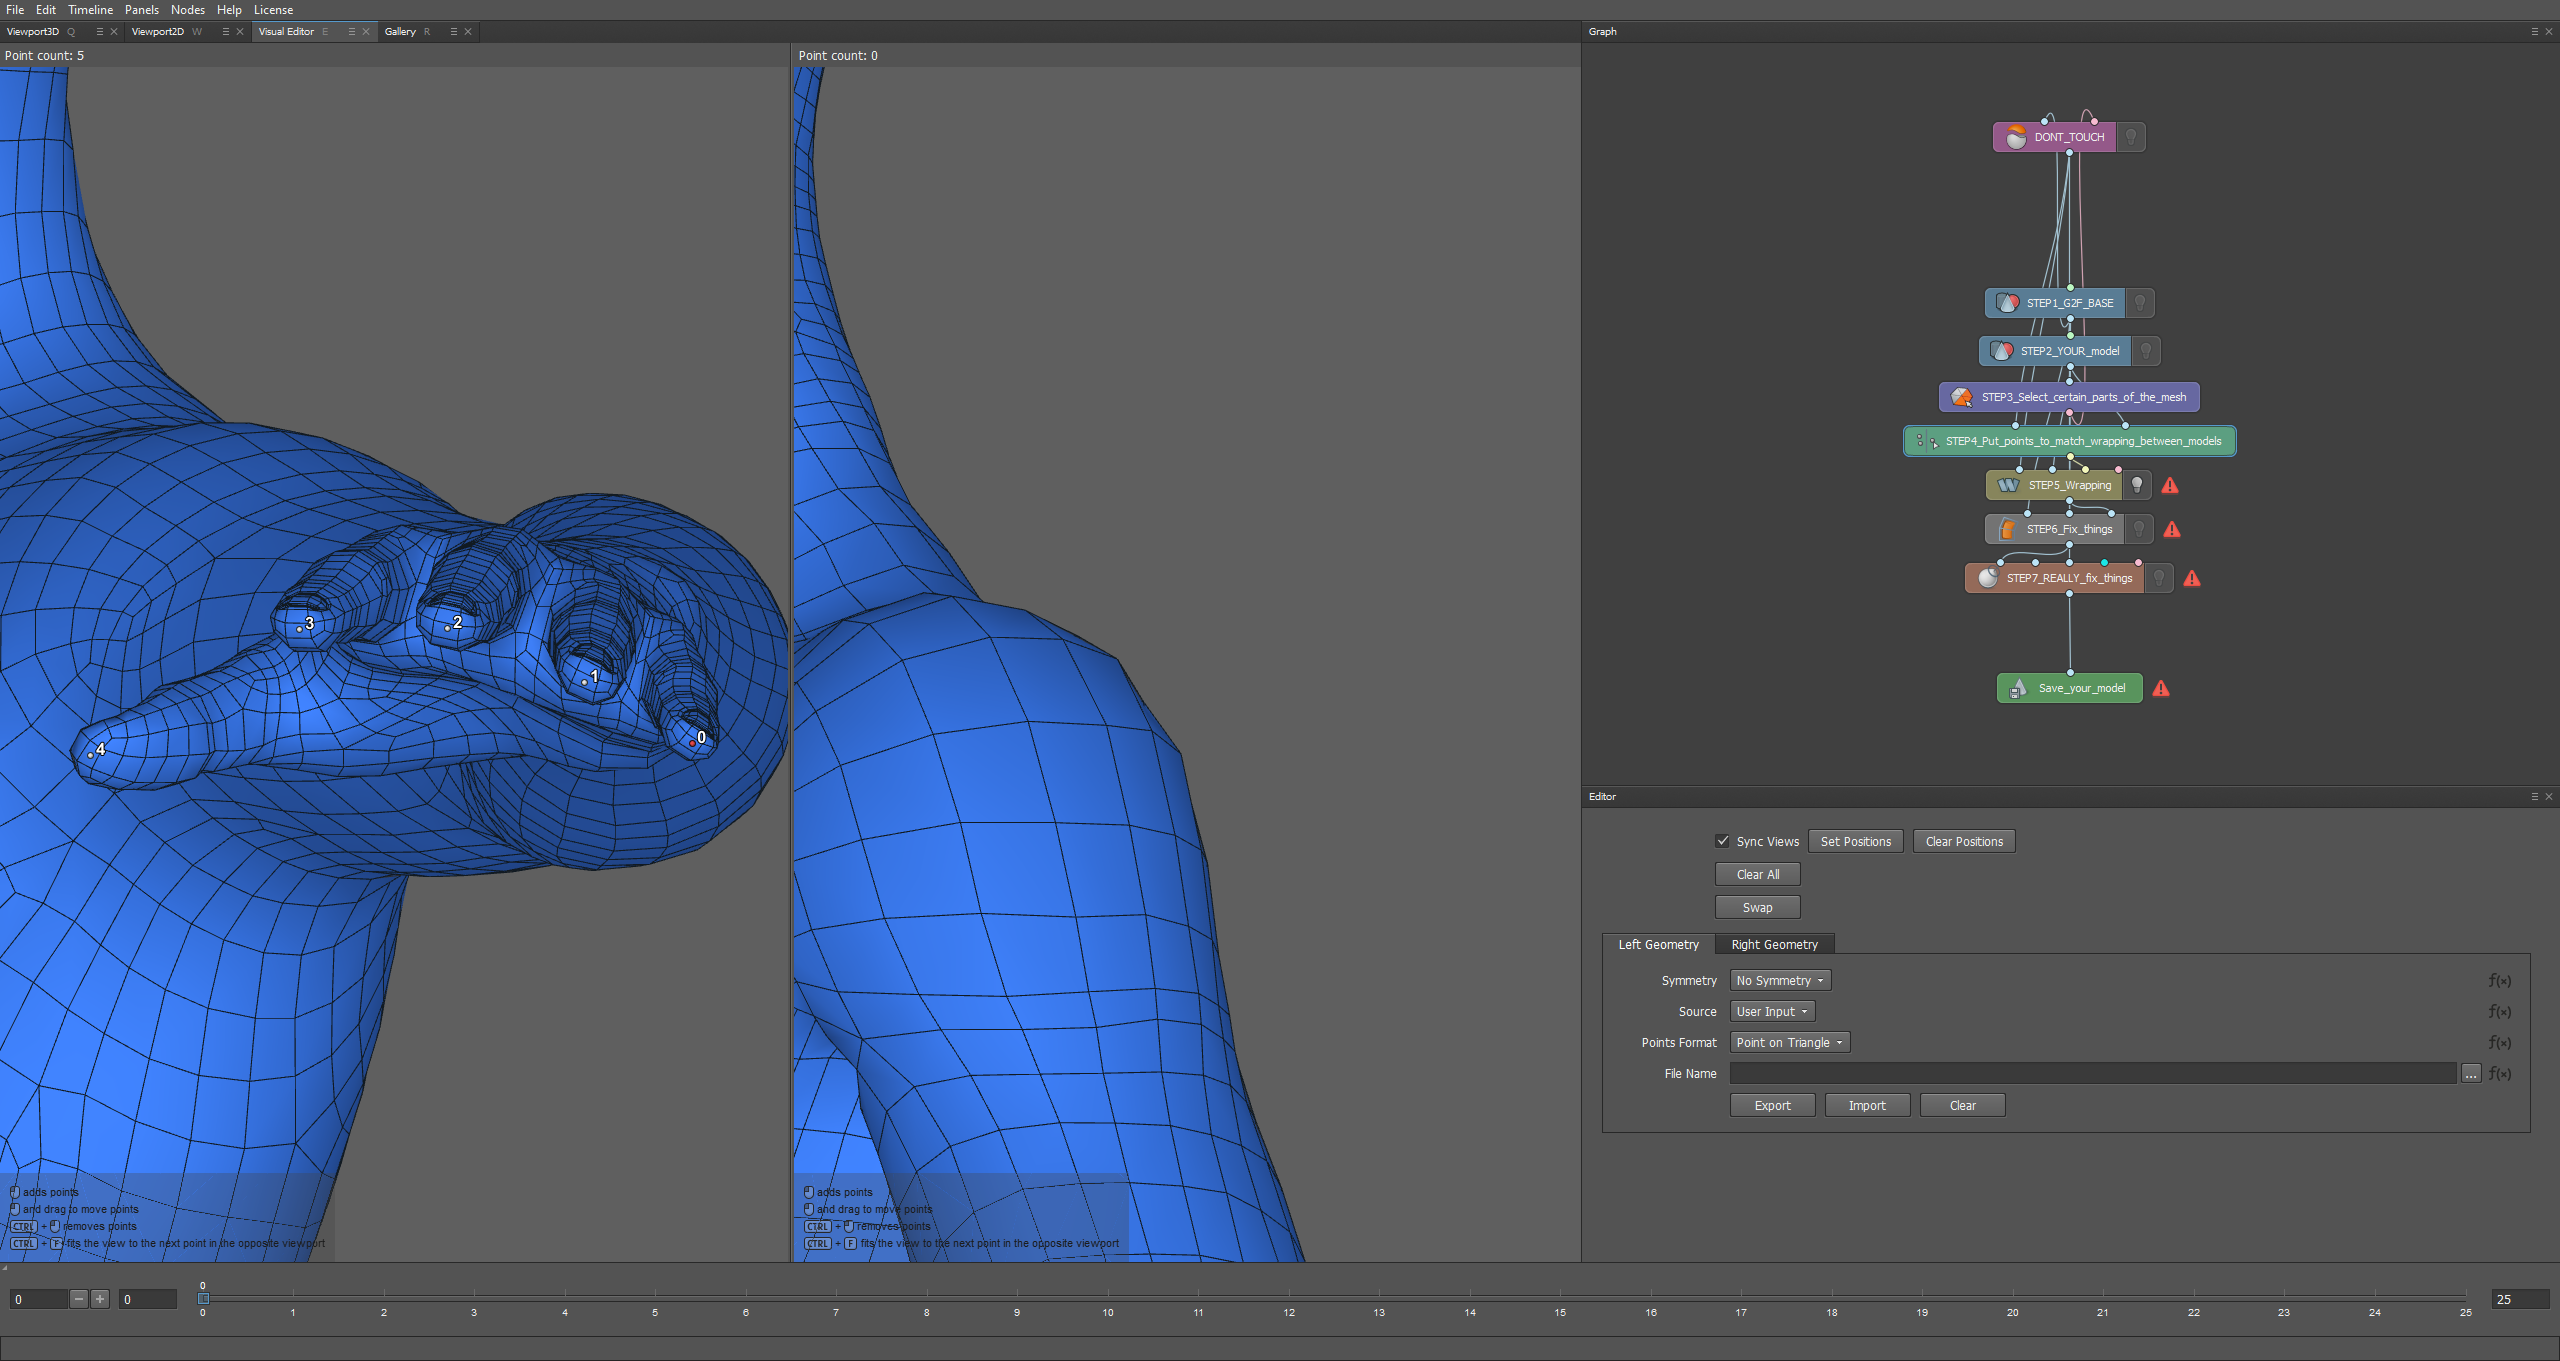
OUR models left hand is done as well! now the program will place the fingers in their proper place!
Be sure to put them in the EXACT order, I went right to left for G2F so I HAVE to go right to left in the model I want!
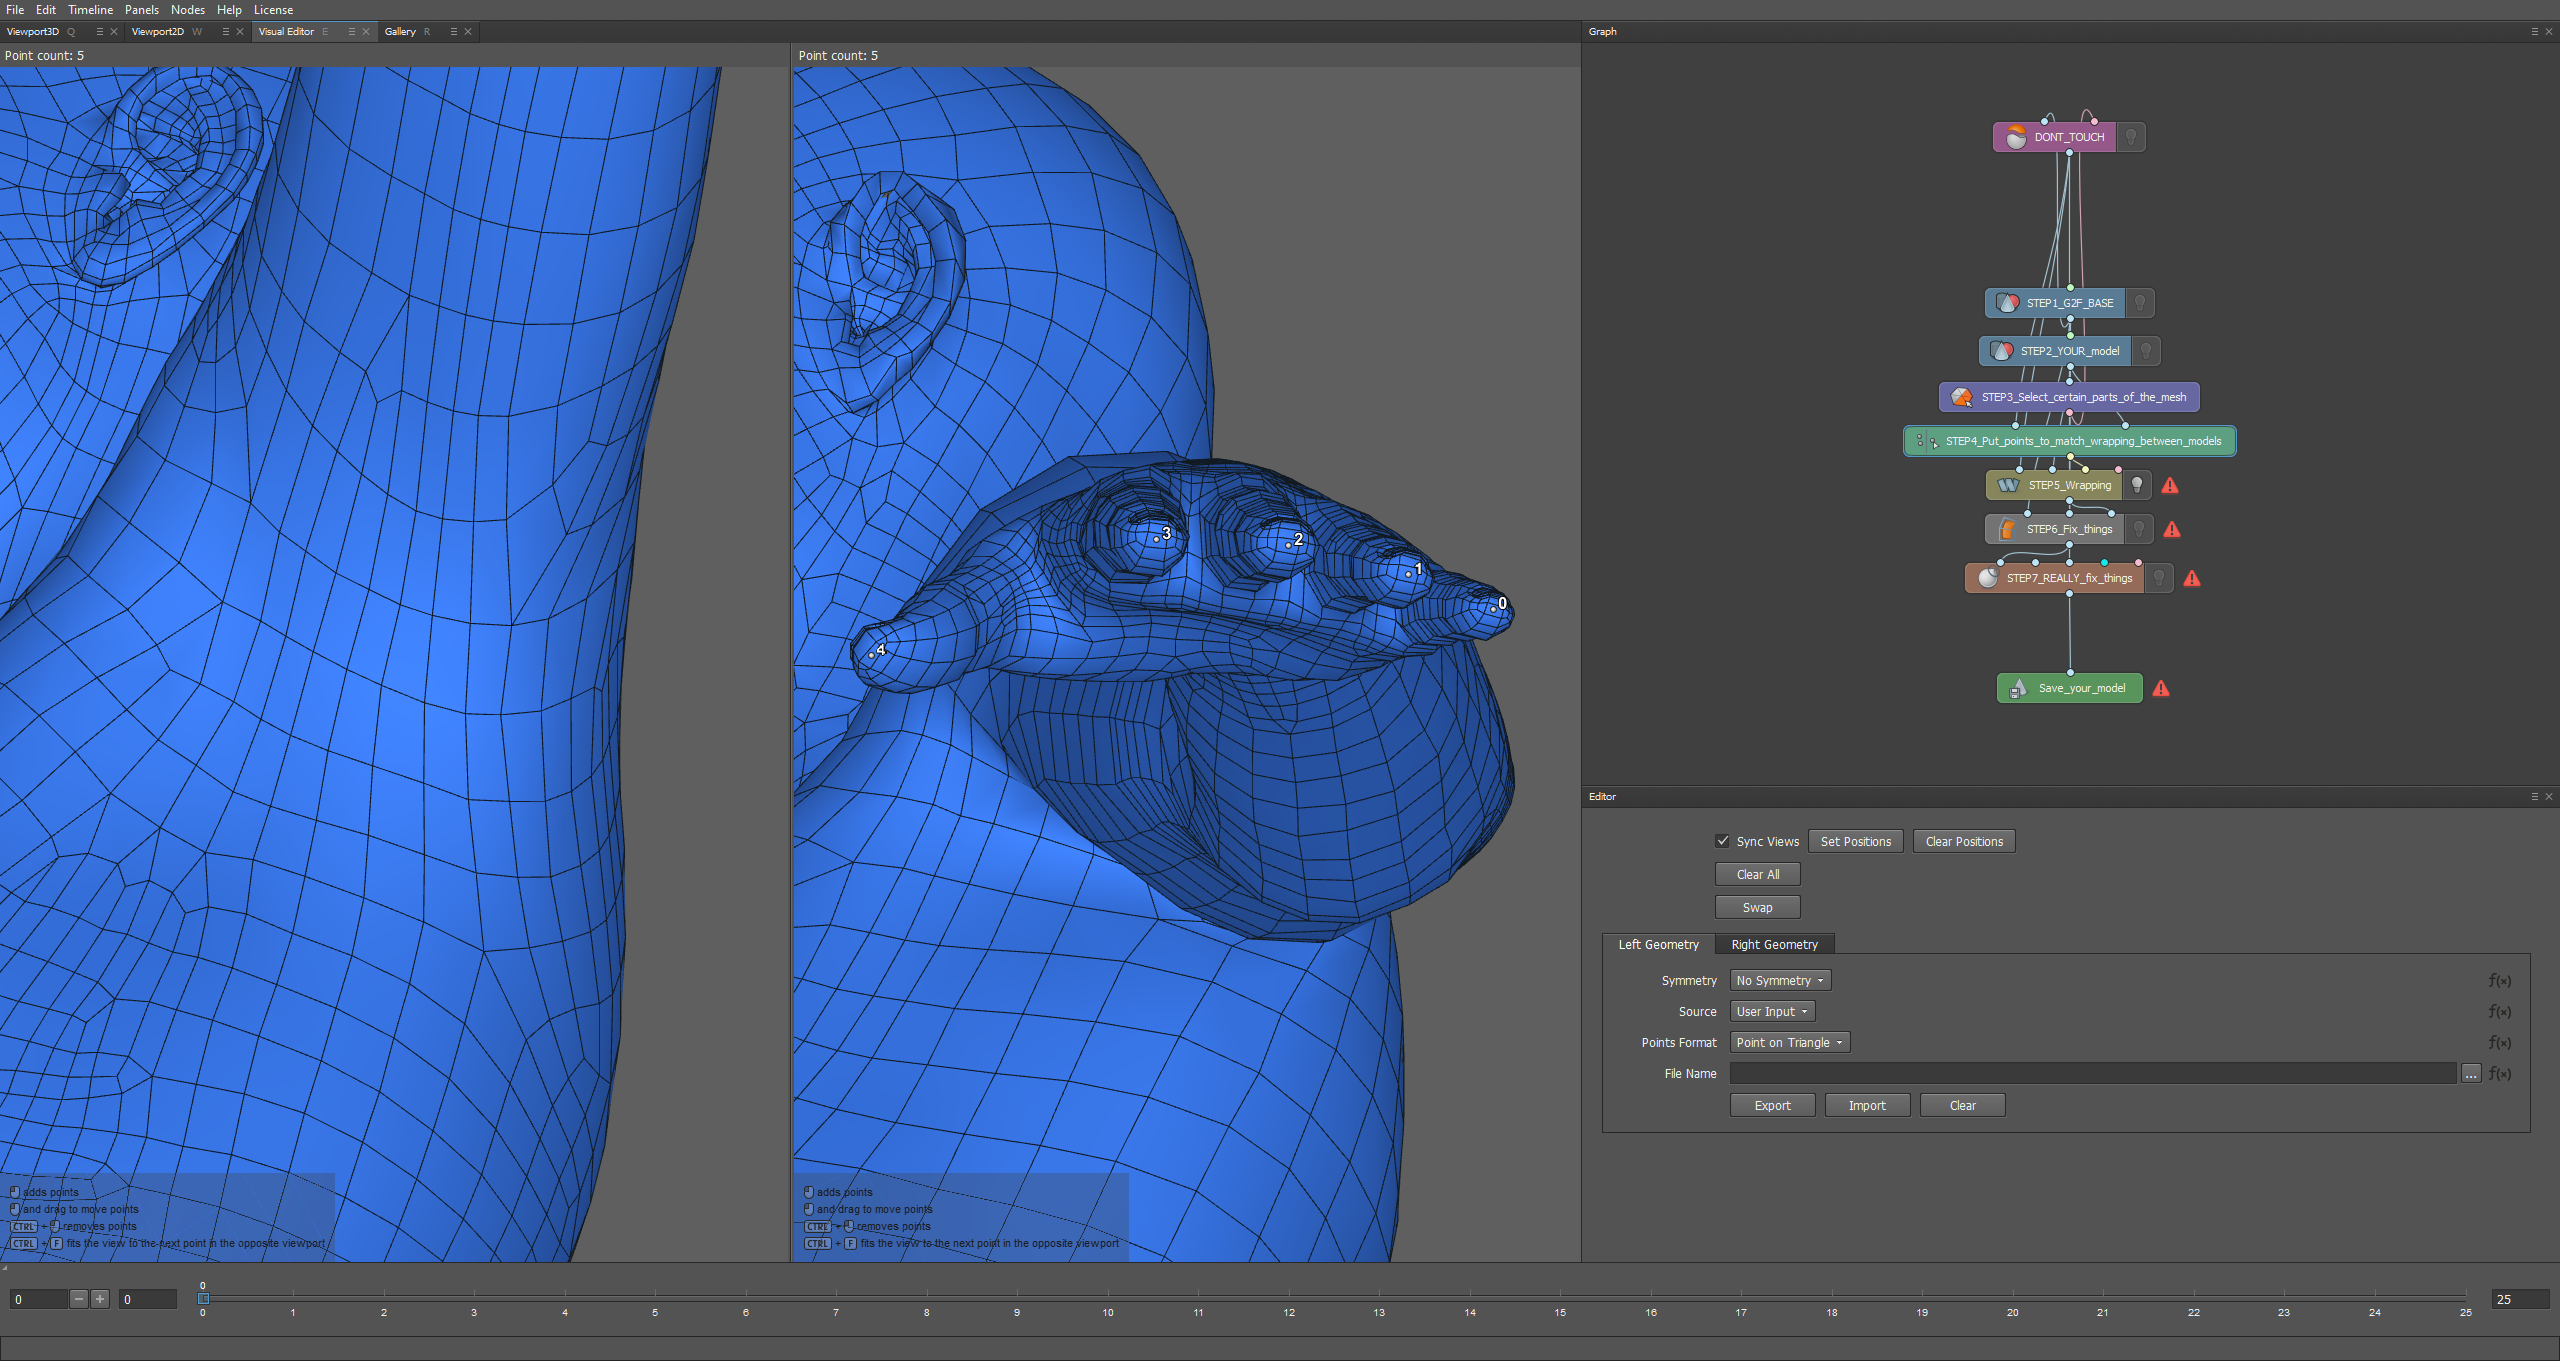
Now let's do the exact same thing for the right hand, the toes and some on the face and nipples so it looks perfect!
And as you can see I put a lot of dots but not too many, you can put as many as you want but MAKE SURE THEY ARE THE SAME NUMBER IN THE SAME PLACE BETWEEN BOTH MODELS!
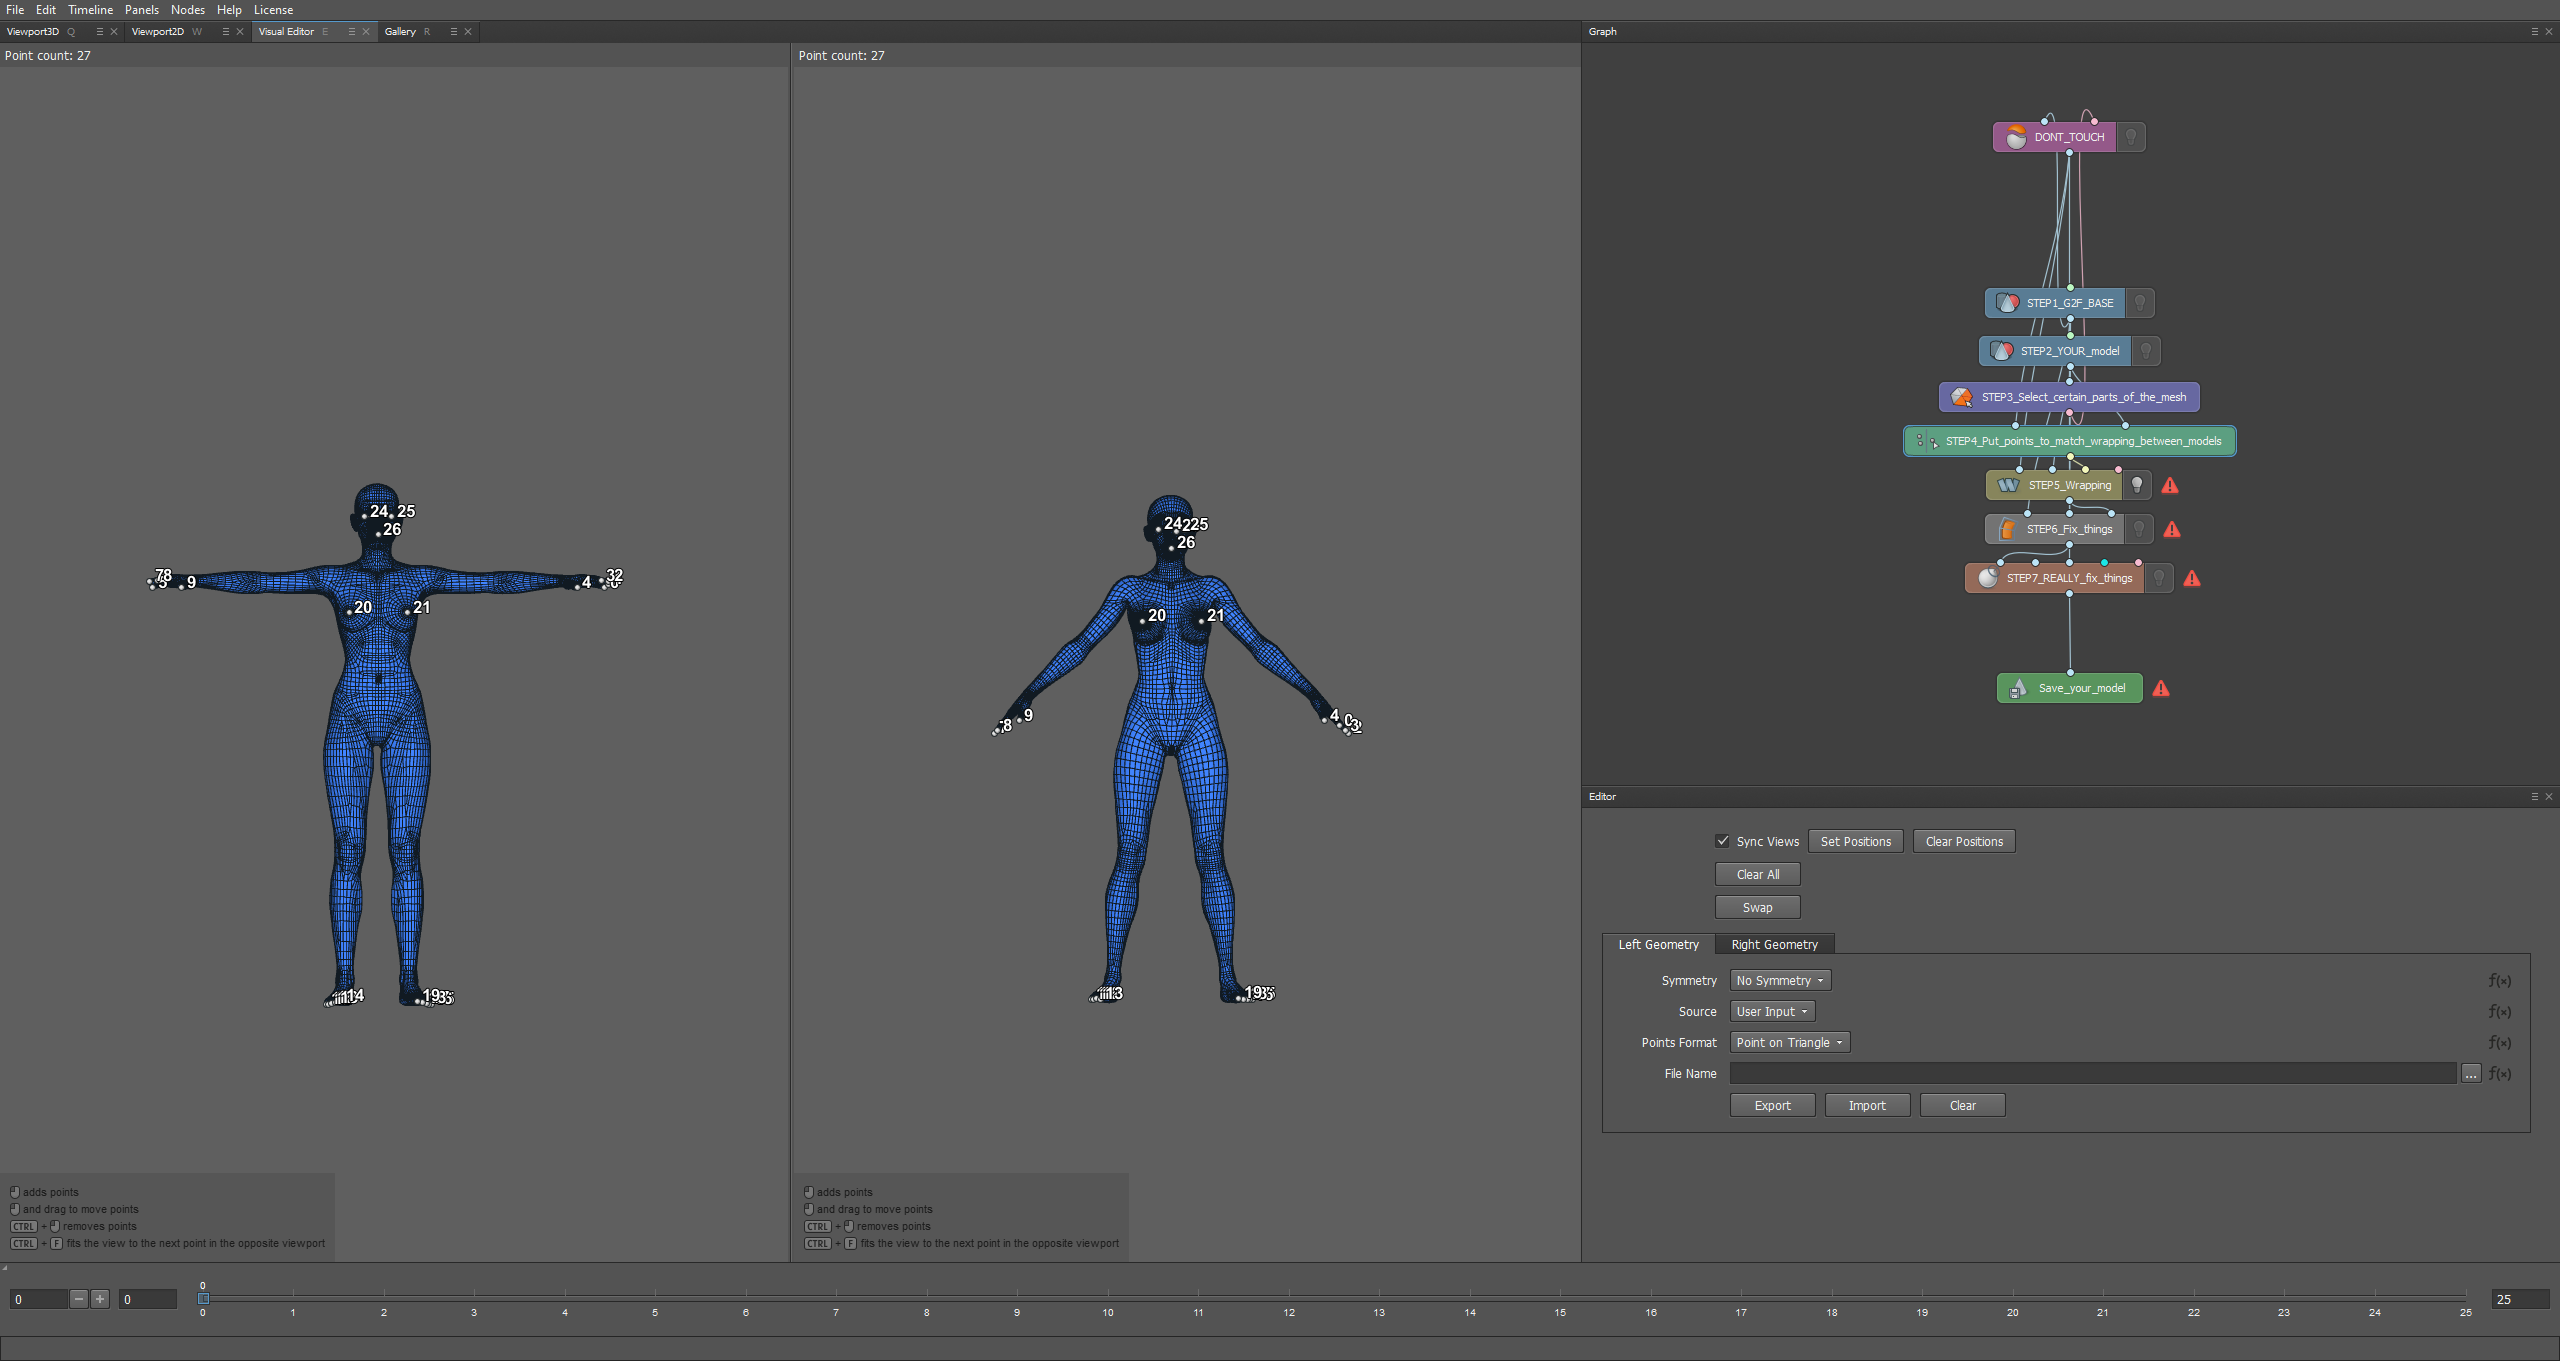
We're now done with Chapter 4!
Chapter 5: Near the end game!
Go to STEP5 then click compute to start WRAPPING!
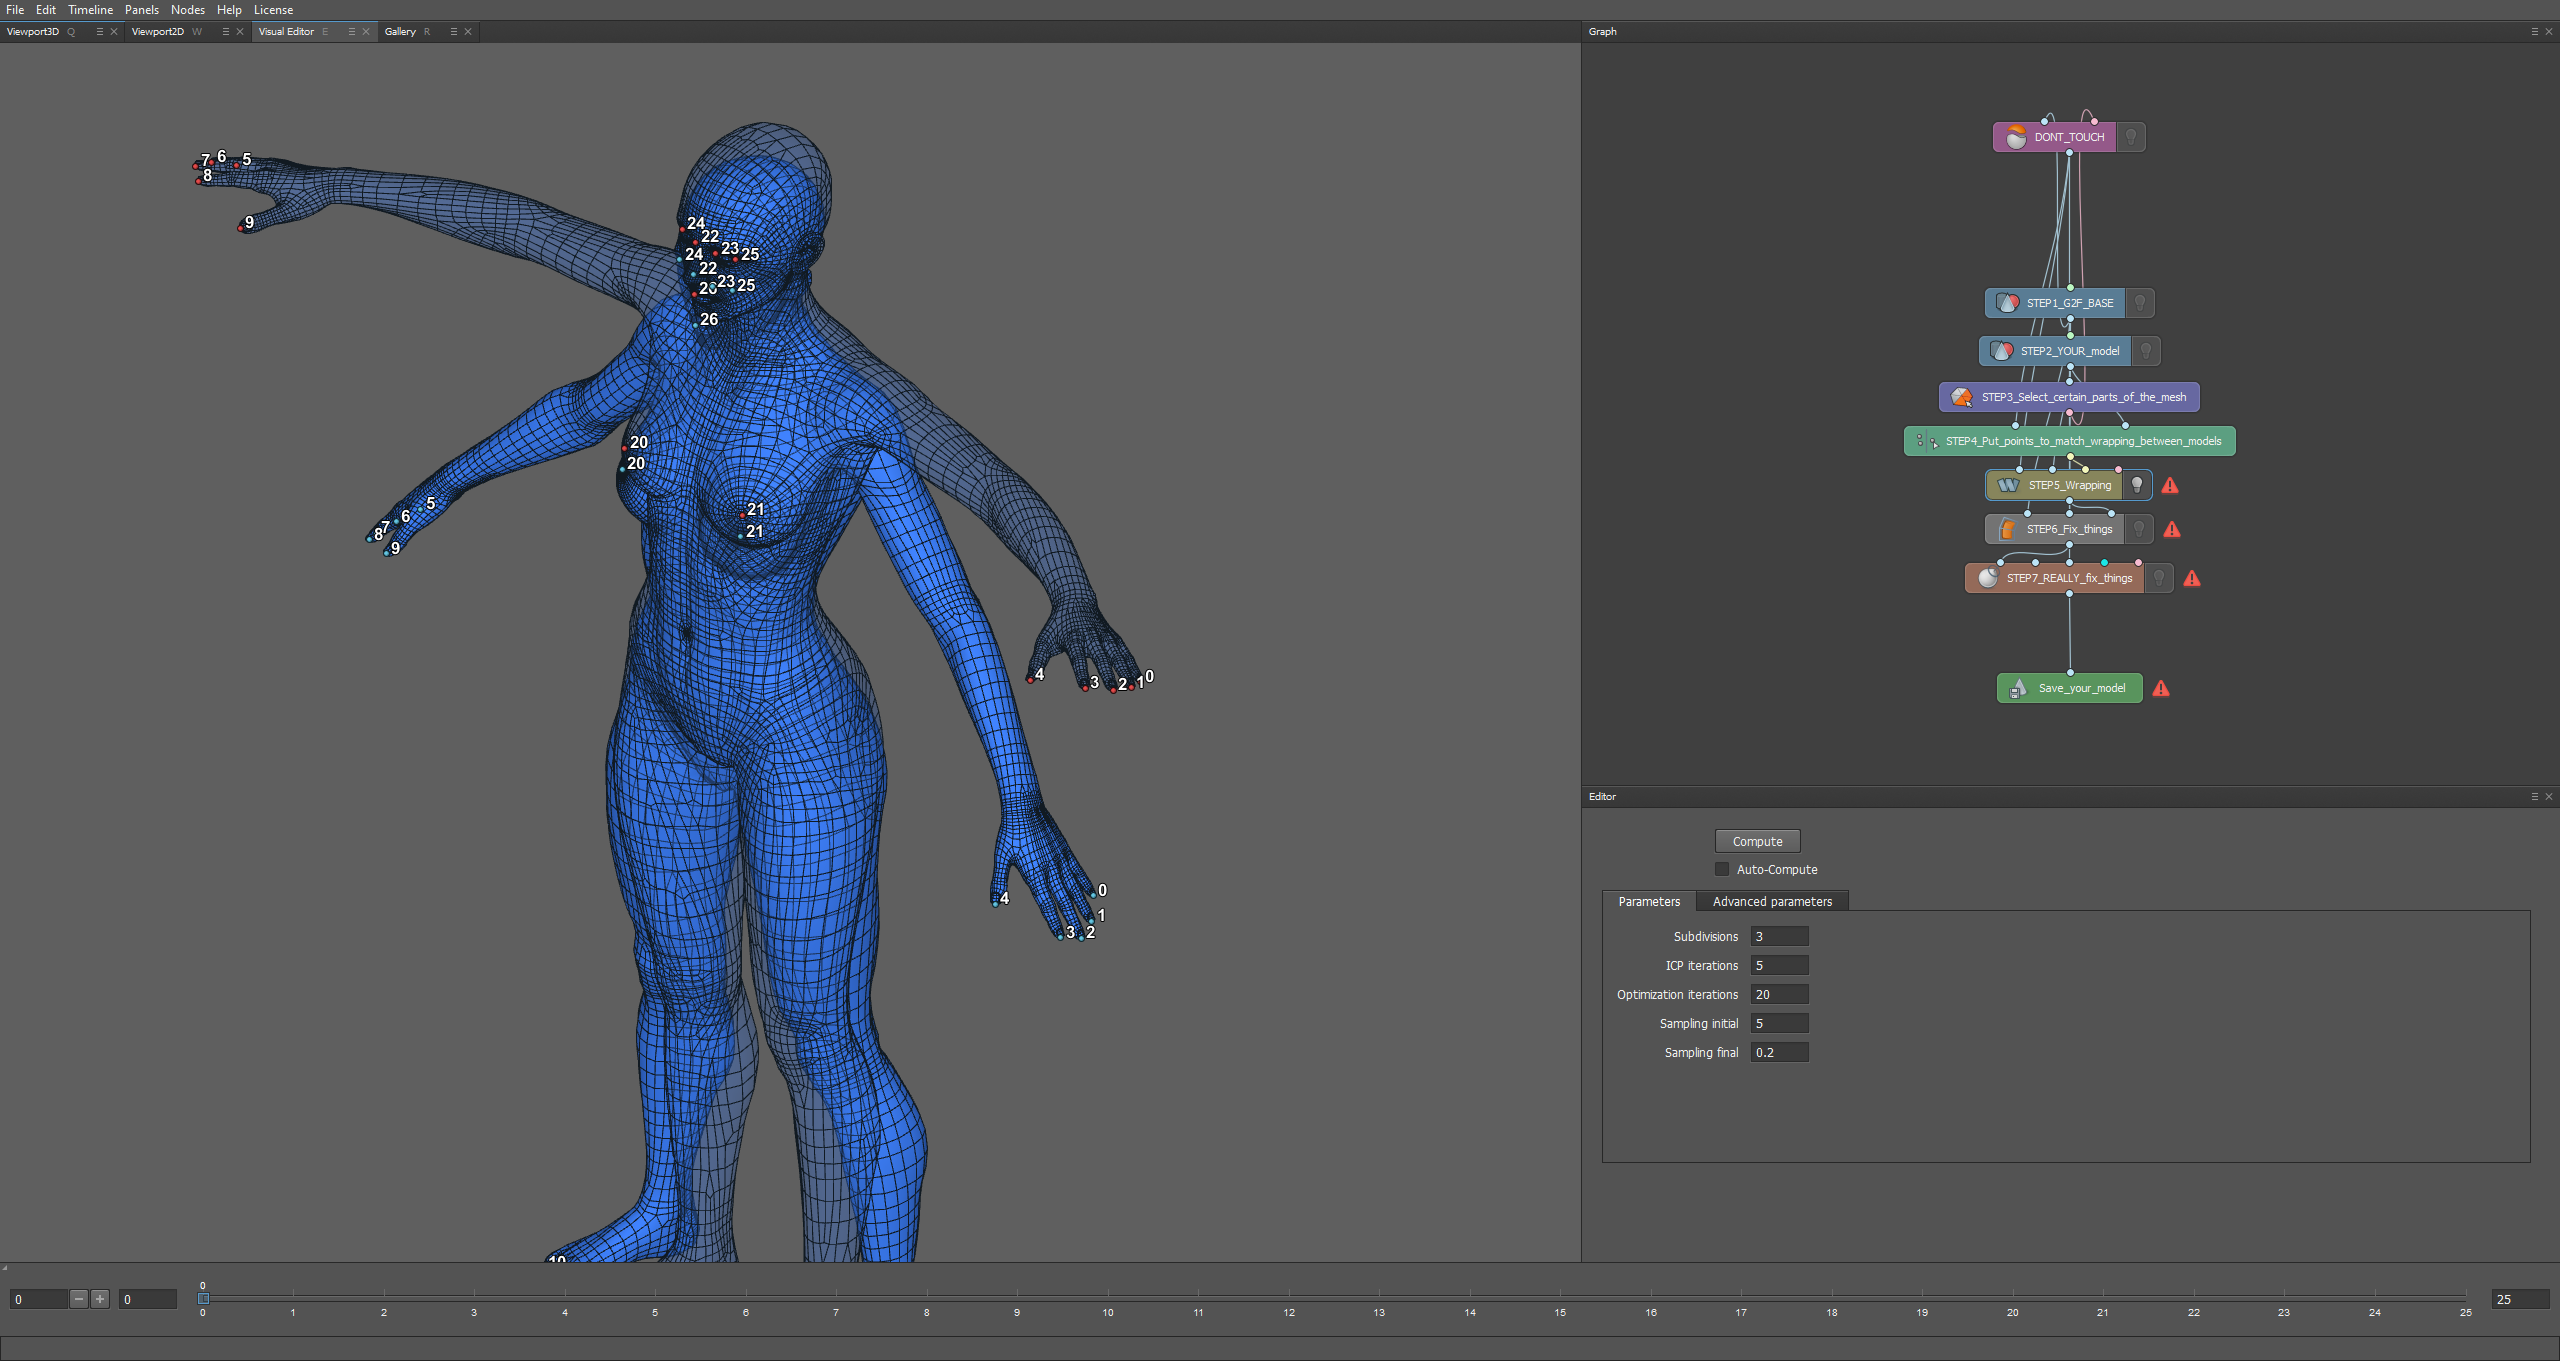
Wow look at that! Amazing isn't it?
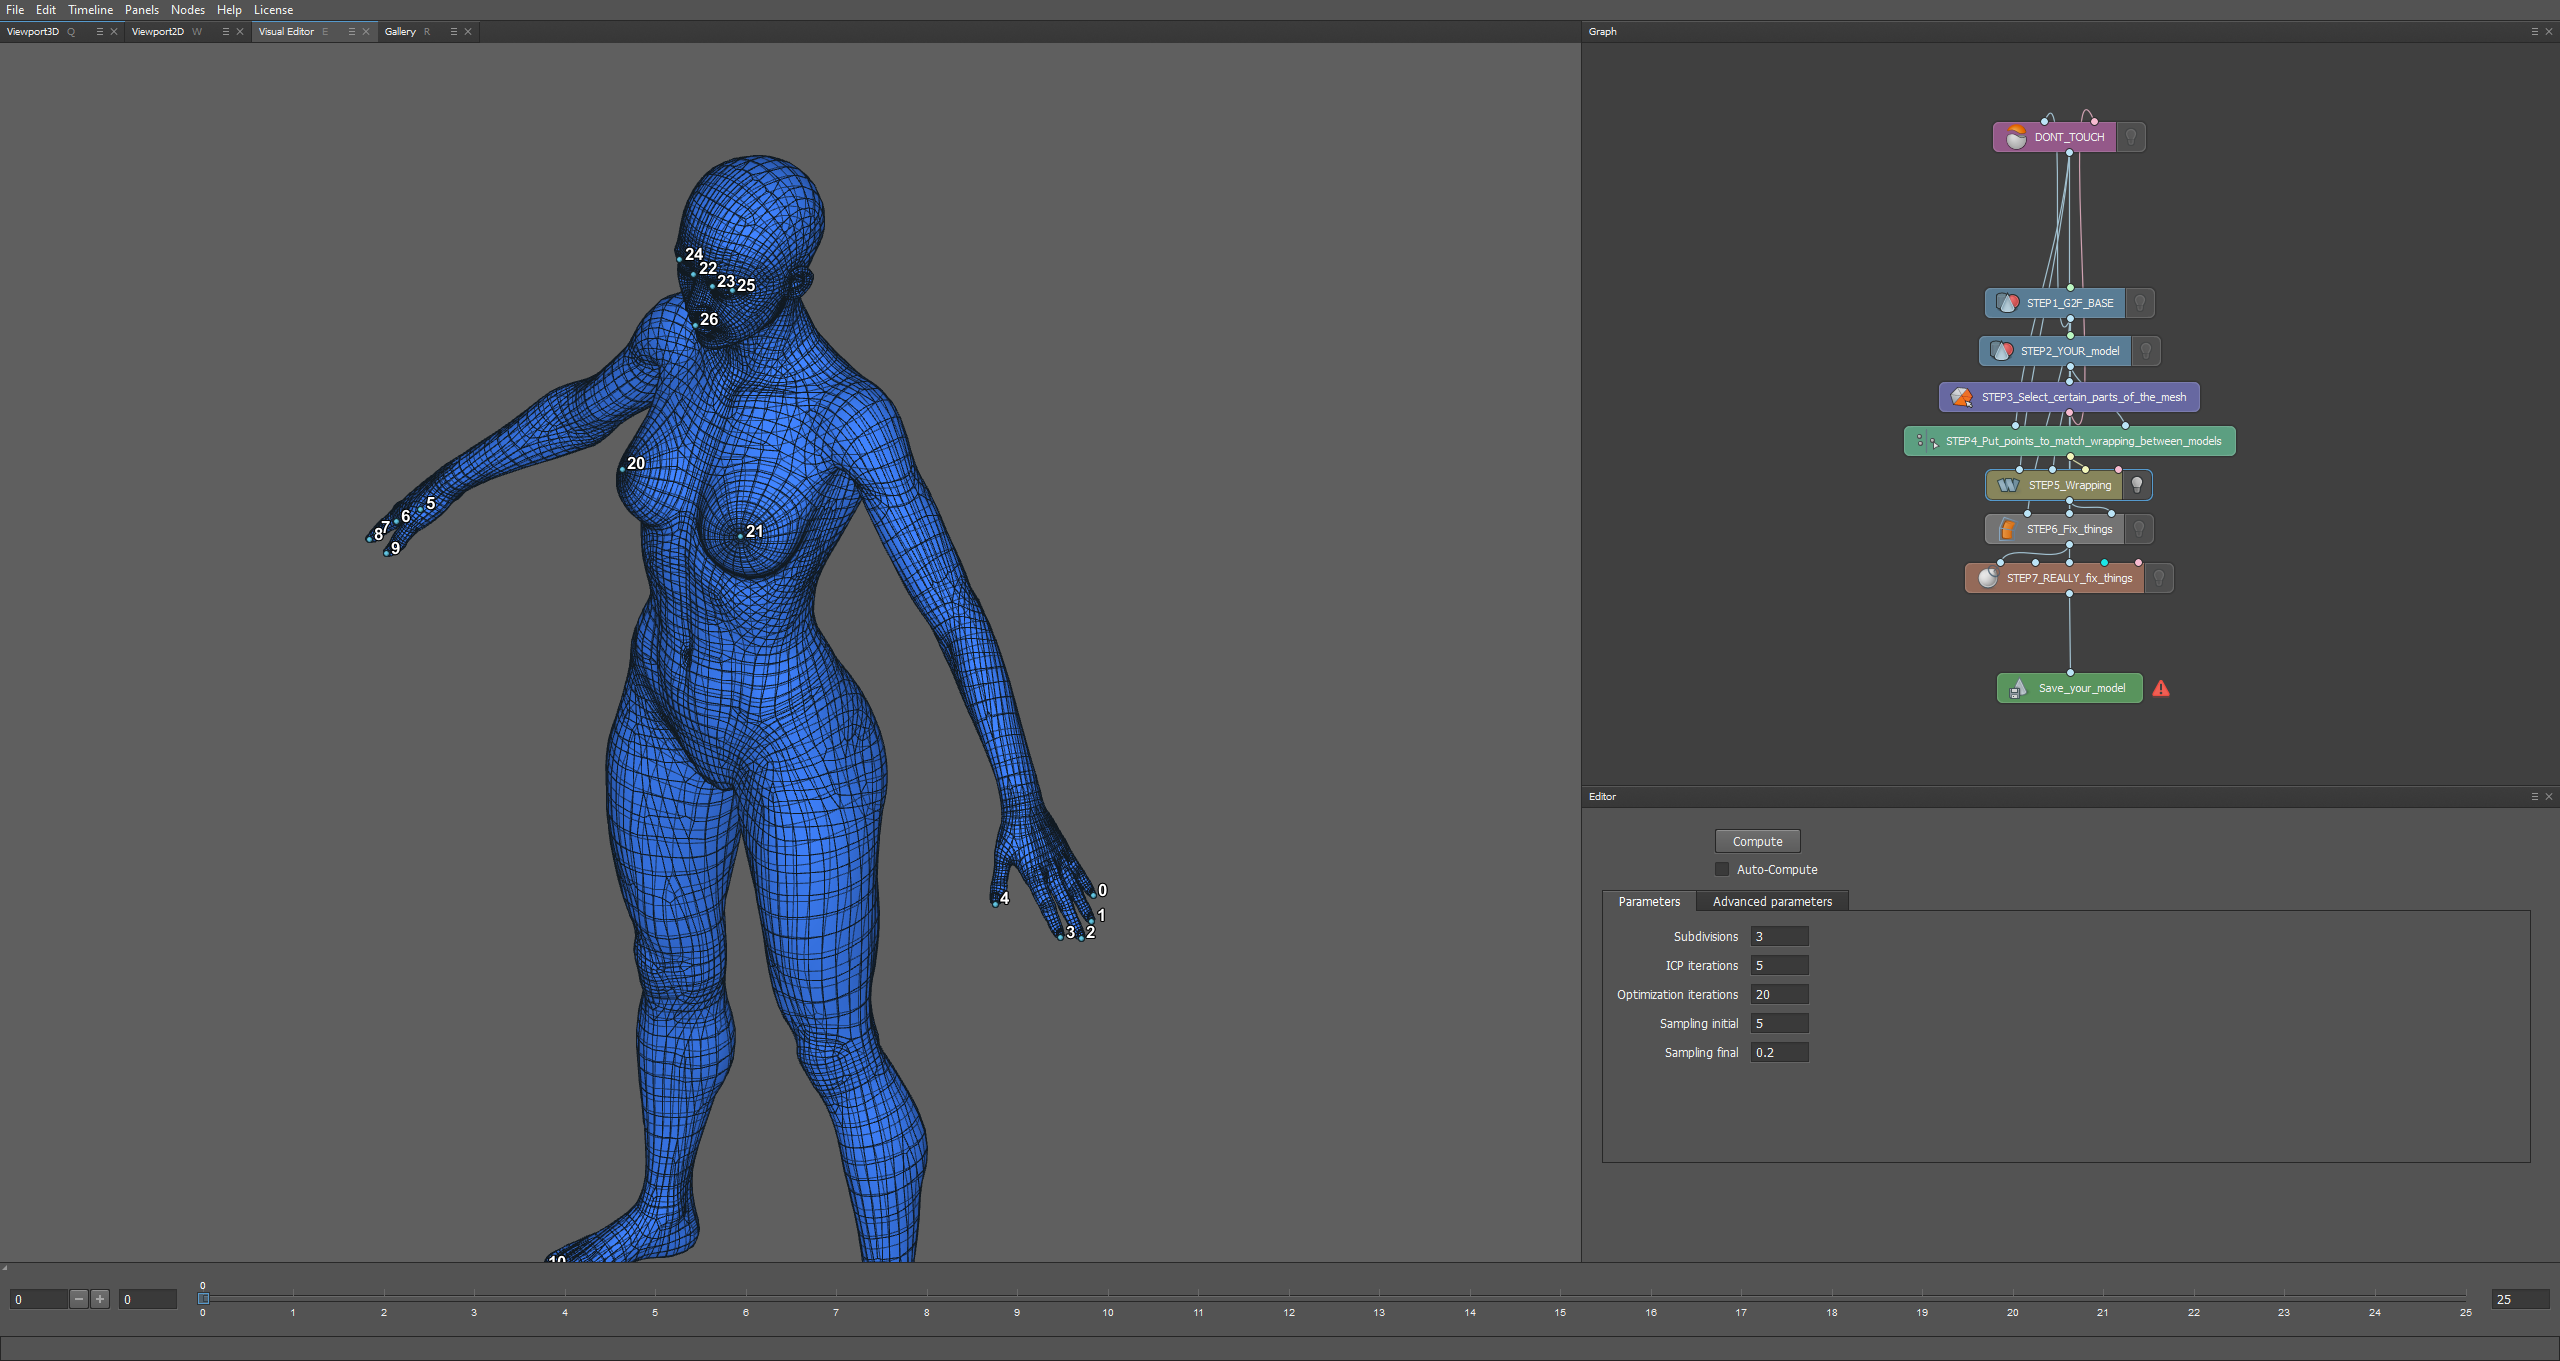
For now I'm not going to focus on the face too much I'll leave it to you to pay attention to details and perfect your model!
If you're not satisfied with the results yet then redo Chapter 4 by either removing all the dots from the thots and put them again, or add more!
Chapter 6: WRAPPING endgame!
We're ALMOST done,
Switch from STEP5 to STEP6 and disable STEP5s lightbulb and turn on STEP6s lightbulb!
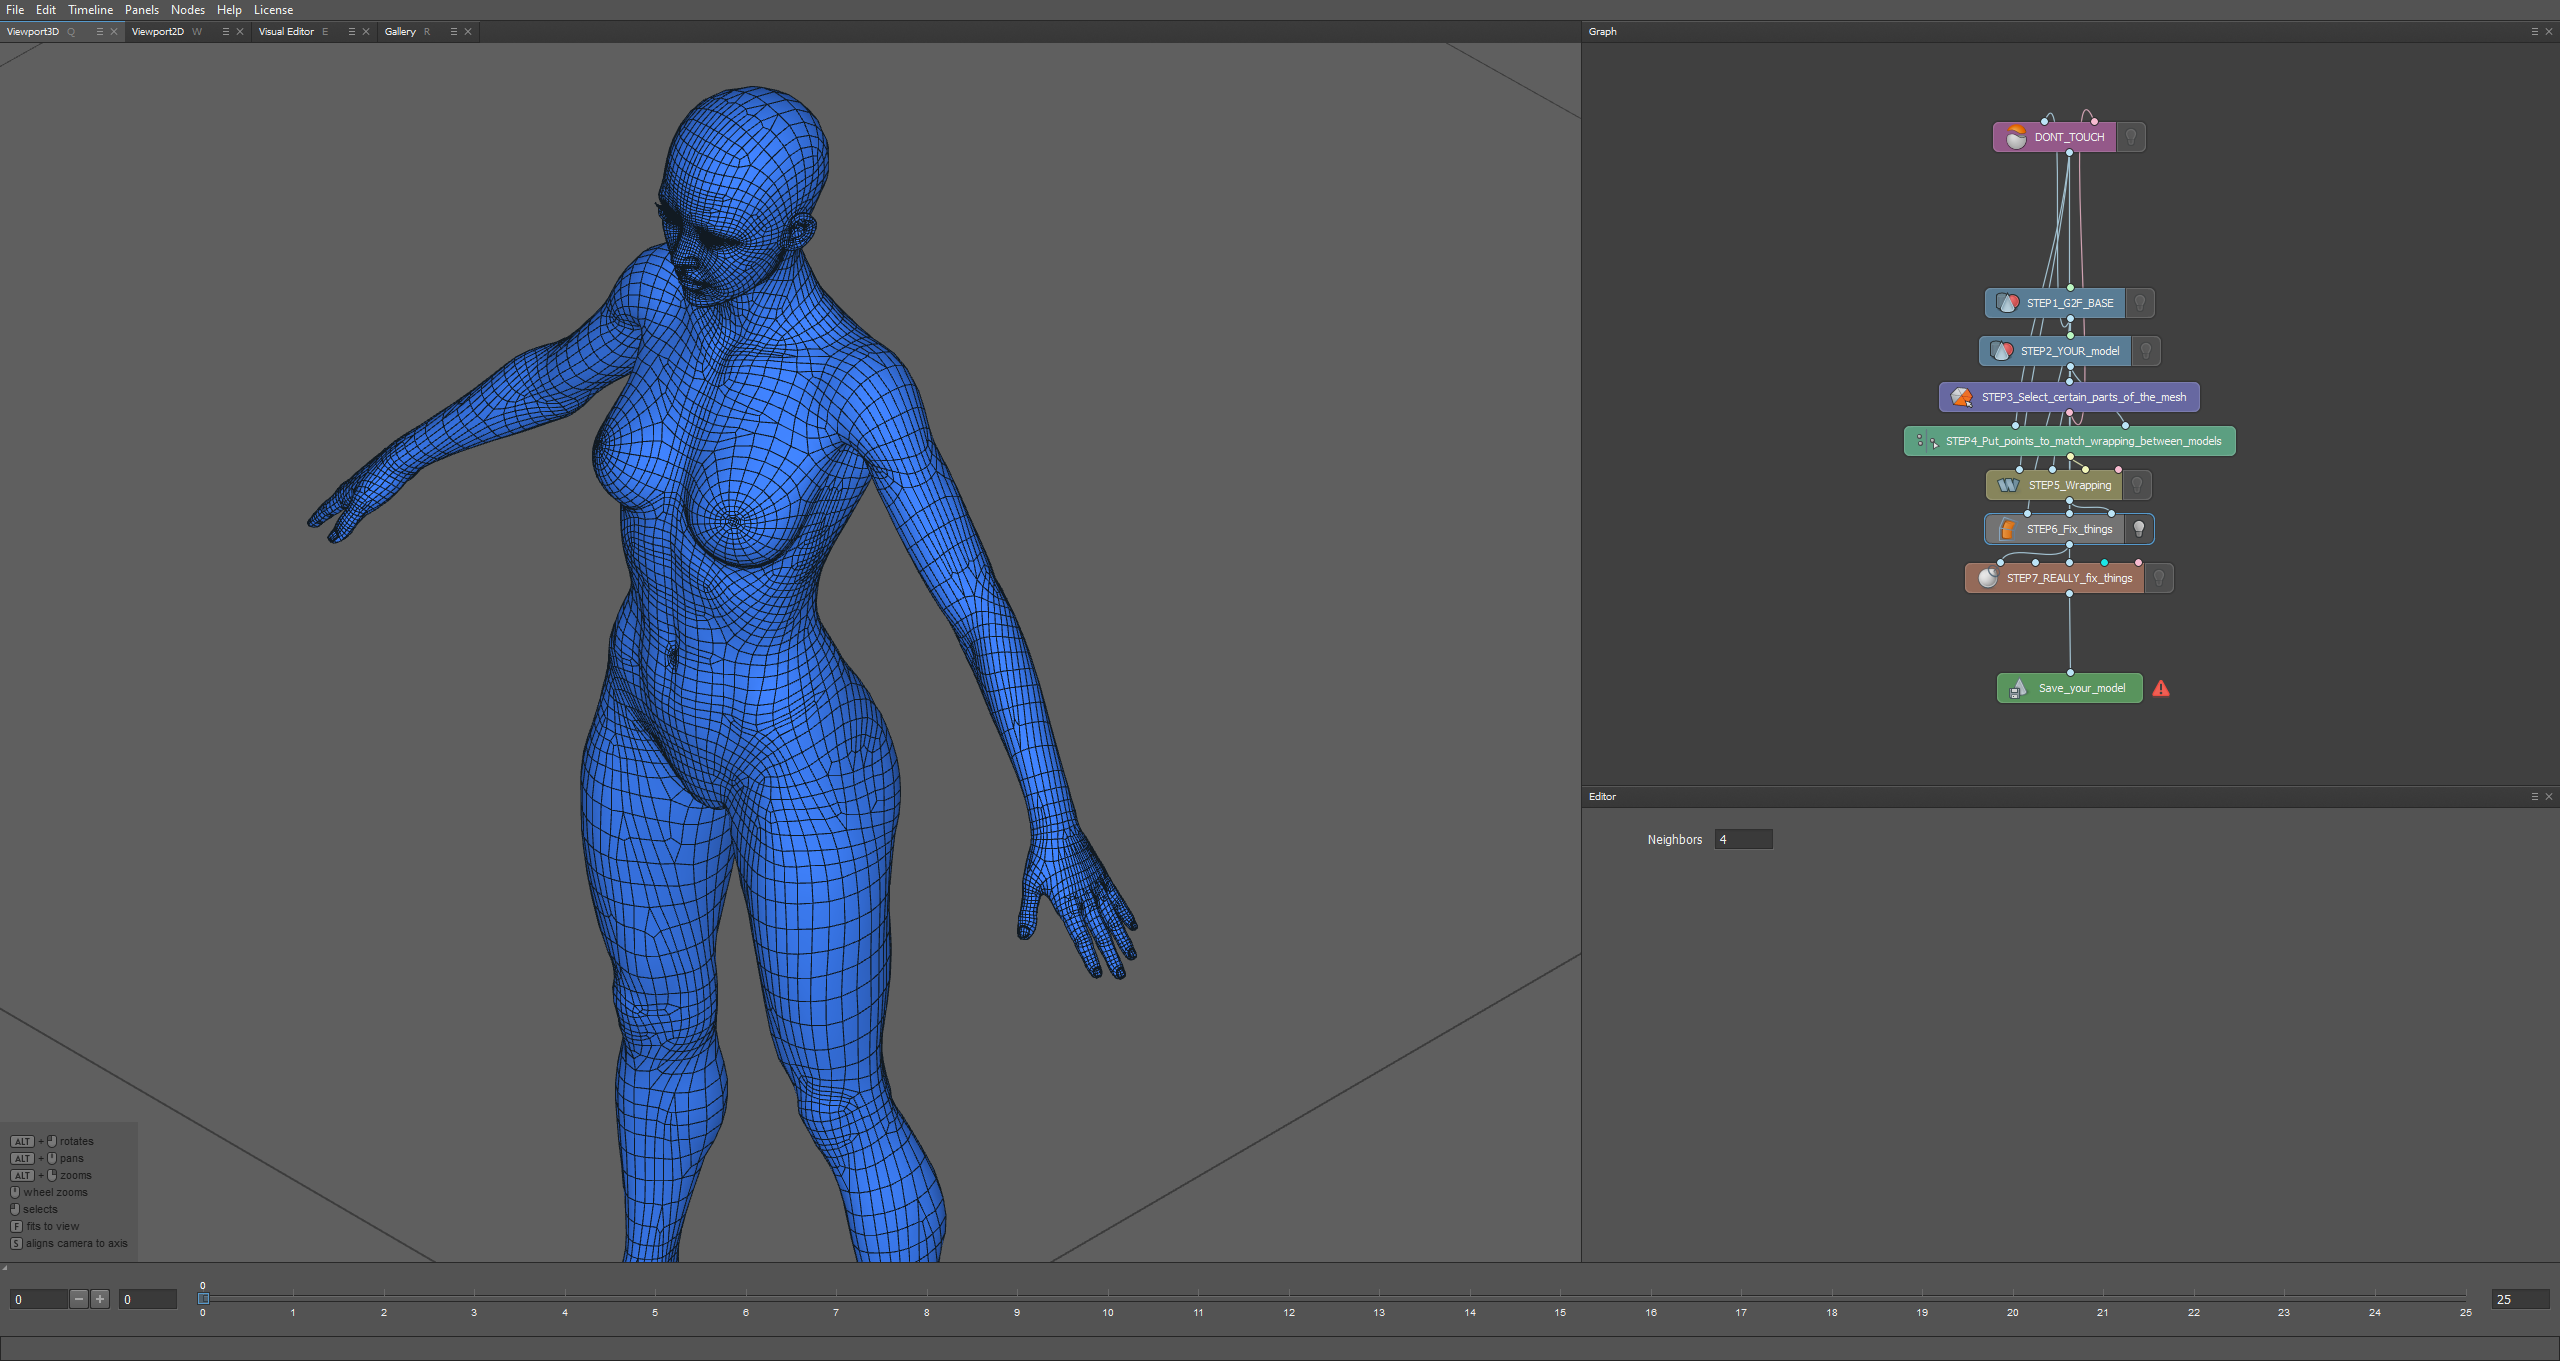
Zooming at the eyes they look a bit fucked don't they? Usually they look a lot more fucked but this time I didn't pay TOO MUCH attention to the eye shape so it turned out not so bad!
But, they're still a bit fucked so we are gonna fix it! I'll teach you a couple of ways I know of fixing the eyes, first of which is STEP6!
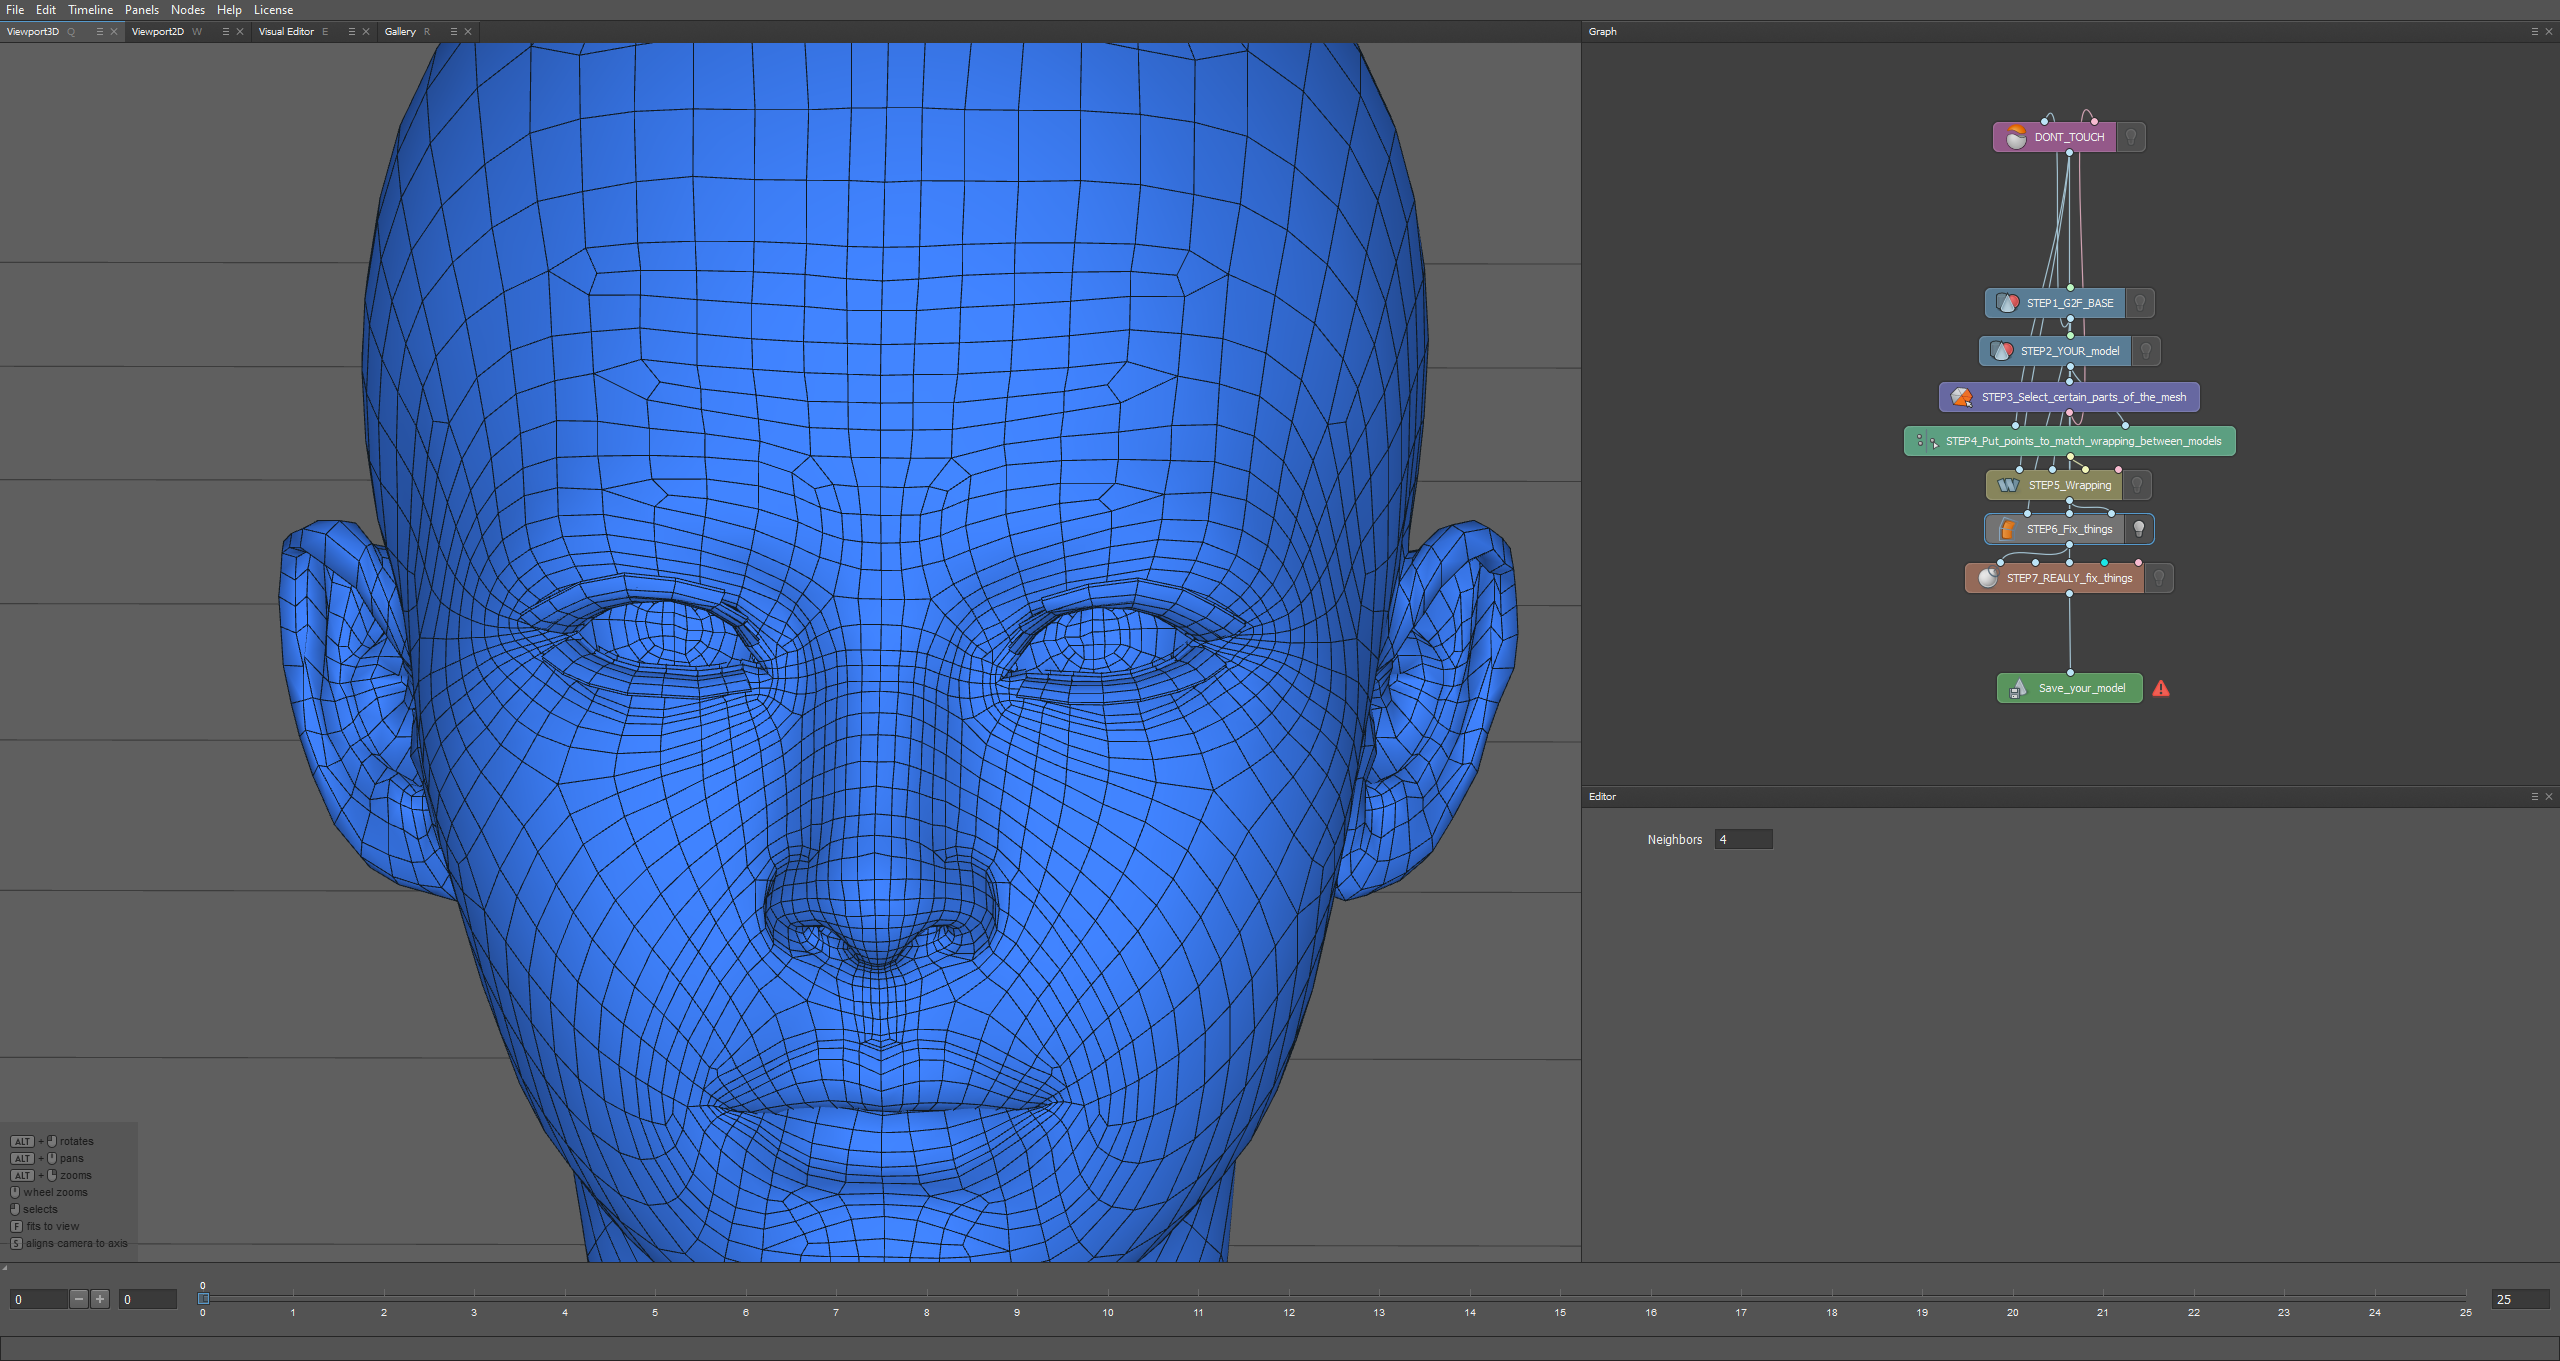
STEP6 is called Lattice it's in my opinion the WORST way to fix eyes, but if it works for you then great!
Changing it from 4 to 15 didn't change much but it changed a bit, It uses nearest neighbour method which imma be honest I don't quite understand it but it kinda ruins the ENTIRE models shape so I mostly refrain from using it.

Now onto my favorite method of fixing the eyes! (sometimes ears as well) STEP7!
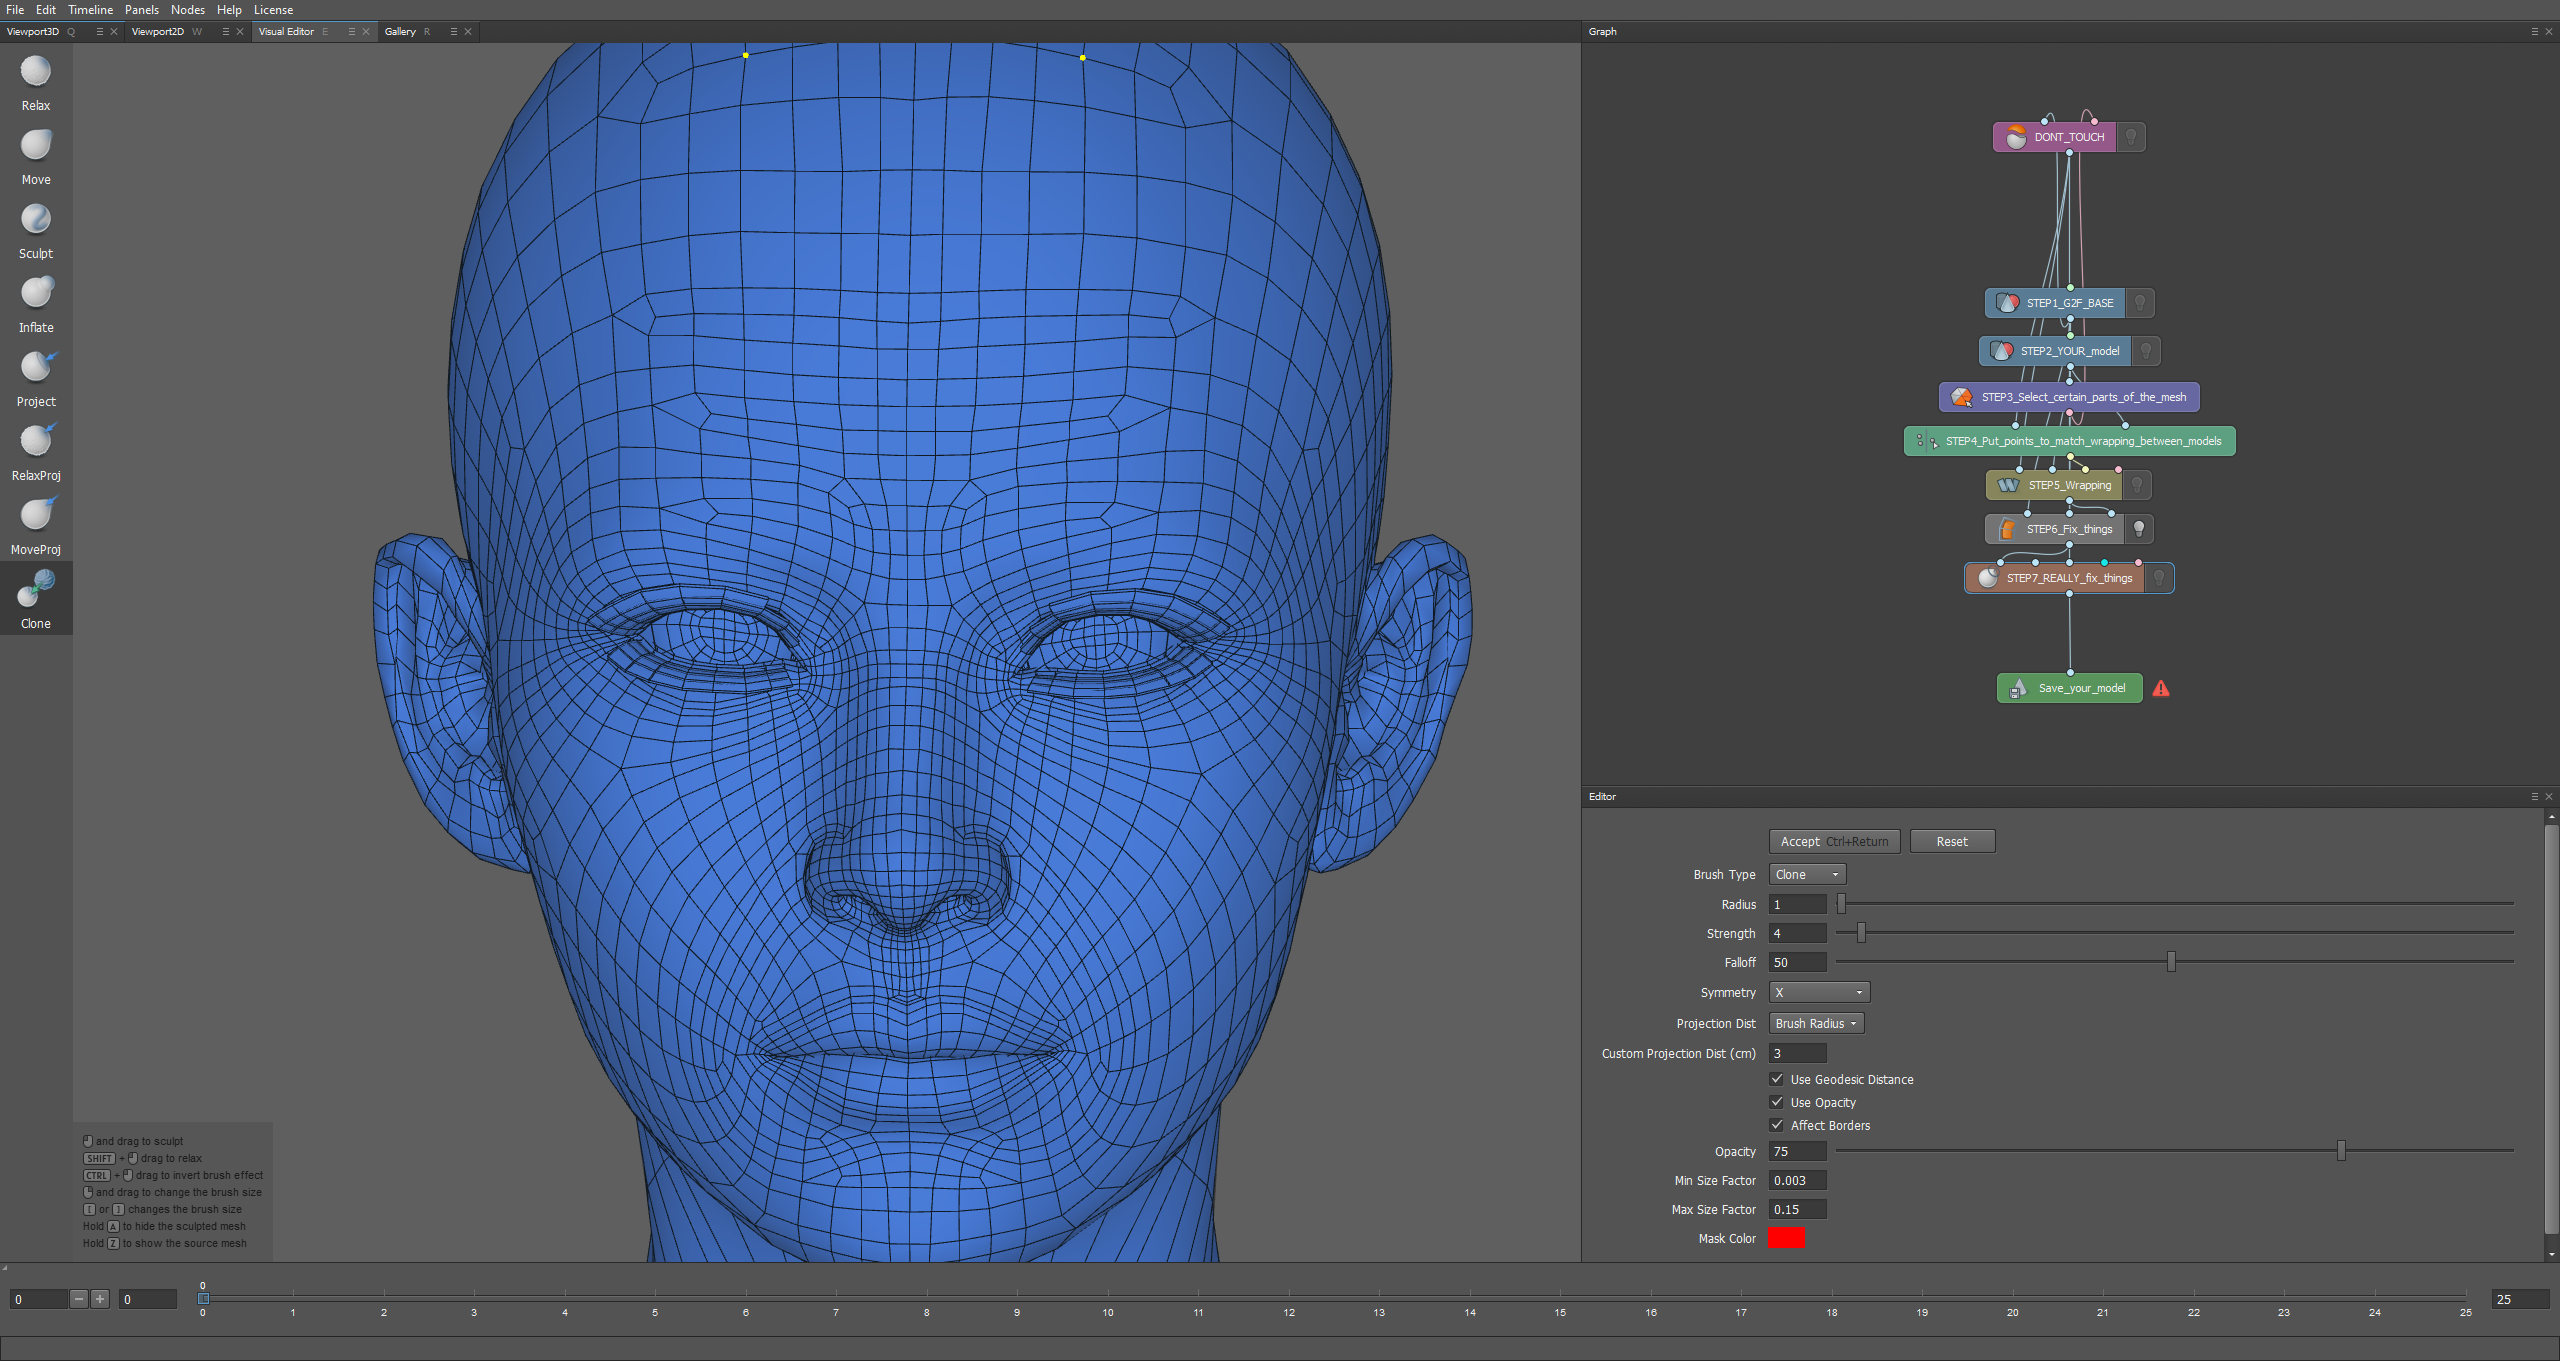
Clicking on STEP7 then going to Visual Editor, will show these tools, You can use whatever tool you want to change the shape, BUT I've changed a couple of settings, mainly Symmetry and Use Geodesic Distance, Symmetry allows me to fix both eyes at the same time! And Use Geodesic Distance allows me to fix/change the eye shape without changing the face shape at all!
What I'd recommend you to use is 100 Radius and 100 Strength so you can fix the eyes faster and restore the original shape! For that you'll need the Clone tool, and for the ears I use Relax lightly.
Now I need you to use your navigation skills to zoom into the the middle of the eye just like this,
You can zoom lightly by holding ALT+Right-click and moving the mouse slightly, I want you to get into the middle of the eye where all parts are visible,
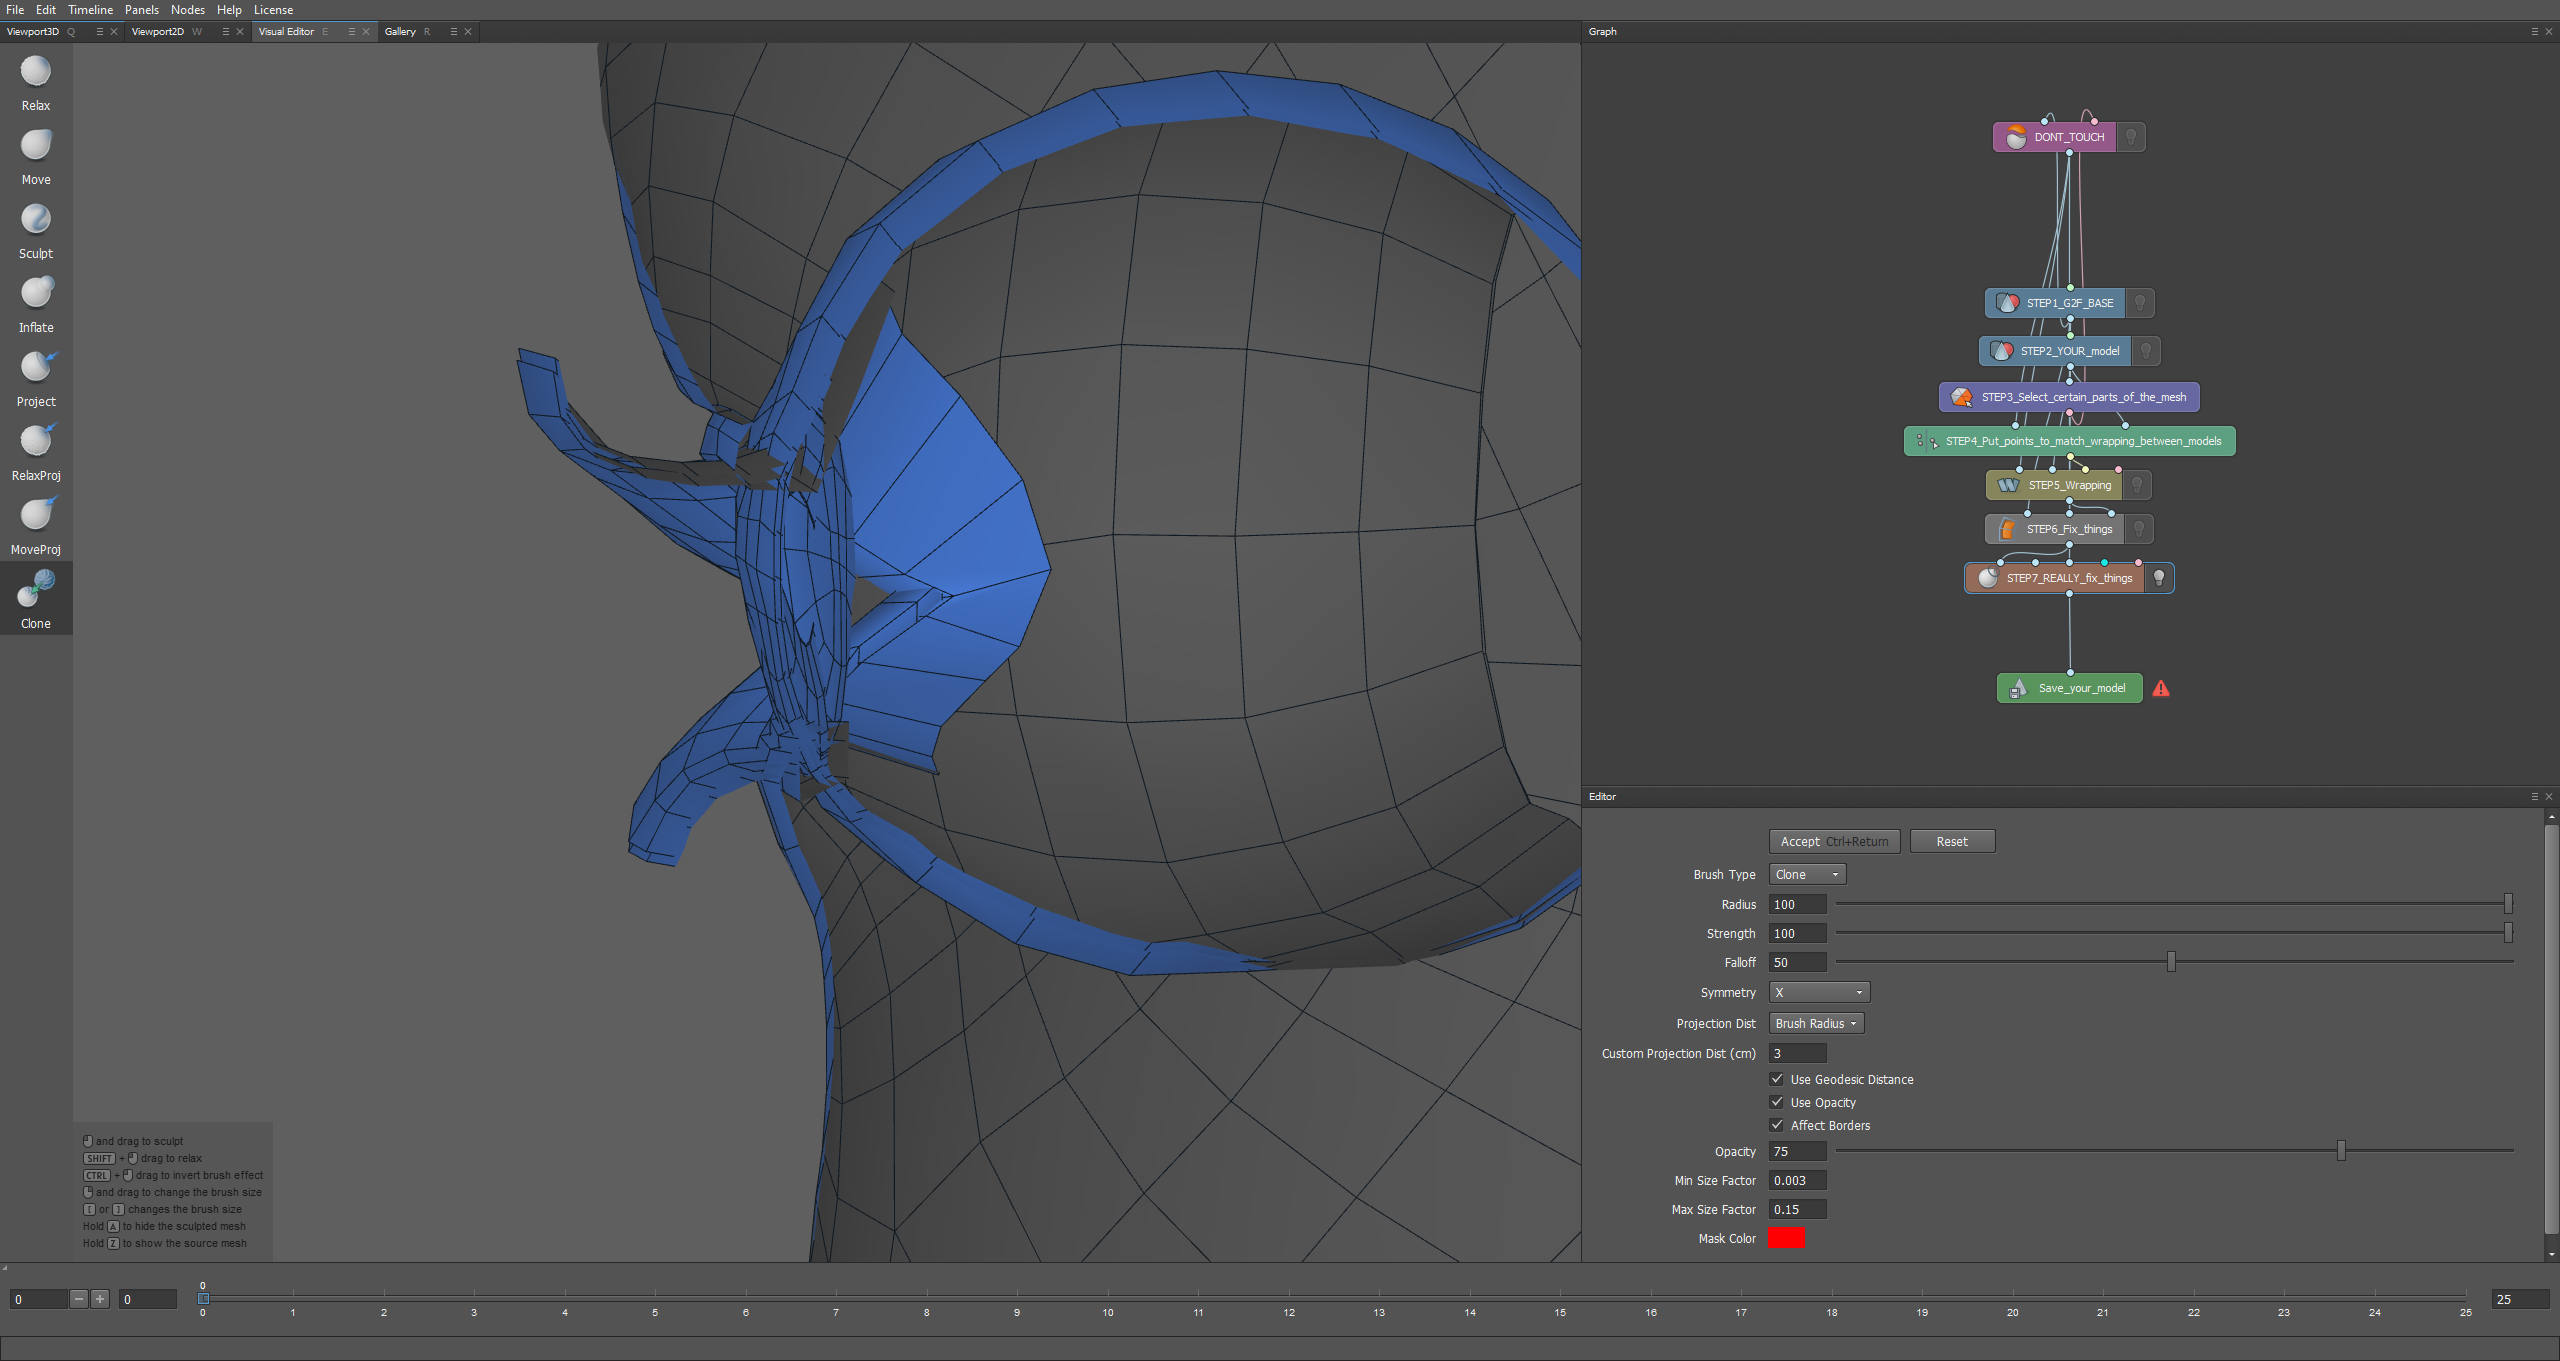
And then I want you to DESTROY those eyes with the clone tool, Just be careful not to touch any face parts or else they'll return to their original shape!
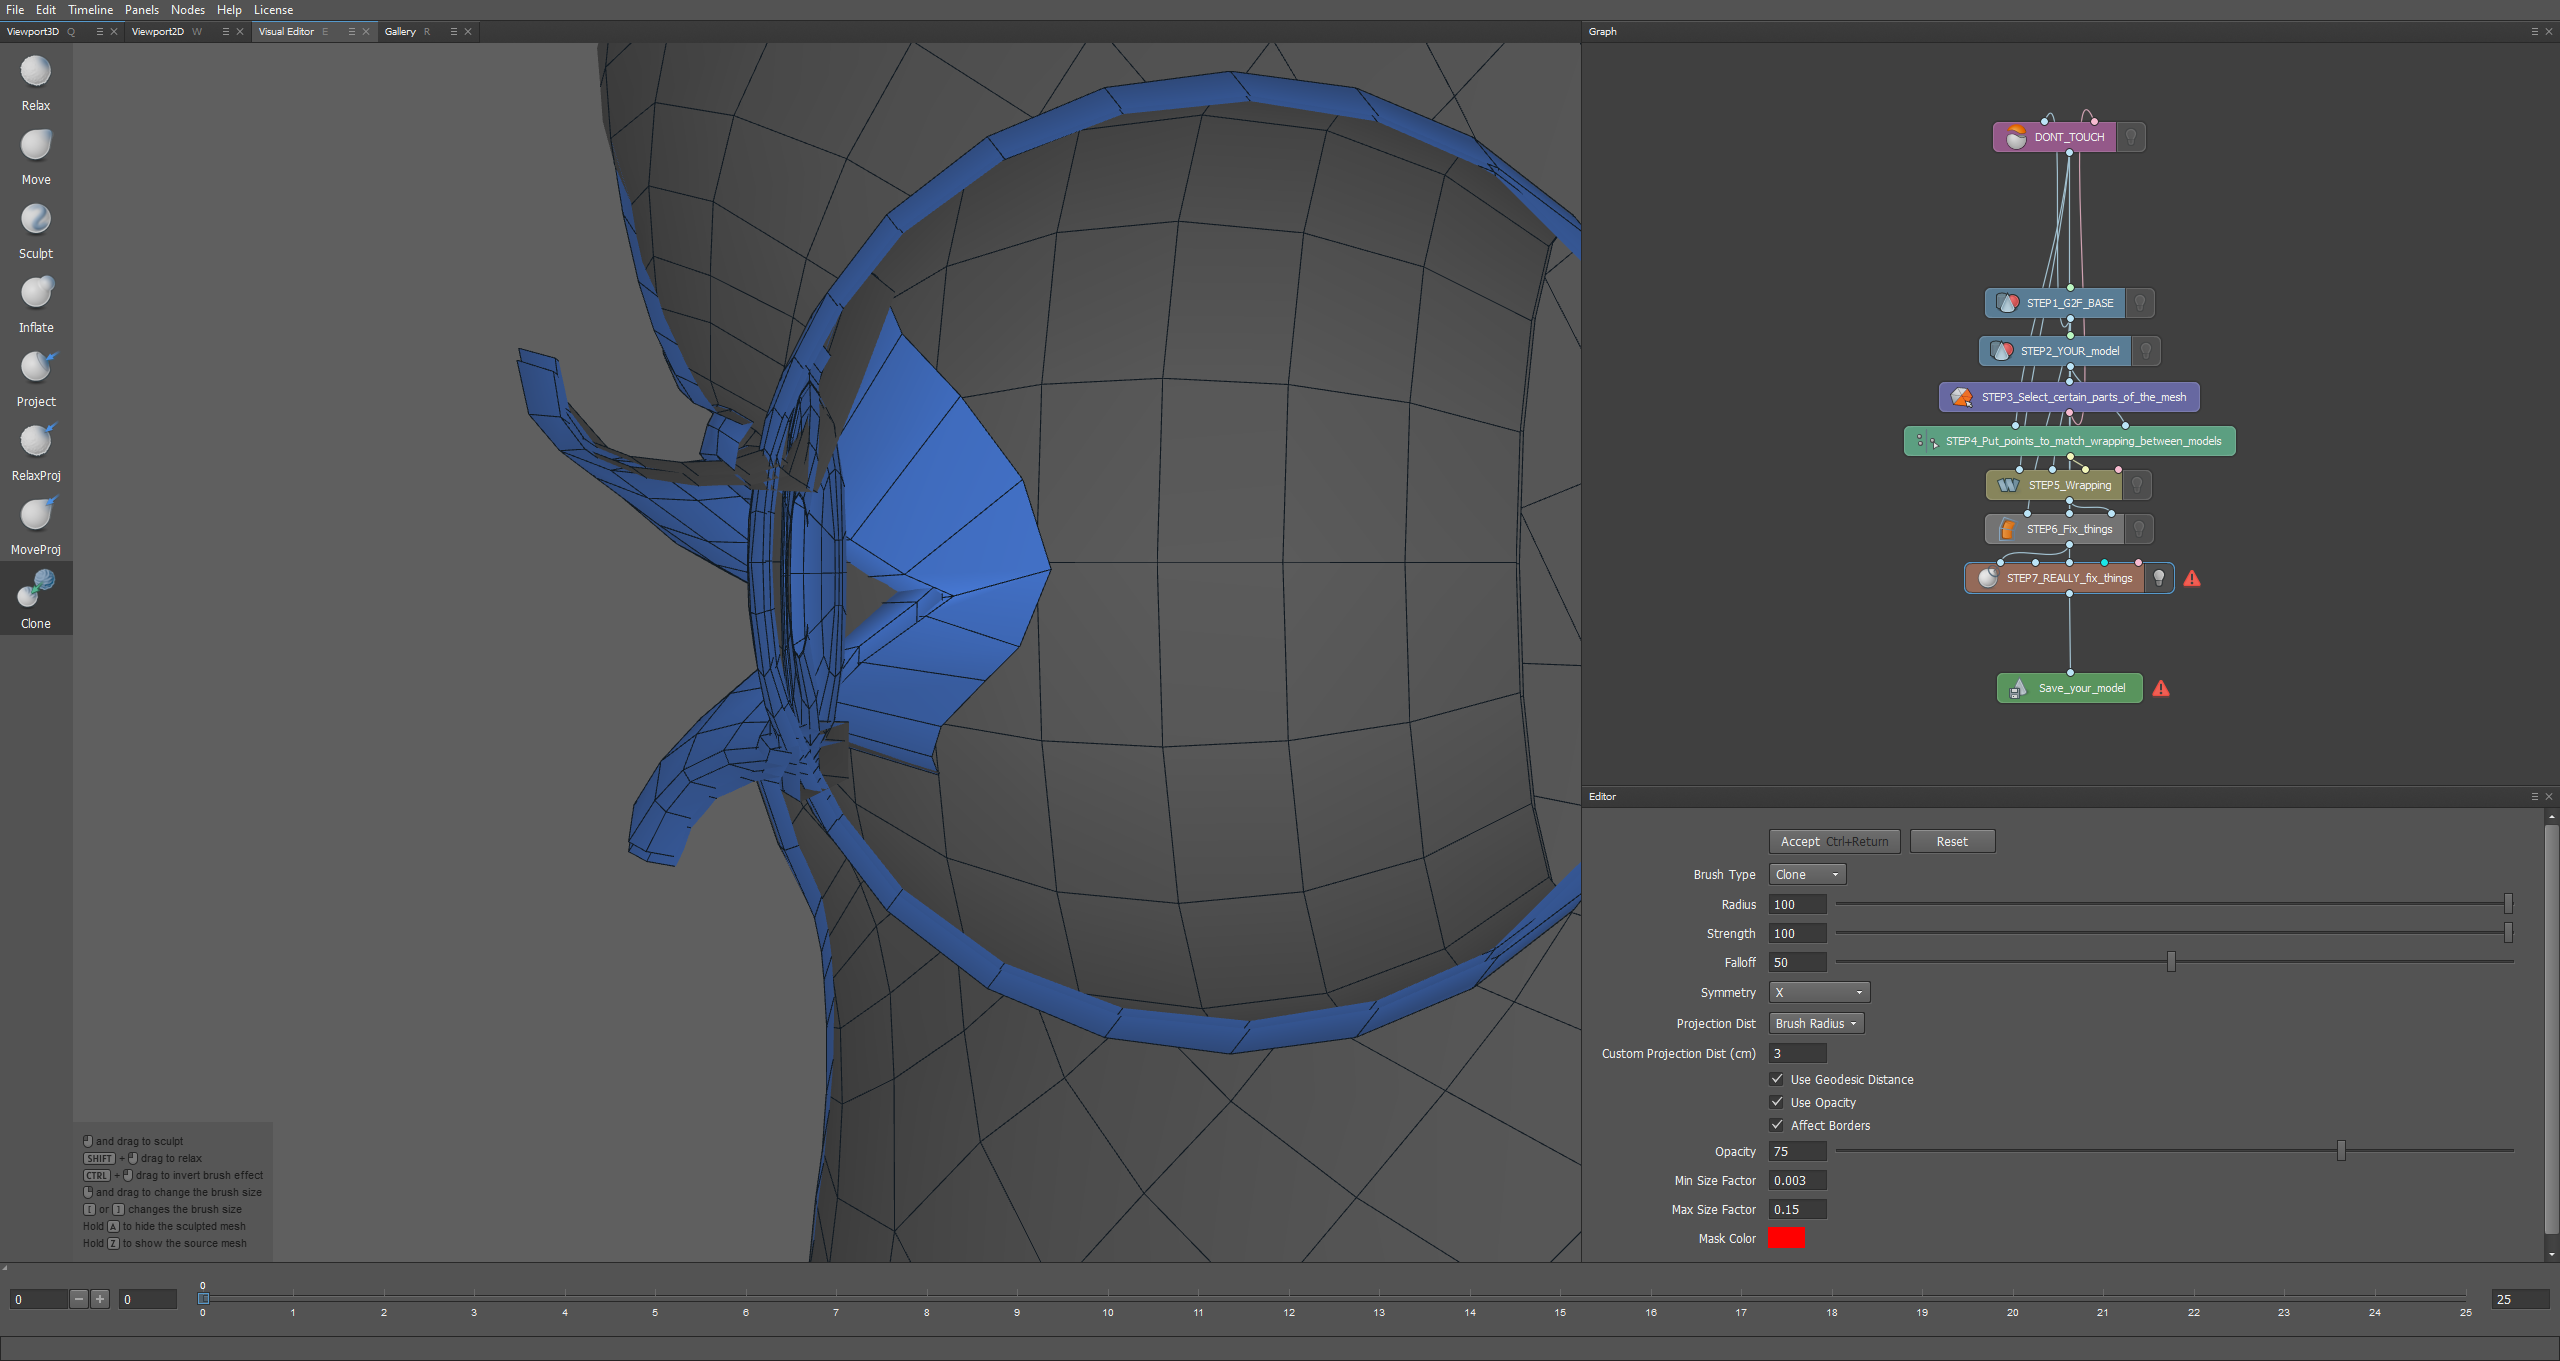
Now the eyes should look like this! Perfect
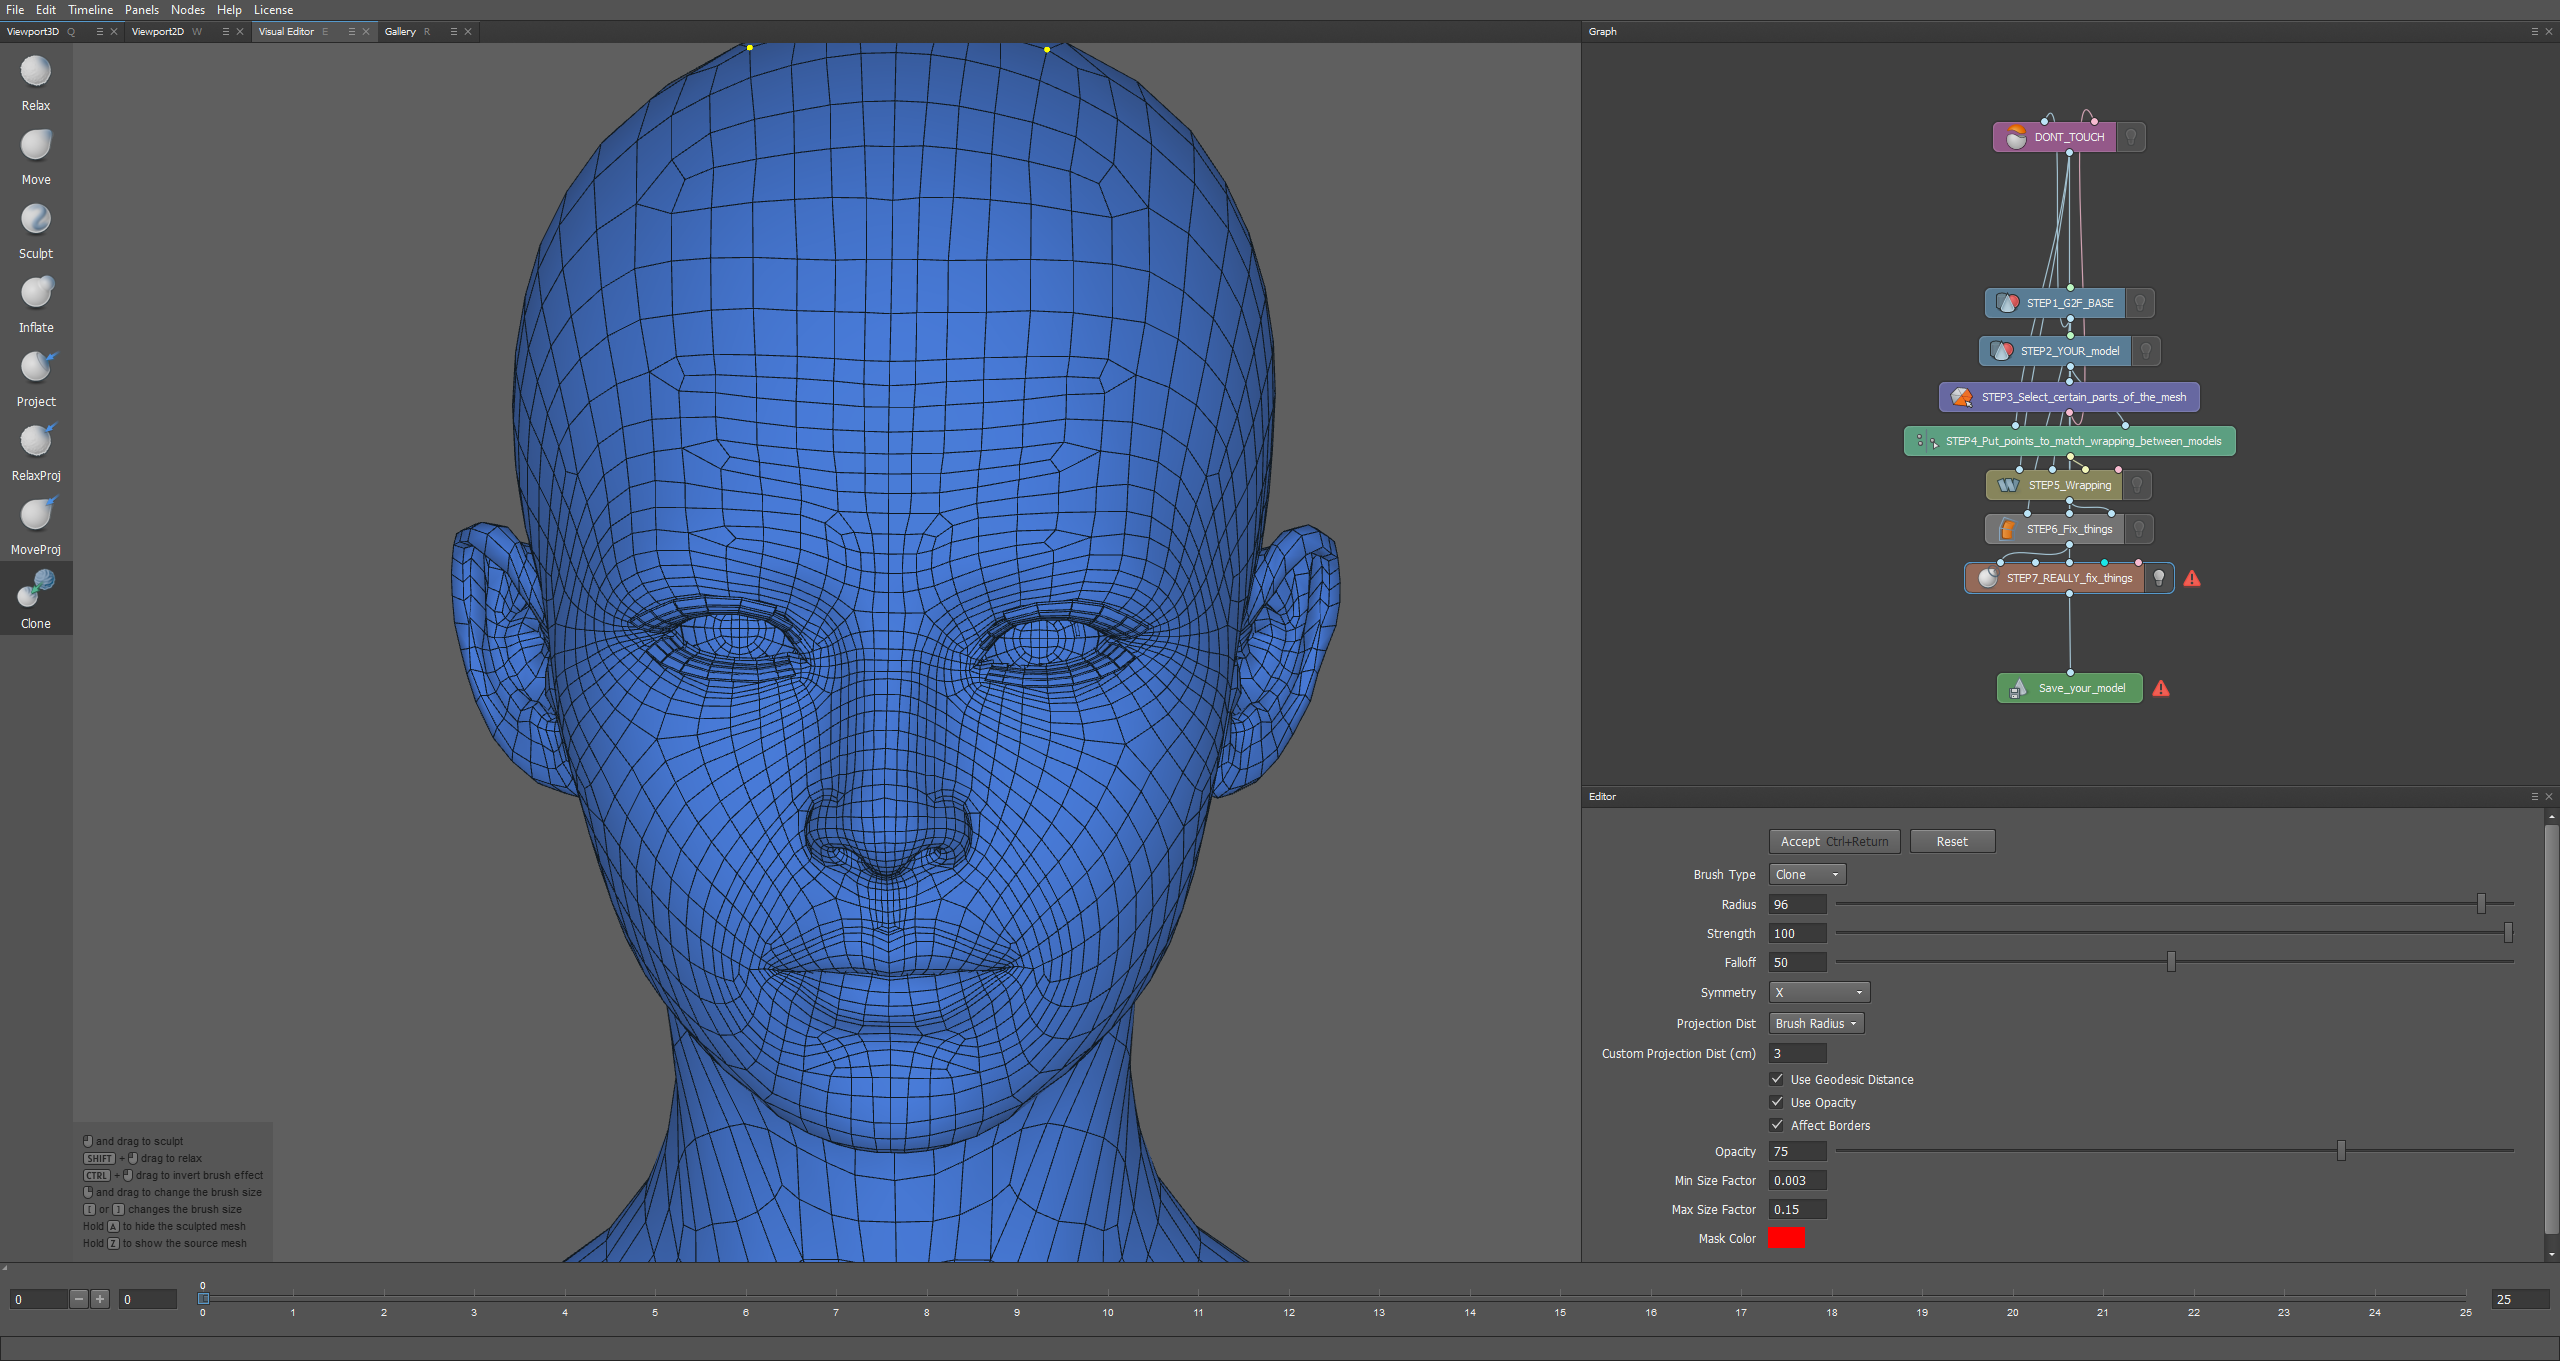
Final Chapter: Wrapping ENDS!
Click Accept on the STEP7 page to apply the changes
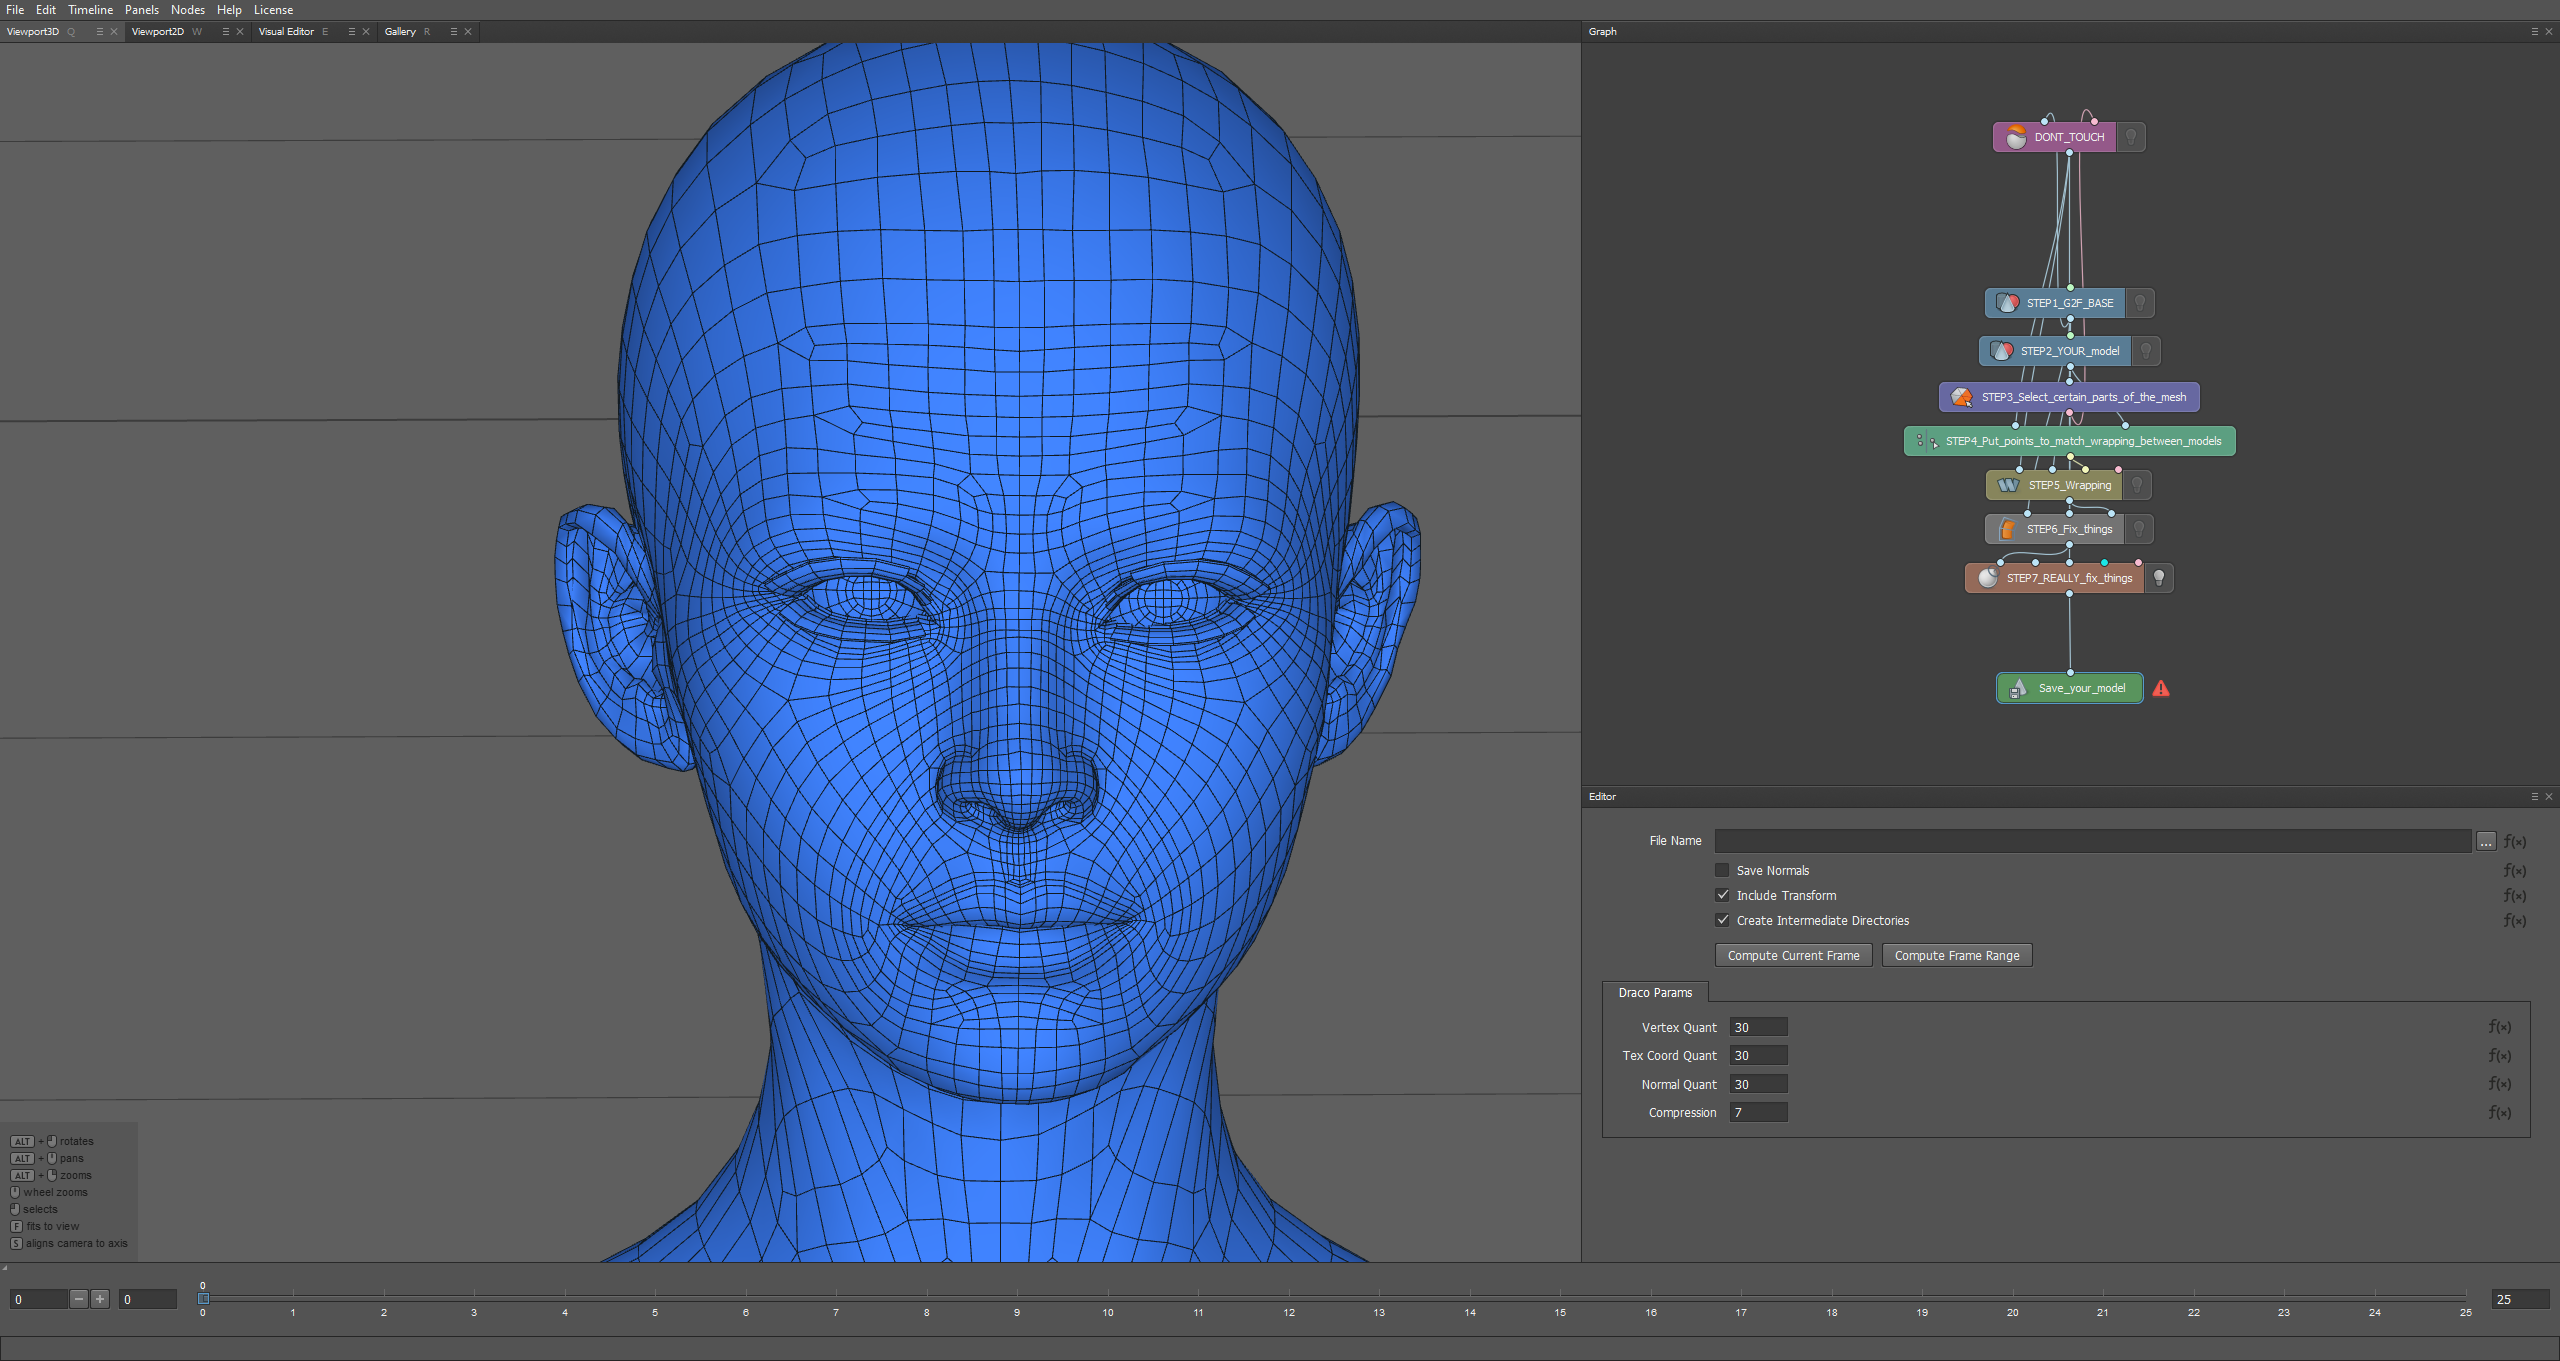
We are ALMOST over with wrapping!
Click on "Save_your_model" then click the 3 dots, choose a path of where to save you model!
Lastly click Compute Current Frame to actually save the model as an .obj file!
Aaaaand DONE!
We're finally done WRAPPING..
In the next guide I'll show you what to do with the newly made .obj file, how to import it into Daz and how to bring it to VAM!
Thank you for reading,
And if you found this guide helpful don't forget to rate!
This is my first guide on the Hub, But I'll make it the best guide for Wrapping!
Before we start you'll need to download 2 things, I'll leave it to you where to install it, But install it in a easy to access/remember place so you can always return to it!
Download/Install steps,
- Download and install R3DS Wrap, Download the 30-day trial version.
- Download my template, which contains the .wrap project we're gonna use and a base res G2F model.
Now the downloads are out of the way, Let's start the guide!
Chapter 1: Getting started!
Launching Wrap3D should bring a menu that looks like this,
After that we need to load my EABAW template! To do that just Click on File>Load Project then head to where you put EndAllBeAllWrapping.wrap and double-click it.
After loading the project it should look something like this!
Don't touch the top one it's not relevant.
Chapter 1 is done, Onto chapter 2!
Chapter 2: Loading the models!
Clicking on STEP1 should bring a menu like bottom right, after that click on the 3 dots and navigate to G2F_BASE.OBJ
Doing so should bring a G2F character onto the scene, but she won't be visible. To make the model visible you have to click on the little light bulb on the node.
The scale by default will be at 1, Leave it at that!
Quick tip navigation controls is at the bottom left!
Chapter 2.1: Now loading the model you want to see in VAM
Click on STEP2 then the 3 dots and navigate to your models .obj double-click it and it should appear! But oh no! my model is massive compared to G2F!
Again do not fret my child! I am here for you! we need to change scale so that OUR model matches G2Fs model, usually 0.4 scale works wonders for me!
I'm going with 0.4 scale, as it's perfect in this case but you can even use 0.37995...
As you can see the poses are a little bit different, but do not fret my child! That is absolutely fine!
Chapter 2 is done, onto chapter 3!
Chapter 3: Separating meshes from G2F!
Click on STEP3 but, it doesn't do anything... Just kidding my friend if you look up you'll notice Visual Editor lights up!
Clicking on it should display something like this!
If everything is done correctly, the model should look like this, mostly red! That means the good parts are already picked for you! Means you're done with STEP3 and skip to Chapter 4!
If not and it looks like this, then you fucked something up..
But don't worry my frined! I'm here for you!
First things first try CTRL+Z if it doesn't fix it then try reloading the project and go through the chapters until you reach this step and most importantly don't click on the screen, if you did and the red color disappears that's fine! Just click CTRL+Z to undo, if that doesn't fix it then try the solution down!
All you have to do is click on +Materials and choose the following,
Doing so will fix the problem (if it ever happened) and now we can move onto Chapter 4!
Chapter 4: The fun part!
Clicking on STEP4 should bring you to a menu like this, If not then go back to Visual editor by clicking {E} or from the tabs up.
In here we'll put tiny dots on the models to let the program know to match the points, for example try clicking on STEP5 and then click compute, the program will start WRAPPING to it's best ability, but it most likely wont end up looking the best, look down
(disable STEP1 and STEP2 lightbulbs and enable STEP5 lightbulb to see results)
As you can see, it mostly looks fine but the fingies are fucked! So we have to tell the program that the pinky goes with the pinky, the ring finger with the ring finger and so on..
And now going back to Visual editor so we can put some dots on those thots! (don't forget to reselect STEP4)
To navigate you have to hold ALT then use the mouse buttons to move around, and again you can see the controls on the bottom left!
Now let's fix the biggest issue, the fingies!
After getting a bit comfortable with the controls let's put the dots on the thots!
G2F left hand done!
OUR models left hand is done as well! now the program will place the fingers in their proper place!
Be sure to put them in the EXACT order, I went right to left for G2F so I HAVE to go right to left in the model I want!
Now let's do the exact same thing for the right hand, the toes and some on the face and nipples so it looks perfect!
And as you can see I put a lot of dots but not too many, you can put as many as you want but MAKE SURE THEY ARE THE SAME NUMBER IN THE SAME PLACE BETWEEN BOTH MODELS!
We're now done with Chapter 4!
Chapter 5: Near the end game!
Go to STEP5 then click compute to start WRAPPING!
Wow look at that! Amazing isn't it?
For now I'm not going to focus on the face too much I'll leave it to you to pay attention to details and perfect your model!
If you're not satisfied with the results yet then redo Chapter 4 by either removing all the dots from the thots and put them again, or add more!
Chapter 6: WRAPPING endgame!
We're ALMOST done,
Switch from STEP5 to STEP6 and disable STEP5s lightbulb and turn on STEP6s lightbulb!
Zooming at the eyes they look a bit fucked don't they? Usually they look a lot more fucked but this time I didn't pay TOO MUCH attention to the eye shape so it turned out not so bad!
But, they're still a bit fucked so we are gonna fix it! I'll teach you a couple of ways I know of fixing the eyes, first of which is STEP6!
STEP6 is called Lattice it's in my opinion the WORST way to fix eyes, but if it works for you then great!
Changing it from 4 to 15 didn't change much but it changed a bit, It uses nearest neighbour method which imma be honest I don't quite understand it but it kinda ruins the ENTIRE models shape so I mostly refrain from using it.
Now onto my favorite method of fixing the eyes! (sometimes ears as well) STEP7!
Clicking on STEP7 then going to Visual Editor, will show these tools, You can use whatever tool you want to change the shape, BUT I've changed a couple of settings, mainly Symmetry and Use Geodesic Distance, Symmetry allows me to fix both eyes at the same time! And Use Geodesic Distance allows me to fix/change the eye shape without changing the face shape at all!
What I'd recommend you to use is 100 Radius and 100 Strength so you can fix the eyes faster and restore the original shape! For that you'll need the Clone tool, and for the ears I use Relax lightly.
Now I need you to use your navigation skills to zoom into the the middle of the eye just like this,
You can zoom lightly by holding ALT+Right-click and moving the mouse slightly, I want you to get into the middle of the eye where all parts are visible,
And then I want you to DESTROY those eyes with the clone tool, Just be careful not to touch any face parts or else they'll return to their original shape!
Now the eyes should look like this! Perfect
Final Chapter: Wrapping ENDS!
Click Accept on the STEP7 page to apply the changes
We are ALMOST over with wrapping!
Click on "Save_your_model" then click the 3 dots, choose a path of where to save you model!
Lastly click Compute Current Frame to actually save the model as an .obj file!
Aaaaand DONE!
We're finally done WRAPPING..
In the next guide I'll show you what to do with the newly made .obj file, how to import it into Daz and how to bring it to VAM!
Thank you for reading,
And if you found this guide helpful don't forget to rate!


