This is just a quick workflow / guide on how i do my faces as someone has requested it.
By no means am i an expert in VAM or Guides but i hope this helps people.
I use facegen and a program called OnTopReplica for my looks and i wont be covering it in this guide as the requester is already familiar with both . OnTopReplica is simply used to overlay the original photo in VAM.
1. Load your Facegen results into VAM and overlay the orginal image of your desired look your attempting with OnTopReplica.
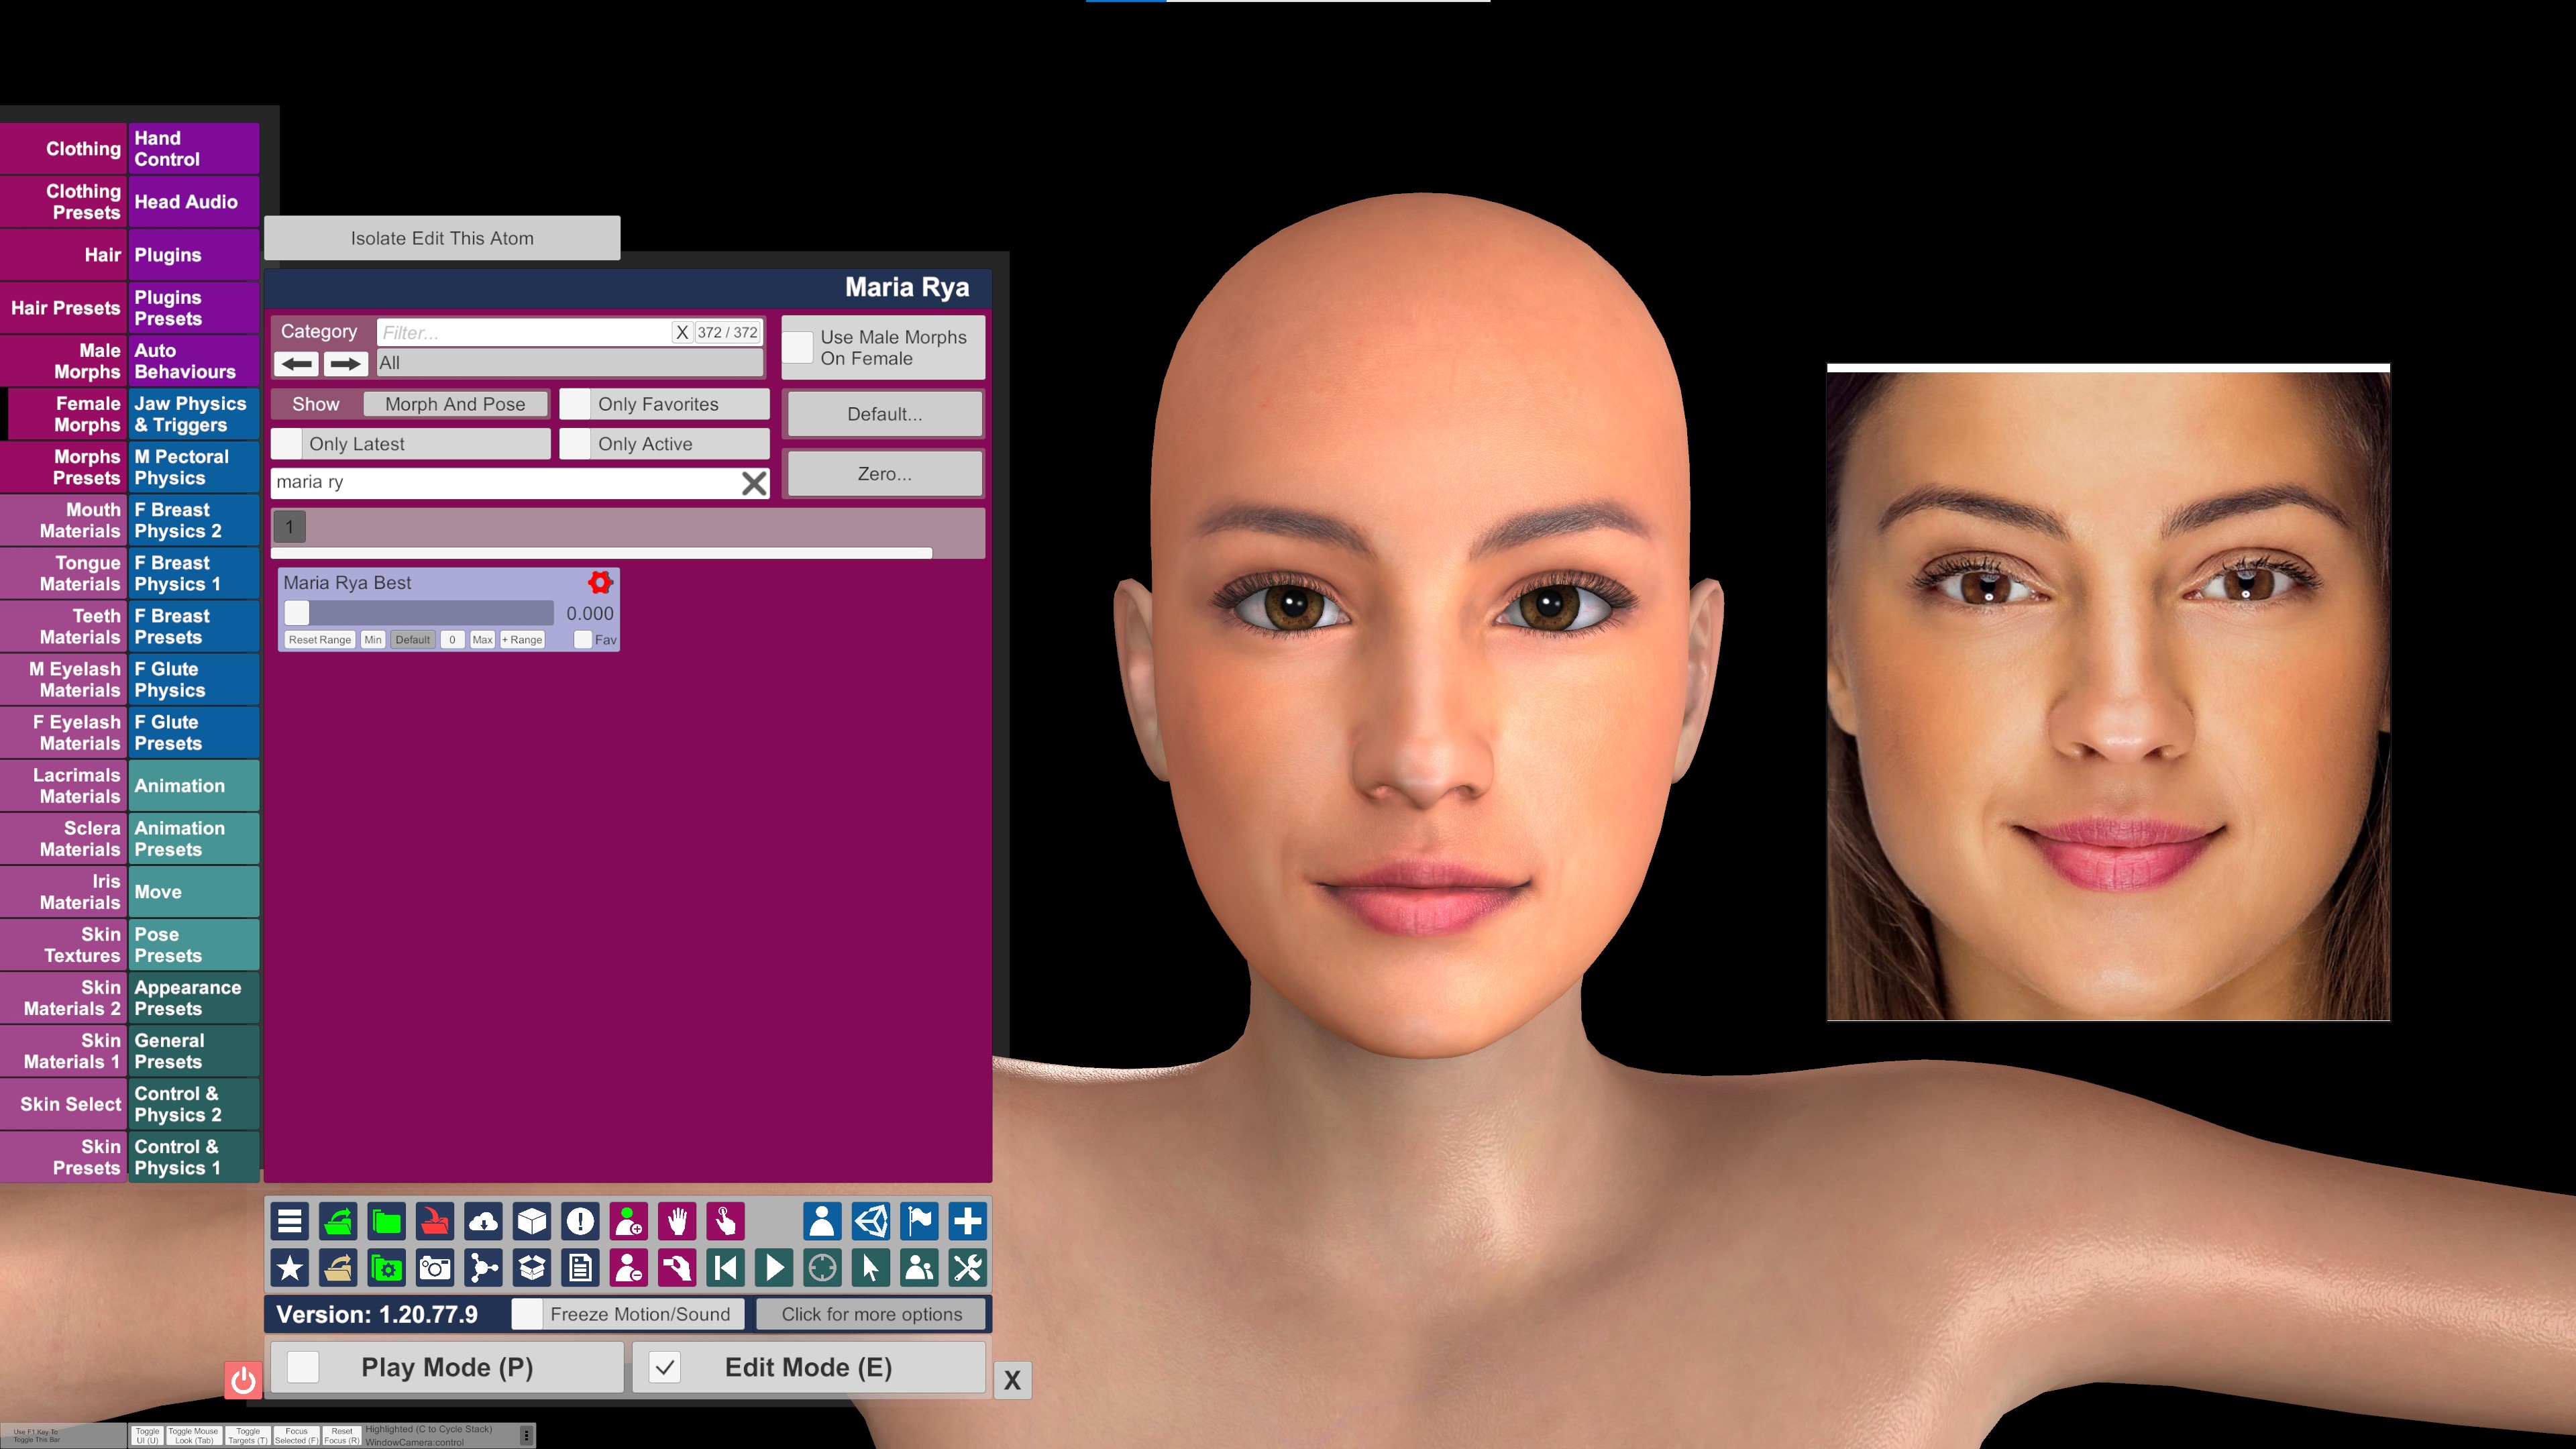
2.Find the Morph created by facegen and set the slider to between 0.550 to 0.650 and NOT 1.000.
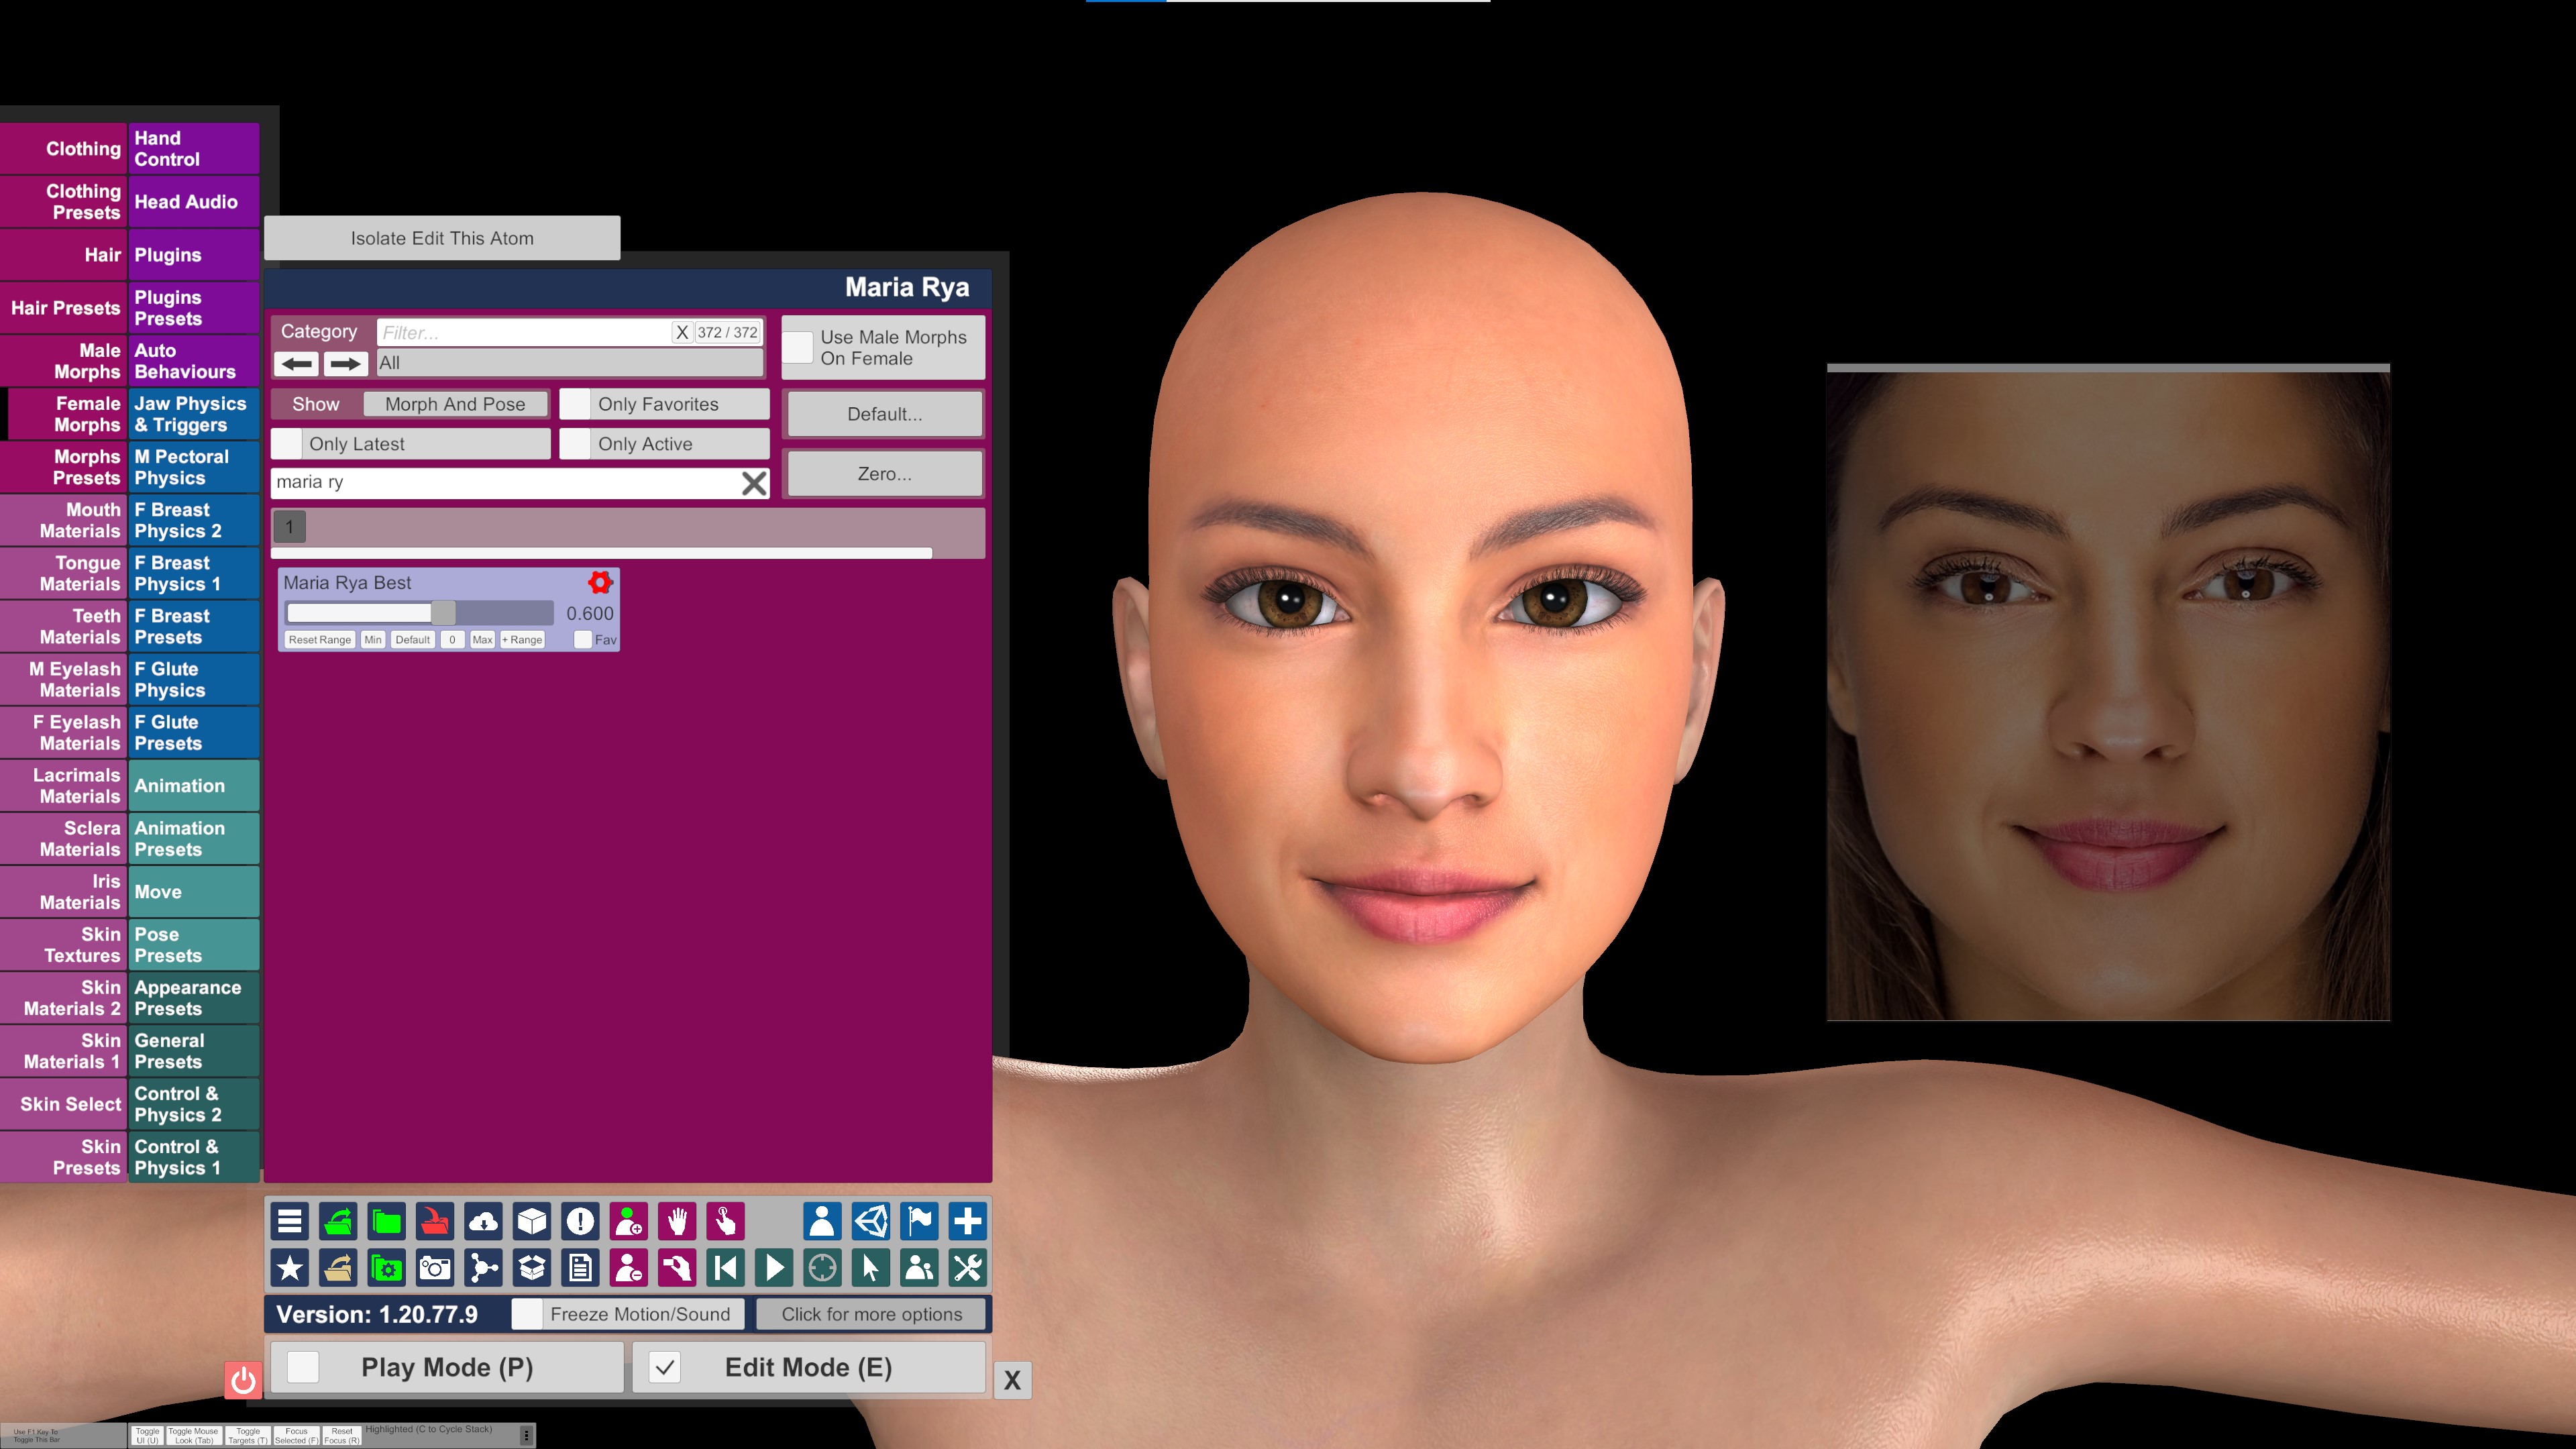
I set it to around 0.600 and find this is best , if set to 1.000 for some reason the Morph is way off the target look and is a well known thing with facegen. Below are images of the Morph set to 1.000 and 0.600.


3. Set the opacity of the OnTopReplica image to 50% and lay it over the face of the Vam model .
I find that facegen always gets the eyes height wrong and also the eye size , so tweak both to your liking as close to the target look as possible and use the rest of the sliders for eye shape etc.
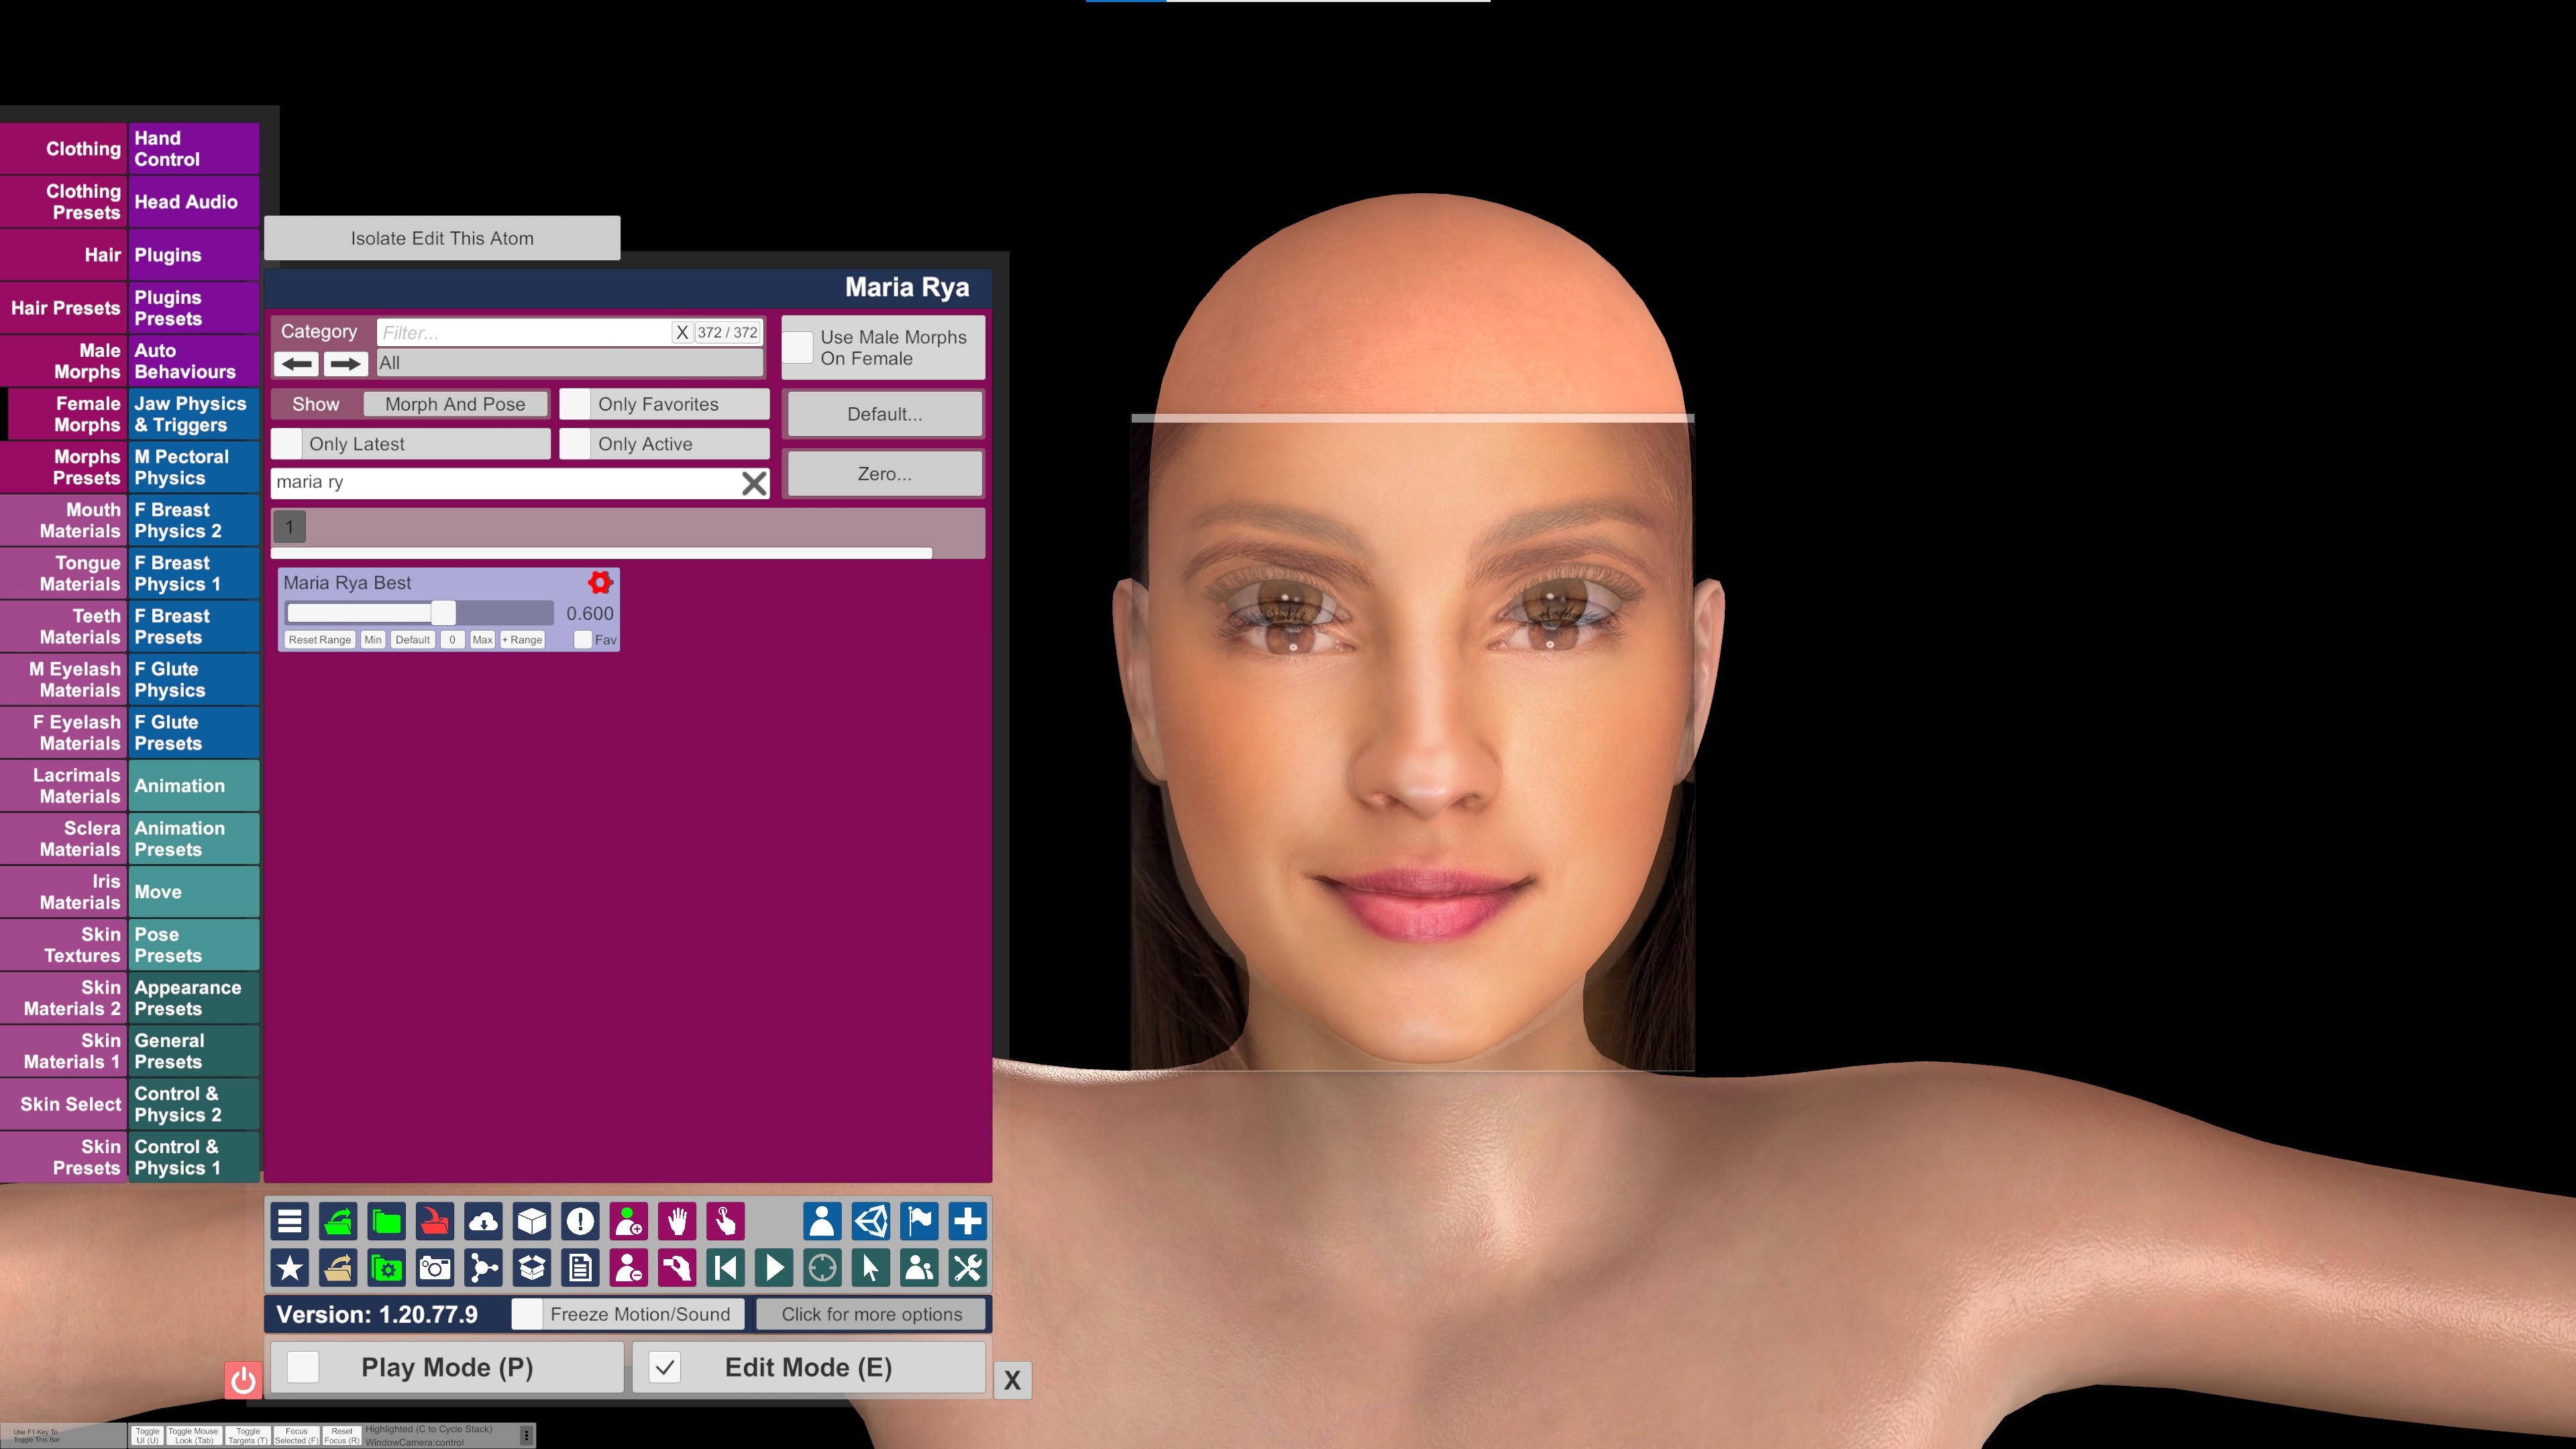
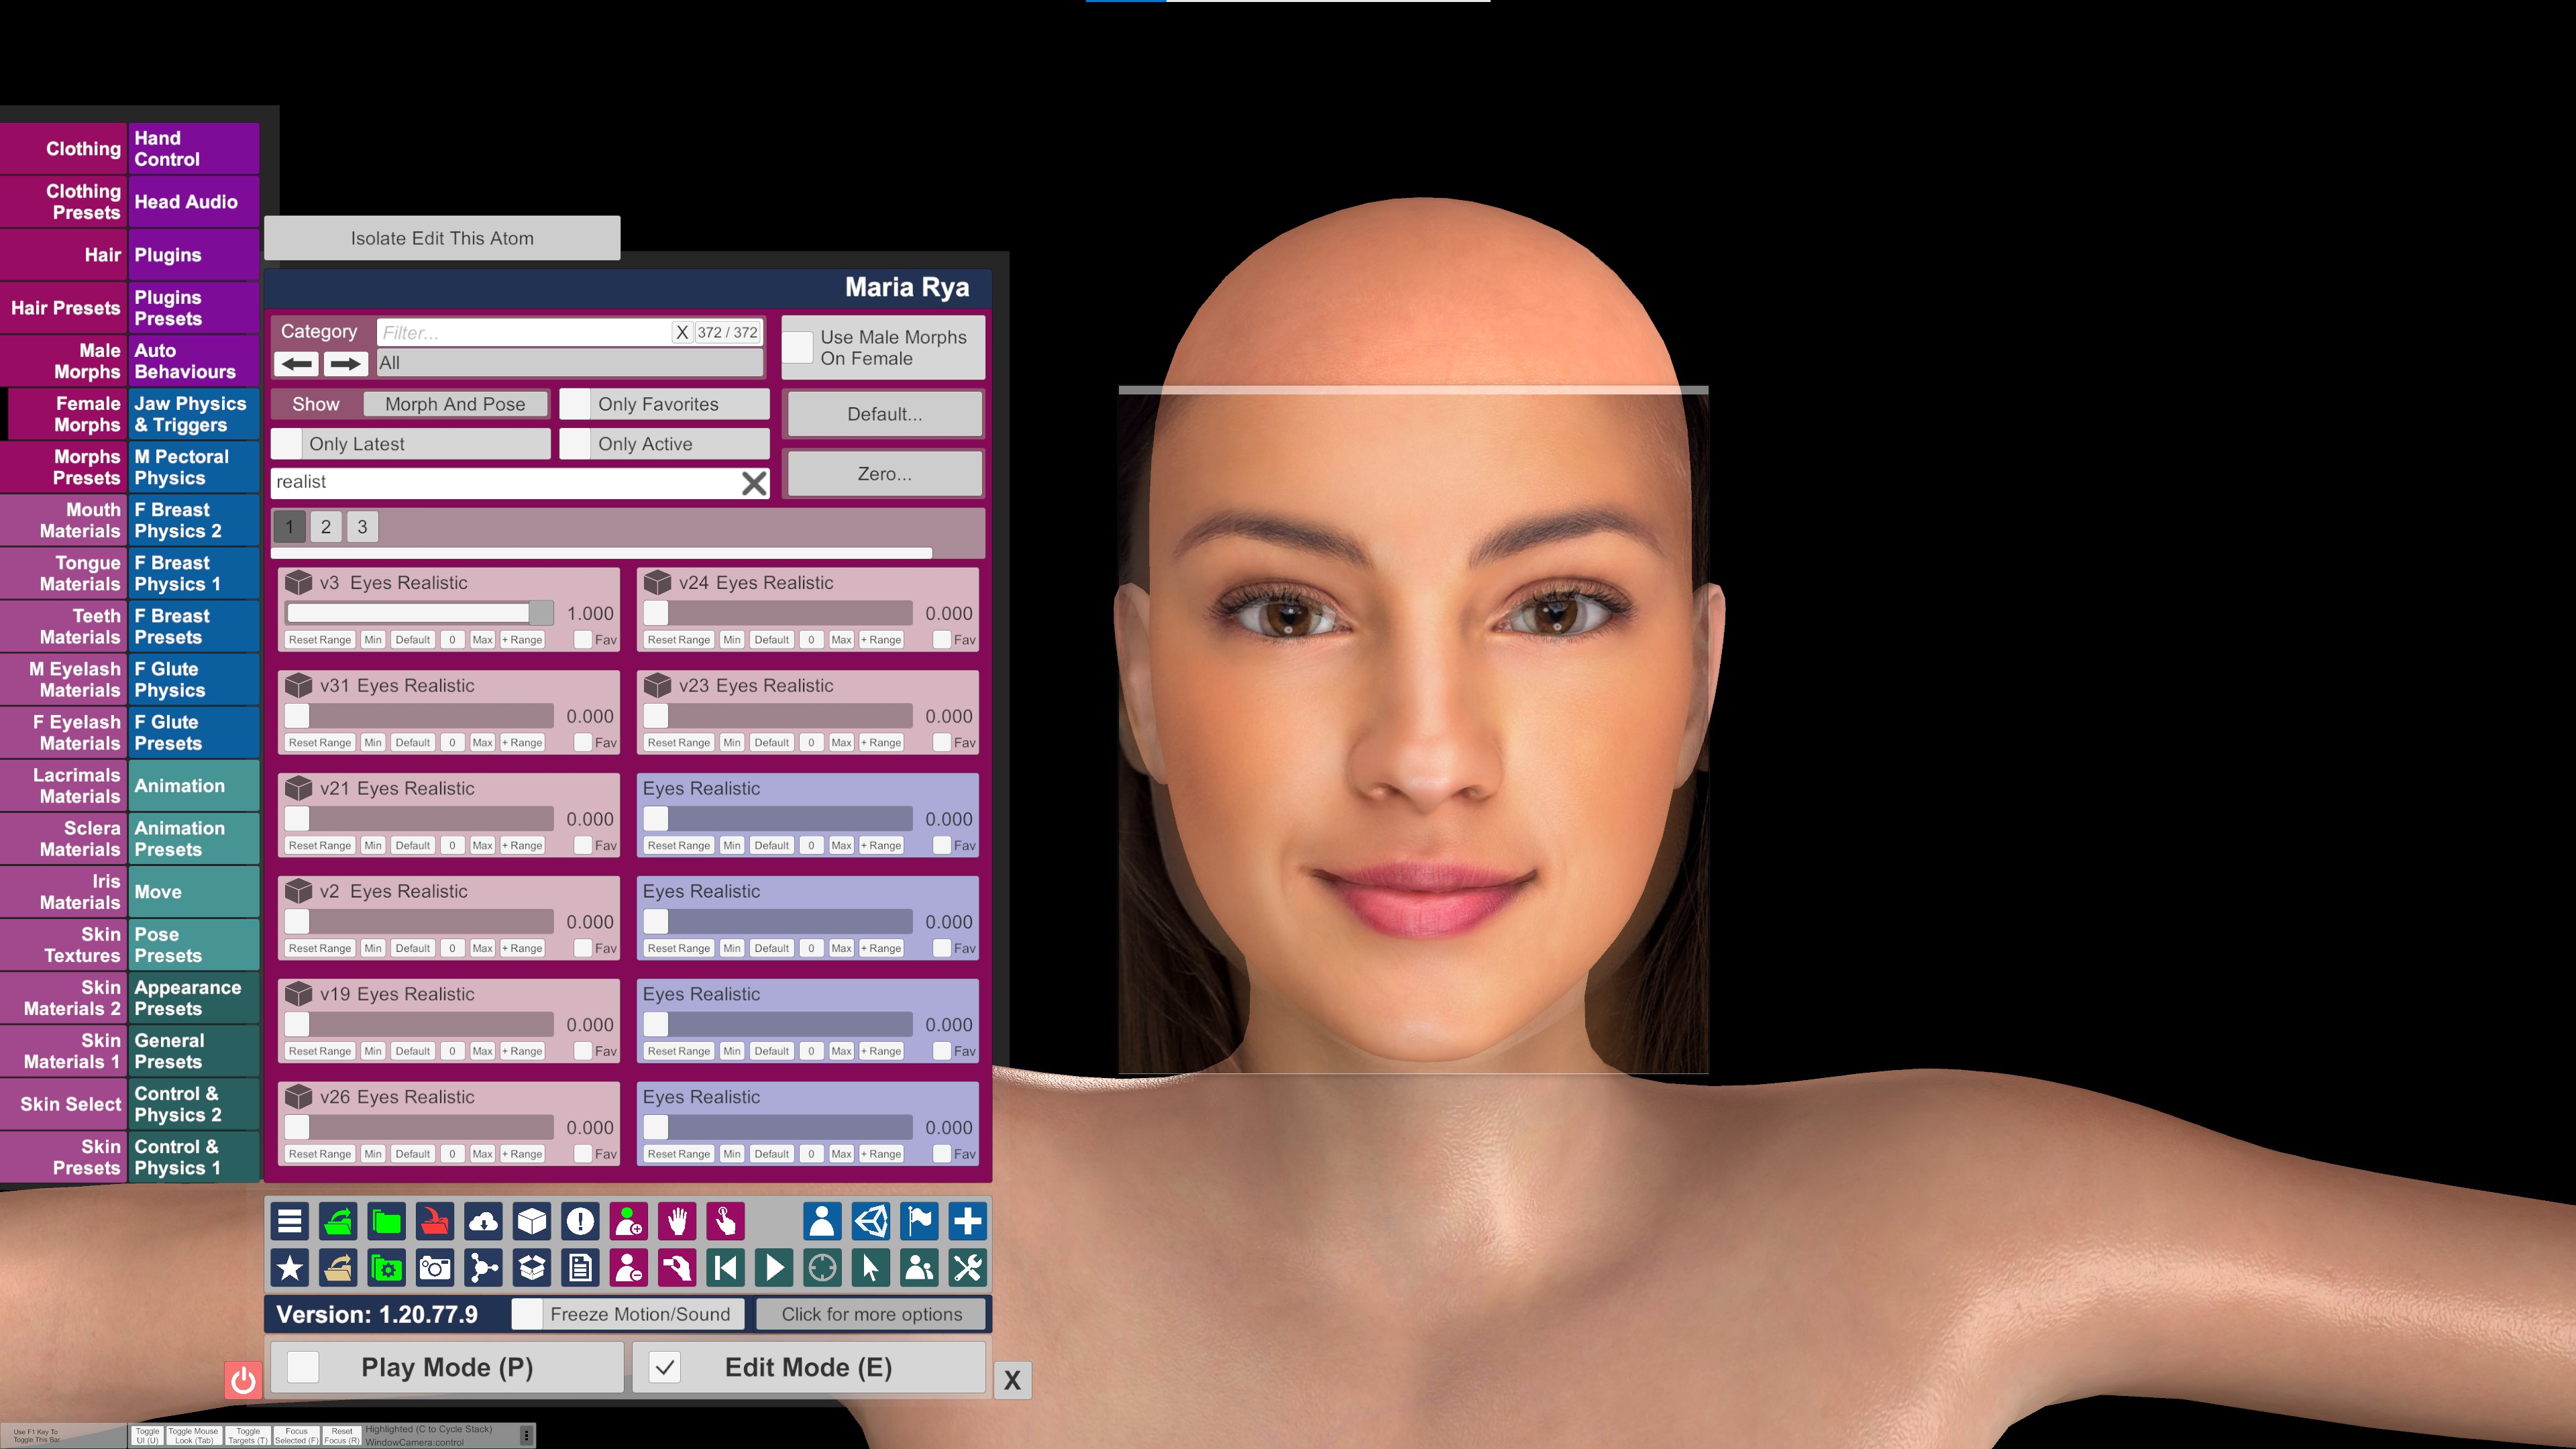
Take note of the eyeball shadow being behind the eye due to the scale being to big , this seems to be a facgen thing so asi said , scale down the eyeball size to fix. i usually scale down until the eyeball shadow shows correctly as shown in the pics below.
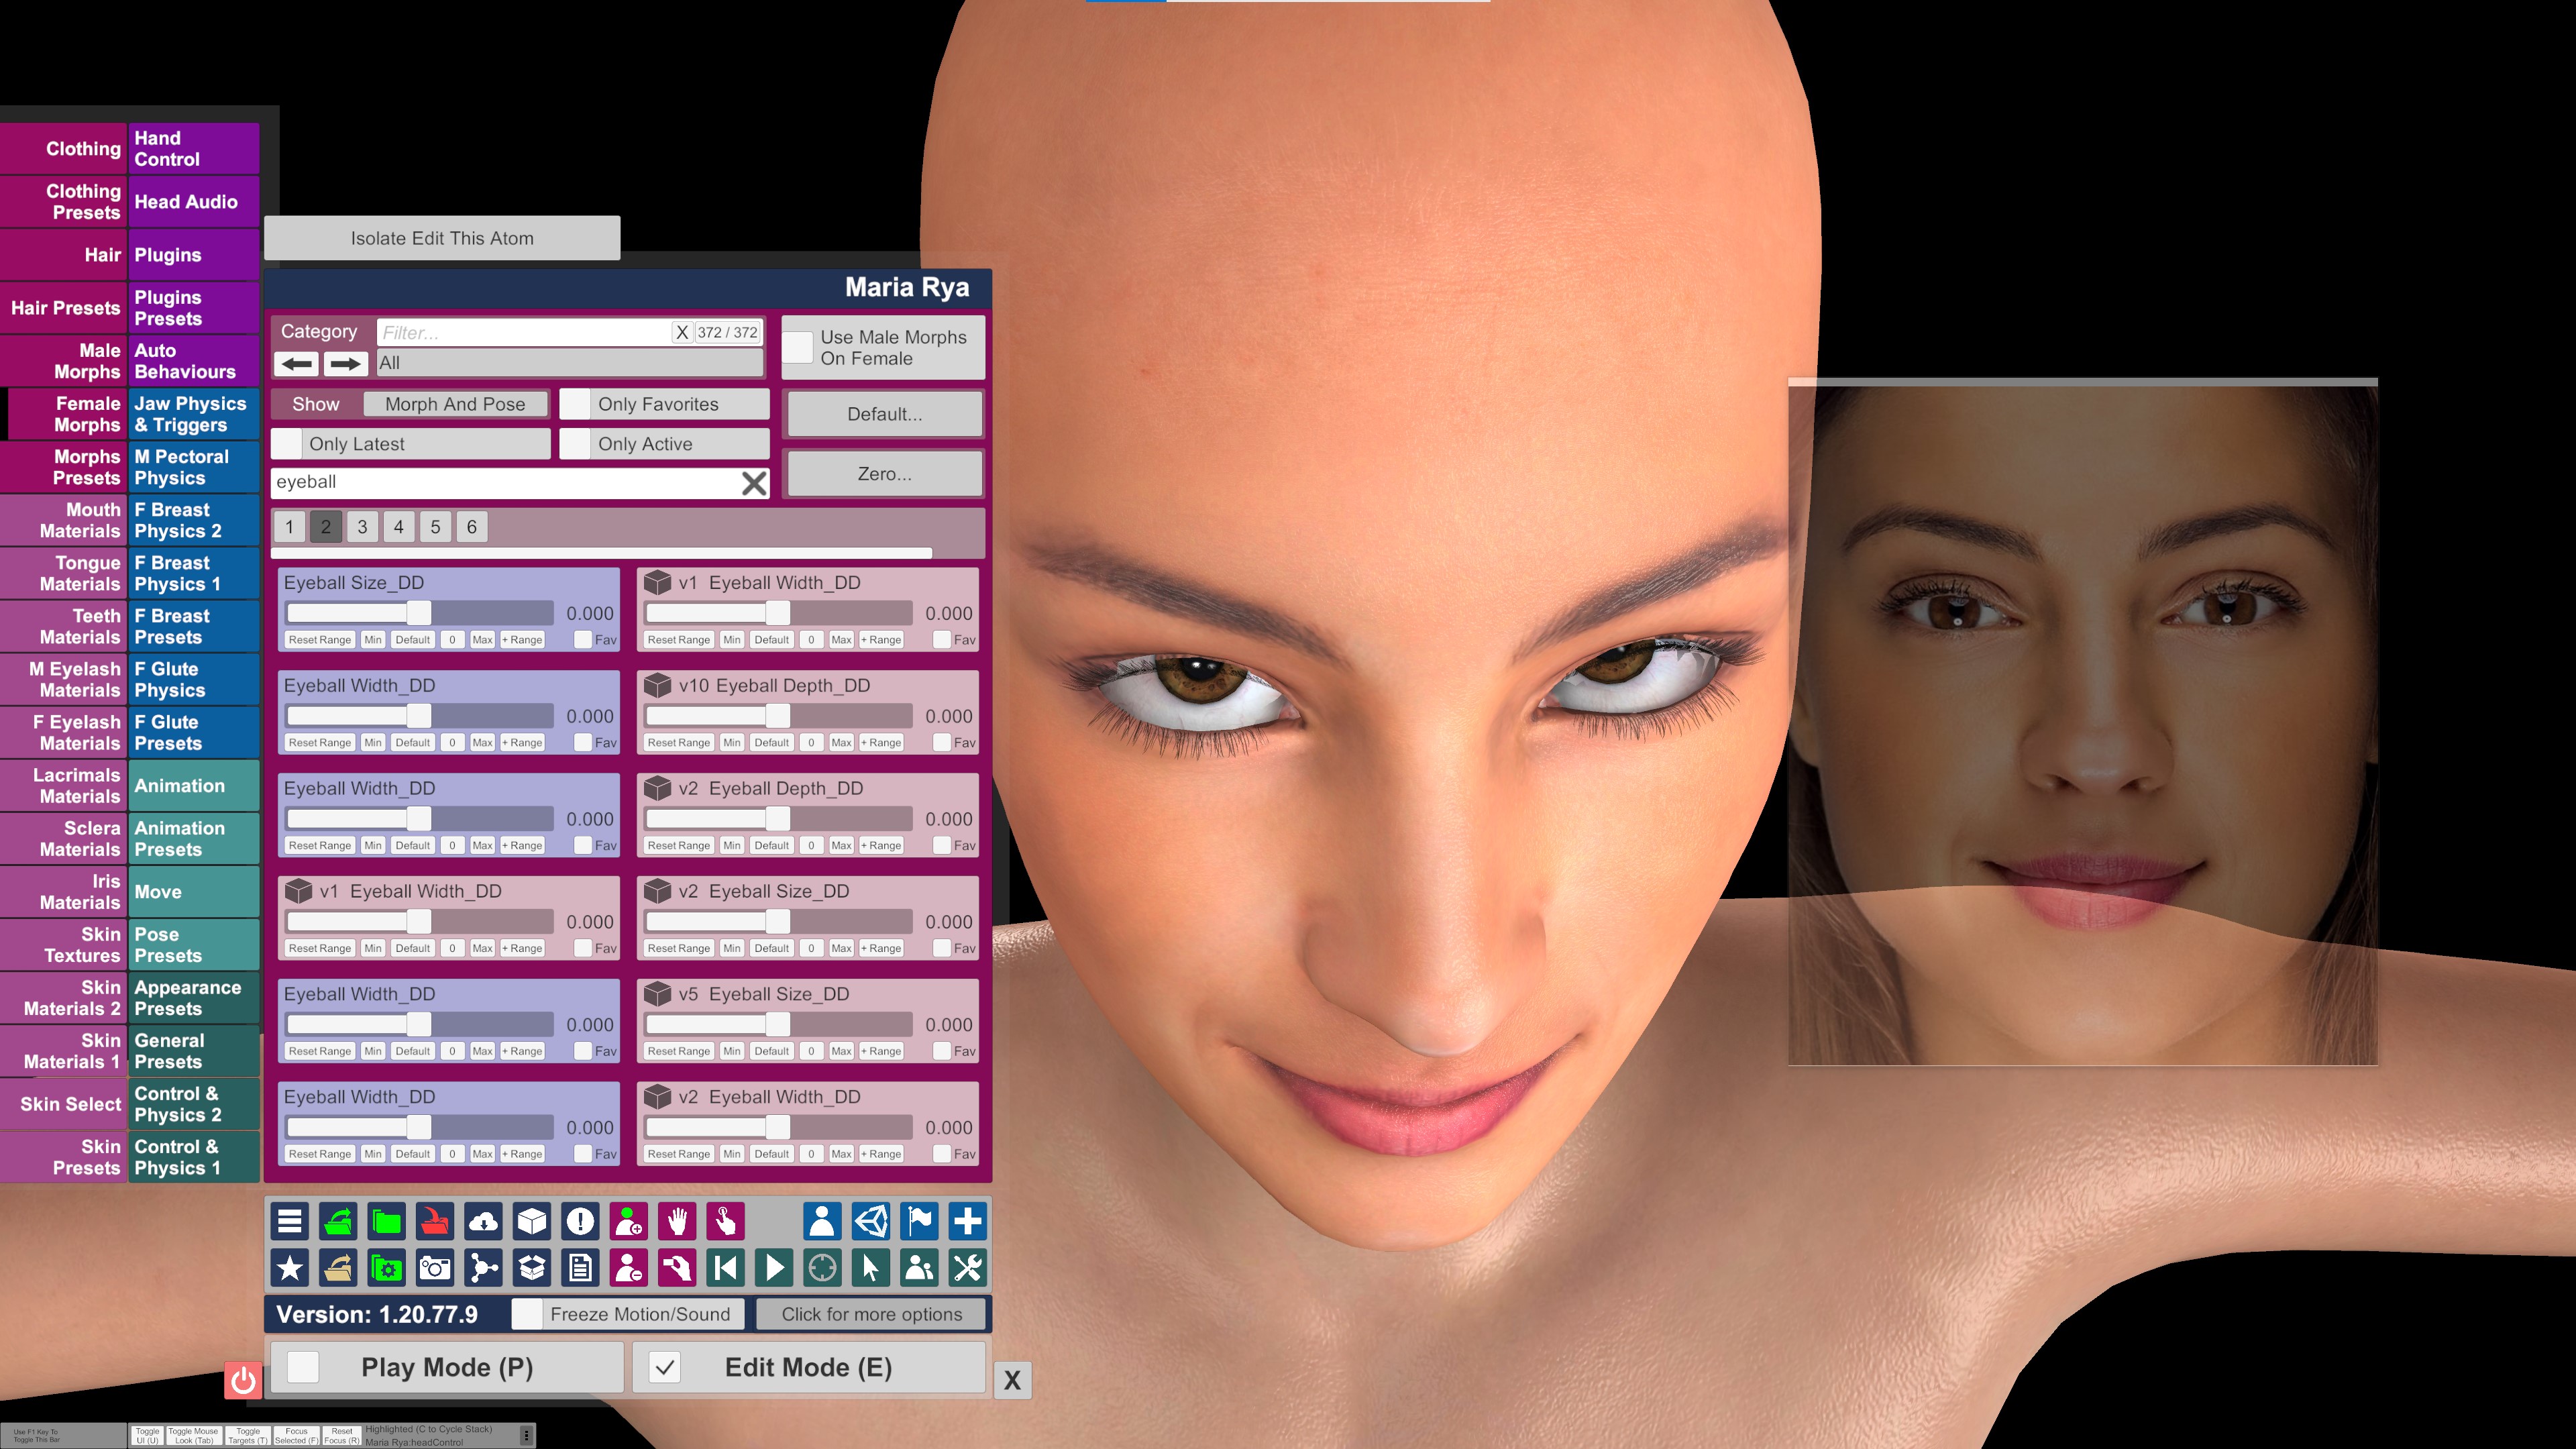

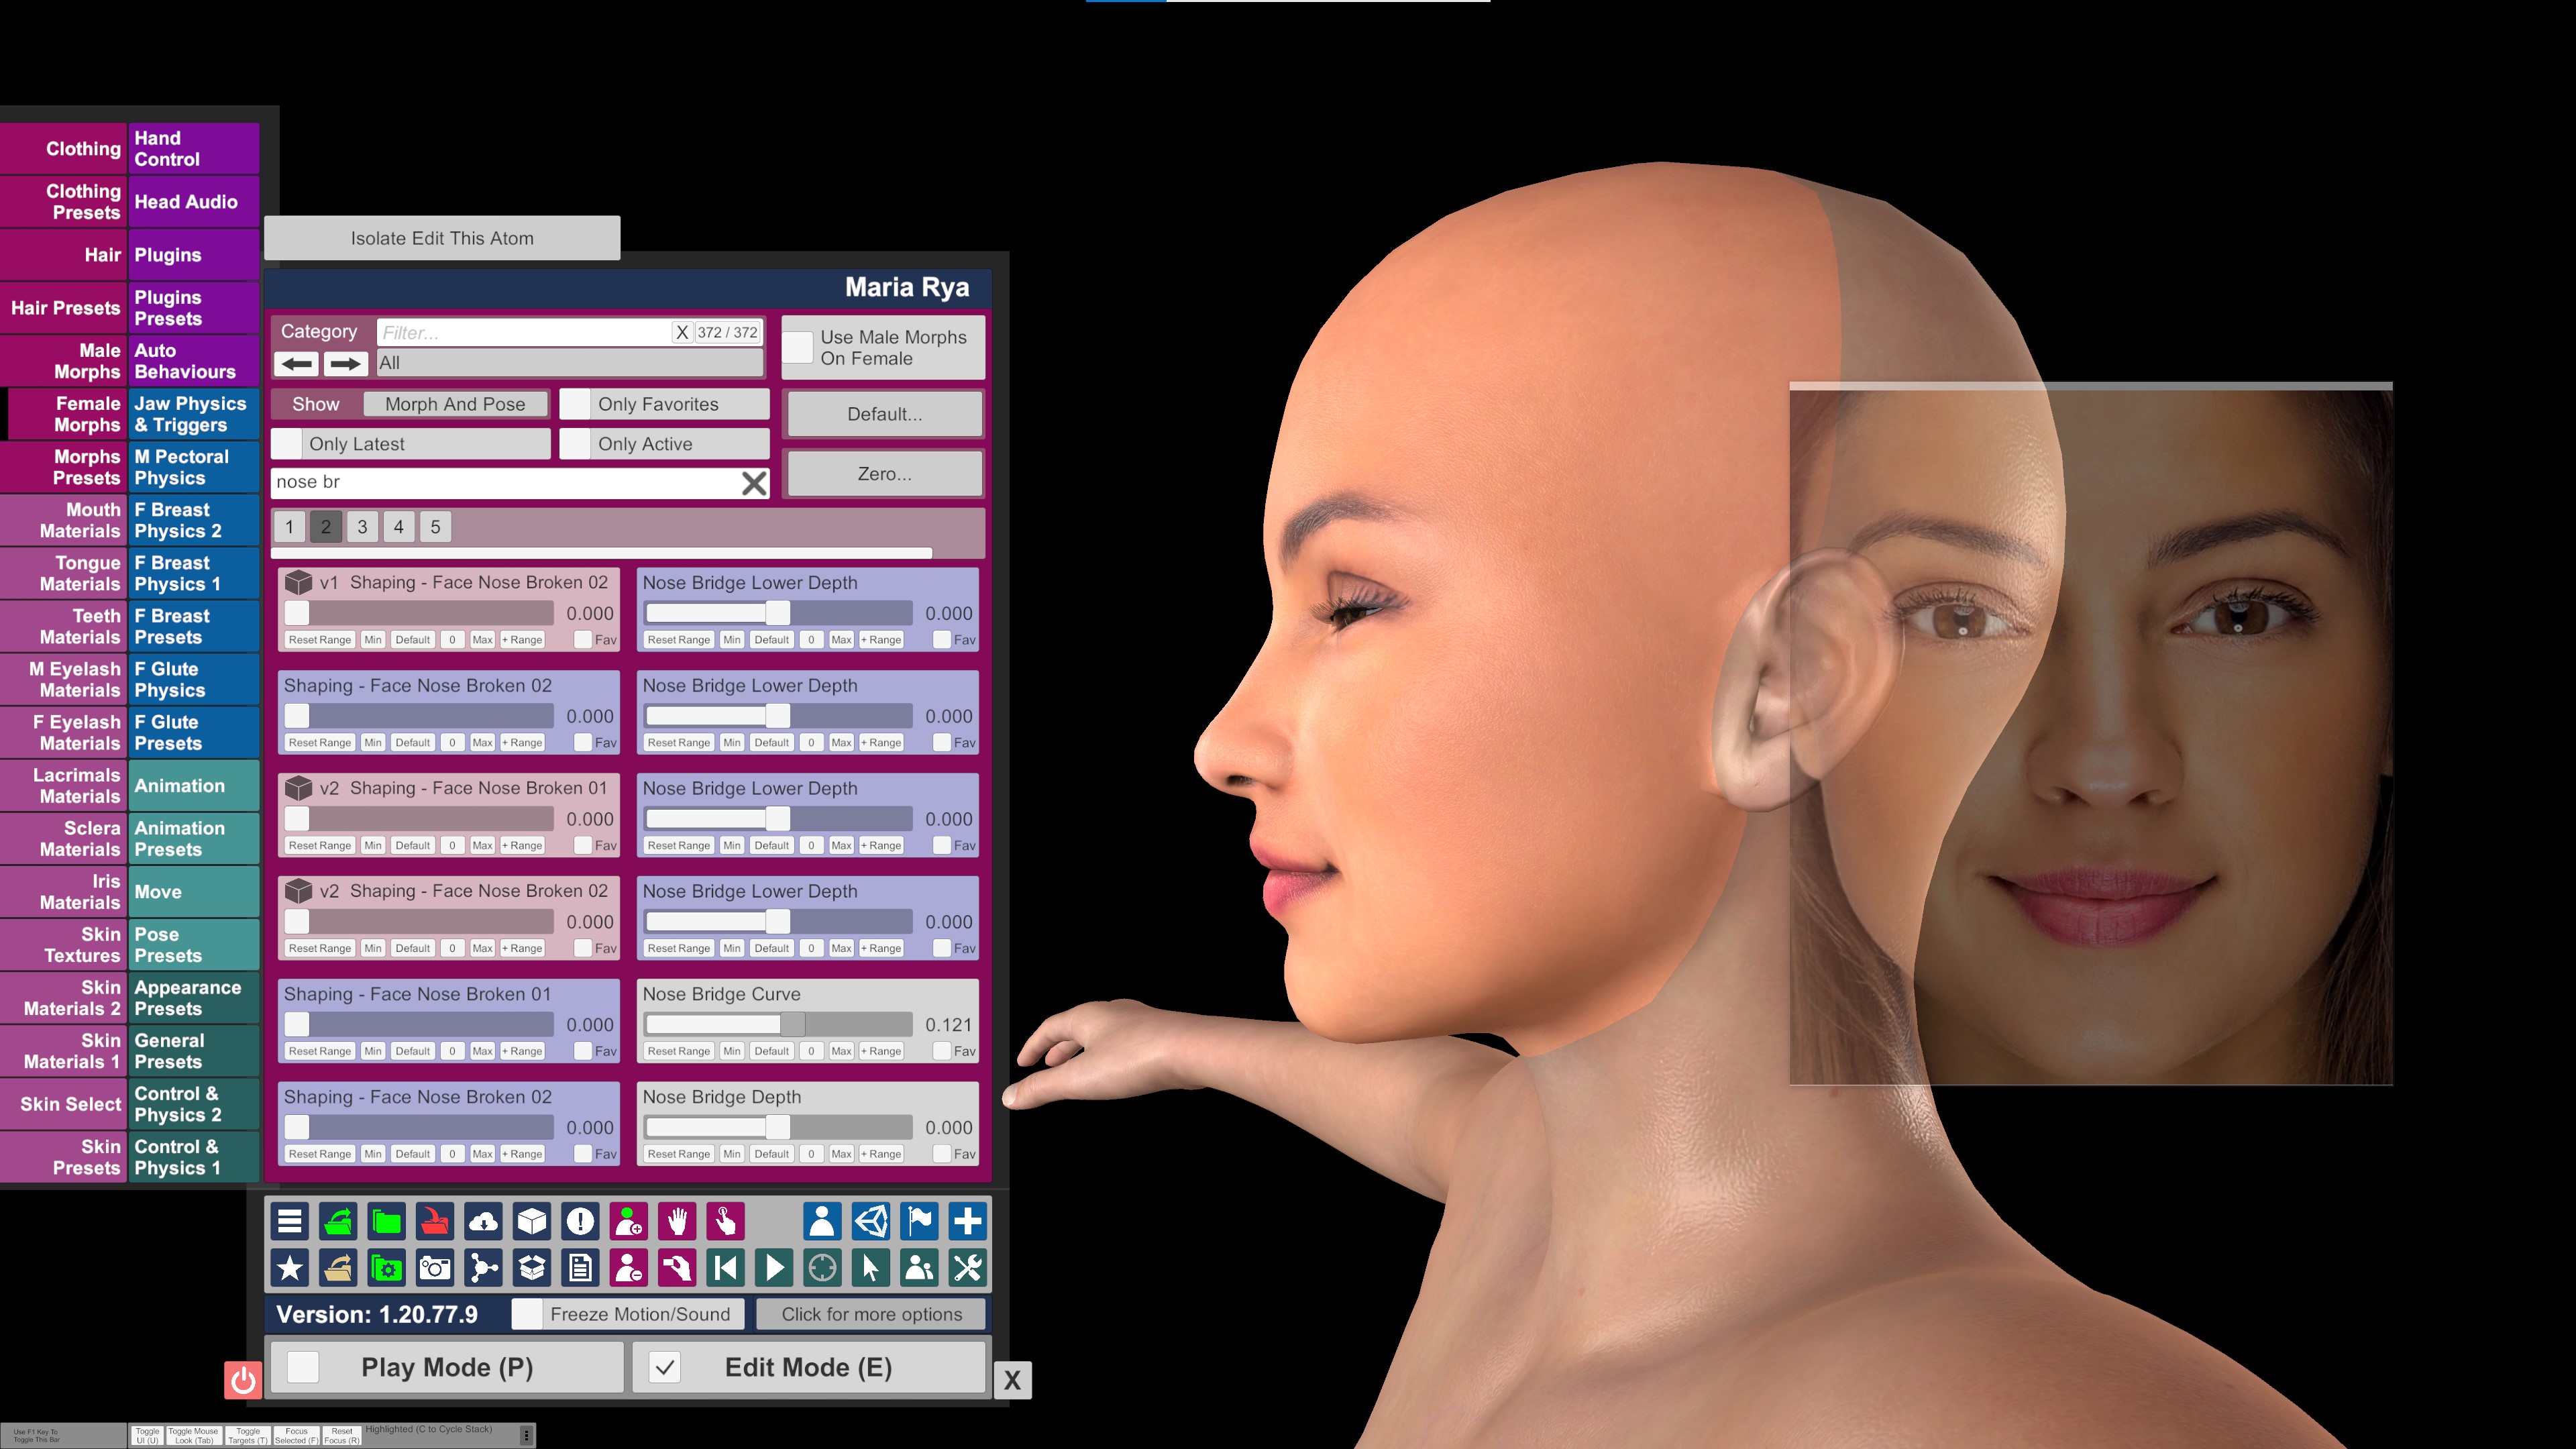
4. once happy with the eyes , i move onto the nose as this is also where facegen fails . Mainly the bridge and curve are the areas needing most work but when happy, move onto the nostrils using the image overlay ontop of your model untill you get a similar shape. Rinse and repeat untill happy. Use side profile images of your target model if you have them for the best results.
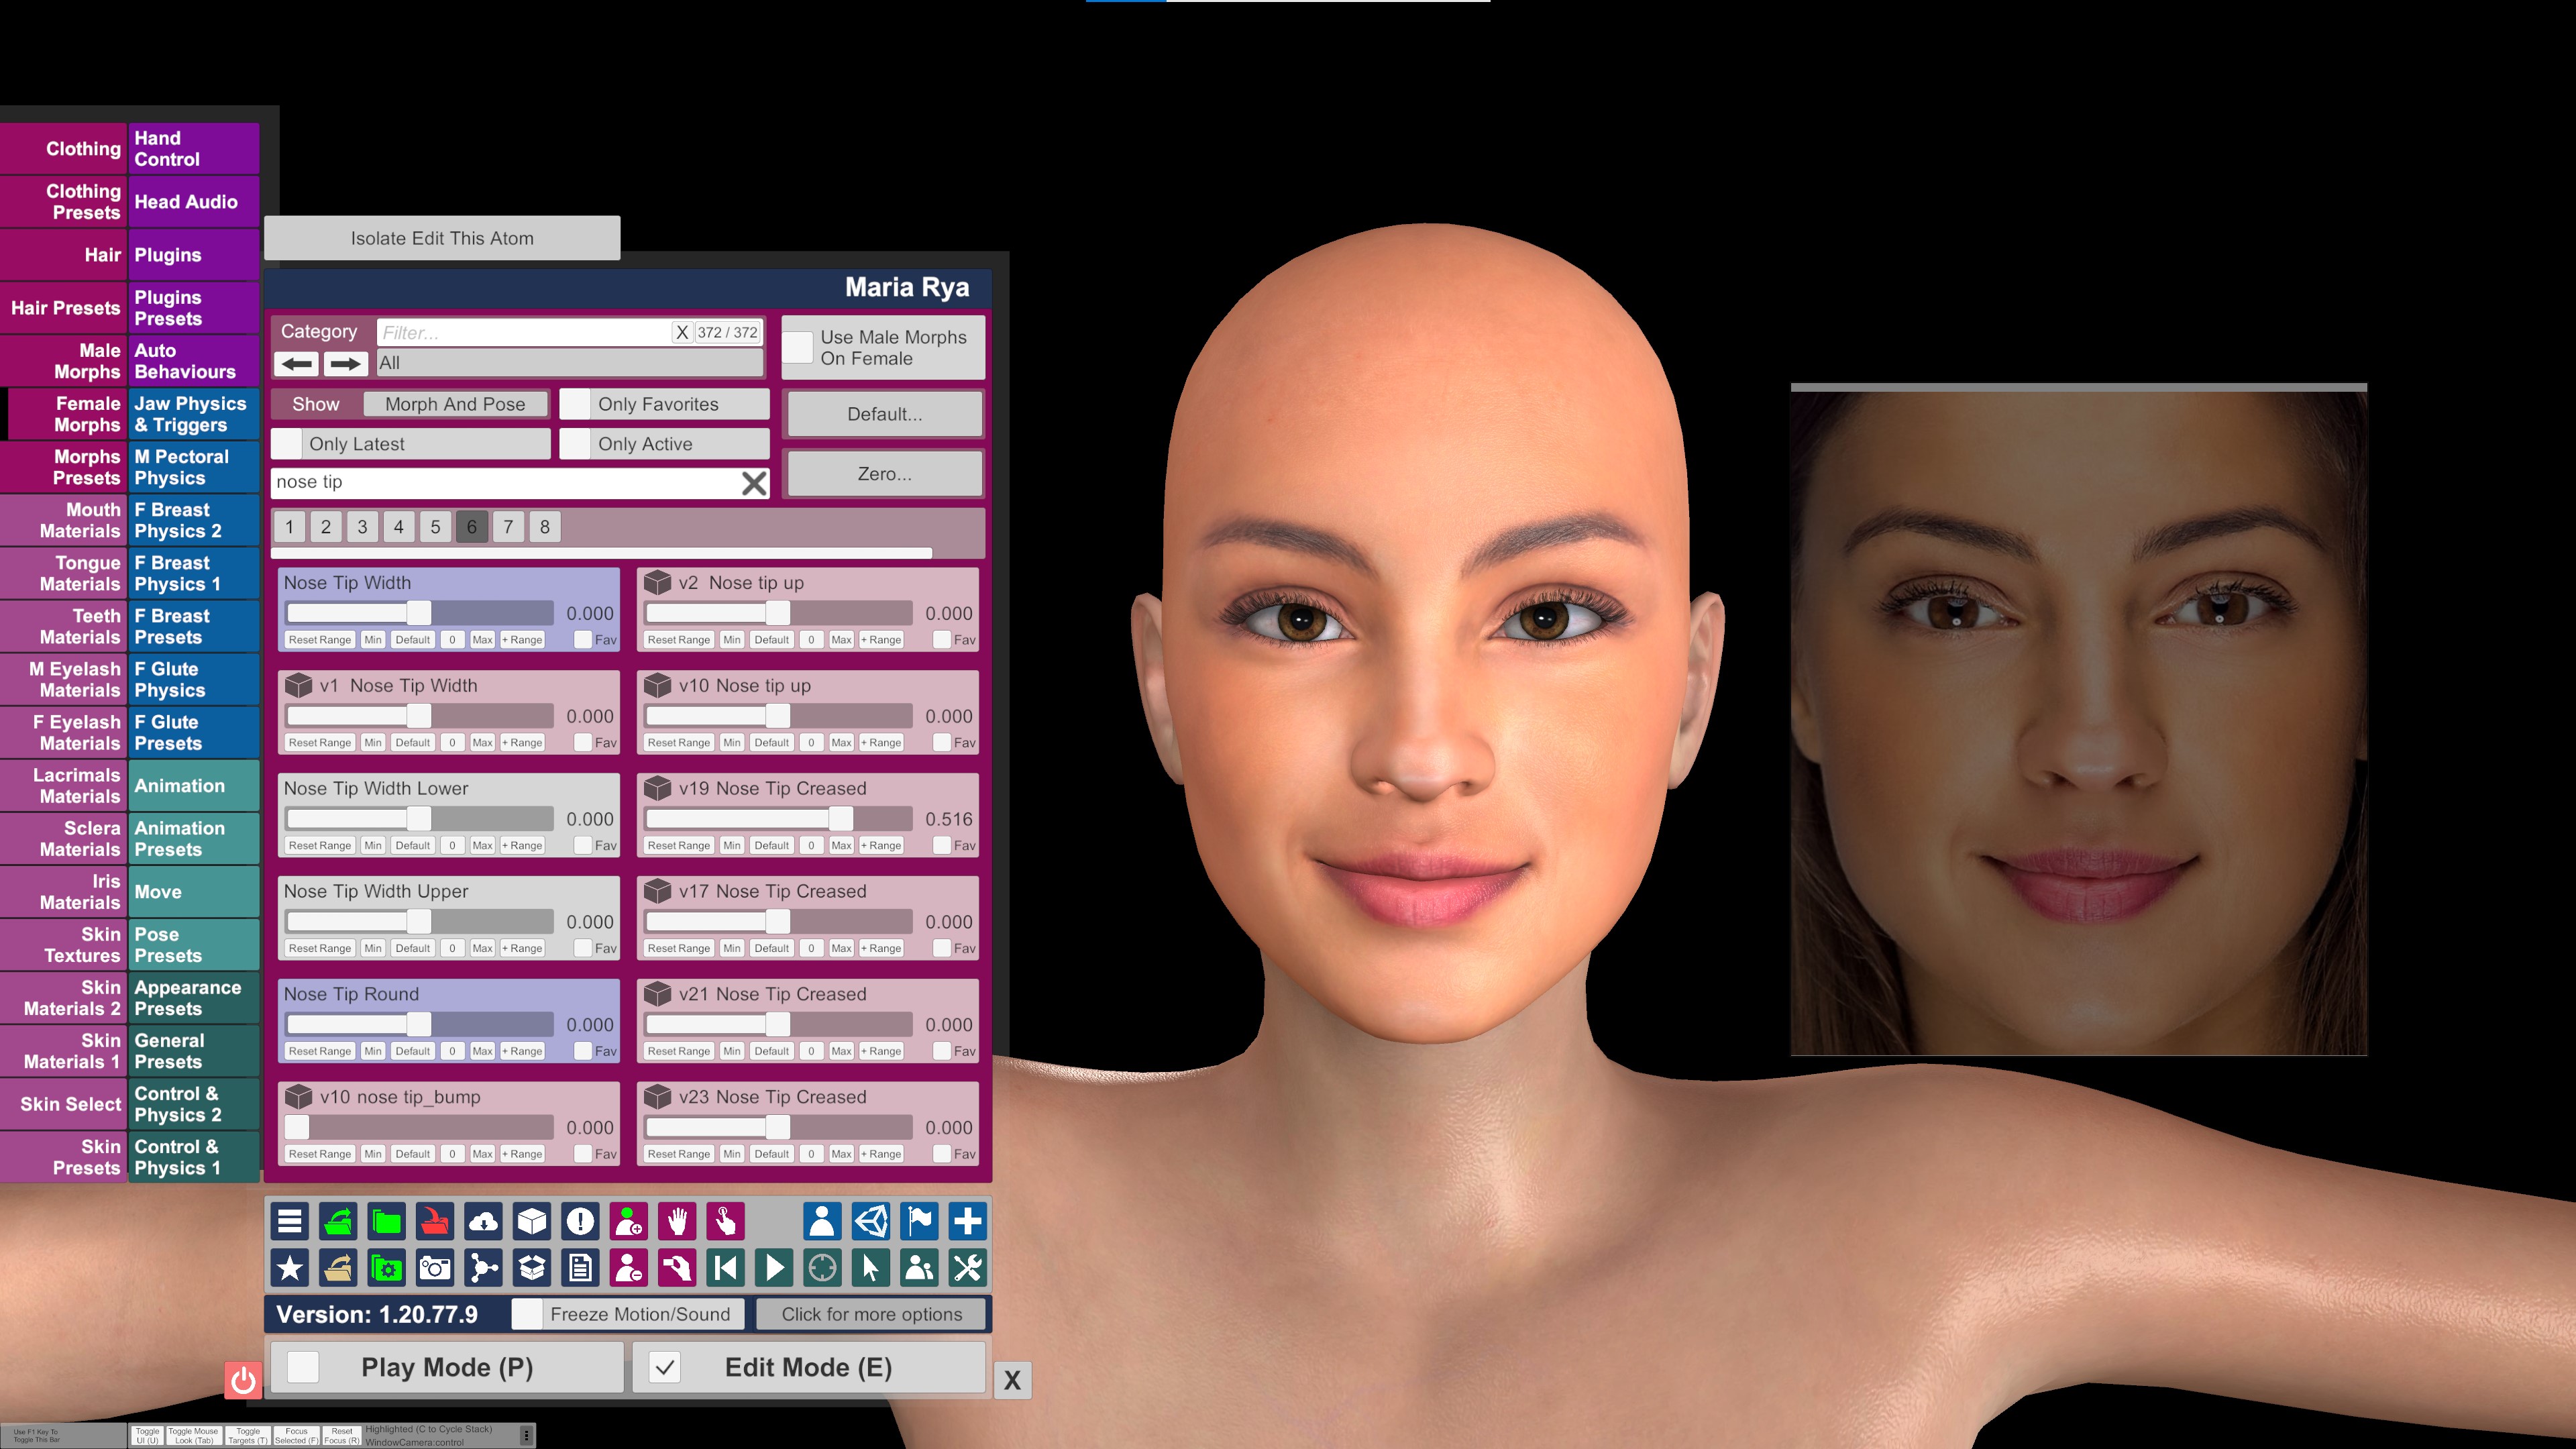
5.This is when i usually fix any texture errors using Paint , you could use photoshop etc but i find paint quick and easy.
i have done a quickfix guide on this as it was requestd awhile age so i will just add some images of this model i made for this guide. It wasnt bad for this model , just slight dark patches under the nose needed fixing.
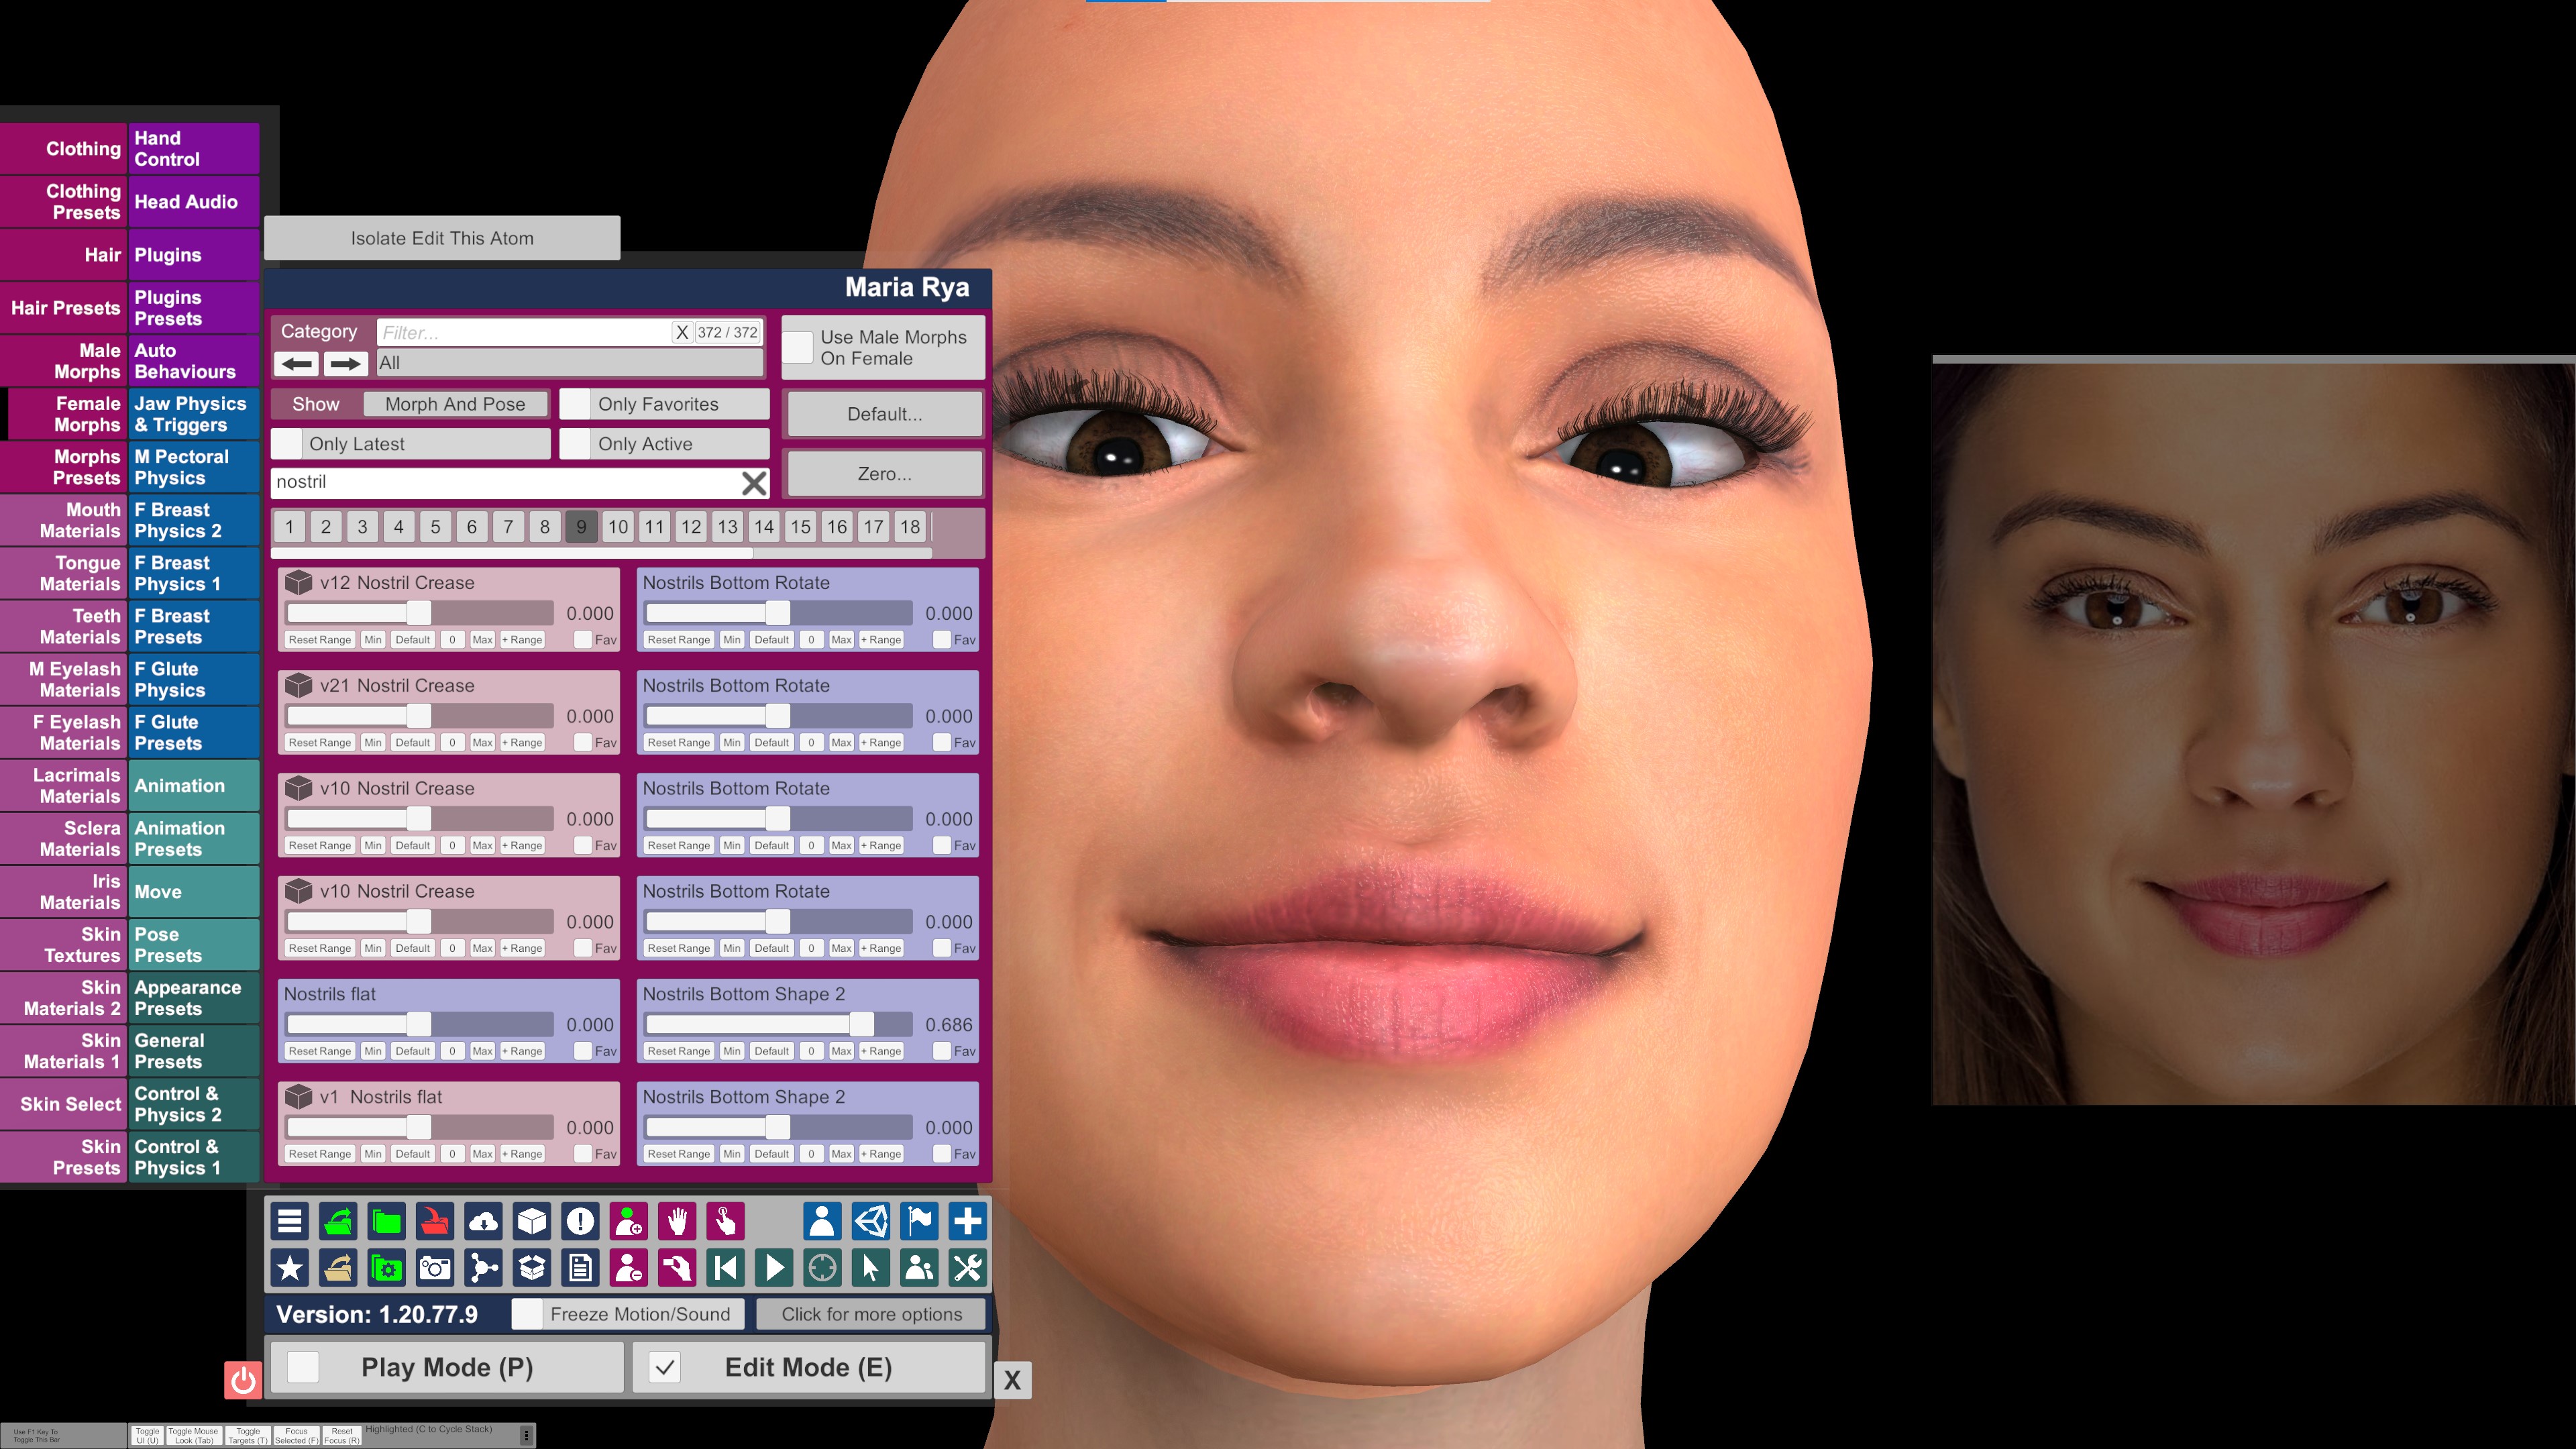
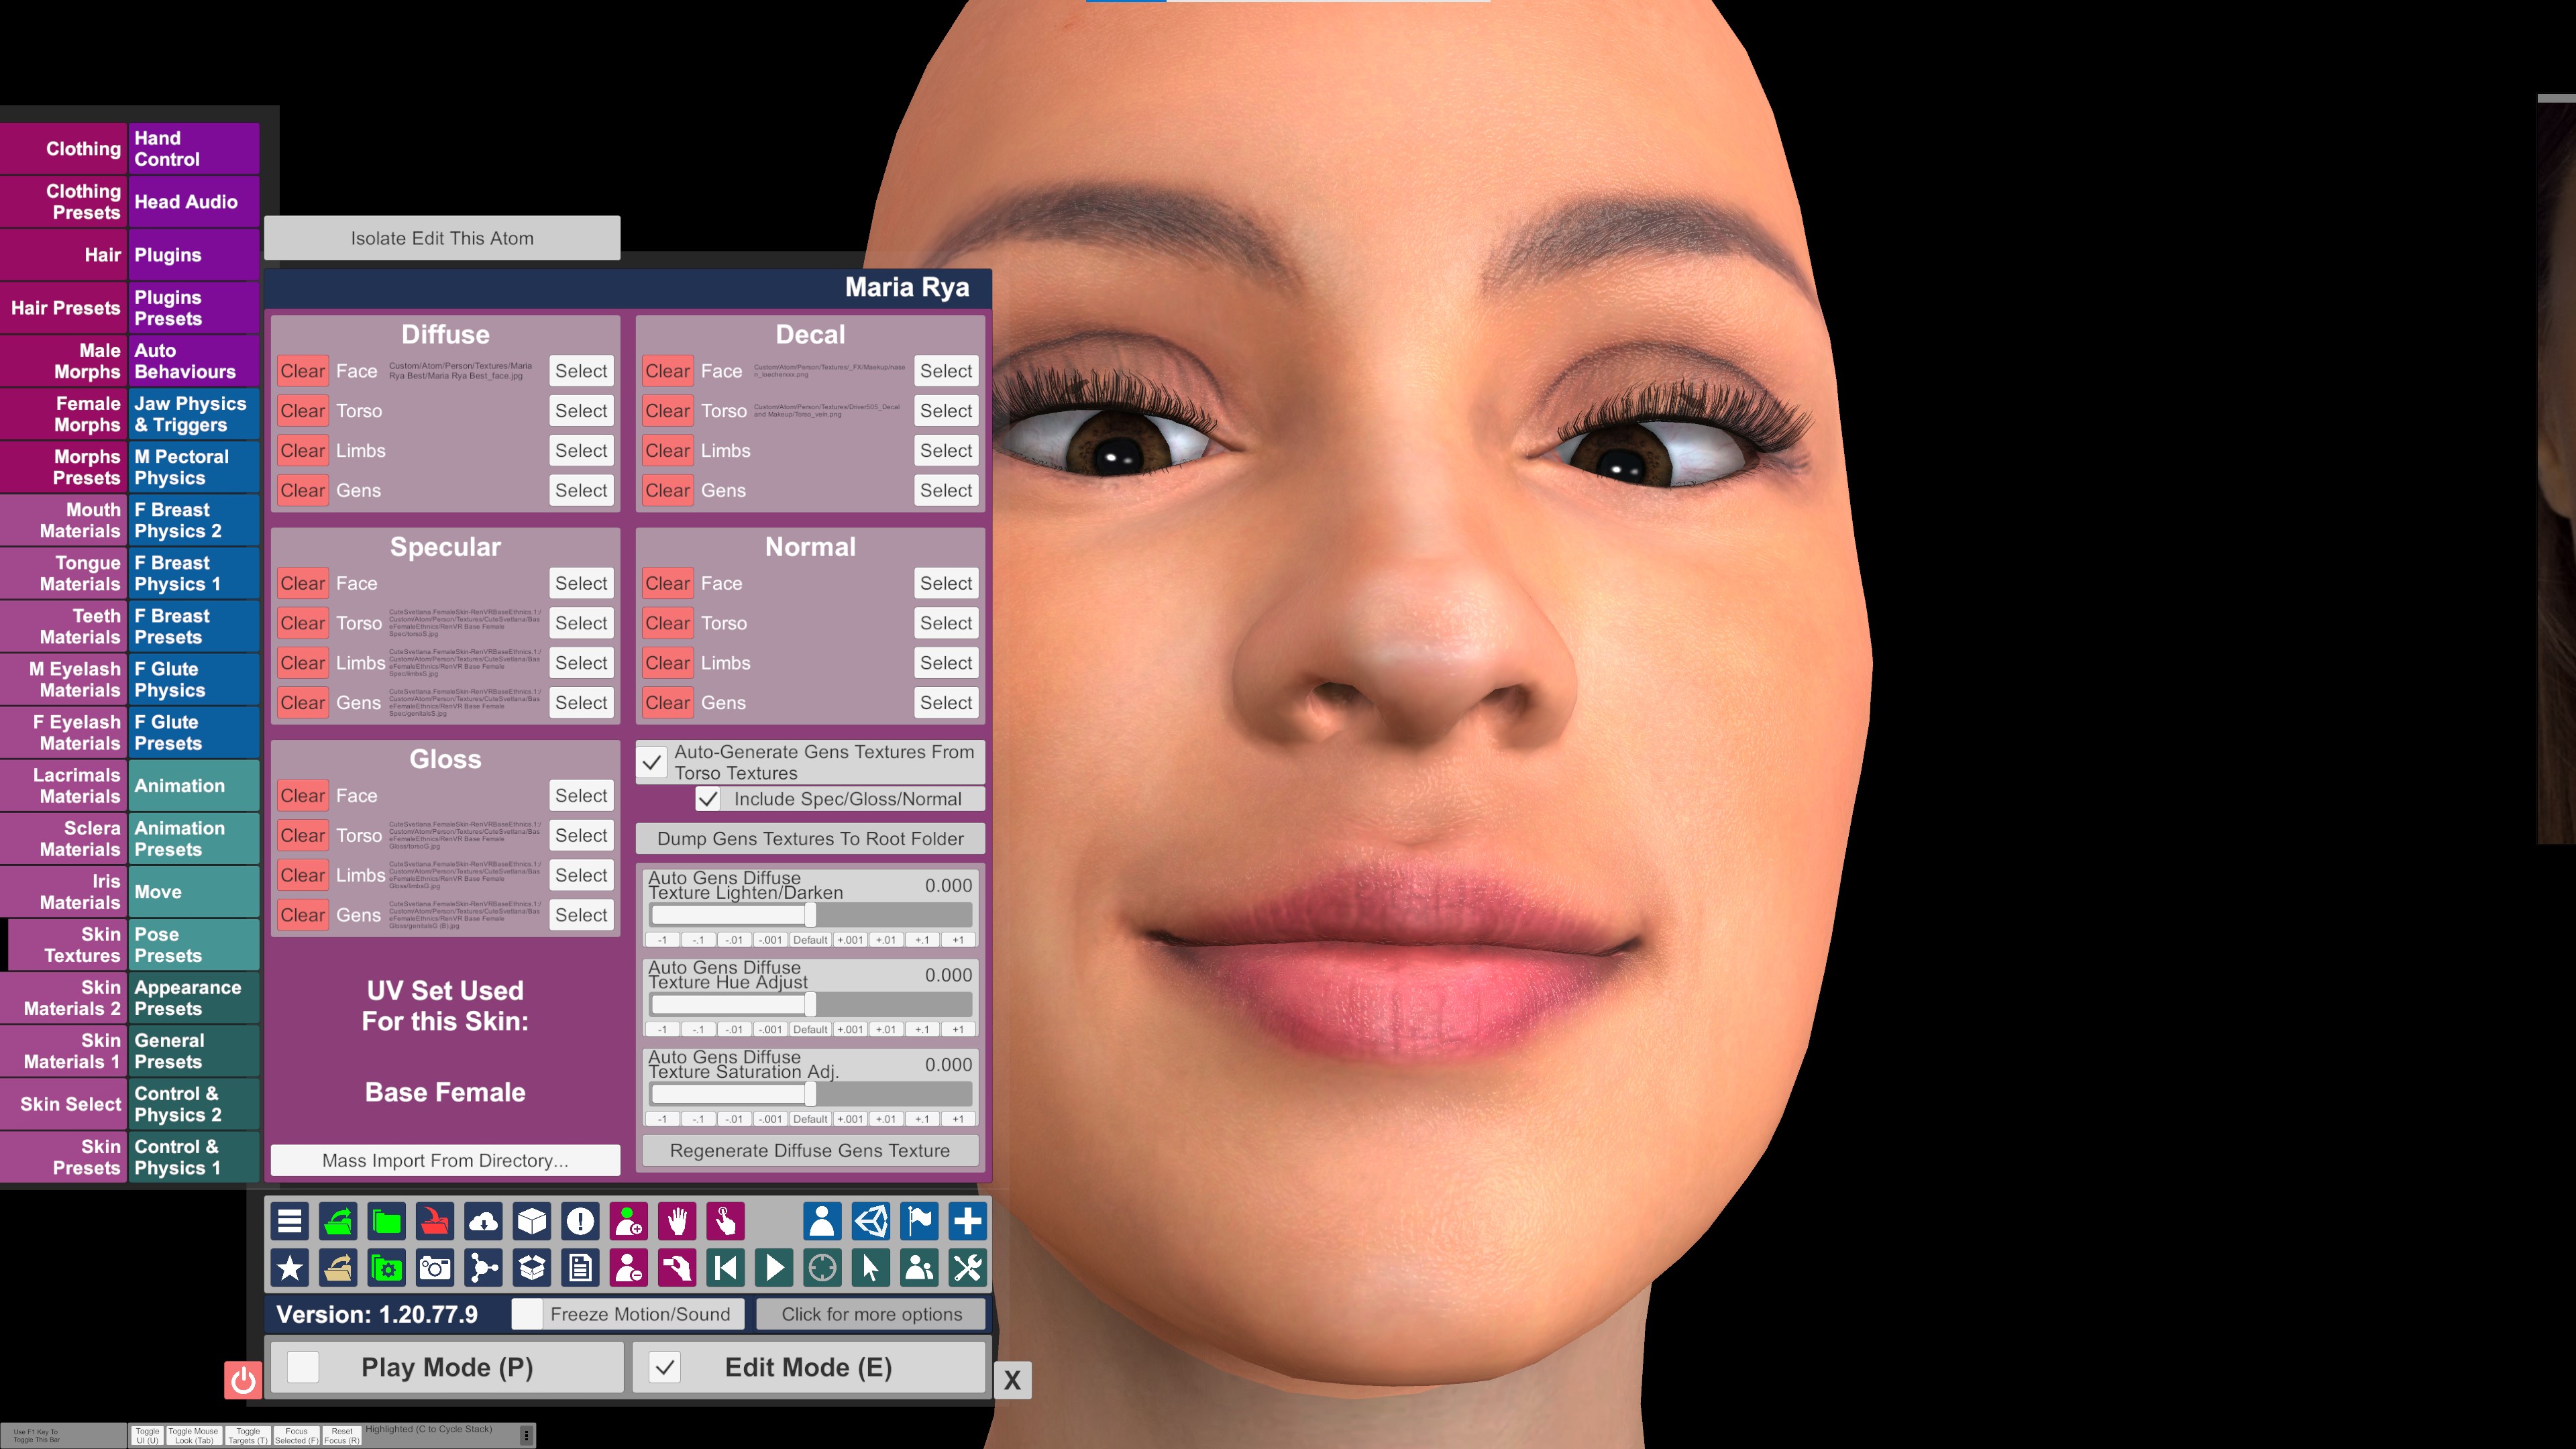
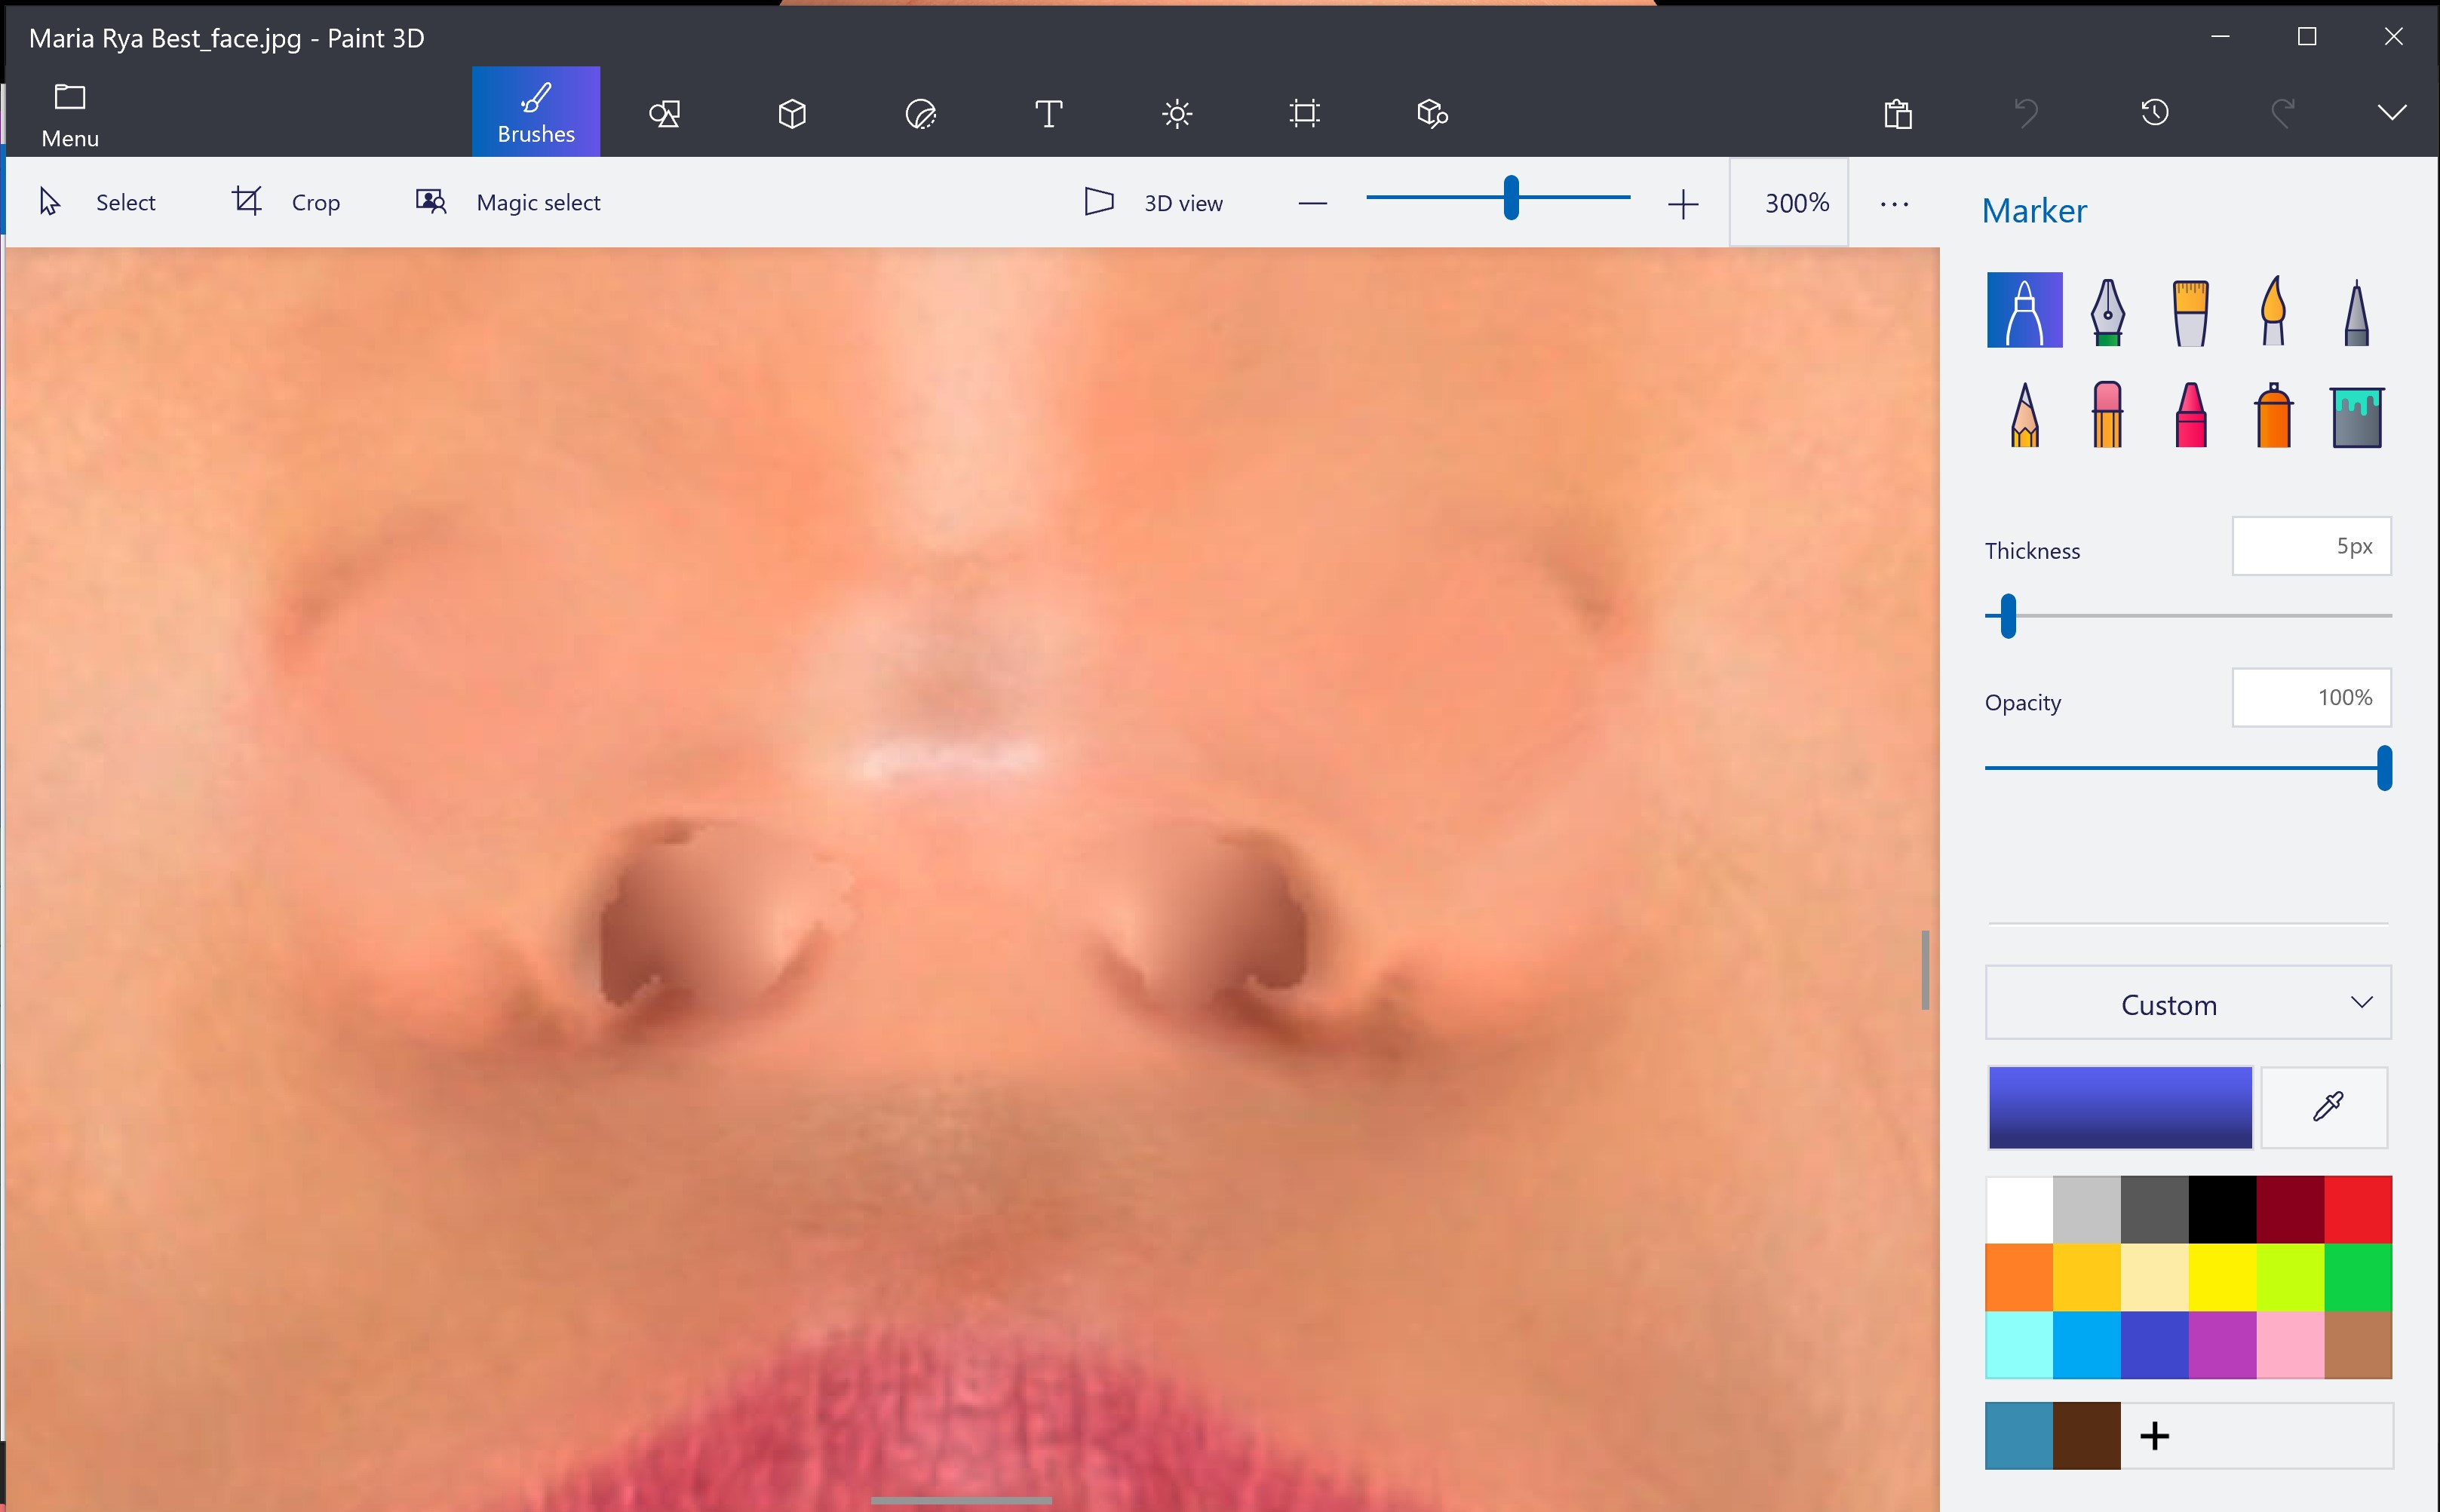
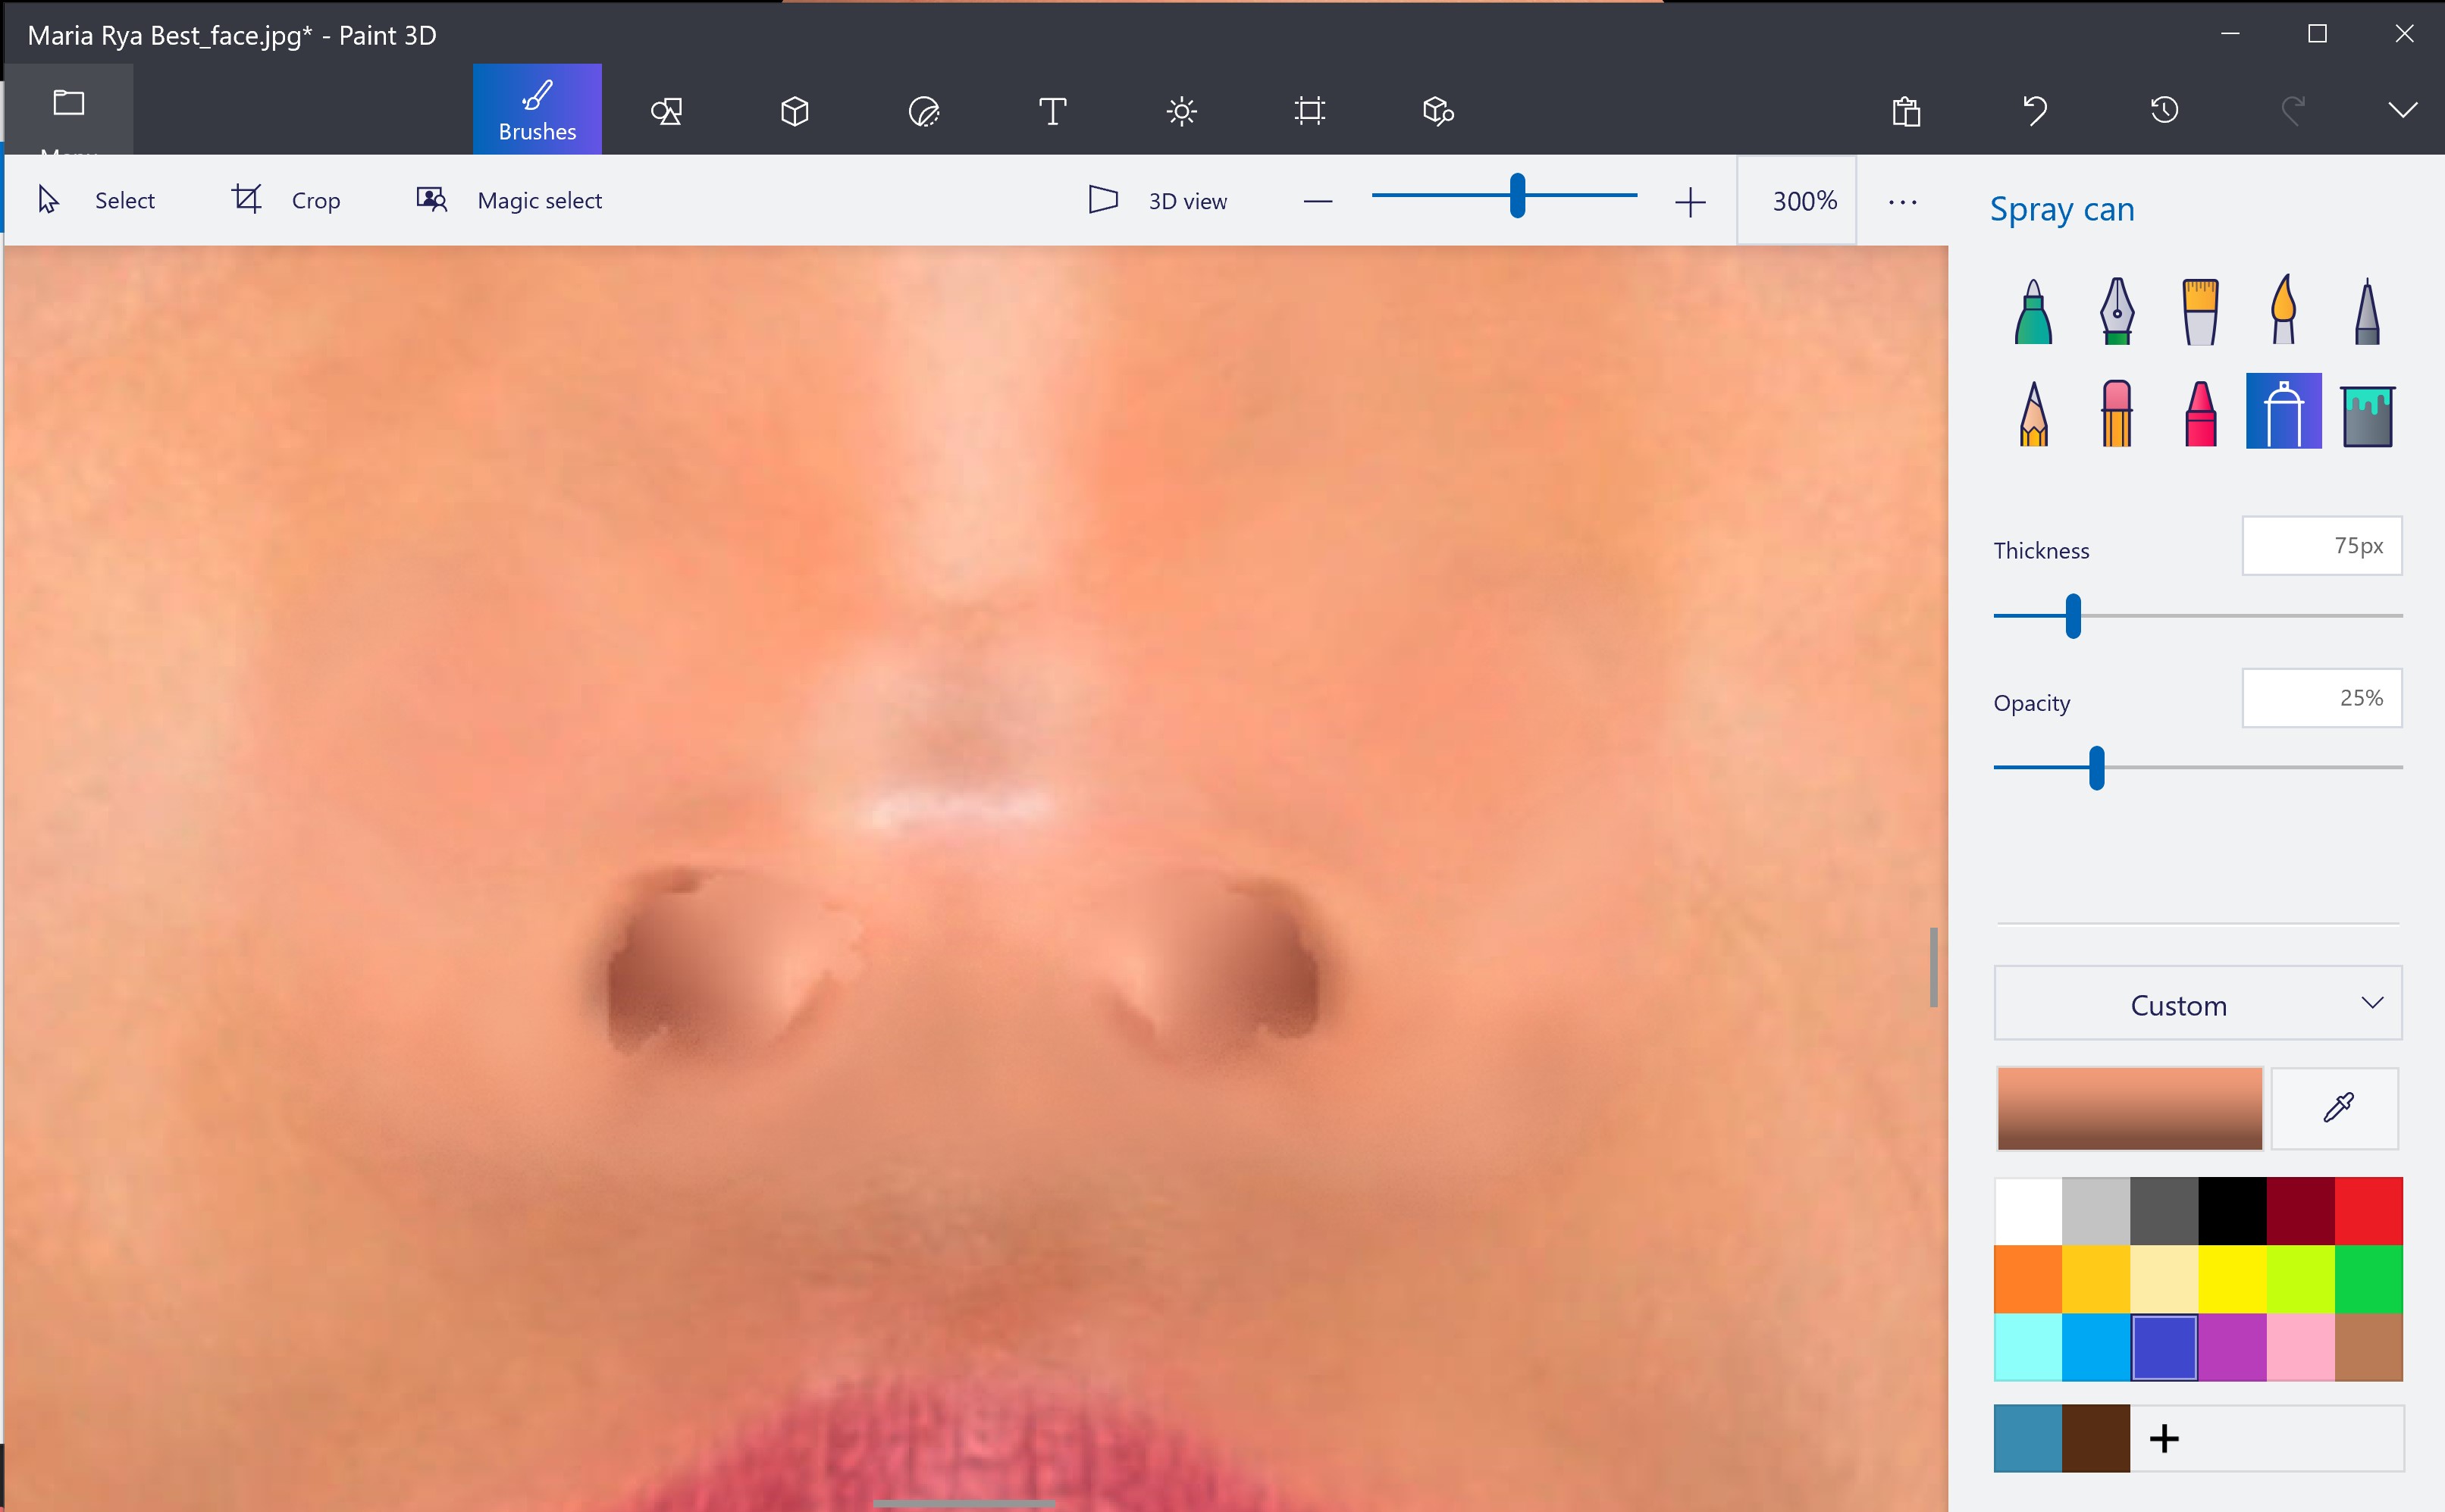
6. Lastly i move onto the chin / jaw and then cheeks/ cheekbones and head shape. This part is aimed specifitly for the person who requested this Guide / workflow.
head shape is relitivley simple , just overlay the image and use the sliders to get as close to the image as you are happy with. It wont always align perfectley with the model and the image as the scale and angle of the face might differ and your model wont look quite right so its just a case of tweaking untill happy.
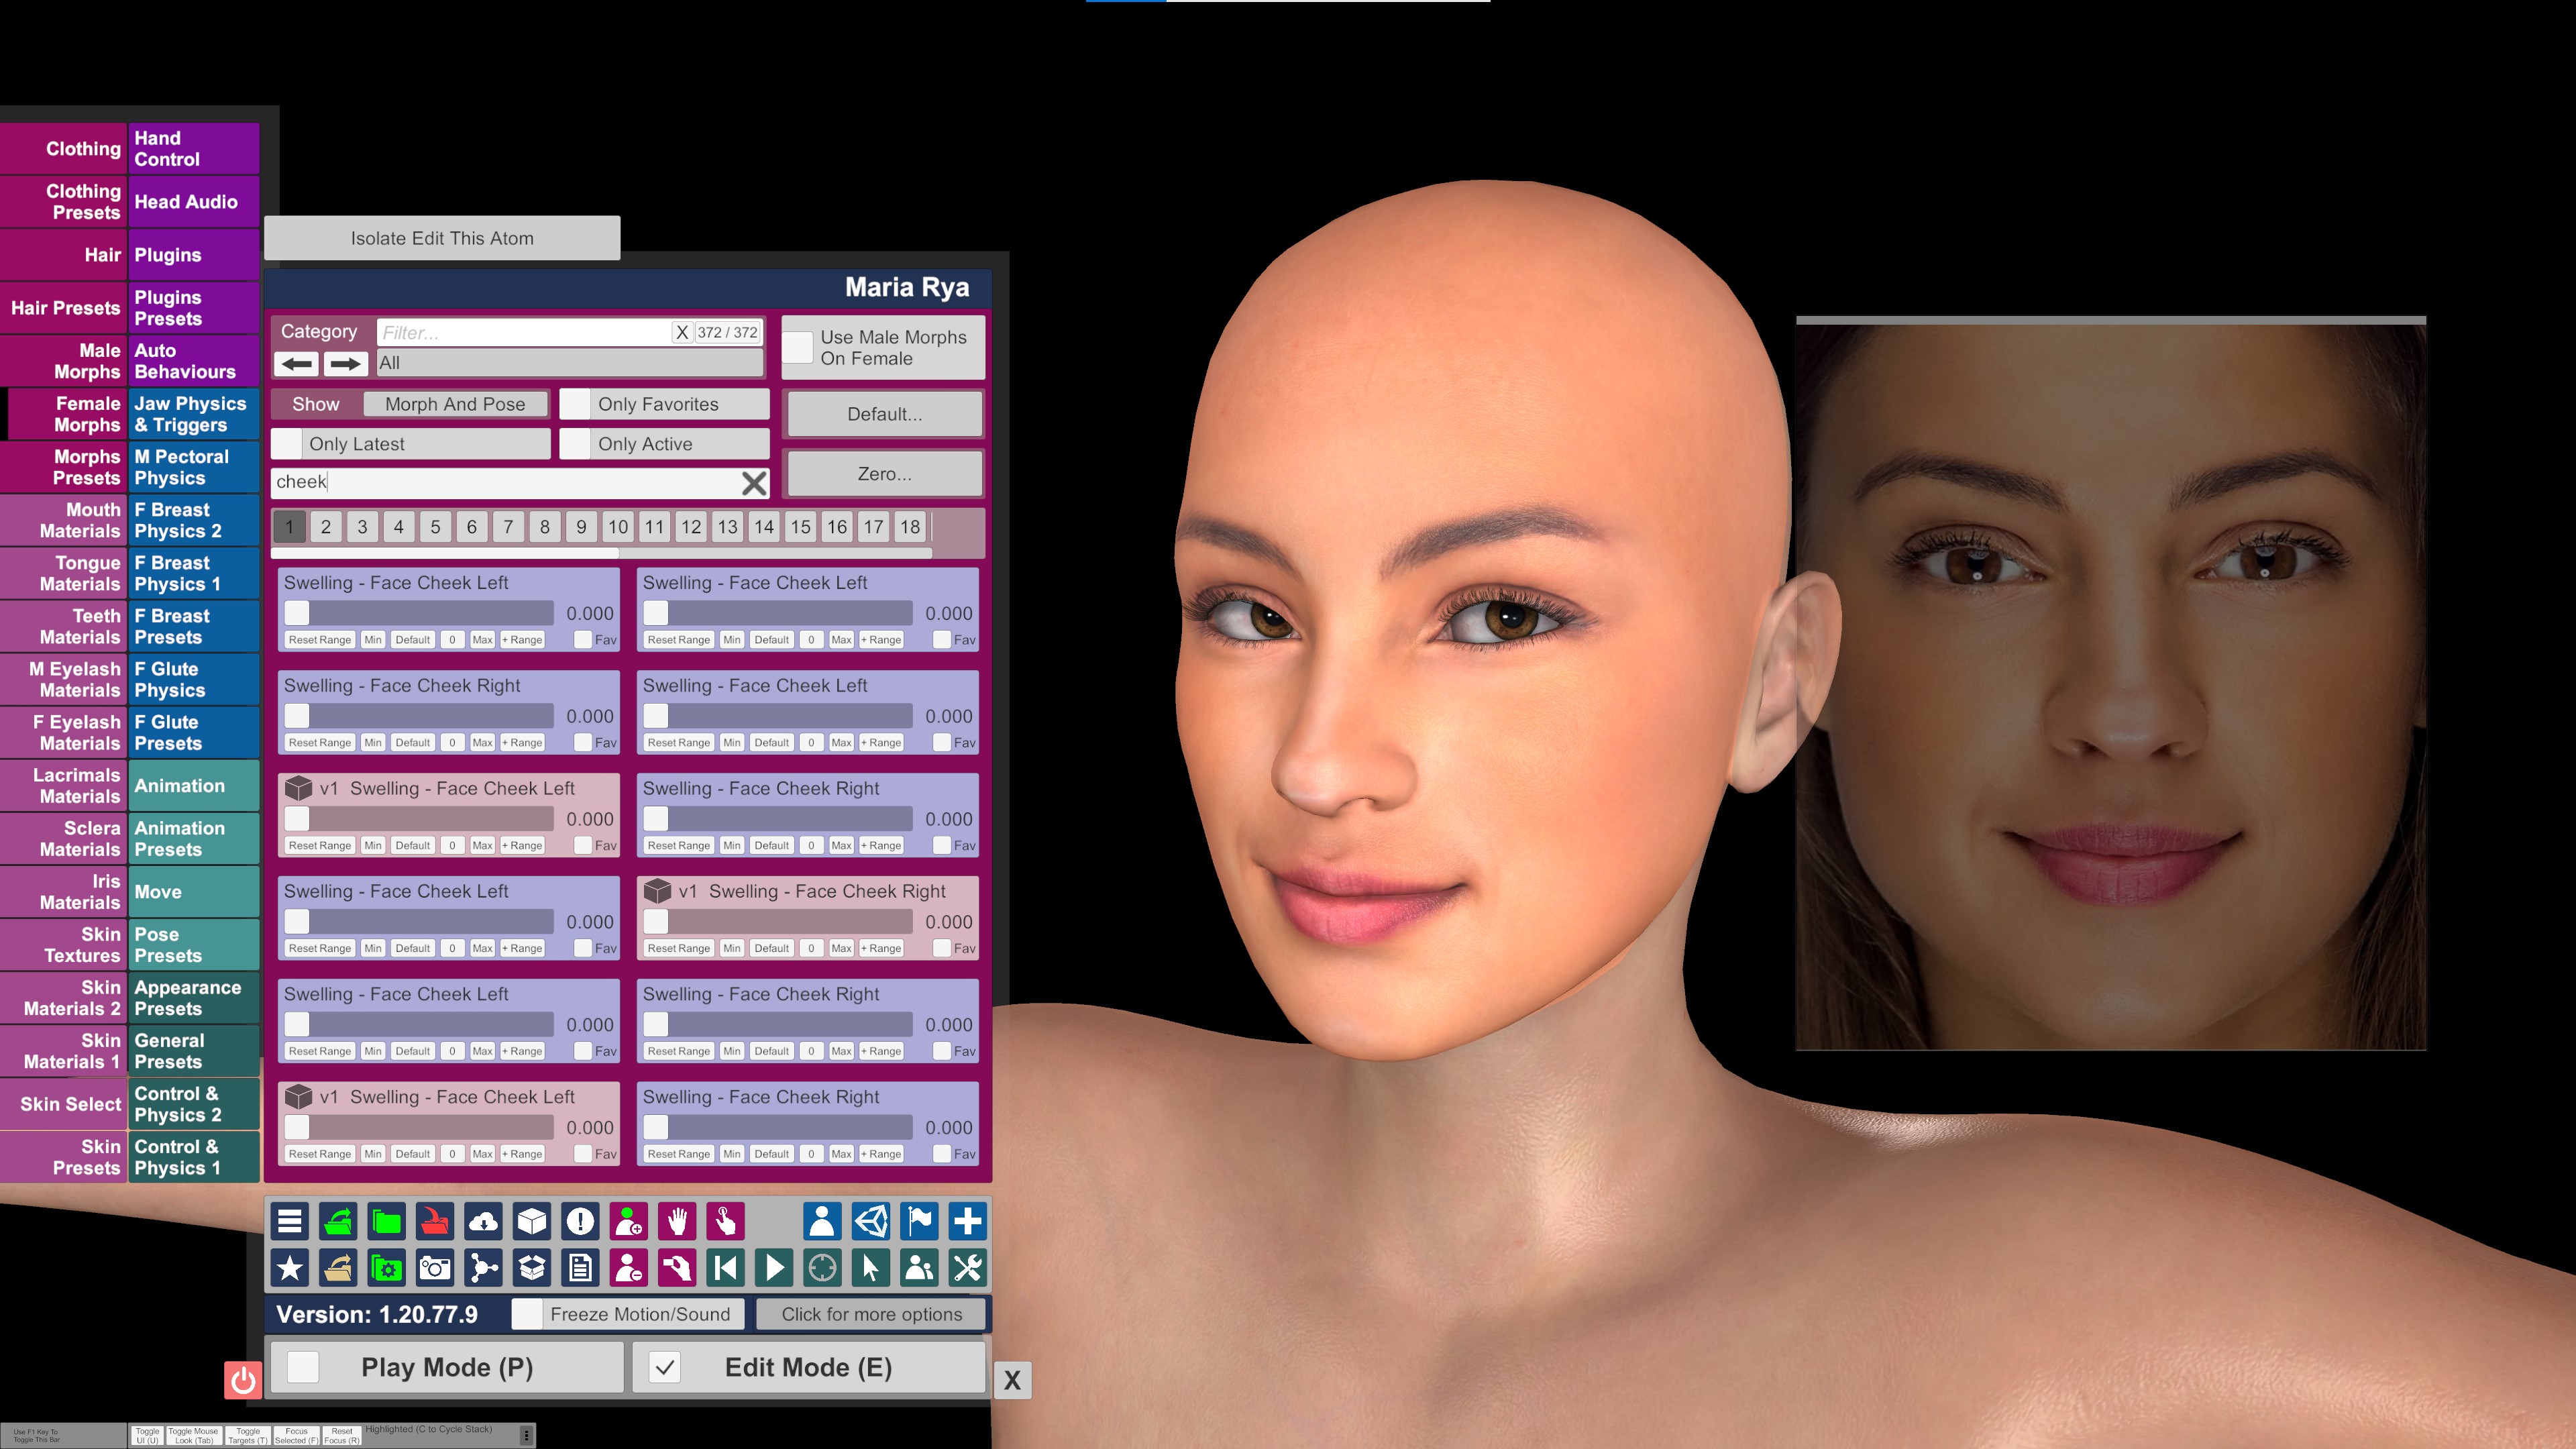
Next is the chin , cheeks and cheekbones to finish which i think make a really big apperance difference and is basicly the same steps as above for the face shape BUT chin and cheekbone protrusion is HARD to judge unless you have a side profile image or similar of the TARGET model which isnt always possible . So what i tend to do and advise you to if you dont have a profile image to work is USE THE LIGHTING , SHADOWS AND FACE LINES AND WRINKLES on the original image your working off and the actual texture of the model. For example the laugh lines / mouth creases , a crease or line in the face is normally sunken in depth so i would find a morph slider to sink the mouth corners for example. The ares of the face that appear to catch the light , like the chin , cheeks /cheekbones protrude from the face so if facgen messed up as always Lol , look for sliders that affect the areas of the face which light catches the face MORE and adjust untill happy. Again , laugh lines , creases and wrinkled areas are normaly deeper/ sunken and areas where the light catches more are proturding and raised .
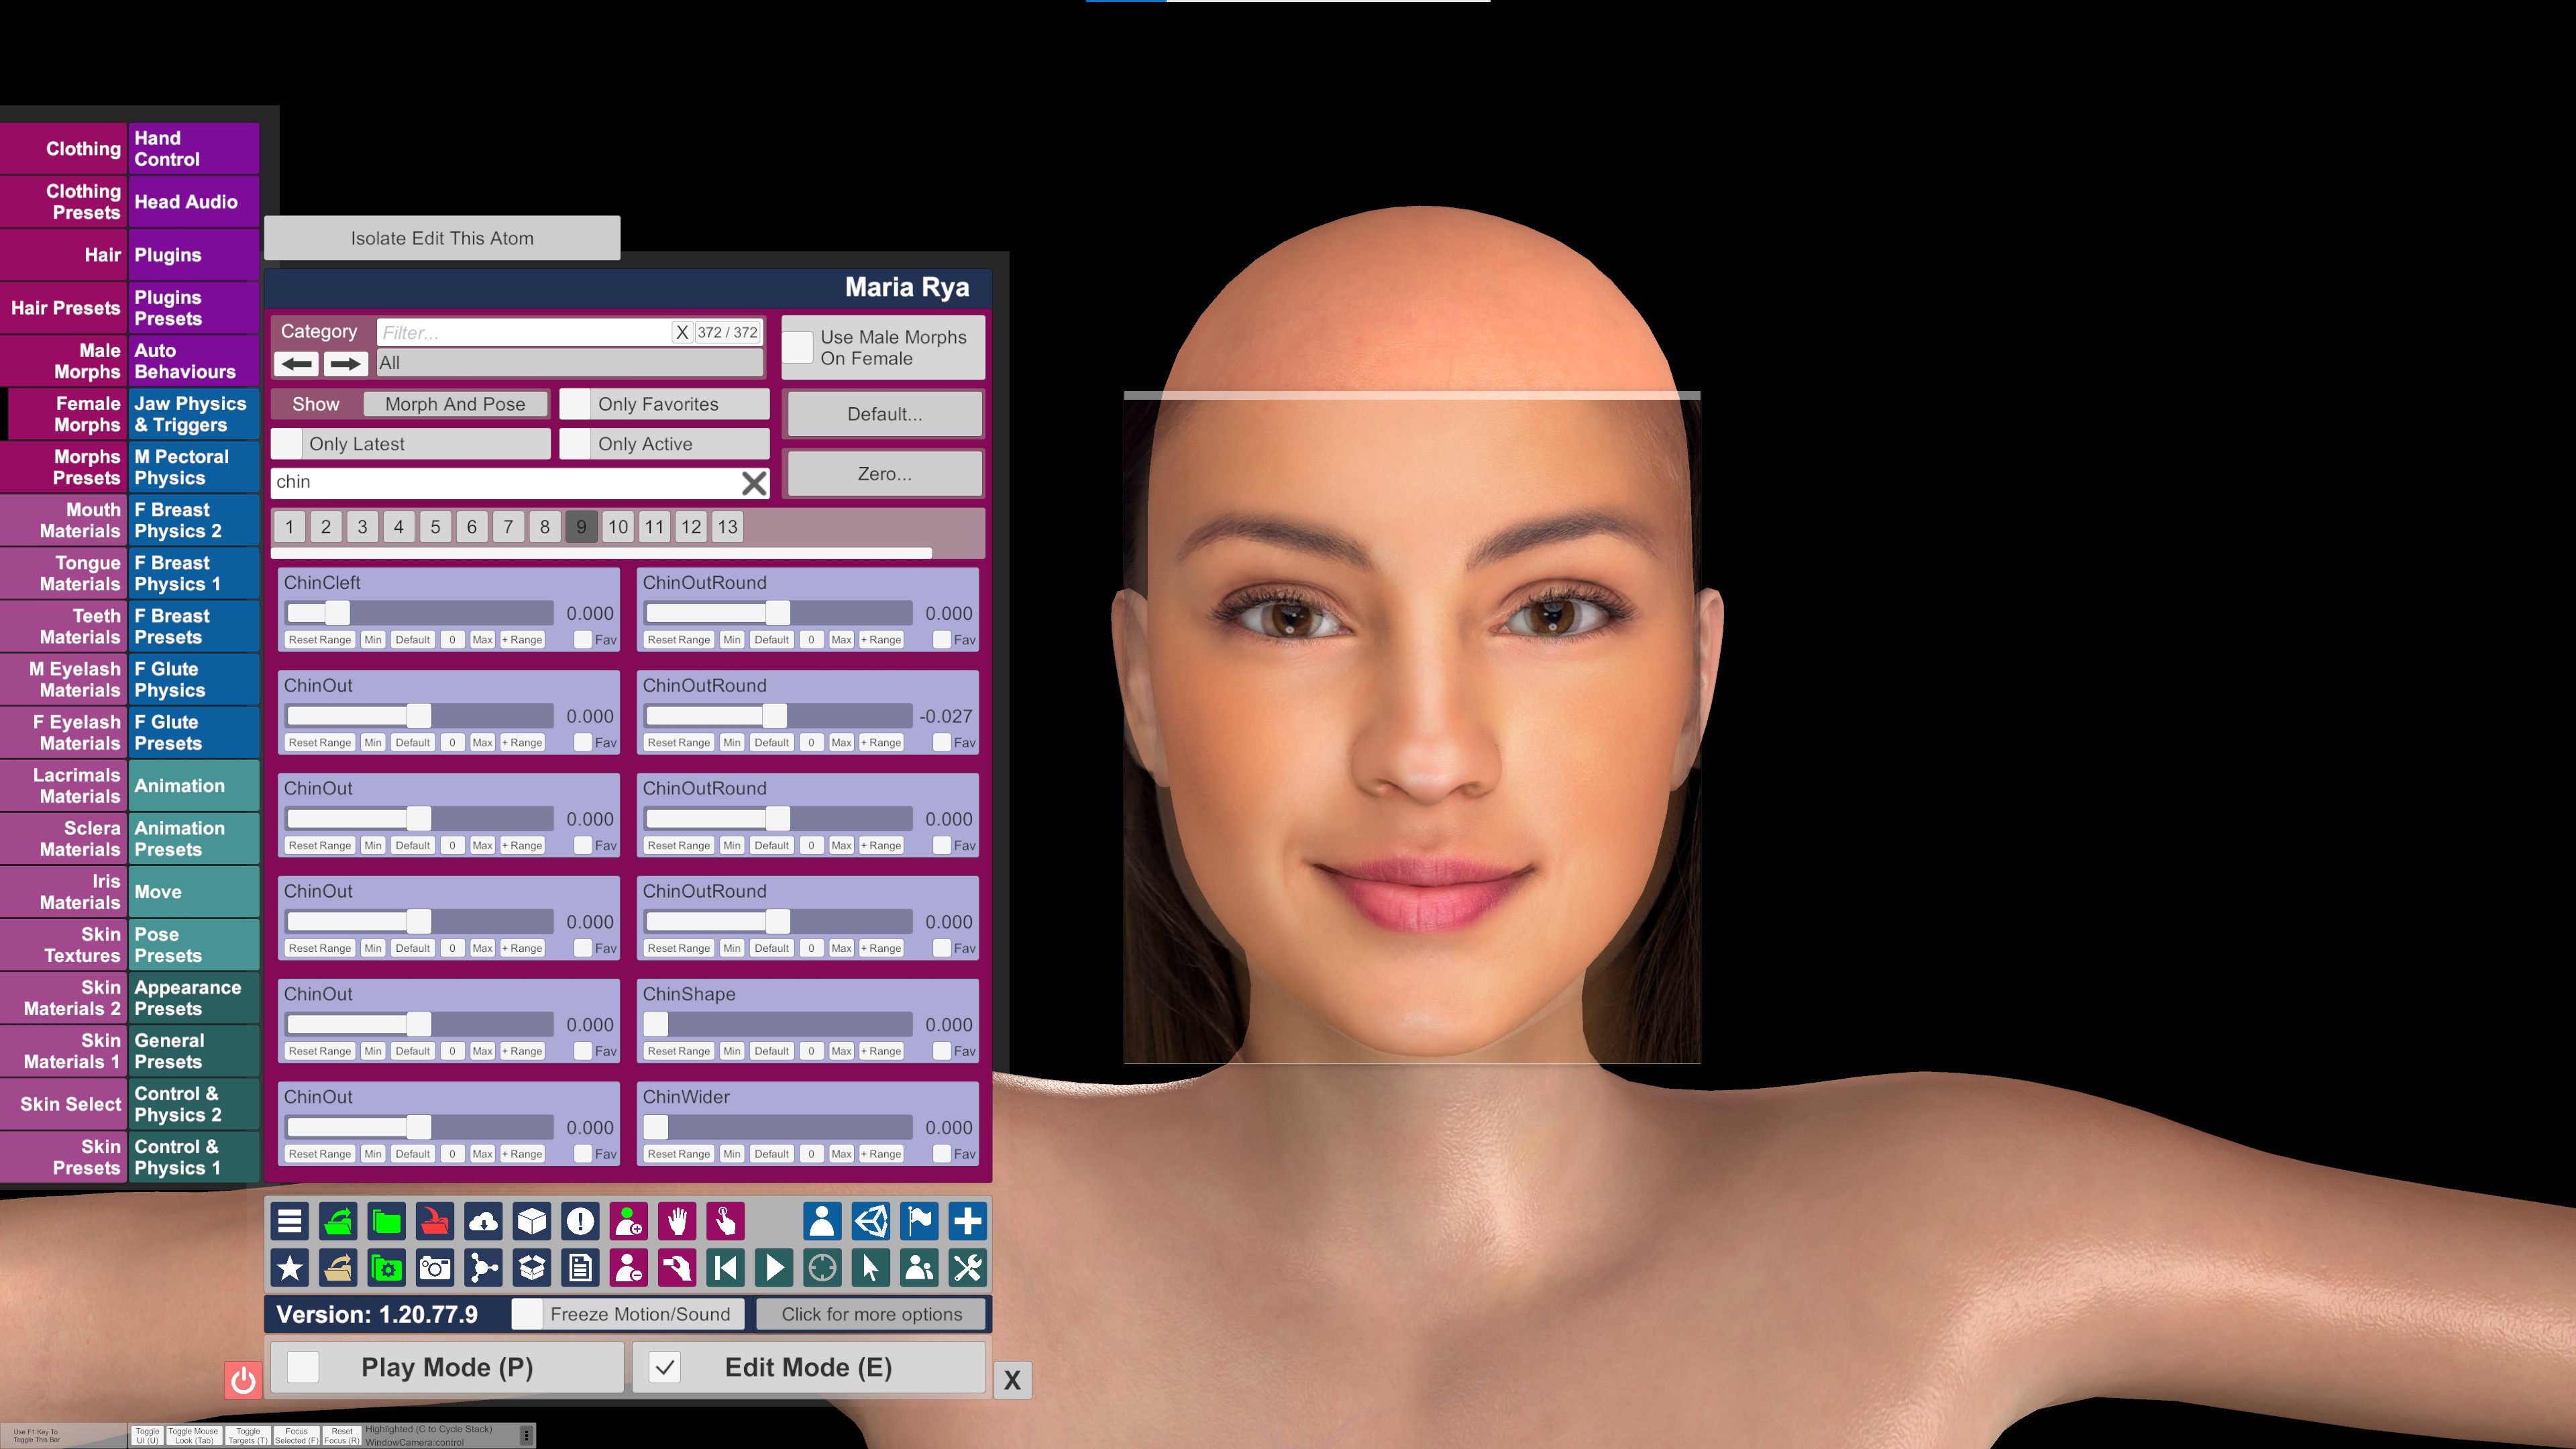
I hope this workflow / guide helps those that requested it and also the rest of the Vam community.
Im by no means an expert at guides or making content but maybe someone will find it helpfull.
Also , if your wondering about the model in the guide She will be uploaded Soon.
By no means am i an expert in VAM or Guides but i hope this helps people.
I use facegen and a program called OnTopReplica for my looks and i wont be covering it in this guide as the requester is already familiar with both . OnTopReplica is simply used to overlay the original photo in VAM.
1. Load your Facegen results into VAM and overlay the orginal image of your desired look your attempting with OnTopReplica.
2.Find the Morph created by facegen and set the slider to between 0.550 to 0.650 and NOT 1.000.
I set it to around 0.600 and find this is best , if set to 1.000 for some reason the Morph is way off the target look and is a well known thing with facegen. Below are images of the Morph set to 1.000 and 0.600.
3. Set the opacity of the OnTopReplica image to 50% and lay it over the face of the Vam model .
I find that facegen always gets the eyes height wrong and also the eye size , so tweak both to your liking as close to the target look as possible and use the rest of the sliders for eye shape etc.
Take note of the eyeball shadow being behind the eye due to the scale being to big , this seems to be a facgen thing so asi said , scale down the eyeball size to fix. i usually scale down until the eyeball shadow shows correctly as shown in the pics below.
4. once happy with the eyes , i move onto the nose as this is also where facegen fails . Mainly the bridge and curve are the areas needing most work but when happy, move onto the nostrils using the image overlay ontop of your model untill you get a similar shape. Rinse and repeat untill happy. Use side profile images of your target model if you have them for the best results.
5.This is when i usually fix any texture errors using Paint , you could use photoshop etc but i find paint quick and easy.
i have done a quickfix guide on this as it was requestd awhile age so i will just add some images of this model i made for this guide. It wasnt bad for this model , just slight dark patches under the nose needed fixing.
6. Lastly i move onto the chin / jaw and then cheeks/ cheekbones and head shape. This part is aimed specifitly for the person who requested this Guide / workflow.
head shape is relitivley simple , just overlay the image and use the sliders to get as close to the image as you are happy with. It wont always align perfectley with the model and the image as the scale and angle of the face might differ and your model wont look quite right so its just a case of tweaking untill happy.
Next is the chin , cheeks and cheekbones to finish which i think make a really big apperance difference and is basicly the same steps as above for the face shape BUT chin and cheekbone protrusion is HARD to judge unless you have a side profile image or similar of the TARGET model which isnt always possible . So what i tend to do and advise you to if you dont have a profile image to work is USE THE LIGHTING , SHADOWS AND FACE LINES AND WRINKLES on the original image your working off and the actual texture of the model. For example the laugh lines / mouth creases , a crease or line in the face is normally sunken in depth so i would find a morph slider to sink the mouth corners for example. The ares of the face that appear to catch the light , like the chin , cheeks /cheekbones protrude from the face so if facgen messed up as always Lol , look for sliders that affect the areas of the face which light catches the face MORE and adjust untill happy. Again , laugh lines , creases and wrinkled areas are normaly deeper/ sunken and areas where the light catches more are proturding and raised .
I hope this workflow / guide helps those that requested it and also the rest of the Vam community.
Im by no means an expert at guides or making content but maybe someone will find it helpfull.
Also , if your wondering about the model in the guide She will be uploaded Soon.


