


You are using an out of date browser. It may not display this or other websites correctly.
You should upgrade or use an alternative browser.
You should upgrade or use an alternative browser.
Download [<1 MB]
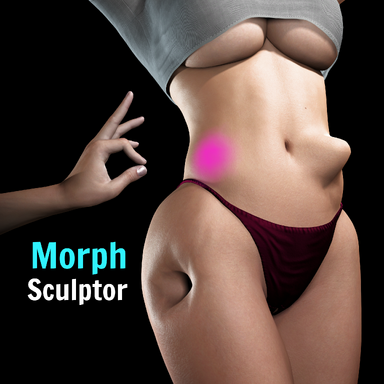
New: Slide tool
Similar to the grab tool, but it moves vertices along the surface. The purpose is to move a selection of vertices around while the overall silhouette stays intact. Good for repositioning details like a navel, nipple or other detail without deforming the shape of the body.



New: Relax tool
Smooths vertices along the surface to even out stretched or bunched-up vertices without changing the shape itself (known in sculpting programs as a tangential or slide relax). The already existing smooth tool irons out bumps in your sculpt, and this new relax tool fixes the mesh distribution while leaving the silhouette alone.
New: sculpting the genital edge (optional)
The outer edge of the genital mesh is stuck to the body mesh by VaM itself, so these vertices normally never move when sculpting. There is a new a toggle in Advanced Settings called "Sculpt Genital Edge" that makes the genital edge sculptable. Since sculpting and moving these edge vertices also move the body's mesh, saving a genital morph with edge changes will also save a second morph called "yourscultpname Edge" in the body morph list. Apply both morphs together to get the full shape. This is off by default so normal genital sculpting will still produce a single morph file. In cases where you prefer the edge vertices of the genitals to follow your sculpting, this setting will allow for that. Note that the Edge morph shows up with the body morphs in the Morphs tab, not in the genitals section.
Other Fixes
- Fixed part of the genital mesh staying frozen in the default pose instead of following the body.
- Fixed the wireframe overlay staying behind in the scene forever (also across scene loads) when the plugin was removed while the wireframe was active

This release is once again built on a version sent to me by @Ghostwalden , who has put a huge amount of work into it. Many thanks to them for growing this plugin!
Some changed shortcuts, please read
Shortcuts are now fully customizable in Advanced Settings, and a few defaults have changed:
Every shortcut can be rebound, and there is a "Reset Shortcuts to Defaults" button if you want to quickly reset them back.
- Sculpt out = Shift, sculpt in = Space (unchanged)
- Brush Radius = hold Alt and drag (unchanged)
- Brush Strength = hold Alt + right mouse button and drag. (This used to be Ctrl + Alt + drag)
- Ctrl + Alt + drag is now Brush Shape (for an elliptical shape), and Ctrl + Alt + RMB + drag is Brush Rotation
- Mirror Toggle = Ctrl + Shift + MMB, Switch Brush = Ctrl + Shift + LMB, Hide Mesh/Brush = Ctrl + Shift + RMB, Sculpt Amount Toggle = Ctrl + MMB
- The old bracket and minus/equals keys for radius and strength have been removed, because typing those characters into the shortcut fields would trigger them
New: Bone Morphs
A new page for rotating bones directly, covering hands, feet, tongue, jaw, penis and other bone groups. Saving creates a normal morph that anyone can use without the plugin, so you can build finger poses, an opened jaw or tongue positions as morphs. Bone Morphs save separately from sculpts, and there are buttons on both sides to combine them into one morph.
New: Reset to Base brush
Fades the brushed area back to the default Genesis 2 shape, undoing the character's own morphs in that spot so you can re-sculpt from a clean base. Shift fades toward the base mesh, Space returns to the character's shape. This can be useful for things like fixing bad neck seams. Keep in mind that morphs made this way only fit the character they were made on.
New: your own default settings
Two buttons in Advanced Settings. "Save Settings as Defaults" stores your shortcuts, brush appearance, colors and toggles, and those are applied every time you load the plugin from then on. "Load Plugin Defaults" puts everything back to the original plugin's settings. Your defaults are stored in Saves/PluginData/MorphSculptor, so they will still work with plugin updates and can be copied over to another VaM install.
Mesh Parts and teeth
Gender switching and targets
- Mesh Parts Adjust expanded, with Single Tooth Mode and Teeth Limit for working on individual teeth
- Sculpting and Mesh Parts Adjust are now saved together in one morph
- Sculpt Mode switches off while you are in Mesh Parts Adjust or Bone Morphs, and comes back afterwards
Loading existing morphs
- You can switch gender while the plugin is loaded by selecting another skin, and your sculpt transfers over
- You can switch between Body and Genitals without losing the sculpt on the other one
- Genital sculpting works properly again. (this was broken in v6)
- Genitals stay visible in Genital Sculpt even when the skin is set to transparent
Improvements
- The plugin can load other morphs, including ones that contain bone values, and you can erase a loaded morph back to the G2 base
- The same morph can no longer be loaded twice
- New Morph Area in the Save section: save a whole morph as one file, as head and body in two files at once, or head and body separately
- 'Open Morph Directory' now opens the folder the morph will actually be saved to
Fixes
- The mesh brush is more precise
- Gizmo Mode is more precise and stable
- Mirror now offers X, Z and XZ symmetry
- Mask Paint has its own strength slider, adjustable with Alt + RMB while Mask Paint is on
- Separate undo and redo history for body sculpt, genital sculpt, mask paint, Mesh Parts Adjust, Single Tooth Mode and Bone Morphs, with an adjustable number of undo steps
- Undo and Redo buttons are now shown by default (which was requested by a user) and follow whatever you are editing
- Sculpt Mode, Single Vertex Mode and Mask Paint can no longer be active at the same time
- "Hide Mesh/Brush on sculpting" now works in Single Vertex Mode and Mask Paint too
- Sculpt Areas can be expanded and collapsed with the arrow button
- A color setting for the normal brush was added to Appearance Settings
- Tears now belong to Skin Only
- Every page has a spacer so the scrollbar stays visible and the UI no longer jumps around
- New toggle to stop the plugin from disabling breast soft physics while it is loaded
- If you switch the plugin off with VaM's 'Enabled' checkbox and then click Open Custom UI, the plugin switches itself back on instead of opening a UI that does nothing
Known issues
- Fixed the Grab tool doing nothing when the camera was very close to the model, which mainly showed up during precise single vertex work
- Grab along the normal (Space) is no longer locked to a defined Grab Axis
- Gender switching can still reset the genital sculpt from the previous gender. It is meant for transferring a sculpt once, not for switching back and forth
- Mesh Parts Adjust for Teeth & Gums and Single Tooth Mode can interfere with each other
- Mesh Parts is not yet included in Body Sculpt Amount
A user manual created by Ghostwalden has been added to the bottom of the main hub page with explanations for each plugin function
This is a big one. @Ghostwalden sent me a heavily extended version of the plugin they had built on top of a previous version, and most of it is now part of the official plugin. Huge thanks to them for the work and for offering it back! I've merged their features into the current version, so everything from v5 (mask fill modes, mirror fixes, grab along normal, ALT brush sizing) is still here, and the controls remain the same as what you're used to: Shift sculpts out, Space sculpts in.
New features:
Fixes and changes:
- Reworked UI, now organized into pages: Main, Mesh Parts Adjust, Advanced, Appearance, Reference Image and Instructions
- Mesh Brush: the brush now shows the actual vertices and wireframe it will affect instead of a plain highlight

- Reference Image: load an image (with a file browser) and show it as an overlay on screen while you sculpt, with position, size and transparency controls
- Single Vertex Gizmo: click a vertex to attach a movable gizmo with axis and plane handles for precise single-vertex placement, plus camera focus on the selected vertex

- Mesh Parts Adjust: move and rotate whole mesh regions (for example the head) with the surrounding skin following, useful for lining up head swaps
- New Rotate tool: twists the brushed region, Shift and Space turn opposite ways

- Grab Axis option: lock the grab tool to a single axis or plane
- Sculpt Area: limit sculpting to part of the mesh, and hide or dim mesh areas you're not working on
- Sliders now come in metre and millimetre pairs for finer control
- Better morph name field: shows whether a name is free or would overwrite, and the saved morph list refreshes automatically
- Sculpt Amount slider + Bake Sculpt Amount button: the slider fades your entire working sculpt between 0 and full strength, and Bake makes the faded version the new 100% so you can keep sculpting from there
- Options to temporarily disable auto expressions, auto blink and eyes look-at while sculpting
- Improved ALT brush sizing: the cursor now stays hidden and frozen in place while adjusting, ALT + RMB adjusts strength (Ctrl + ALT still works like before)
- On-screen Brush Strength readout while adjusting strength with the mouse or the - and = keys
- Optional "Hide Targets in Sculpt Mode" (off by default): hides all atoms from selection while sculpting. Note that this includes the Person itself, so if you click into the scene you'll need Select > Show Hidden to get the UI back. Only turn this on if that trade is worth it to you
- Smooth tool strength fixed: it now responds properly across the whole strength range instead of feeling weak even at maximum
- The plugin's internal working morphs no longer show up in the Morphs tab. While you sculpt, the plugin stores your unsaved work in two hidden helper morphs called "MorphSculptor A" and "MorphSculptor B". These used to appear as sliders in the Morphs tab, where they always read 0 and couldn't be changed by hand, which confused some people into thinking something was broken. They're now hidden like they should have been. Your actual saved morphs are unaffected and show up like normal.




New features
Fixes
- Tool grid: the brush tools are now a compact grid of buttons with the active tool highlighted in green, instead of a dropdown. This makes it faster to switch and easier to see what's selected.

- Mask fill modes: the Mask tool gets two fill modes alongside brush painting. Mesh Island fills the entire connected piece under the cursor (a whole eyeball, a tooth, the body), and Material Zone fills a whole material region (all teeth, eye parts, eyelashes, lips, and so on). In these modes the region under your cursor is highlighted so you can see what you'll be masking. Shift fills, Space erases.


- Grab along the normal: the Grab tool now has two directions. Hold Shift to drag freely in the camera view plane (as before), or Space to drag straight in and out along the surface normal, for clean pushes and pulls without sliding across the surface.

- Brush sizing shortcut: hold ALT and drag the mouse left/right to resize the brush. Hold Ctrl+ALT and drag to change strength instead. Similar to Blender's F shortcut (F is taken in VaM).

- Mirror symmetry: with Mirror enabled, a large brush (or the Grab tool) started near the body's centerline no longer pulls the other side along with it. The brush is now clipped at the centerline, vertices sitting exactly on the centerline stay put instead of being dragged sideways. Most noticeable with the Grab tool.

New features
Fixes and improvements
- Genital sculpting now fully works: the Genital sculpting is no longer experimental. Vertex positions are now read directly from the GPU, which fixed the misplaced wireframe, the unresponsive vertices, and the overlays not following your sculpt. It behaves exactly like body sculpting now, on any pose and any morphs. Huge thanks to @Eye9 for suggesting the GPU approach! I finally got it to work because of their comment.
- Erase tool: brush the sculpt back to the original body. Both SHIFT and SPACE erases, and it works in single-vertex mode too.
- Invertible morphs: a new "Save Range -1 to 1" toggle saves morphs with a -1 to 1 slider instead of 0 to 1, where negative values will apply the sculpt in the opposite direction. A "Convert Selected to -1..1 Range" button has been added that upgrades previously saved morphs to the same range.
- Body wireframe modes: the wireframe toggle is now Off / Wireframe / Solid. Solid hides the skin and shows a shaded wireframe body instead, so no skin clips through the wireframe on heavily morphed models and it stays clearly visible in brightly lit scenes. Clothing still shows in front for reference.
- Smooth tool reworked: it used to act like a slow eraser, flattening bumps into the skin. It now smooths out jagged, uneven areas while keeping the overall shape and volume, and softens the transition into the surrounding skin. Use the new Erase tool when you actually want to remove sculpting.
- Grab strength: the Grab tool's drag response now scales with Brush Strength. Default strength is 1:1 with the mouse, a lower is finer control, a higher value is amplified.
- Mask Tint Offset now defaults to 0.02 so the mask tint stays visible above clothing.



New features
Fixes & Improvements
- Mask tool: paint areas that are protected from sculpting. Shift paints, Space erases, orange tint shows the masked area. Works with every tool including Grab and vertex mode.

- Clear Mask / Invert Mask buttons.
- Show Mask Tint toggle: temporarily hide the tint without clearing the mask. When using the mask tool, hiding will not work (to prevent masking blindly)
- Mask Tint Offset slider: raise the mask overlay off the skin so it stays visible above clothing when masking under a bra or panties.
- Load Selected for Editing: loads a previously saved morph into the sculpt buffer to continue working on it. Its slider resets to 0 (the shape moves into the buffer, so nothing visually changes), the name box picks up its name, and re-saving with the same name overwrites while a new name will make a copy. One undo step reverts the load.
- Genital sculpting (EXPERIMENTAL): a new Sculpt Target dropdown adds a Genitals mode with its own morph bank and save folder, so sculpts save as real genital morphs. Please read the note below.
- Grab tool direction fix: grabbed vertices used to drift in a wrong direction that changed with camera angle, worst on heavily morphed characters. The drag should now follow the mouse correctly, and drag distance is right on scaled atoms too.
- Close-up picking fix: picking vertices stopped working when the camera got within 5 cm of the mesh. Now works down to 2 mm, so you can zoom in for fine work.
- Finer brush control: the strength slider shows 4 decimals to improve precision work. Brush Radius got the same change, and the minimums for Brush Radius and Vertex View Radius dropped from 5 mm to 2 mm.
- Overwrite protection: saving over an existing morph name asks for a second click to confirm.
- Delete protection: deleting a saved morph asks for a second click, and the deleted morph is set to 0 so what you see matches what is on disk.
About the experimental genital sculpting
Genital sculpting does not work the same as body sculpting, and right now I can't get it any better than this. The genitals are a separate grafted mesh inside VaM, and the data the plugin needs to show you where those vertices are is broken on VaM's side in several ways. Sculpting itself works, and saved morphs come out correct in the proper genital morphs folder, but the wireframe and brush overlays can sit in the wrong place on morphed or posed models, and some vertices may not respond to the brush. It works best on a model with few or no morphs in a neutral pose. The plugin shows a red warning when you select the Genitals target as a reminder. I'll try revisiting this in the future, but for now this is the best I can get it.
- Vertex dots now stay the same size on screen no matter how far you zoom in. Before, zooming in on a dense area made the dots overlap and hard to tell apart. Now they hold a fixed on-screen size, so tightly packed vertices spread out and stay easy to pick.
- 2
-
 2
2