

You are using an out of date browser. It may not display this or other websites correctly.
You should upgrade or use an alternative browser.
You should upgrade or use an alternative browser.
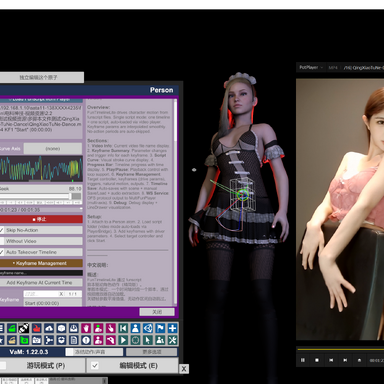
This release mainly addresses the issue where audio files become unusable after scene packaging and export. It adds the Global Progress Trigger and fixes MFP WebSocket connection failures.
After releasing the previous demo scene, I found background audio went missing in the packaged build. Audio is a key advantage for all funscript‑driven scenes, so I spent a lot of time fixing this bug.
My original plan was to let the plugin handle sound automatically, so audio could adapt to playback progress, playback speed and mask‑based skip logic. I implemented this feature, and the workflow was as follows:
This workflow worked perfectly on local machines. However, I later discovered it does not support published exports. Even after assets are added to scene audio, the clips captured by sound‑management only exist in runtime cache. I do not know why VaM enforces this limitation. It appears audio can only be played through AudioSource atoms. If anyone has a solution, feel free to share your insights.
- When extracting audio, you can output an audio name within the control; if not specified, it defaults to timeline.
- Users generate audio files using batch commands.
- Users manually add the generated audio files to scene audio.
- Inside the sound‑management section, users can select and bind audio clips via dropdown lists.
- Once an audio clip is bound, playback, pause, mask‑skipping, speed adjustment and other behaviours are handled internally by the plugin. Users only need to focus on scene elements such as character clothing and poses.
Since that path was not viable, I moved to a second approach which requires the everlaster.AudioScrubber.3 plugin. It is capable of controlling playback progress on AudioSource atoms. Therefore you now need to do the following:
You will notice that playing audio via AudioSource adds a lot of extra manual steps. My recommended workflow is: use the tools inside the sound‑management section during early‑stage scene creation; switch over to the AudioSource + AudioScrubber workflow when you are ready for release.
- Attach the everlaster.AudioScrubber.3 plugin to every AudioSource atom.
- Use triggers at appropriate points to set and play audio for scene AudioSources as well as character‑head‑audio‑sources on person atoms.
- Use the plugin‑provided Progress trigger to keep all AudioSources synchronised to the timeline in real‑time.
- Manually add Pause and Stop actions for each AudioSource wherever audio needs to be paused or halted.
That said, using AudioScrubber also brings one extra benefit. I can now expose a UI slider as a timeline progress indicator. Note this slider is display‑only and cannot be used to seek the playback position.
Regarding character‑vocals extraction: you do not have to use my provided tool. You may use other audio‑track‑separation software. The critical requirement is that every extracted track must match the total length of the original video. The sole purpose of separate character vocal tracks is to achieve more responsive character lip‑sync. If you do not prioritise lip‑sync quality, extracting the full mixed‑track from the original video is sufficient.
这个版本主要解决音频文件打包发布后不可用的问题,新增全局 Progress Trigger,修复 MFP WebSocket 连接失败问题。
上一版的 demo 场景发布后我才发现,打包发布的版本背景音丢掉了。音频是所有 Funscript 脚本驱动场景一项很重要的优势,所以我花了很长时间去修复这个 bug。
我原先的思路是通过插件自动管理 sound,这样音频可以随着播放进度、播放速度,以及 mask 跳过逻辑自适应。我也实现了这个功能,基本流程是:
1)在extract audio时可以在控件中输出音频的名字,如果不设定则默认为timeline
2)用户利用批处理指令生成音频文件
3)用户手动将音频文件添加到场景音效
4)然后在sound management区就可以利用下拉列表选择并绑定音频clip
5)音频clip一旦绑定,后续音频播放,暂停,mask路过,加速播放等都由插件后台实现,用户只需要关注于场景中人物服饰、姿势等
上述流程在本地电脑运行一切正常。但后续发现这套方案无法用于正式发布;即便音频素材已经添加到场景音效,sound management 抓取到的音频仅存在运行时缓存里。我不清楚 VAM 为什么存在该限制,看起来我们只能依靠 AudioSource 来播放音频。如果有人有解决思路,欢迎提供线索。
由于这条路走不通,我尝试了第二种实现方案,该方案需要依赖 everlaster.AudioScrubber.3 插件,它可以控制 AudioSource 上的音频播放进度。现在你需要完成以下操作:
1)为所有 AudioSource 原子挂载 everlaster.AudioScrubber.3 插件
2)在合适时机通过触发器,为场景 AudioSource 以及人物原子的头部音频源设置并播放音频
3)使用插件提供的 Progress 触发器,实时同步所有 AudioSource 的播放进度与时间线
4)所有需要暂停、停止音频的位置,手动给对应 AudioSource 添加暂停与停止动作
你会发现使用 AudioSource 播放音频会多出大量手动操作步骤。我推荐工作流:场景前期制作阶段使用 sound management 模块内的工具;准备发布场景时,切换为 AudioSource + AudioScrubber 这套方案。
当然使用 AudioScrubber 也带来额外增益:现在可以提供一条 UI 滑块用作时间线进度指示器。该滑块仅做展示,无法用来调整播放位置。
关于角色人声提取:你不必使用我提供的工具,可以选用其他音轨分离软件。硬性要求:所有分离出来的音轨时长必须和原视频保持一致。分离出独立角色人声的唯一作用,是实现更贴合的人物嘴型同步。如果你对嘴型效果要求不高,直接提取原视频混合音频就足够使用。
Plugin Update Log
1. The plugin no longer forces PotPlayer bridging for script loading. You can load funscripts directly via Load Funscript From File, which automatically enters video-free mode.
2. The plugin no longer binds rigidly to a single person atom. You can switch different person atoms as the driving target during timeline playback.
3. Fixed core bugs in the Driver engine. The initial MFPButtDriver code was developed without considering subsequent person atom iteration and update requirements, causing severe instability. Continuous optimization is ongoing.
4. Developed a new audio track extraction tool for centralized audio management, supporting up to 5 character audio tracks simultaneously.
5. Added keyframe jump playback and playback speed adjustment functions to improve debugging efficiency during scene production. It is recommended to use these tools instead of dragging the progress bar directly.
6. Optimized the trigger list UI. It now displays trigger categories and the exact number of actions under each category for clearer management.
7. Added complete external trigger call interfaces:
8. Implemented multiple UI optimizations and minor bug fixes.
- TL Start: Start timeline playback
- TL Stop: Pause timeline playback
- TL ResetOrigin: Reset the driven atom’s origin point
- TL ResetProgress: Jump playback progress back to 0
- TL PlayfromKF: Jump to a specified keyframe and start playback
- Playback Speed: Adjust the global timeline playback speed in real time
- TL DelayRestart: Restart the driver with a custom delay (500ms default delay)
- TL Restart: Fully restart the entire timeline and driver system instantly
Demo Scene Introduction
FunTimeline’s greatest strength is directly converting plot-based videos into playable VAM scenes. Therefore, I selected an 18-minute moderate-length video resource from the Eroscripts forum for this demo. As my first official VAM scene production, some production methods may not be optimal, but the overall workflow is feasible and complete. This plugin has finally evolved from a conceptual idea to a fully functional practical tool.
Data Source: Original video and funscript resources are sourced from: https://discuss.eroscripts.com/t/lu...he-alluring-neighbor-on-a-deeper-level/290686
Preset Preparation:
Auxiliary Plugins:
- Clothing Presets: 3 sets for male characters, 2 sets for female characters
- Pose Presets: 3 daily scene poses + 5 interactive action poses, totaling 16 male & female universal pose presets
- BodyLanguage + PoseMe: Supply natural idle movements, facial expressions and cinematic camera motions (compensating for FunTimeline’s lack of subtle organic animations); provide standardized pose management.
- VAMOverlay: Provide scene transition effects and subtitle display (replaces the original PoseMe subtitle function which failed to display normally).
- DockedUI: Fix UI buttons to fixed screen positions, adapting to frequently switching camera perspectives in cinematic scenes.


Demo Production Workflow
The core advantage of producing scenes with FunTimeline is to restore scene plots, poses and actions by referencing the original video. The complete practical production process is summarized as follows:
Step 1: Mask Redundancy Trimming
Use masks to filter redundant content such as opening credits, ending credits and non-plot-driven dialogues. Operation: Click Add Mask At Current Time at the start position of redundant segments; the system will automatically generate a 5-second mask. Adjust the start/end time via the slider (automatically saved). Masked segments are displayed as red filled areas on the timeline.
Mask segments used in this demo:
Step 2: Scene Segmentation & Preset Configuration
- Mask1: 00:00:00 → 00:00:11 (11100ms)
- Mask2: 00:02:41 → 00:03:10 (28310ms)
- Mask3: 00:03:39 → 00:04:50 (71378ms)
- Mask5: 00:07:53 → 00:08:18 (24158ms)
- Mask6: 00:10:05 → 00:10:26 (20832ms)
- Mask7: 00:12:33 → 00:13:05 (32512ms)
- Mask9: 00:15:04 → 00:18:30 (205943ms)
- Mask11: 00:01:12 → 00:01:20 (7409ms)
- Mask12: 00:05:22 → 00:05:27 (5000ms)
The entire demo is divided into 8 transition scenes, including 3 daily casual scenes and 5 interactive action scenes. Match dedicated pose presets and partial clothing presets for each scene in advance.
Clothing preset rules: Male (b-ori / b-s1 half-nude / b-s1 full-nude); Female (g-ori / g-s1 half-nude / g-s1 full-nude)
Scene time division:
The gaps between adjacent scenes are reserved for transition effects, avoiding unnatural instantaneous pose switching.
- P1: Door conversation | 00:00:25 ~ 00:01:23
- P2: Sofa conversation | 00:01:26 ~ 00:02:34
- P3: Sofa flirting | 00:03:14 ~ 00:04:06
- P4: Action Pose 1 | 00:04:53 ~ 00:07:50
- P5: Action Pose 2 | 00:08:22 ~ 00:10:02
- P6: Action Pose 3 | 00:10:27 ~ 00:12:27
- P7: Action Pose 4 | 00:13:06 ~ 00:15:05
- P8: Action Pose 5 | 00:15:22 ~ 00:17:35
Step 3: Hierarchical Keyframe Division
Keyframes adopt a two-level hierarchical structure:
Naming specification: 8 core scenes are named P1~P8; transition segments are named pn-0; subsequent detailed keyframes are named pn-1, pn-2... Dialogue subtitles are distinguished as pnBm (male subtitles) and pnGm (female subtitles). Add CAM switch keyframes to enrich visual layers.
- Keyframe Layer (Scene Level): Control scene transition effects and Driver parameter switching (pose replacement requires matching updated driver parameters).
- Ordinary Keyframe (Detail Level): Control scene-independent elements such as camera movement, lighting, and subtitles.
Step 4: Driver Parameter Setup
The first 3 daily scenes disable atom driving (empty driver target). The last 5 action scenes enable driving for male/female atoms according to action types. Adjust the L0 main axis direction (downward/forward) and axis range via preview debugging.
Step 5: Trigger Configuration
Step 6: Final Initialization Binding
- pn-0 (Transition Segment): Trigger fade-out at the end of the previous scene; apply matching poses and load clothing presets via PoseMe after the new scene starts. Each transition is limited to 3 seconds, and redundant interval time is trimmed via masks.
- pn-1 (Scene Entry): Trigger fade-in to enter the scene; configure driven atom, driving parts, movement direction and amplitude via Driver settings. Core Notes: Reset the driven atom origin via Reset Origin before driving to fix position offset errors; disable all FillMeUp force parameters and retain user default presets to shield BodyLanguage automatic idle actions. If the Driver fails to take effect due to PoseMe joint linkage, restart the driver manually. If simultaneous PoseMe and Driver execution causes invalid restart, use DelayRestart(100) (restart driver 100ms after PoseMe execution).
- pn-m (Detail Segments): Control auxiliary elements such as subtitles, camera switching and lighting adjustment via triggers.
Bind all FunTimeline external control commands and scene initialization actions to DockedUI buttons for one-click control.
Demo Scene Notes
1. Scene design distinction: The first 3 daily scenes are enriched with dialogues and diverse camera motions; the last 5 interactive action scenes focus purely on action performance without additional dialogue arrangements.
2. Production flaws: Early scene production improperly used pose presets to achieve camera effects instead of dedicated camera keyframes. To avoid introducing new unknown bugs, this legacy issue has not been modified in the final version.
3. Irregular segment settings: Individual scenes do not fully follow the standard pn-0/pn-1 layered rules. P3 skips independent transitions due to dense continuous dialogues between P2 and P3; P5 omits dedicated transitions due to highly continuous and similar poses with the previous scene.
4. Known issue: The final scene switch triggers physical explosion bugs. The root cause is currently undetermined, and the problematic segment is temporarily skipped via Mask trimming.
To-Do List
1. Optimize and implement hierarchical management for keyframe layers.
2. Realize unified subtitle file import and management via PoseMe or Overlayer plugins.
插件更新说明
1. 插件不再强制依赖 PotPlayer 桥接方式加载脚本,可直接通过Load Funscript From File载入脚本,自动进入无视频运行模式。
2. 取消插件单人原子强制绑定限制,时间线运行过程中,可自由切换任意人物原子作为驱动对象。
3. 修复 Driver 引擎核心BUG。初代 MFPButtDriver 开发阶段未预留人物原子迭代更新适配逻辑,导致代码稳定性极差,目前正在持续迭代优化。
4. 全新开发音轨提取工具,实现音频统一管理,单场景最多支持5个人物独立音轨。
5. 新增关键帧跳转播放、播放速度调节功能,大幅提升场景制作的调试效率。推荐优先使用该功能,替代直接拖拽进度条的操作方式。
6. 优化触发器列表界面,可视化展示各类触发器分类及对应动作数量,管理更清晰。
7. 新增全套外部触发器调用接口,支持外部场景/插件联动控制:
8. 还完成多项界面细节优化与已知小问题修复。
- TL Start:启动时间线播放
- TL Stop:停止时间线播放
- TL ResetOrigin:重置驱动物体原点
- TL ResetProgress:将播放进度归零
- TL PlayfromKF:跳转至指定关键帧播放
- Playback Speed:实时调节时间线全局播放速度
- TL DelayRestart:延时重启驱动(默认500毫秒延迟执行)
- TL Restart:即时完全重启整条时间线与驱动系统
场景介绍及前期准备场景介绍及前期准备
FunTimeline 最核心的优势,就是可以将带有完整情节的影片直接转化为可运行的VAM场景。因此我在ES论坛挑选了这段时长18分钟的素材,长度适中、非常适合用来做完整demo测试。这也是我第一次独立制作完整VAM剧情场景,部分制作思路或许不够成熟优雅,但整套流程完整可行,也标志着FunTimeline插件从构思落地为完整可用的实战工具。
数据源:场景视频与脚本素材来源:https://discuss.eroscripts.com/t/lu...he-alluring-neighbor-on-a-deeper-level/290686
预设准备:
必备辅助插件:
- 服装预设:男性3套、女性2套
- 姿势预设:3组日常场景姿势、5组互动动作姿势,男女通用共计16组姿势预设
- BodyLanguage + PoseMe:弥补FunTimeline无自然微动、表情短板,提供自然人物动作、微表情及电影级运镜效果,同时标准化管理场景姿势。
- VAMOverlay:实现场景转场特效与字幕展示(替代原有失效的PoseMe字幕功能)。
- DockedUI:将功能UI固定在屏幕位置,适配镜头频繁切换的剧情场景,操作更稳定。
场景制作步骤
使用FunTimeline制作场景的核心优势:只需对照原视频复刻剧情、姿势与动作,即可快速完成场景制作。以下是本人总结的全套实操流程:
步骤1:Mask冗余内容裁剪
通过Mask功能剔除片头、片尾、无剧情意义的冗余对话片段。操作方法:在冗余内容起始位置点击Add Mask At Current Time,系统自动生成5秒长度的遮罩,选中遮罩后可通过滑块自由调整起止时间(修改自动保存),被遮罩片段在时间线中以红色填充块展示。
本次Demo使用的遮罩区间:
步骤2:场景拆分与预设配置
- 遮罩1:00:00:00 → 00:00:11(11100毫秒)
- 遮罩2:00:02:41 → 00:03:10(28310毫秒)
- 遮罩3:00:03:39 → 00:04:50(71378毫秒)
- 遮罩5:00:07:53 → 00:08:18(24158毫秒)
- 遮罩6:00:10:05 → 00:10:26(20832毫秒)
- 遮罩7:00:12:33 → 00:13:05(32512毫秒)
- 遮罩9:00:15:04 → 00:18:30(205943毫秒)
- 遮罩11:00:01:12 → 00:01:20(7409毫秒)
- 遮罩12:00:05:22 → 00:05:27(5000毫秒)
本Demo整体拆分为8个转场子场景,包含3个日常场景、5个互动动作场景。提前为每个子场景配置专属姿势预设,部分场景配套专属服装预设。
服装预设规范:男性(b-ori原版 / b-s1半脱 / b-s1全脱);女性(g-ori原版 / g-s1半脱 / g-s1全脱)
子场景时间划分:
子场景之间预留时间间隙,专门用于转场过渡,避免姿势瞬间切换的生硬违和感。
- P1:门前对话|00:00:25 ~ 00:01:23
- P2:沙发交谈|00:01:26 ~ 00:02:34
- P3:沙发挑逗|00:03:14 ~ 00:04:06
- P4:动作姿势1|00:04:53 ~ 00:07:50
- P5:动作姿势2|00:08:22 ~ 00:10:02
- P6:动作姿势3|00:10:27 ~ 00:12:27
- P7:动作姿势4|00:13:06 ~ 00:15:05
- P8:动作姿势5|00:15:22 ~ 00:17:35
步骤3:分层关键帧设计
关键帧采用双层层级架构,逻辑更清晰、修改更便捷:
命名规范:8个核心场景命名为P1~P8;转场片段统一命名pn-0;后续细节动画帧依次命名pn-1、pn-2……对话字幕区分男女,分别为pnBm(男字幕)、pnGm(女字幕);穿插CAM镜头切换关键帧,丰富画面层次。
- 关键帧层(场景层):负责场景转场效果、Driver驱动参数切换(姿势更换必须同步更新驱动参数)。
- 普通关键帧(细节层):负责镜头运动、灯光、字幕等独立于人物姿势的细节元素。
步骤4:Driver驱动参数设置
前3个日常场景置空驱动原子,关闭动作驱动;后5个动作场景根据互动类型,选择驱动男性/女性原子,按需调整L0主轴方向(向下/向前),预览调试并校准各轴运动范围。
步骤5:触发器完整配置
步骤6:最终初始化绑定
- pn-0 转场片段:上一场景结束时触发淡出;转场起始阶段通过PoseMe应用新姿势、LoadPreset加载对应服装预设。单段转场时长控制在3秒,过长间隙通过Mask裁剪冗余时间。
- pn-1 场景主体片段:触发淡入进入场景,配置驱动原子、驱动部位、运动方向及幅度等核心参数。核心注意事项:人物姿势切换后位置会偏移,驱动前必须执行Reset Origin重置原点;关闭FillMeUp所有Force强制参数,保留用户默认预设,屏蔽BodyLanguage自动待机动作。若因PoseMe关节绑定导致Driver失效,需手动重启驱动;若同步执行PoseMe和重启驱动无效,调用DelayRestart(100),延迟100毫秒重启驱动。
- pn-m 细节片段:通过触发器统一控制字幕、镜头切换、灯光微调等辅助效果。
将所有FunTimeline外部控制指令、场景初始化动作绑定到DockedUI固定按钮,实现一键启停控制。
场景制作备注
1. 场景设计差异:前3个日常场景重点优化对话节奏与镜头运镜,画面层次更丰富;后5个动作场景专注动作演绎,未额外添加对话内容。
2. 制作瑕疵:前期制作存在逻辑不合理问题,本应通过镜头关键帧实现的运镜效果,错误使用姿势预设替代。为避免修改引发未知BUG,该遗留问题暂未调整。
3. 非标准化片段说明:部分子场景未严格遵循pn-0/pn-1分层规范。P3因相邻场景对话连贯、节奏紧凑,无多余时间制作转场;P5与前序场景姿势衔接度高、画面延续性强,无需额外转场过渡。
4. 已知问题:最后一段场景切换时会触发物理爆炸异常,目前暂未定位根本原因,临时通过Mask裁剪跳过该异常片段。
To-Do List
1. 完善关键帧分层管理体系,优化场景架构。
2. 实现字幕文件批量导入,统一接入 PoseMe 或 Overlayer 进行集中管理。