

Guide: How to Set Up Virtamate (VAM) in VR with Meta Quest
Beginner Friendly, SteamVR Method
There are ways to run VAM in VR without SteamVR and Meta Quest Link app, but it requires that you purchase Virtual Desktop (Currently $25). For first-time users, who want to just use free software to get it setup to try it out first, this is the easiest and most reliable method to get things working and to make sure you have everything to get it working. I recommend setting it up this way first to see if you even like VAM in VR and it also helps you confirm how well your computer works with VAM in VR.
This guide uses the VAM default free ways of SteamVR and Meta Quest Link, both free. This is a great way to get VR setup and try it out in Virtamate before looking at potentially better ways to use VR like with Virtual Desktop (paid). I personally use Virtual Desktop and highly recommend it but before I set that up, I tried it out the regular free way like this first, to see if I liked using Virtamate in VR. This way lets you try it out before spending money on additional software like Virtual Desktop.

 What You Need to Install (on your PC):
1. Steam + SteamVR (Desktop Software)
2. Meta Quest Link App (Desktop Software)
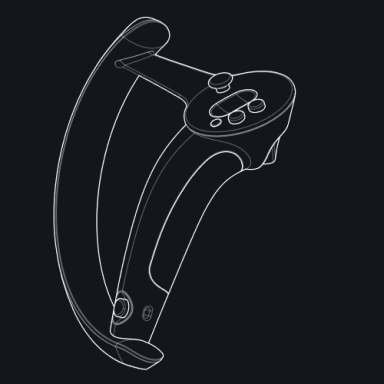
3. Meta Quest to PC Link Cable (recommended for first time setup)
If you don't have a cable, you can try Meta Quest Air Link which comes free with the Meta Quest Link App:
 Step-by-Step Setup:
1. Install & Setup SteamVR

After Installing SteamVR, open it and go to Settings. You can also get to Settings from the Steam System Tray Icon. Right click on the icon and click Settings.

On the Steam Settings screen, click on Privacy Settings.

Steam may broadcast what you're doing to others. Just to make sure Steam doesn't broadcast you're playing VAM, you could consider signing in with another account not connected to your friends, or make your "Game details: Private"

2. Install & Setup Meta Quest Link
3. Enable “Unknown Sources” for VAM

4. Prepare VAM for VR

5. Restart Everything Before Launching
6. Connect Quest to PC with Link Cable

 You’re In!
- You’ll now see VAM in both your headset and on your monitor.
- You can interact with the UI in VR or use desktop controls.
- Tap M on your keyboard to toggle between desktop view on your PC monitor or VR view.
- This makes it easier to load/edit scenes on desktop, then return to VR.
From here you can reference the Virtamate Wiki articles on the VR Tab 1 and VR Tab 2 to figure out which settings you prefer:
User Preferences / VR1 Tab: https://hub.virtamate.com/wiki/user_preferences_vr1/
User Preferences / VR2 Tab: https://hub.virtamate.com/wiki/user_preferences_vr2/
There is also a guide on how to setup your SteamVR Controller Bindings with Virtamate:
 hub.virtamate.com
Moving Up and Down in VR Mode
You will notice with your VR controller joy sticks you can move forward and back and left and right but not up and down.
This is because by default Navigate Lock Height is checked in VAM. This locks the height so it cannot be moved.
You will want to click on Edit Mode / Navigation tab / and uncheck Navigate Lock Height.
You will then be able to move your position up and down in VR mode.

 Tips:
Tips:
Trouble Shooting Tip
Nvidia 4000+ Series Graphics Cards
If you are on a 4000 series Nvidia Graphics card (e.g. 4090), there have been reported issues of black line flickering or screen tearing issues with Meta Quest. This has been reported by multiple users in this thread for example:
hub.virtamate.com
This can be resolved by turning off: (PC) Asynchronous Spacewarp
Open the Oculus Debug Tool
Location:
C:\Program Files\Oculus\Support\oculus-diagnostics\OculusDebugTool.exe
In the window that opens, look for the setting for:
(PC) Asynchronous Spacewarp: Auto
Set it to Disabled.

You do not need to restart Oculus or your VAM to see it take effect. If you see the flickering instantly go away, you will know that this is the cause. The setting change only applies while the Debug Tool is running unless you automate it with CLI or a startup script. It resets every time you reboot.
What you can do is open your VaM (OpenVR).bat file that you use to launch VAM in VR mode by right clicking on it, click Edit to open in NotePad, and add CLI code to turn it off before launching VAM. However Quest keeps updating their software to not work with old CLI commands.
* I'm still double checking cli code as from what I am seeing old code that worked, no longer does because Meta updated their code/commands and is not providing documentation. So a lot of cli commands online no longer work with the latest version of their software. I swore it worked on the first run I did with it and then I tried again and it did not work.
* So a workaround may be to to use a non-Oculus Quest alternative like Virtual Desktop which can run without Oculus Quest desktop software if you are on 4000 series and have that issue or just make sure it is off when running VAM.
Hope this helps others get started with VAM in VR! Feel free to reply with questions or suggestions.
For Additional VAM VR Guides, reference the following:
 hub.virtamate.com
 hub.virtamate.com
 hub.virtamate.com
Beginner Friendly, SteamVR Method
There are ways to run VAM in VR without SteamVR and Meta Quest Link app, but it requires that you purchase Virtual Desktop (Currently $25). For first-time users, who want to just use free software to get it setup to try it out first, this is the easiest and most reliable method to get things working and to make sure you have everything to get it working. I recommend setting it up this way first to see if you even like VAM in VR and it also helps you confirm how well your computer works with VAM in VR.
This guide uses the VAM default free ways of SteamVR and Meta Quest Link, both free. This is a great way to get VR setup and try it out in Virtamate before looking at potentially better ways to use VR like with Virtual Desktop (paid). I personally use Virtual Desktop and highly recommend it but before I set that up, I tried it out the regular free way like this first, to see if I liked using Virtamate in VR. This way lets you try it out before spending money on additional software like Virtual Desktop.
What You Need to Install (on your PC):1. Steam + SteamVR (Desktop Software)
2. Meta Quest Link App (Desktop Software)
3. Meta Quest to PC Link Cable (recommended for first time setup)
If you don't have a cable, you can try Meta Quest Air Link which comes free with the Meta Quest Link App:
 Step-by-Step Setup:
1. Install & Setup SteamVR
- Download and install Steam: https://store.steampowered.com/about/
- Create or sign into your Steam account.
- Search for SteamVR in the Steam Store and click Play Now to install (~5GB).
- After install, close the browser and launch SteamVR from your desktop.
- Click Allow/Open if prompted.
- Wait for it to sync with Steam Cloud (status: “Cloud up to date”).
- You’ll then see a SteamVR status window in your system tray.
After Installing SteamVR, open it and go to Settings. You can also get to Settings from the Steam System Tray Icon. Right click on the icon and click Settings.
On the Steam Settings screen, click on Privacy Settings.
Steam may broadcast what you're doing to others. Just to make sure Steam doesn't broadcast you're playing VAM, you could consider signing in with another account not connected to your friends, or make your "Game details: Private"
2. Install & Setup Meta Quest Link
- Download and install the Meta Quest Link: https://www.meta.com/quest/setup/
- Launch it and sign in (you can use email or Meta/Facebook login).
- Set your profile picture and privacy settings.
- Choose your default VR downloads folder (optional).
- When asked, choose “Link (USB cable)” to ensure easy setup.
- Click Close when setup is complete.
3. Enable “Unknown Sources” for VAM
- Open Meta Quest Link from the system tray.
- Go to Settings > General.
- Find the “Unknown Sources” toggle and turn it ON.
- Without this, VAM won’t launch in VR. You will get an alert when launching VAM to turn this on.
4. Prepare VAM for VR
- Launch VAM normally from the desktop.
- Load the Default Scene (or any scene).
- Click Edit Mode > Main UI > User Preferences.
- Go to the VR tab and check “Mirror to Desktop”.
- This shows what’s on your headset on your monitor—helpful for first-time setup.
- Once VR is setup, you can come back to the VR 1 and VR 2 tabs to update your VR setting preferences.
5. Restart Everything Before Launching
- Close SteamVR and Meta Quest Link completely.
- Restart your PC and your Quest 2/3 headset to avoid weird connection issues.
6. Connect Quest to PC with Link Cable
- Plug a USB-A to USB-C cable in to connect your PC to your Meta Quest. If your PC supports USB-C to USB-C can use that as well.
- On your Quest headset, you should see a popup: “Enable Link”
- Click Enable to switch to PC VR mode.
- Wait for the Quest Horizon 3D environment to load.
- If it gets stuck on the Meta icon loading screen, restart your Quest and try again until it loads properly.
- Make sure your Quest is connected and Enable Link is active. You can leave it on that Horizon screen.
- Go to your VAM installation folder.
- Double-click: VaM (OpenVR).bat
- This launches VAM in SteamVR-compatible mode. This is a file that comes with VAM when you install it.
You’re In!- You’ll now see VAM in both your headset and on your monitor.
- You can interact with the UI in VR or use desktop controls.
- Tap M on your keyboard to toggle between desktop view on your PC monitor or VR view.
- This makes it easier to load/edit scenes on desktop, then return to VR.
From here you can reference the Virtamate Wiki articles on the VR Tab 1 and VR Tab 2 to figure out which settings you prefer:
User Preferences / VR1 Tab: https://hub.virtamate.com/wiki/user_preferences_vr1/
User Preferences / VR2 Tab: https://hub.virtamate.com/wiki/user_preferences_vr2/
There is also a guide on how to setup your SteamVR Controller Bindings with Virtamate:
Customizing SteamVR Controller Bindings - Guides -
What is this? This is a guide on setting SteamVR controller bindings. VaM uses the newer SteamVR controller binding style, which means that buttons are mapped to actions. More than one action can be mapped to the same button or control, and...
Moving Up and Down in VR Mode
You will notice with your VR controller joy sticks you can move forward and back and left and right but not up and down.
This is because by default Navigate Lock Height is checked in VAM. This locks the height so it cannot be moved.
You will want to click on Edit Mode / Navigation tab / and uncheck Navigate Lock Height.
You will then be able to move your position up and down in VR mode.
Tips:- Use a high-quality USB cable that supports data (not just charging).
- Let SteamVR update the first time if needed—don’t skip it.
- Disable/Allow any antivirus/firewall warnings if they block Quest Link/SteamVR.
- Air Link also works, but Link Cable is recommended for first-time setup.
Trouble Shooting Tip
Nvidia 4000+ Series Graphics Cards
If you are on a 4000 series Nvidia Graphics card (e.g. 4090), there have been reported issues of black line flickering or screen tearing issues with Meta Quest. This has been reported by multiple users in this thread for example:
4090 bad visual effect
Hello to all, I just got a new pc which is normally a beast: rtx 4090 trio, i9 13900 and 64 gb ram and m2 ssd. Despite this I have many visual defects that appear, some kind of curves and lines appear in the scenes that move a lot, I specify that I am with a meta quest 2 with air link, I have...
This can be resolved by turning off: (PC) Asynchronous Spacewarp
Open the Oculus Debug Tool
Location:
C:\Program Files\Oculus\Support\oculus-diagnostics\OculusDebugTool.exe
In the window that opens, look for the setting for:
(PC) Asynchronous Spacewarp: Auto
Set it to Disabled.
You do not need to restart Oculus or your VAM to see it take effect. If you see the flickering instantly go away, you will know that this is the cause. The setting change only applies while the Debug Tool is running unless you automate it with CLI or a startup script. It resets every time you reboot.
What you can do is open your VaM (OpenVR).bat file that you use to launch VAM in VR mode by right clicking on it, click Edit to open in NotePad, and add CLI code to turn it off before launching VAM. However Quest keeps updating their software to not work with old CLI commands.
* I'm still double checking cli code as from what I am seeing old code that worked, no longer does because Meta updated their code/commands and is not providing documentation. So a lot of cli commands online no longer work with the latest version of their software. I swore it worked on the first run I did with it and then I tried again and it did not work.
* So a workaround may be to to use a non-Oculus Quest alternative like Virtual Desktop which can run without Oculus Quest desktop software if you are on 4000 series and have that issue or just make sure it is off when running VAM.
Hope this helps others get started with VAM in VR! Feel free to reply with questions or suggestions.
For Additional VAM VR Guides, reference the following:
How to launch without SteamVR (Performance Increase) - Guides -
As of right now (June 2025), there are 3 methods I know of to launch in VR without SteamVR. Will go through them quickly to increase your performance. This guide is the basic guide. Advanced guide here What is this? It is a list of methods to...
How to use Passthrough in VAM (VR/AR) - Guides -
Guide last updated: July 2026, big thanks to ALXR dev Korejan This guide will be separated into 2 methods: Method 1: Virtual Desktop (Easy, Paid) Method 2: ALXR (Experimental, Free) *Difficulty level: 4/5* What is this? Imagine using VAM in...
How to use Hand Tracking in VAM | 2.0 (Quest) - Guides -
Guide last updated: October 2025 How to use Hand Tracking in VAM in VR with Steam Link & Virtual Desktop *Difficulty level: 3/5* Update 2.0 is here. NEW: No more accidental grabbing, movement (finally), and more What is this? Imagine using your...