


Shoes - High Heels - Guide
This guide will walk you through step by step how to make high heel shoes.
Process Overview
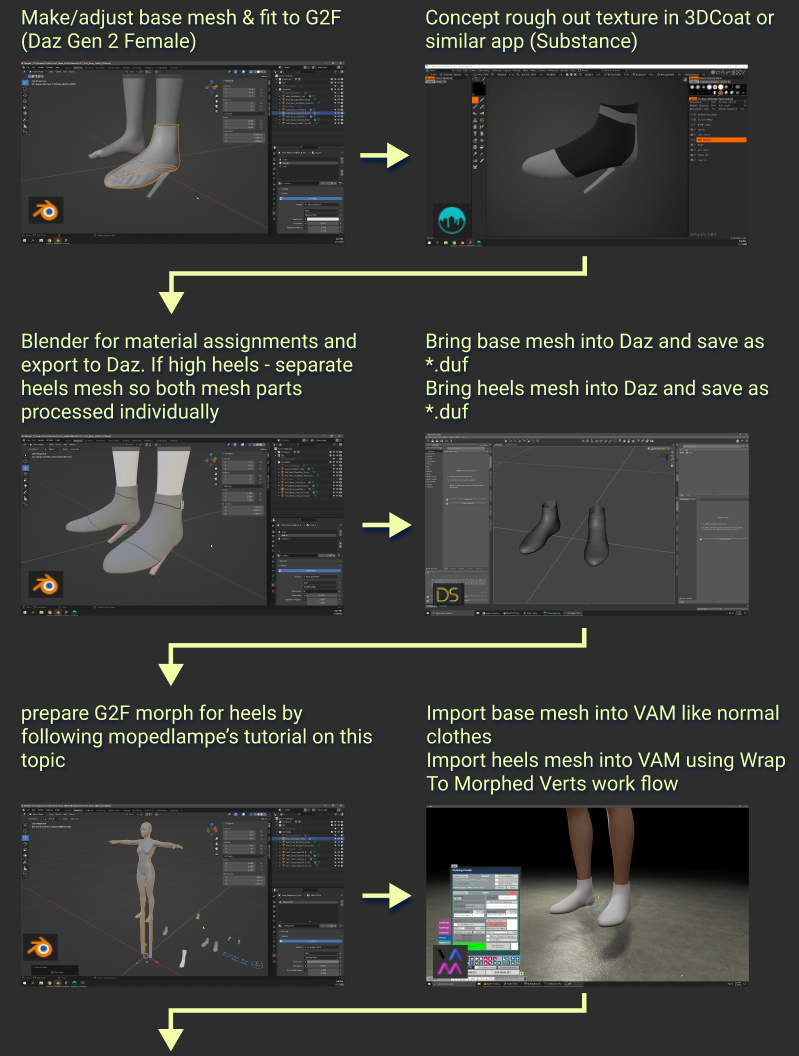
Make/adjust base mesh & fit to G2F (Daz Gen 2 Female)
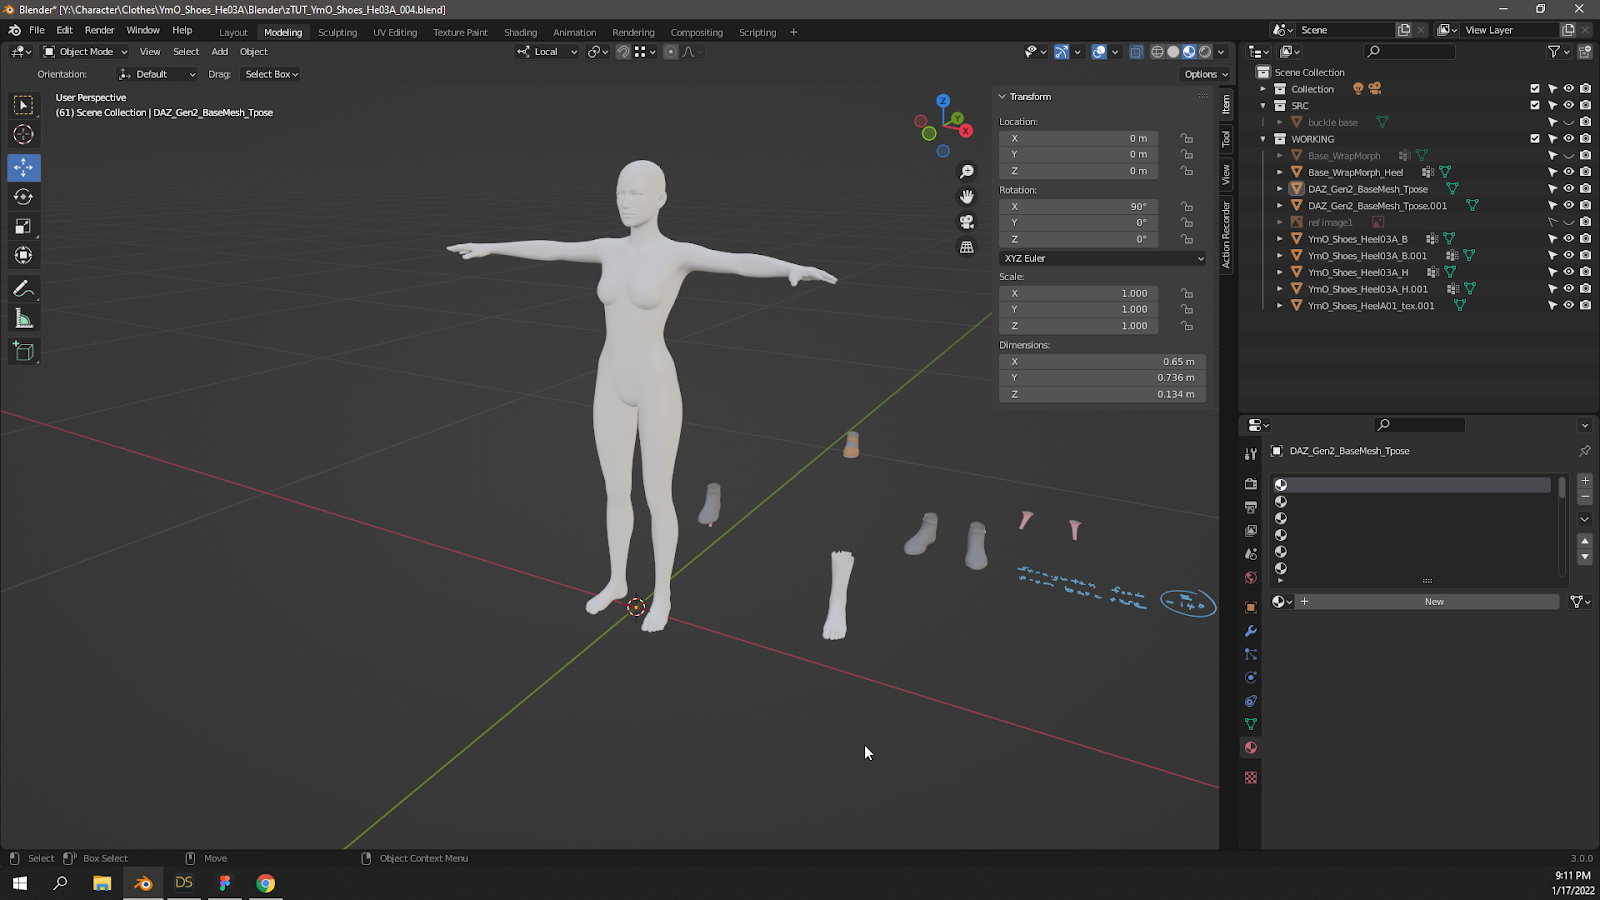
Import or open a Blender file with the Daz Gen 2 Female. You’ll use the G2F just for reference to make your shoe mesh.
I have attached to this guide a Blender file with the stuff you need inside it. Be sure to download it!
For instructions on how to import the G2F model, please see this mopedlampe tutorial.
https://hub.virtamate.com/resources...g-without-deformation-by-custom-morphs.12708/
But also, I will try to supply a source file with the G2F mesh already in the scene.
Model/adjust the mesh to fit the foot
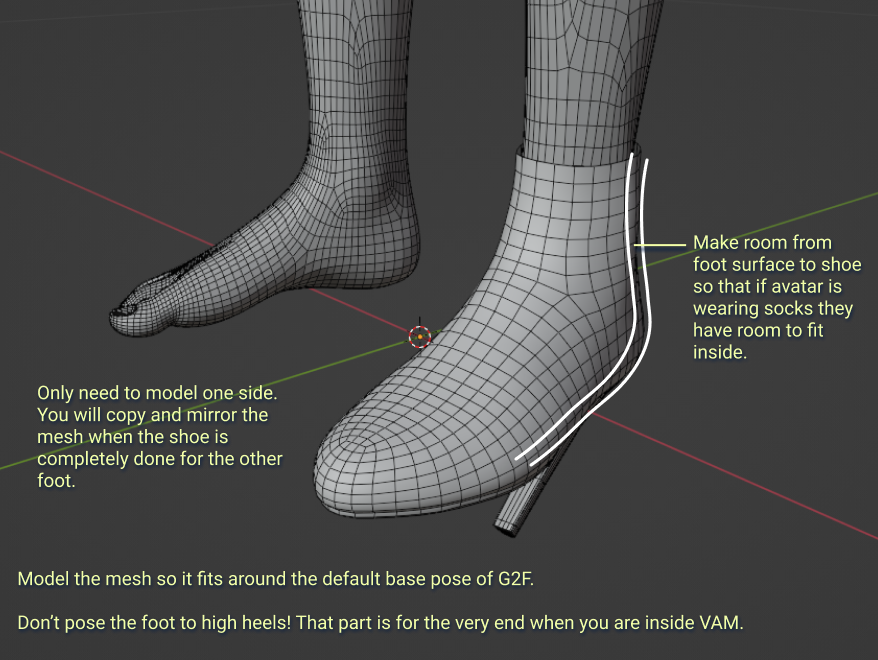

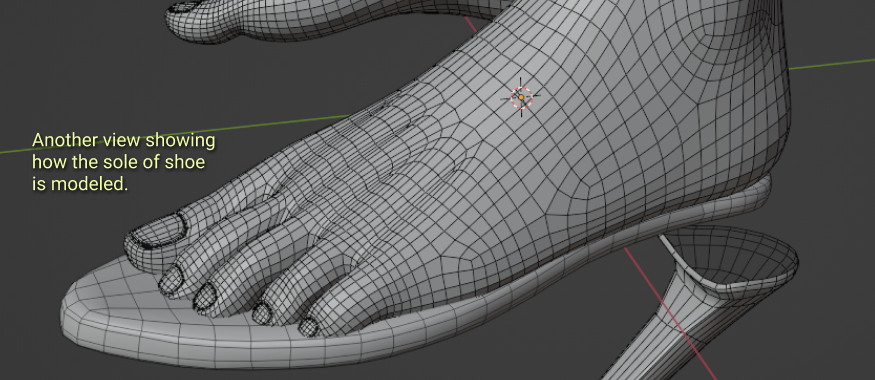
I often use Sculpt mode to adjust the mesh. It’s very nice and easy!
Once the mesh is how you want it, then you have a few options for Unwrapping UV - you can do it inside Blender if you like. But I unwrap inside 3DCoat because it is much faster for me. Export the mesh out as *.obj (this is what I use for export) and on to the next steps!
Concept rough paint in 3DCoat or Substance Painter
I use 3DCoat for painting, but you can use any similar app like Substance for example.But I choose 3DCoat because it does so many things like unwrap and retopologize mesh.
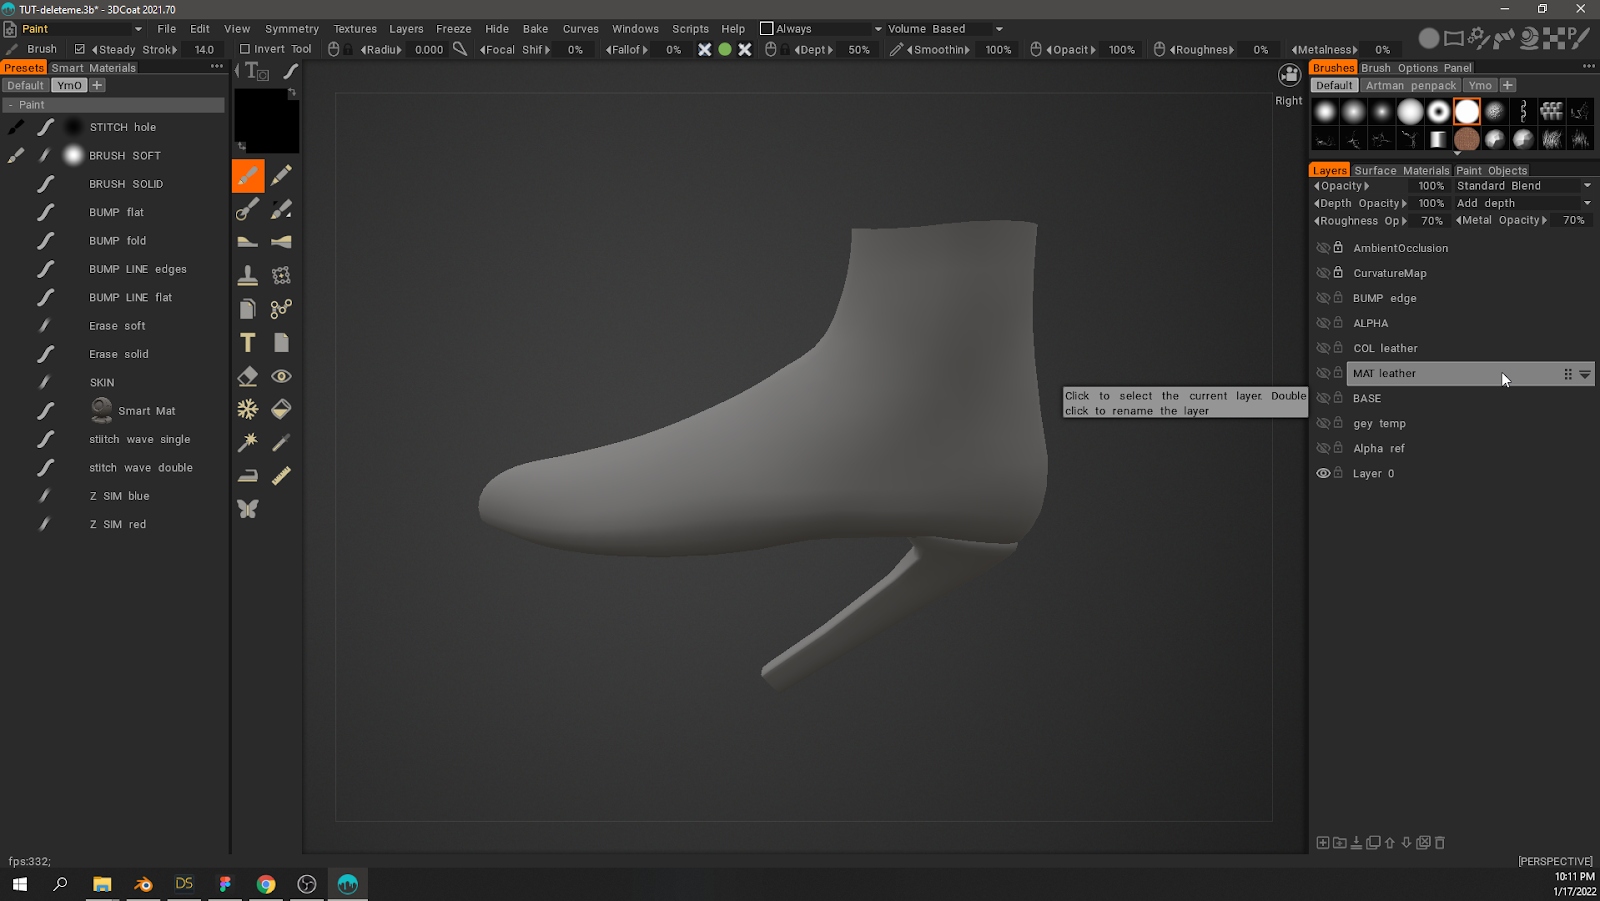
Here I have imported the mesh.
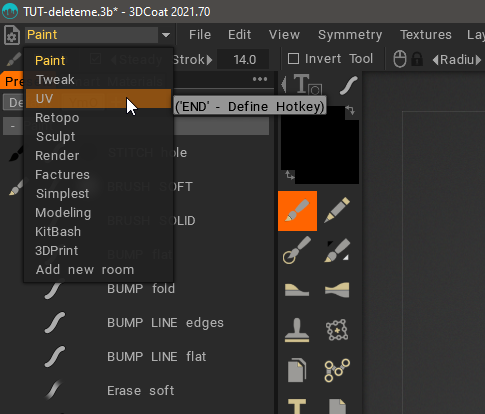
The next step is to unwrap UV. This is 3DCoat 2021 so the unwrap room is now on a drop down menu.
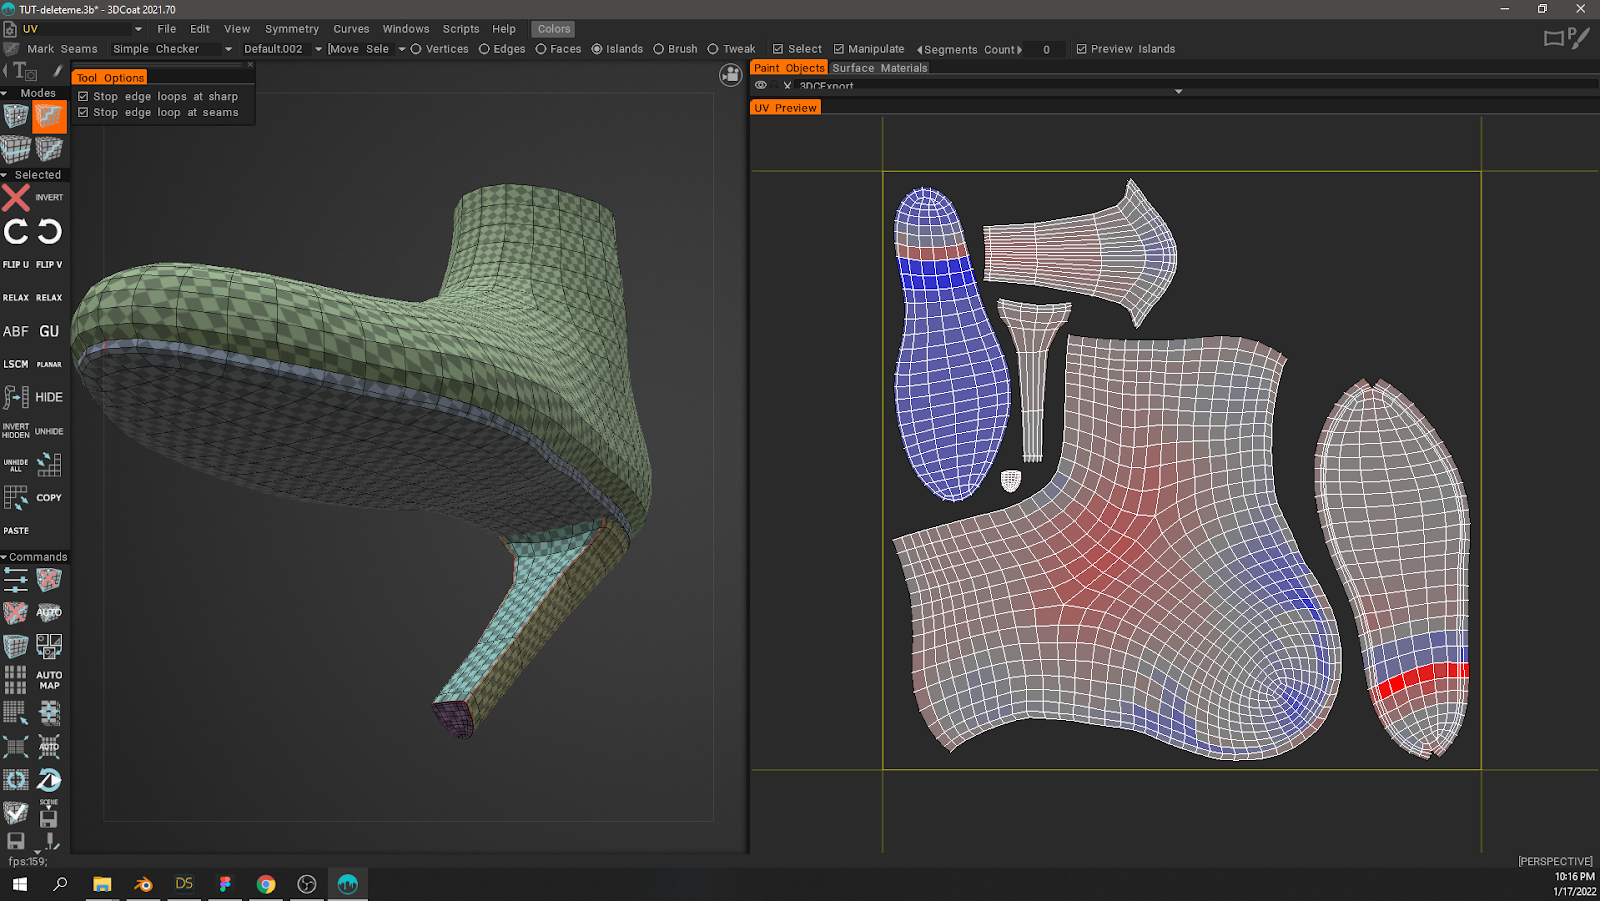
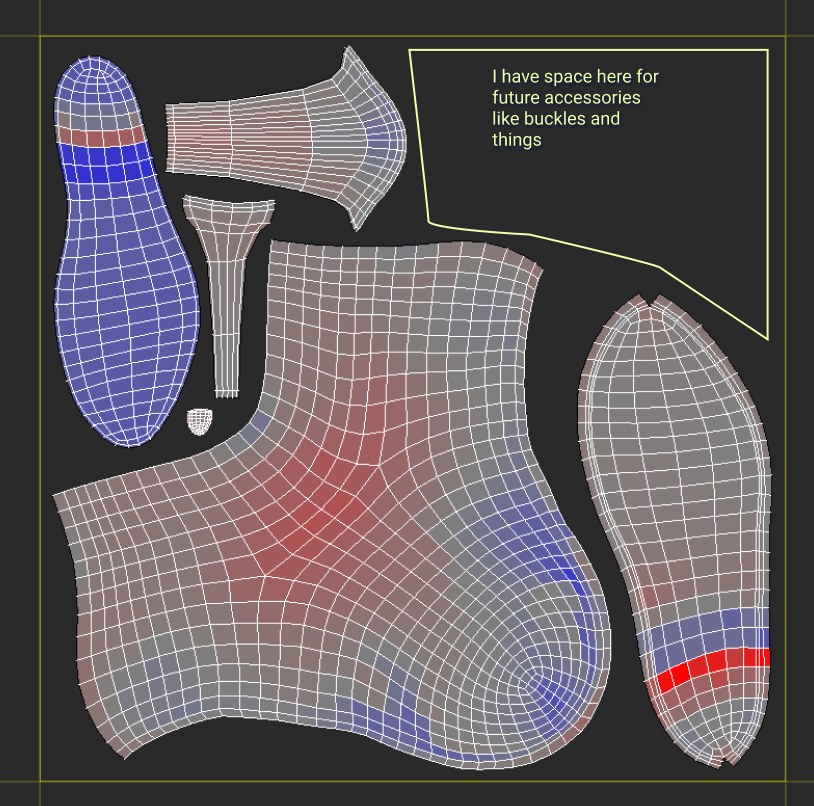
Here is the unwrap. I won’t cover how to do this here but there are videos on YouTube on how to do this in 3DCoat.
Note: Since this was my first High Heel clothing item, I had to unwrap the mesh. Even though I started from an existing shoe mesh, this high heel extended higher up the ankle so I had to model that in. And that meant unwrapping again!
Slightly off topic:
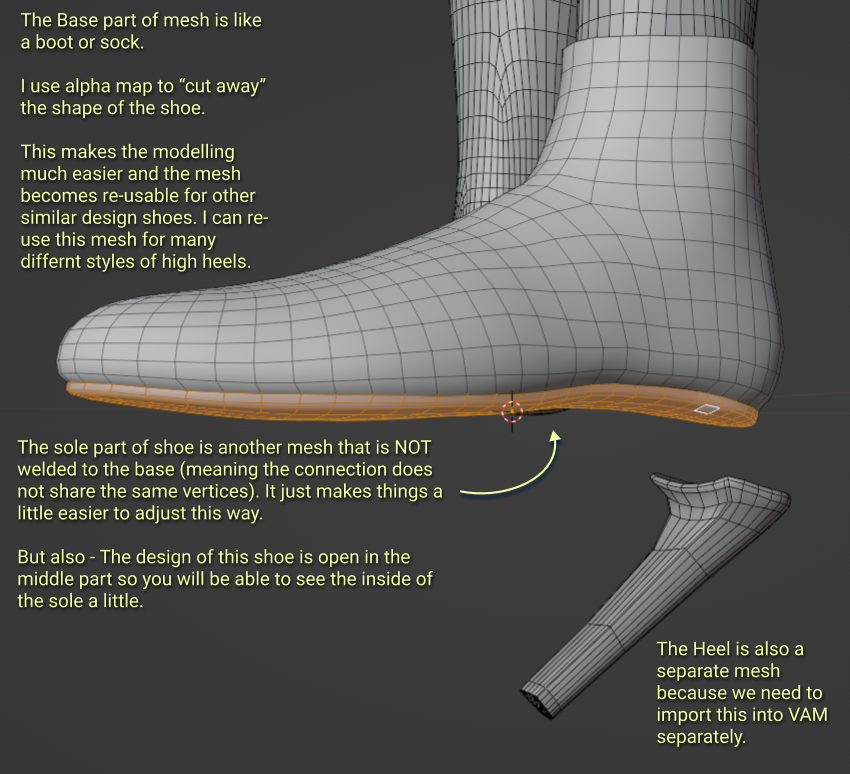
The Life of a Shoe Base Mesh

Bonus! This High Heel base mesh is inside the attached Blender file. It should give you a head start if you’re making shoes like this.
Back on topic:
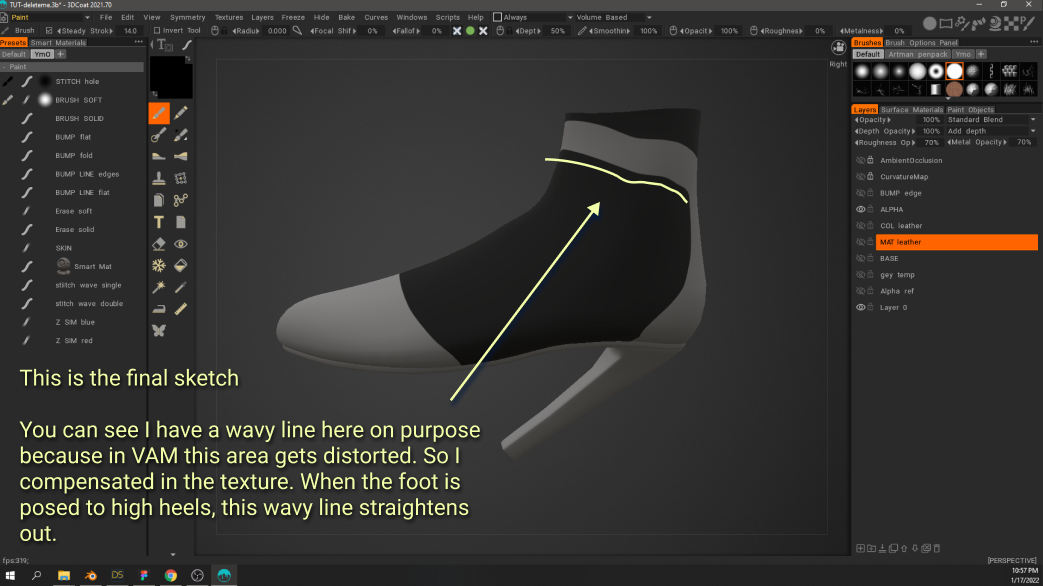
After unwrap is done - Paint/Sketch the shoe. Just simple sketch lines or black and white like you see below is good enough. Don’t spend too much time because you’ll need to go back and forth from here to VAM to adjust the sketch because of distortions.
Now export to Blender as obj.
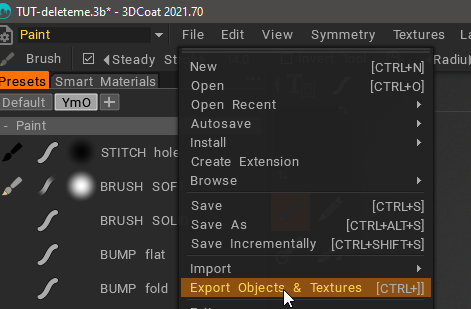
Here are my export settings
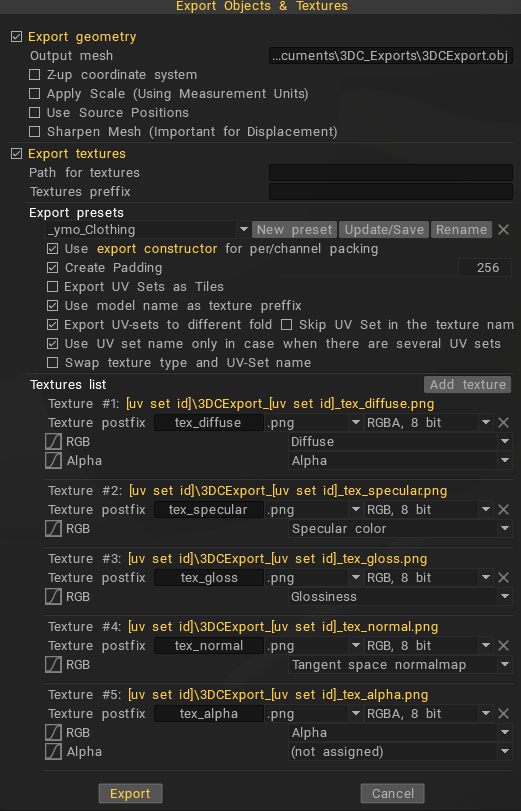
Note: Alpha map will be empty because I don’t set it up that way. But I still export it because its convenient to have the file generated because I’ll paste in the alpha to the file later.
The exported files will be something like this:

To Blender for material assignments and export to Daz.
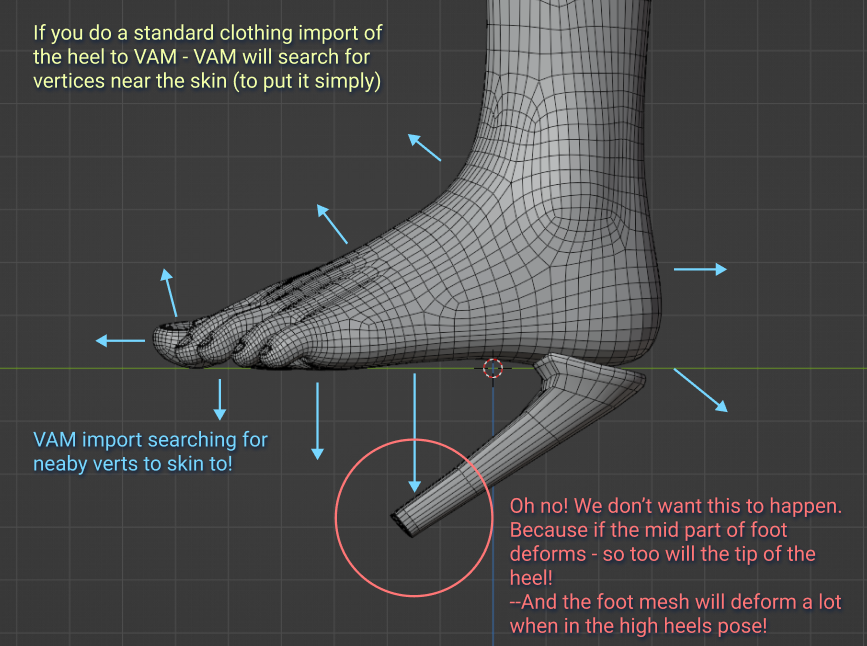
If high heels - separate heels mesh so both mesh parts processed individually
Base mesh and heel are separate.
Assign the different materials. Do this for faces of mesh that you want to customize for different colors in VAM. In example below - I want to give users the option to change colors for the very bottom of the heel.

Export both parts (base & heel) separately.
These are my export settings.

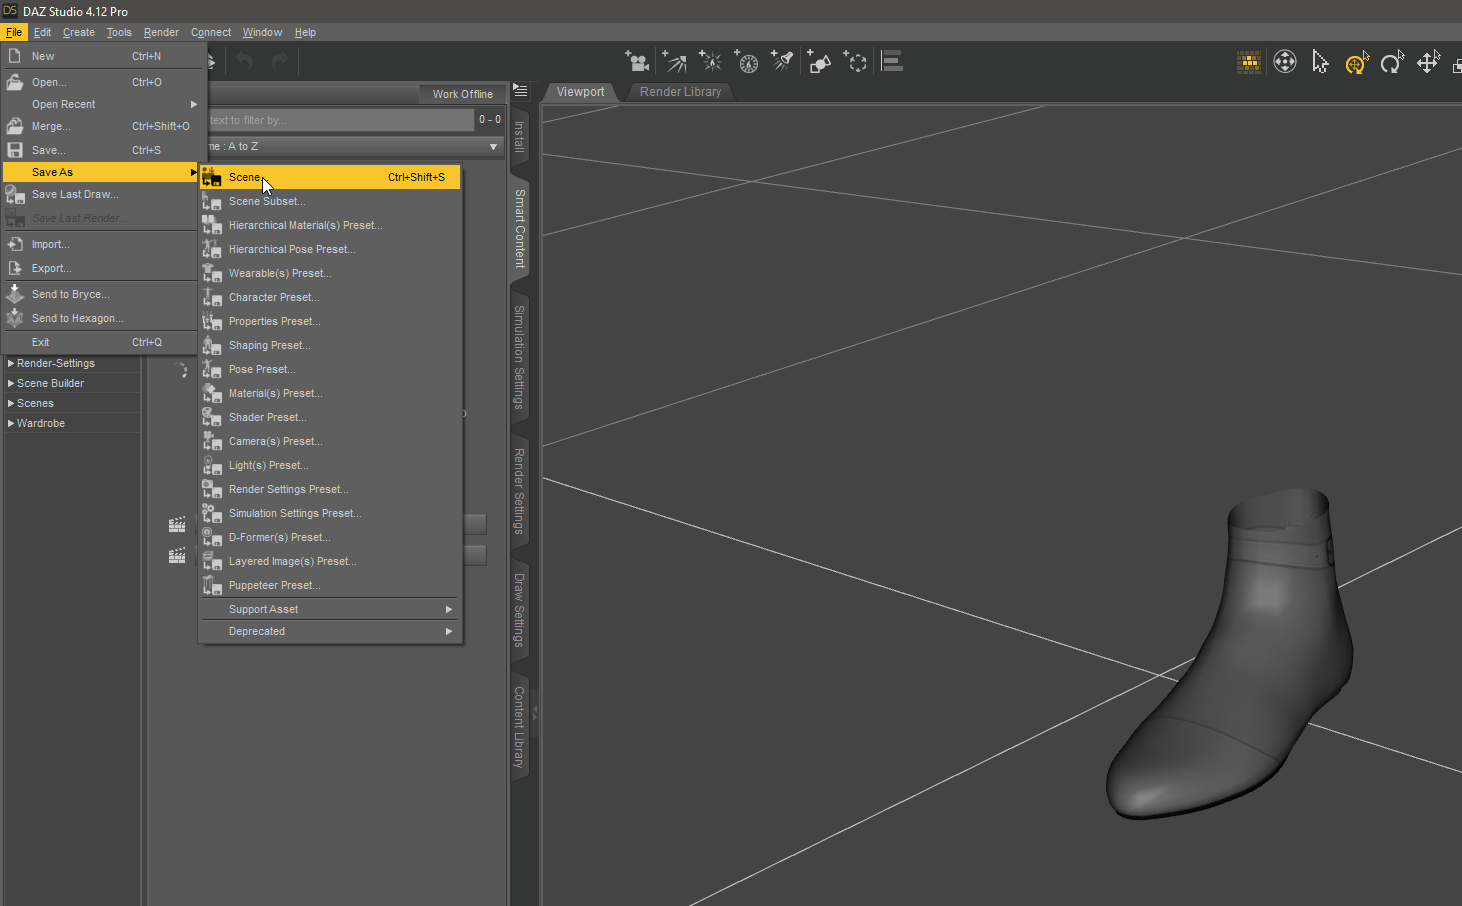
Bring base mesh into Daz and save as *.duf
Bring heels mesh into Daz and save as *.duf
Sorry I keep saying it but save both base and heels separately to their own *.duf files. This is only necessary for high heels where you want the heel part to skin to a morph in VAM. Save the scene as the name you want the asset to be in VAM. You can save it anywhere.
Prepare G2F morph for heels by following mopedlampe’s guide on this topic
Mopedlampe’s guide on VAM Hub - https://hub.virtamate.com/resources...g-without-deformation-by-custom-morphs.12708/

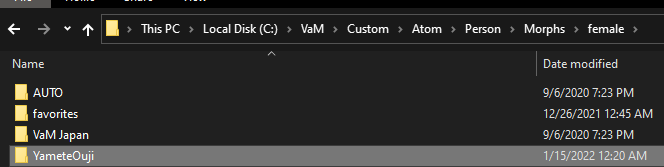
I will provide the heels morph file ready to go, all you need to do is copy it to the correct VAM folder. It is attached as a download to this file.
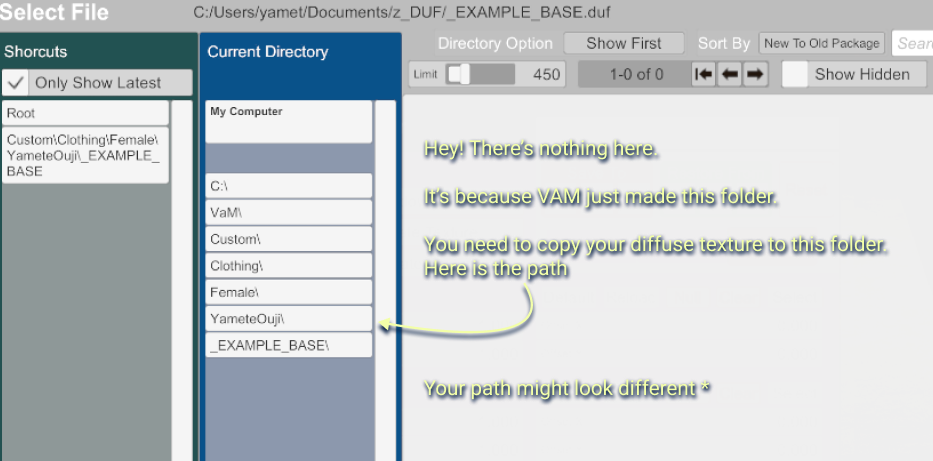
The YameteOuji Folder contains the heel morph. Just copy the YameteOuji folder to the path seen in image below.
Import base mesh into VAM like normal clothes


And here is the import result

Apply the sketch texture
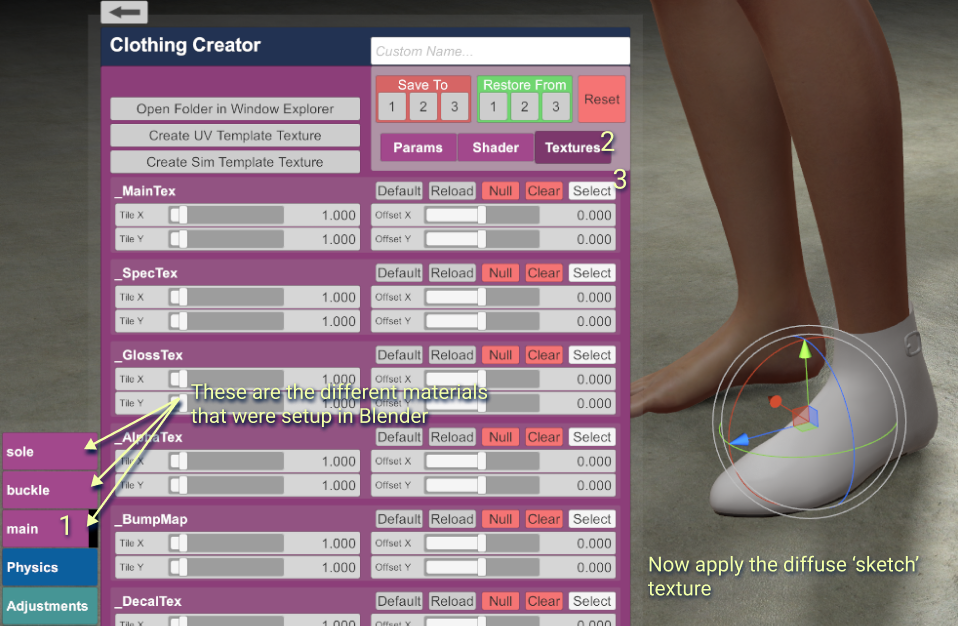

And the texture is loaded!

Now create new item.

Now back out of creator and make sure that your new item is there.
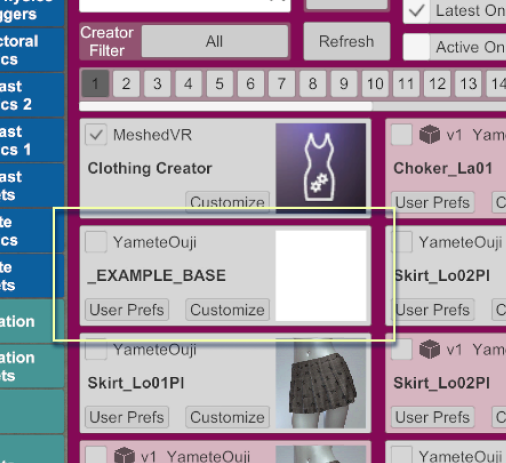
And that's the Base part for now.
Onto the Heel.
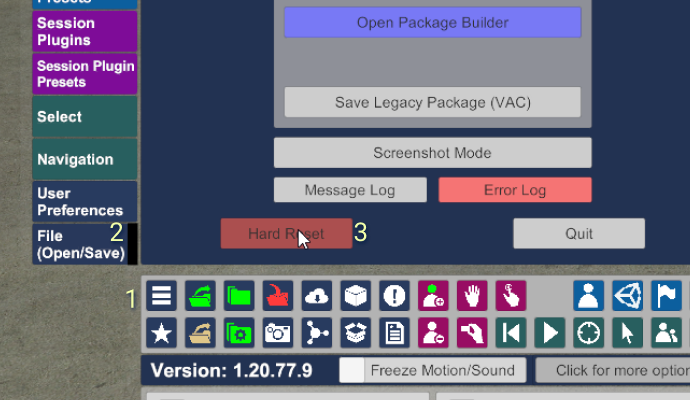
Whenever I need to go back into Clothing Creator with a clean beginning, I perform a hard reset just to make sure no data is ghosting. I’m paranoid!
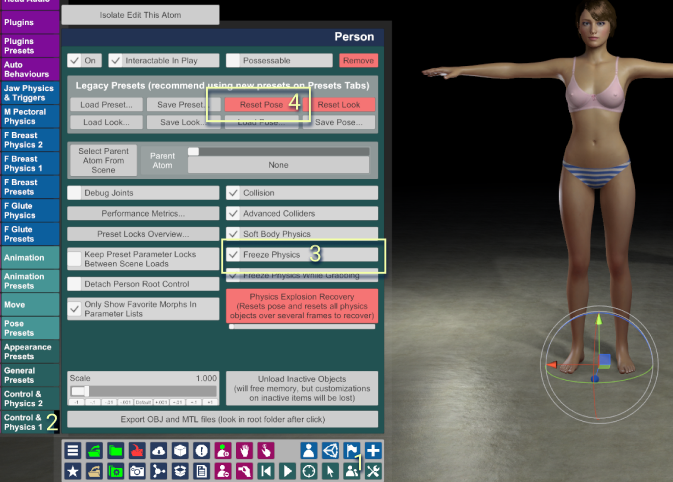
Before we jump back into clothing creator, we need to get the avatar ready.
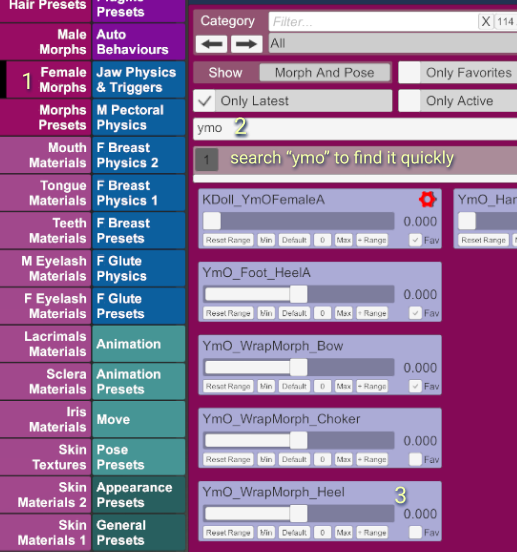
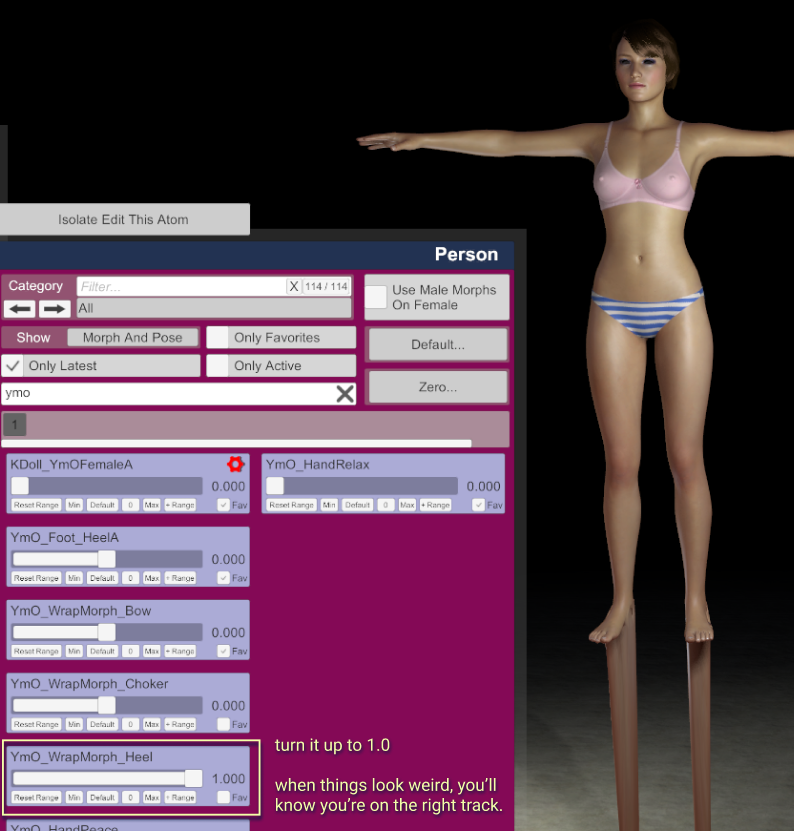
Now load the heels morph
I feel like this every morning..
Ok now back in Clothing Creator - pretty much all the same steps except this time you’ll check on Wrapped To Morphed Verts
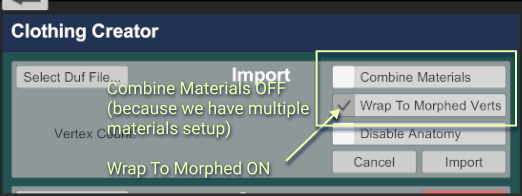
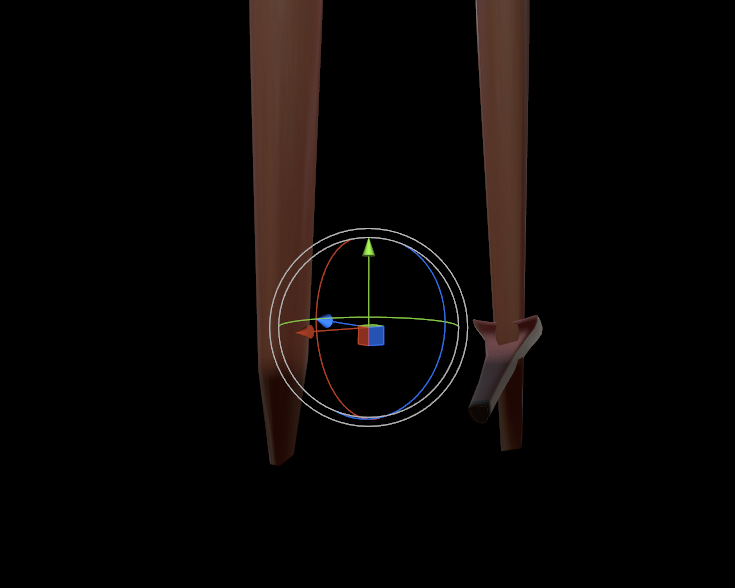
And then hit Import to bring in your shoe’s heel mesh.
You might need to look under the floor to see it.
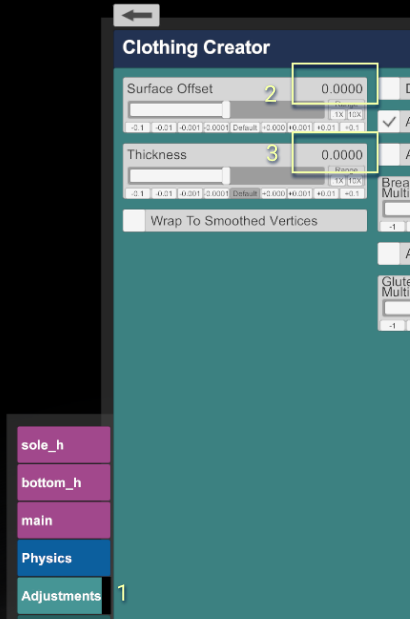
Oh! And I forgot about this step for the base shoe mesh. But do this for both Base and Heel meshes. Set the Surface Offset, and Thickness to 0.0.
If you forget too, you can re-open the item in clothing creator and set it, the save item again. Be sure to Hard Reset after that so your changes show the update.
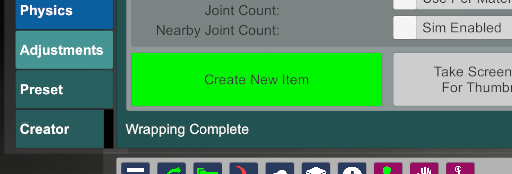
Ok so back on Creator tab, Create New Item!
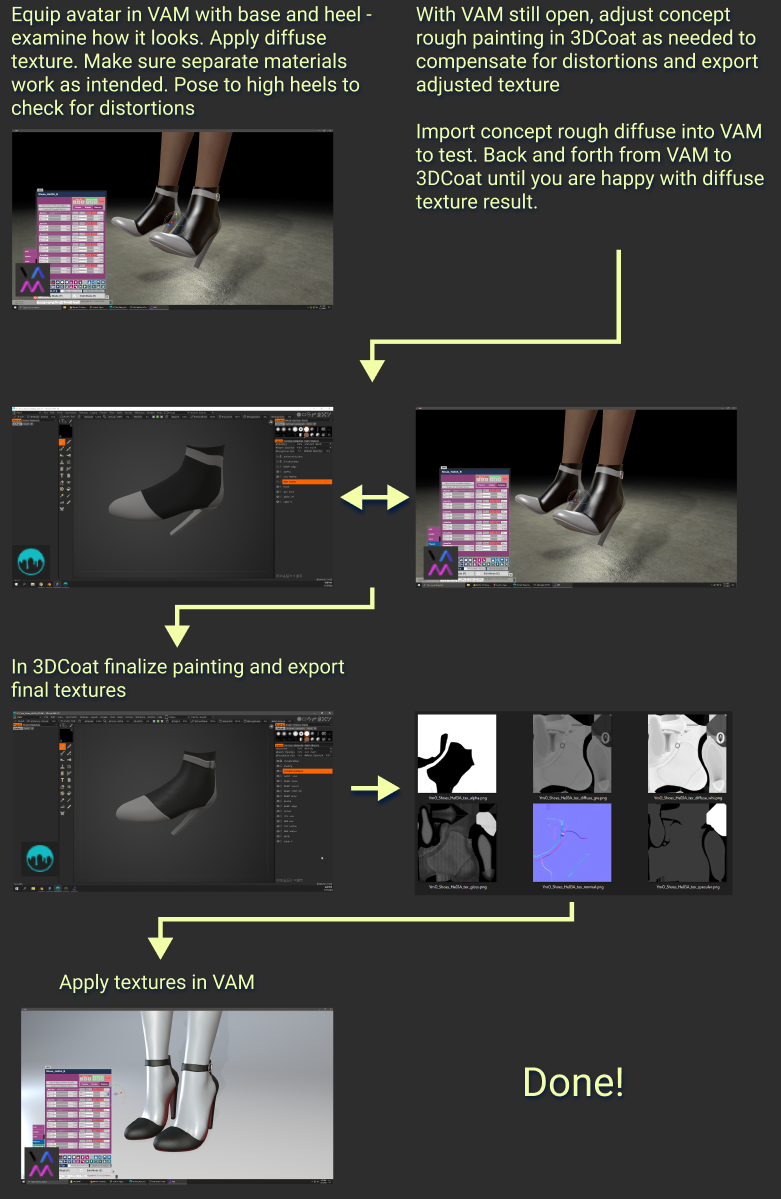
Equip avatar in VAM with base and heel items
Now Hard Reset again (its faster than setting morph back to normal and all that jazz)
Load up your default scene and equip your new items!
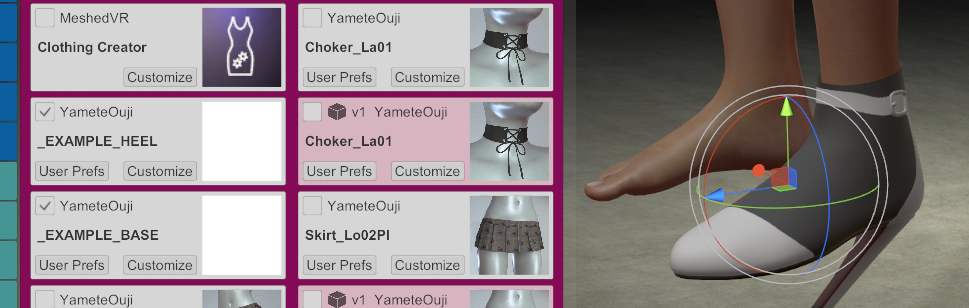
Now set the pose to high heels.
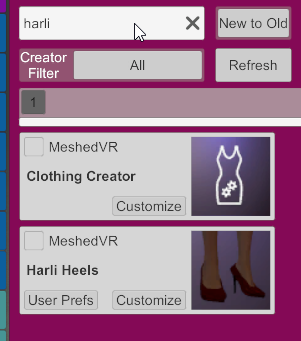
To do this quickly you can equip the Harli Heels and then hide them with transparency. If you’ve downloaded my high heels before, then there should already be a preset in there to hide them.
And here it is posed with Harli Heel hidden.

At this stage you’ll want to examine how the texture looks.
You can jump back and forth from your model painting app and VAM to load up new texture adjustments.
It’s so so important to get the rough texture correct before moving on to the final texture! I’ve skipped the rough out part before, and sometimes I forget in my excitement. But I’ve always regretted it and had to go back and make big changes to the final texture!
When you’re happy with your rough texture then it's time for finalizing the texture.
In 3DCoat (or similar app) finalize painting and export final textures
I won’t go into details about how I paint in 3DCoat because if I do this guide will never end! But also, everyone has their own favorite software for this.
So just a summary of what I do in 3DCoat:
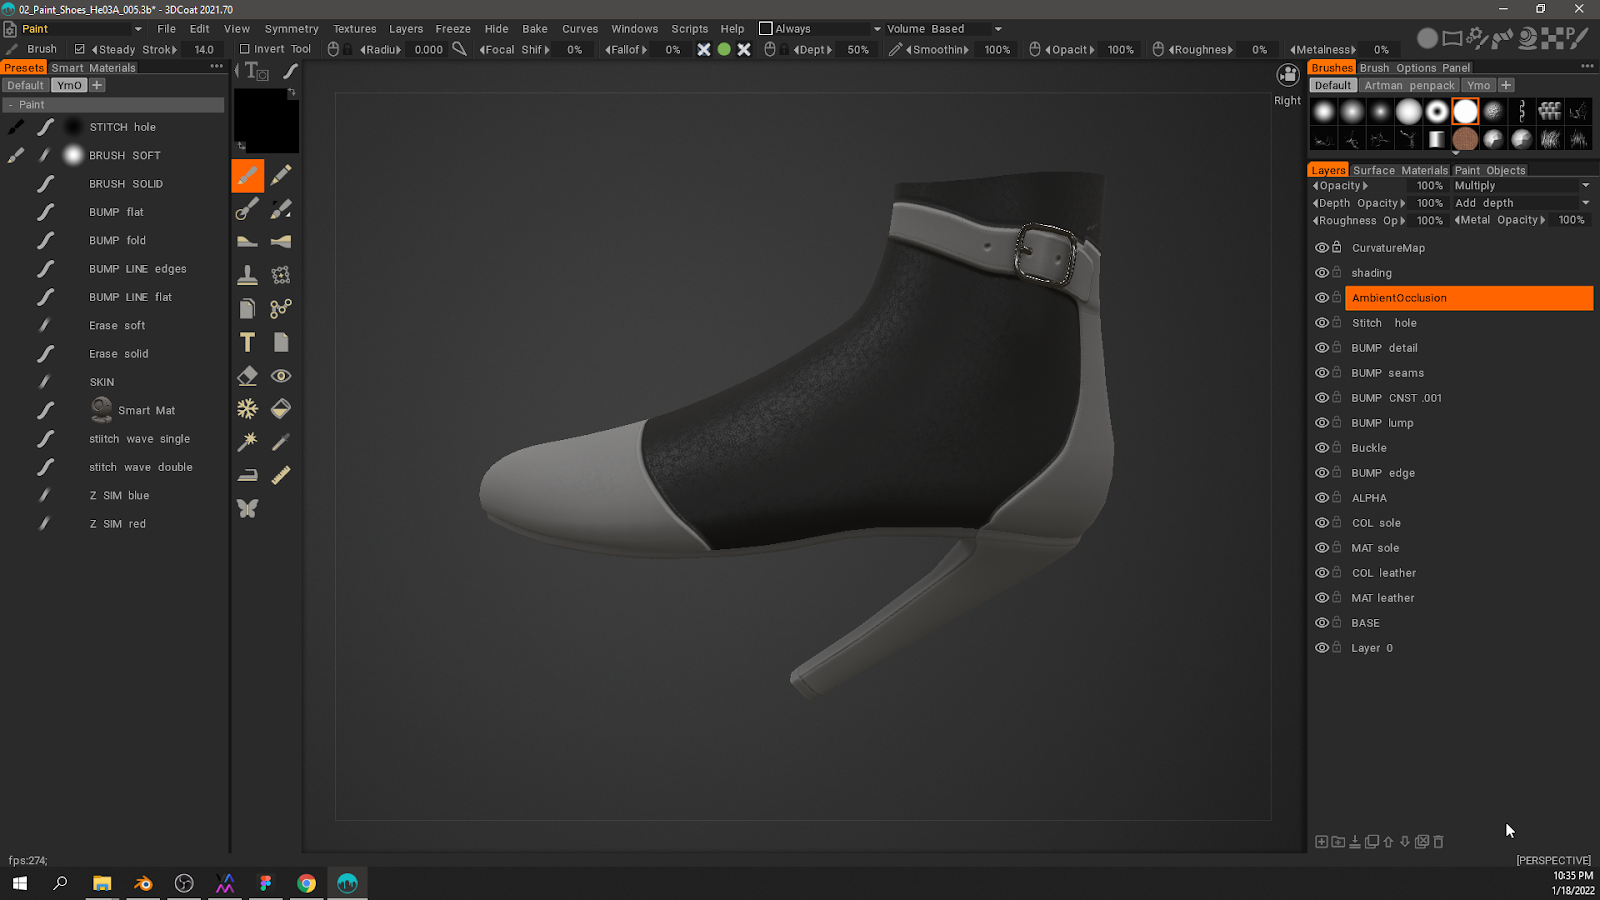
After painting is done, export out final textures.
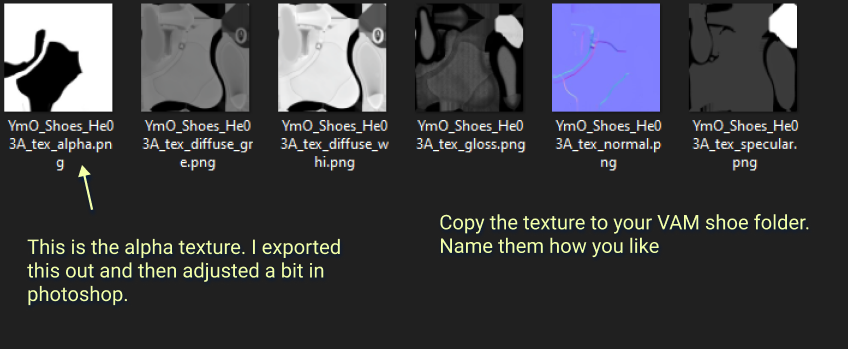
Just one quick 3DCoat tip! I use this function so much. I have it on a hotkey.
What this does is open up a the layered psd in photoshop directly.
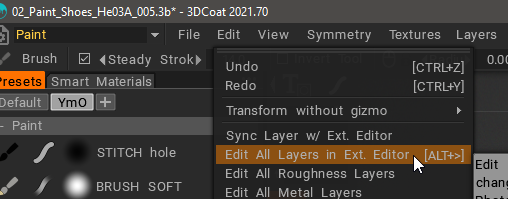
This is how I extract my alpha map. But it’s also how I quickly extract SIM textures too!
It appears in Photoshop like this with all layers intact. But be VERY careful with this. If you make edits in here, it’s best to make a brand new layer in PS to do that. Sometimes if you edit existing layers too much it might break things!

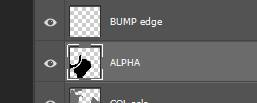
You can see I have created this layer in 3DCoat. It for my alpha. I’ll copy this out and into the VAM alpha map.
Ok so after you’ve finalized textures it’s time to finalize the mesh.
Finalize the mesh
Pretty straight forward - Copy/mirror for the other shoe. Do the same for the heel mesh.

I almost forgot! You can optimize the mesh by deleting faces in transparent areas.

Then repeat all the export and import to VAM steps!
Are you feeling like this yet?
Don’t worry, we’re almost done!
Finishing up
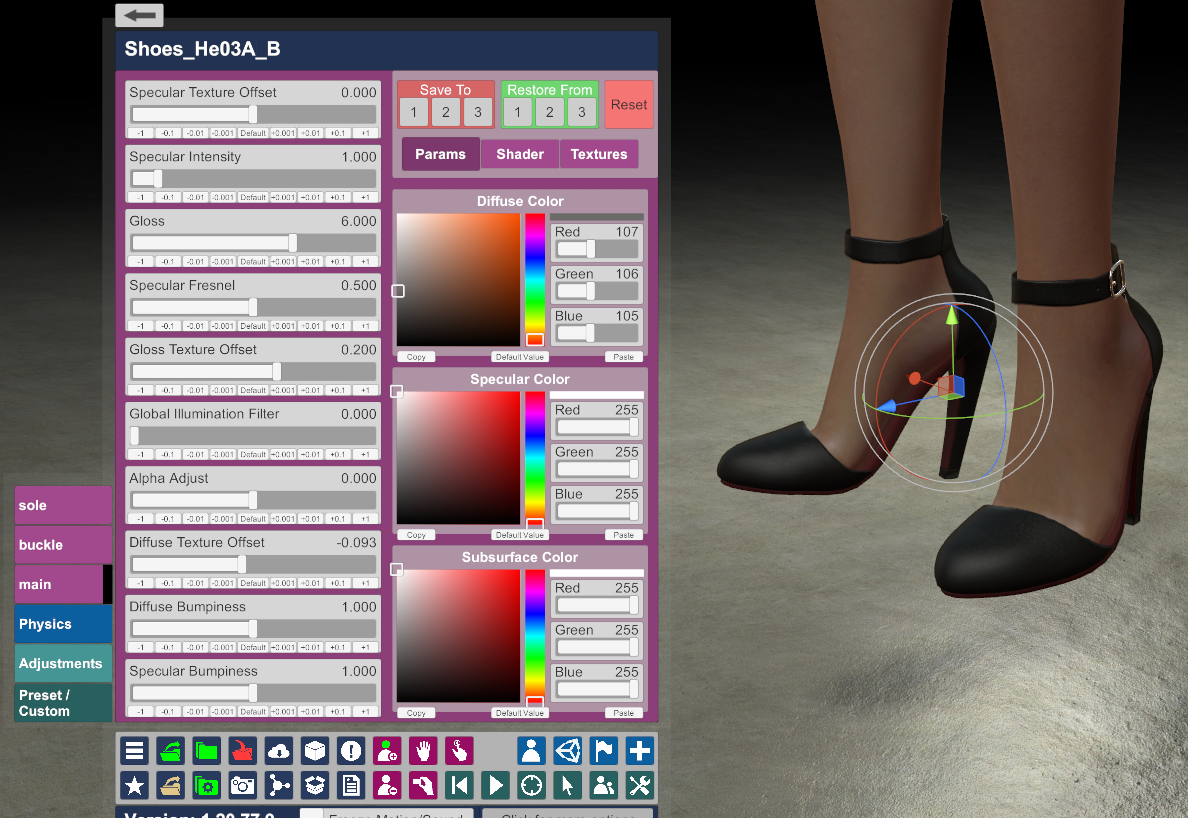
The last part is bringing all your textures into VAM and tuning materials. It’s very likely you’ve done this part before!
After that, you’re done.
And look at that, you got your eyes back!

This guide will walk you through step by step how to make high heel shoes.
Process Overview
Make/adjust base mesh & fit to G2F (Daz Gen 2 Female)
Import or open a Blender file with the Daz Gen 2 Female. You’ll use the G2F just for reference to make your shoe mesh.
I have attached to this guide a Blender file with the stuff you need inside it. Be sure to download it!
For instructions on how to import the G2F model, please see this mopedlampe tutorial.
https://hub.virtamate.com/resources...g-without-deformation-by-custom-morphs.12708/
But also, I will try to supply a source file with the G2F mesh already in the scene.
Model/adjust the mesh to fit the foot
I often use Sculpt mode to adjust the mesh. It’s very nice and easy!
Once the mesh is how you want it, then you have a few options for Unwrapping UV - you can do it inside Blender if you like. But I unwrap inside 3DCoat because it is much faster for me. Export the mesh out as *.obj (this is what I use for export) and on to the next steps!
Concept rough paint in 3DCoat or Substance Painter
I use 3DCoat for painting, but you can use any similar app like Substance for example.But I choose 3DCoat because it does so many things like unwrap and retopologize mesh.
Here I have imported the mesh.
The next step is to unwrap UV. This is 3DCoat 2021 so the unwrap room is now on a drop down menu.
Here is the unwrap. I won’t cover how to do this here but there are videos on YouTube on how to do this in 3DCoat.
Note: Since this was my first High Heel clothing item, I had to unwrap the mesh. Even though I started from an existing shoe mesh, this high heel extended higher up the ankle so I had to model that in. And that meant unwrapping again!
Slightly off topic:
The Life of a Shoe Base Mesh
Bonus! This High Heel base mesh is inside the attached Blender file. It should give you a head start if you’re making shoes like this.
Back on topic:
After unwrap is done - Paint/Sketch the shoe. Just simple sketch lines or black and white like you see below is good enough. Don’t spend too much time because you’ll need to go back and forth from here to VAM to adjust the sketch because of distortions.
Now export to Blender as obj.
Here are my export settings
Note: Alpha map will be empty because I don’t set it up that way. But I still export it because its convenient to have the file generated because I’ll paste in the alpha to the file later.
The exported files will be something like this:
To Blender for material assignments and export to Daz.
If high heels - separate heels mesh so both mesh parts processed individually
Base mesh and heel are separate.
Assign the different materials. Do this for faces of mesh that you want to customize for different colors in VAM. In example below - I want to give users the option to change colors for the very bottom of the heel.
Export both parts (base & heel) separately.
These are my export settings.
Bring base mesh into Daz and save as *.duf
Bring heels mesh into Daz and save as *.duf
Sorry I keep saying it but save both base and heels separately to their own *.duf files. This is only necessary for high heels where you want the heel part to skin to a morph in VAM. Save the scene as the name you want the asset to be in VAM. You can save it anywhere.
Prepare G2F morph for heels by following mopedlampe’s guide on this topic
Mopedlampe’s guide on VAM Hub - https://hub.virtamate.com/resources...g-without-deformation-by-custom-morphs.12708/
I will provide the heels morph file ready to go, all you need to do is copy it to the correct VAM folder. It is attached as a download to this file.
The YameteOuji Folder contains the heel morph. Just copy the YameteOuji folder to the path seen in image below.
Import base mesh into VAM like normal clothes
And here is the import result
Apply the sketch texture
And the texture is loaded!
Now create new item.
Now back out of creator and make sure that your new item is there.
And that's the Base part for now.
Onto the Heel.
Whenever I need to go back into Clothing Creator with a clean beginning, I perform a hard reset just to make sure no data is ghosting. I’m paranoid!
Before we jump back into clothing creator, we need to get the avatar ready.
Now load the heels morph
I feel like this every morning..
Ok now back in Clothing Creator - pretty much all the same steps except this time you’ll check on Wrapped To Morphed Verts
And then hit Import to bring in your shoe’s heel mesh.
You might need to look under the floor to see it.
Oh! And I forgot about this step for the base shoe mesh. But do this for both Base and Heel meshes. Set the Surface Offset, and Thickness to 0.0.
If you forget too, you can re-open the item in clothing creator and set it, the save item again. Be sure to Hard Reset after that so your changes show the update.
Ok so back on Creator tab, Create New Item!
Equip avatar in VAM with base and heel items
Now Hard Reset again (its faster than setting morph back to normal and all that jazz)
Load up your default scene and equip your new items!
Now set the pose to high heels.
To do this quickly you can equip the Harli Heels and then hide them with transparency. If you’ve downloaded my high heels before, then there should already be a preset in there to hide them.
And here it is posed with Harli Heel hidden.
At this stage you’ll want to examine how the texture looks.
You can jump back and forth from your model painting app and VAM to load up new texture adjustments.
It’s so so important to get the rough texture correct before moving on to the final texture! I’ve skipped the rough out part before, and sometimes I forget in my excitement. But I’ve always regretted it and had to go back and make big changes to the final texture!
When you’re happy with your rough texture then it's time for finalizing the texture.
In 3DCoat (or similar app) finalize painting and export final textures
I won’t go into details about how I paint in 3DCoat because if I do this guide will never end! But also, everyone has their own favorite software for this.
So just a summary of what I do in 3DCoat:
- Apply materials (like what is shiny or like leather, or rubber) !! Now don’t get materials in 3DCoat or Substance confused with materials VAM. Everyone has their own pipeline for how that material info exports out of the 3d painting app and into VAM. But in general - all the materials used in 3DCoat or within Substance get exported out and transferred to texture maps (diffuse, specular, gloss, normal, alpha). You get the idea I hope.
- Painting bump
- Setup all my colors with a 50% grey value. Or at least just the color that I want to be able to color tint in VAM. If you like working with color because it helps you visualize things, thats fine too. You can convert to grey later if you need to.
- Add fine details like stitching and buckle holes. Basically all texture and bump details
- Setup my alpha mask (make the basis for my alpha texture)
After painting is done, export out final textures.
Just one quick 3DCoat tip! I use this function so much. I have it on a hotkey.
What this does is open up a the layered psd in photoshop directly.
This is how I extract my alpha map. But it’s also how I quickly extract SIM textures too!
It appears in Photoshop like this with all layers intact. But be VERY careful with this. If you make edits in here, it’s best to make a brand new layer in PS to do that. Sometimes if you edit existing layers too much it might break things!
You can see I have created this layer in 3DCoat. It for my alpha. I’ll copy this out and into the VAM alpha map.
Ok so after you’ve finalized textures it’s time to finalize the mesh.
Finalize the mesh
Pretty straight forward - Copy/mirror for the other shoe. Do the same for the heel mesh.
I almost forgot! You can optimize the mesh by deleting faces in transparent areas.
Then repeat all the export and import to VAM steps!
Are you feeling like this yet?
Don’t worry, we’re almost done!
Finishing up
The last part is bringing all your textures into VAM and tuning materials. It’s very likely you’ve done this part before!
After that, you’re done.
And look at that, you got your eyes back!