High poly cloth are not video game friendly when come to rendering and physics sim,
Please use UNREAL ENGINE, bye~
JK. 1 earring could be easily over 20k. For props needs high rigidity like the earrings
you might want to consider using low-poly to preserve the rigidity with sim.
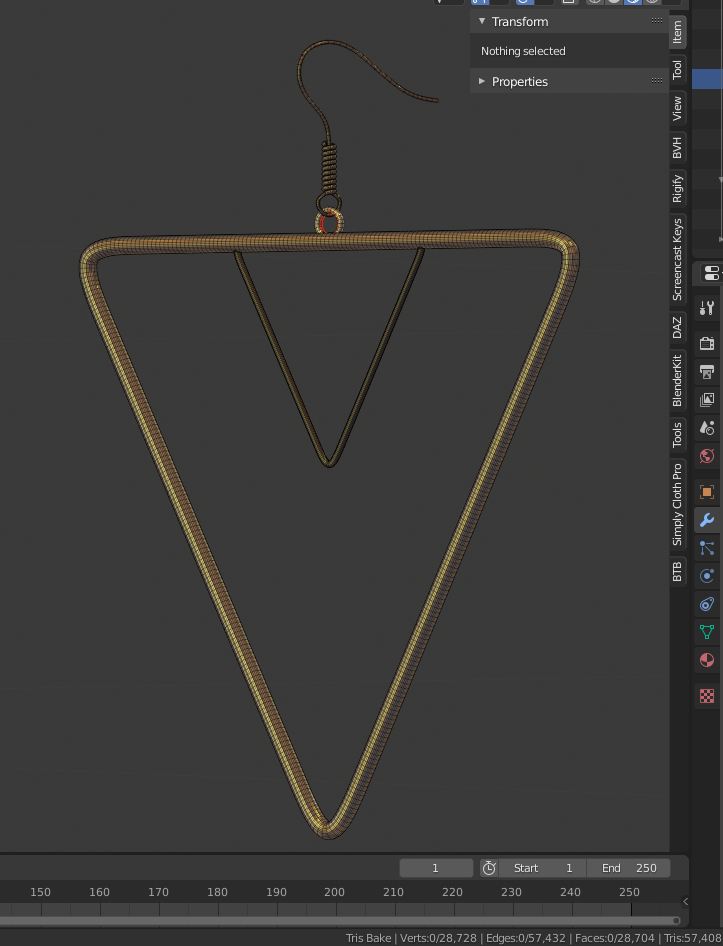
Here are the steps I took for my

 hub.virtamate.com
Mesh Design:
Design with the mindset of you are gonna retopo to low-poly (Very important)
Retopo the prop as basic shape, triangle, square are both fine (using just around 10 poly for my earring)
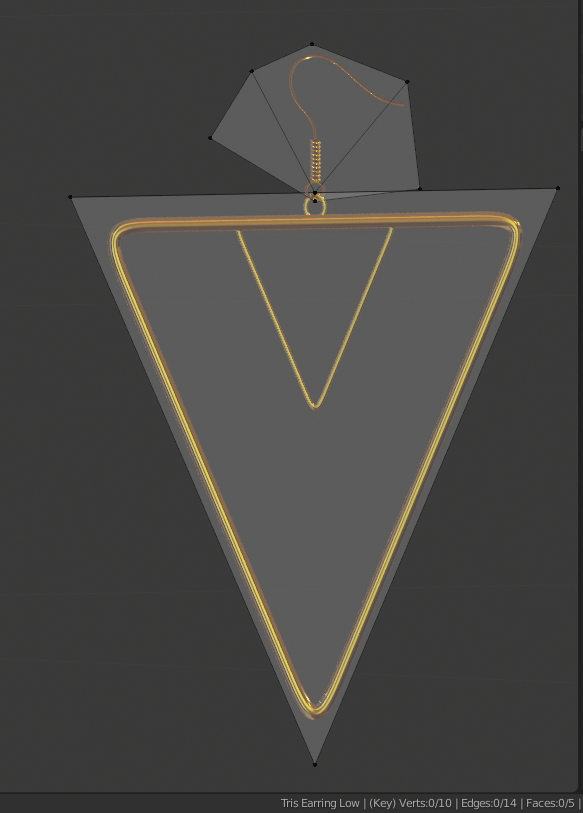
In this case when sim for the rigidity, it would hold much better because its not able to bend nor twist.
Bake Texture:
Use any kind of baker to bake the high ply model to low poly mesh
(I am using either SimpleBake in blender or marmoset toolbag)
Sim Physics Setup:
There are two ways to go with physic sim
You can keep each part of the mesh either connected or disconnected
if mesh are connected, they will be stay connected after sim.
Since they are low-poly, they might be overly stiff like one single piece
In this case you might want to disconnect them and reimport
then use create nearby joint setting instead.
In clothing creator cloth sim section
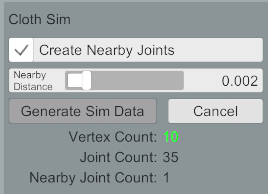
For what I understand, it create hinge joins between disconnected parts
The result could looks really good, but at the a cost of lower fps,
you want to use as low nearby distance as possible.
Sim Painting is supa easy, just need to up the top vert and loose all others.
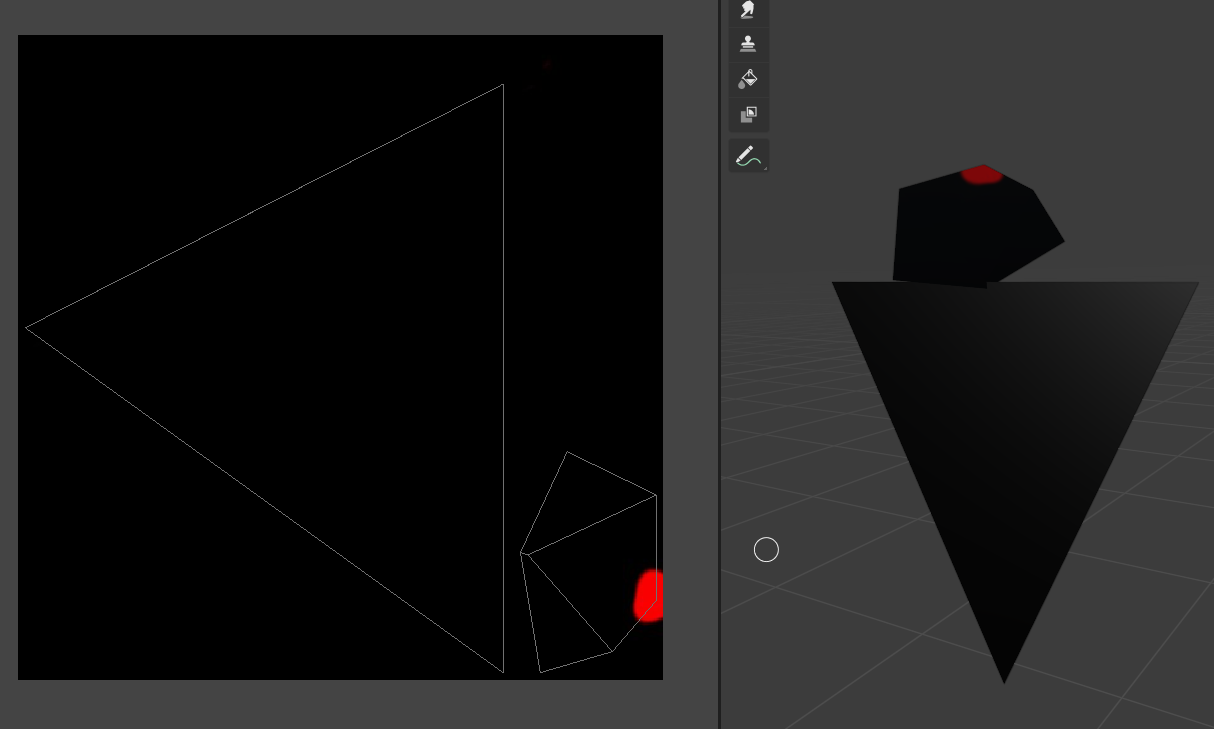
Sim Setting is important on how the physics gonna look,
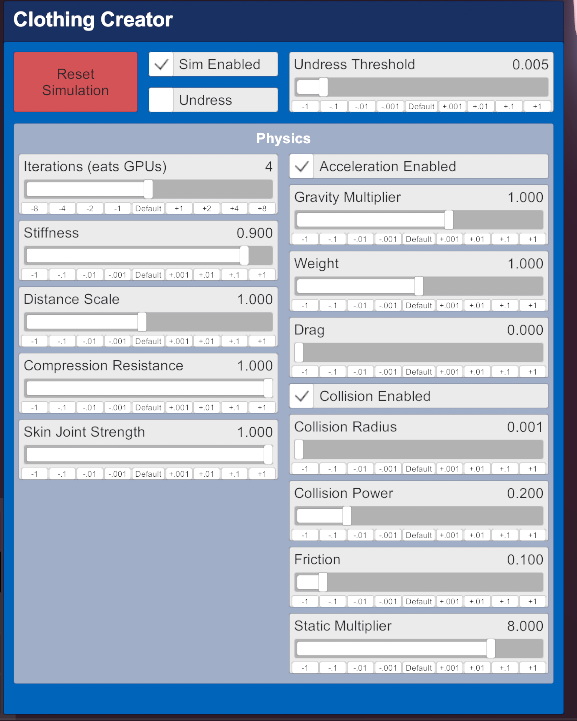
Iterations in general you want to keep it low to not affecting performance much,
but since it is low-ply mesh, you can go as high as you need without much penalty.
High stiffness is needed for high rigidity, but it could produce some shaking, so I dont use 1
Drag will lower the rate of flow, no drag is good for this
Collision Radius somehow affect the physics movement, lower it will give you more natural result
but we still want the mesh to collide with skin, so some collision power is very needed.
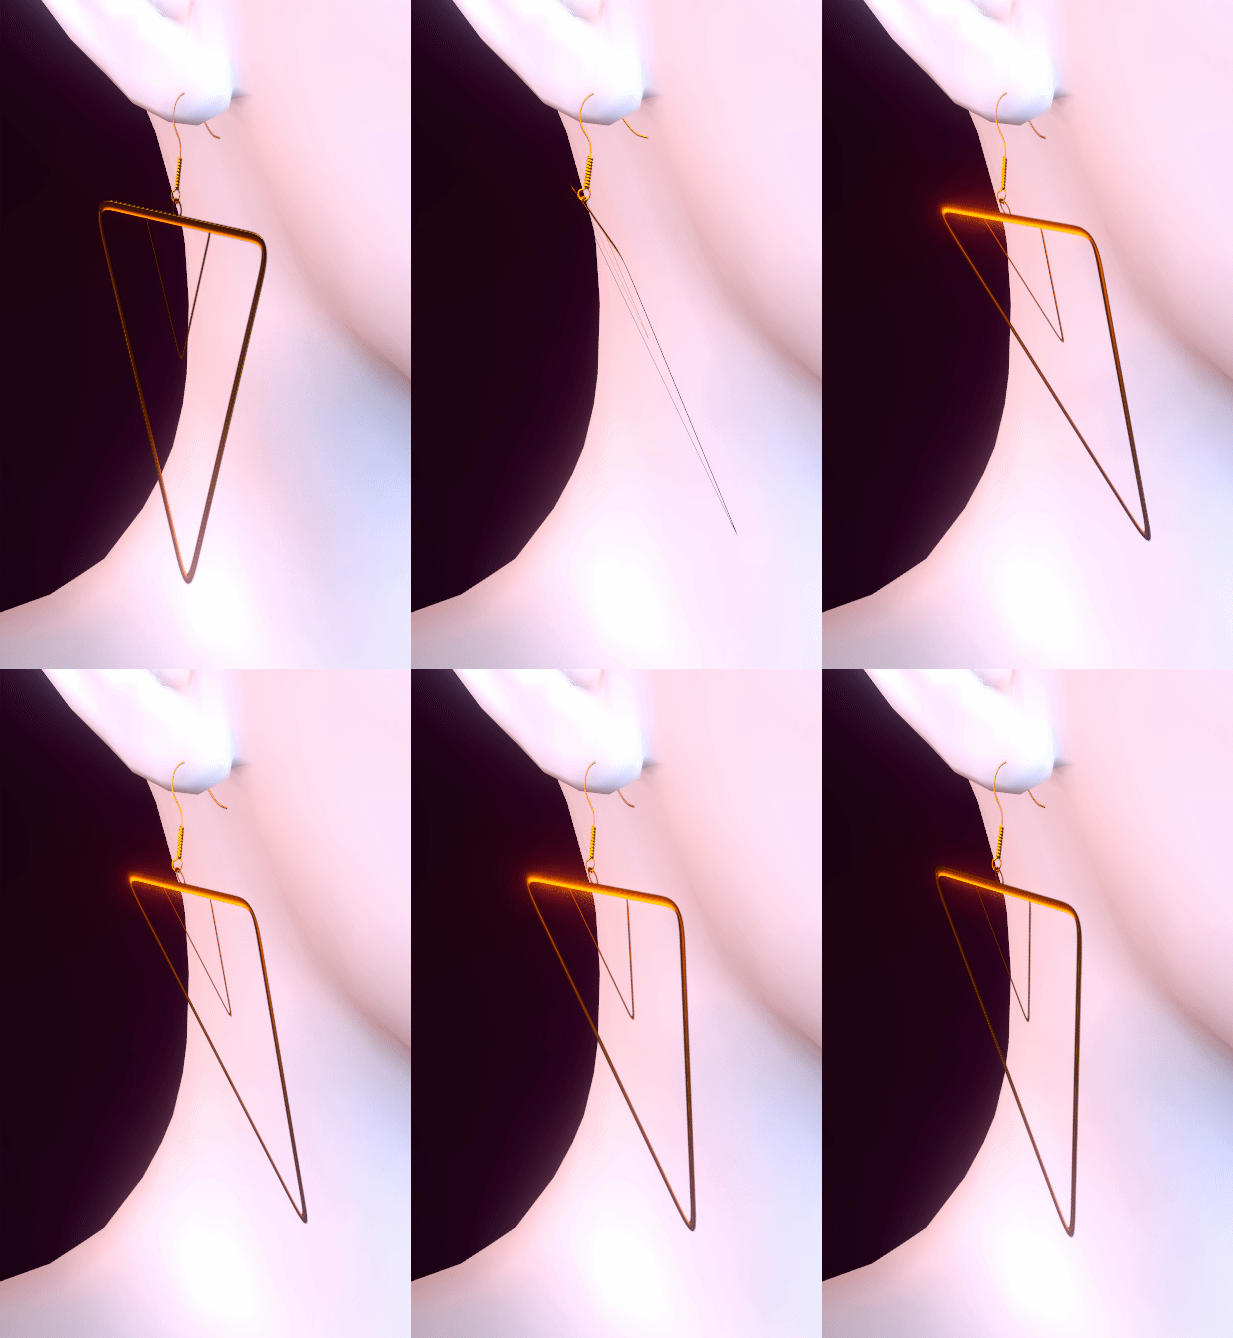
Play around with the setting then we got result like below
Extra Important:
Just remember to use smooth iteration as 0 when setup presets
Or low-poly cloth looks like crap.
Happy Vaming
Please use UNREAL ENGINE, bye~
JK. 1 earring could be easily over 20k. For props needs high rigidity like the earrings
you might want to consider using low-poly to preserve the rigidity with sim.
Here are the steps I took for my
Basic Shapes Earrings (Added TriForce Version) - Clothing -
3D Rendering Preview/Download on Sketchfab Physic Preview: Experimental low poly earring set by SupaRioAmateur 2 sets are in Clothing section, they are resizable by changing the distance scale in sim settings.
Mesh Design:
Design with the mindset of you are gonna retopo to low-poly (Very important)
Retopo the prop as basic shape, triangle, square are both fine (using just around 10 poly for my earring)
In this case when sim for the rigidity, it would hold much better because its not able to bend nor twist.
Bake Texture:
Use any kind of baker to bake the high ply model to low poly mesh
(I am using either SimpleBake in blender or marmoset toolbag)
Sim Physics Setup:
There are two ways to go with physic sim
You can keep each part of the mesh either connected or disconnected
if mesh are connected, they will be stay connected after sim.
Since they are low-poly, they might be overly stiff like one single piece
In this case you might want to disconnect them and reimport
then use create nearby joint setting instead.
In clothing creator cloth sim section
For what I understand, it create hinge joins between disconnected parts
The result could looks really good, but at the a cost of lower fps,
you want to use as low nearby distance as possible.
Sim Painting is supa easy, just need to up the top vert and loose all others.
Sim Setting is important on how the physics gonna look,
Iterations in general you want to keep it low to not affecting performance much,
but since it is low-ply mesh, you can go as high as you need without much penalty.
High stiffness is needed for high rigidity, but it could produce some shaking, so I dont use 1
Drag will lower the rate of flow, no drag is good for this
Collision Radius somehow affect the physics movement, lower it will give you more natural result
but we still want the mesh to collide with skin, so some collision power is very needed.
Play around with the setting then we got result like below
Extra Important:
Just remember to use smooth iteration as 0 when setup presets
Or low-poly cloth looks like crap.
Happy Vaming


