
This Guide is about adding scaling and/or fixed foveated rendering to VAM, dramatically increasing either your Image Quality without FPS-loss or increasing FPS drastically with minimal image quality loss. Im not talking about a handful finetune-fps, im talking like 15-50 vr fps gain. Desktop scaling methods can help but arent as impactful as the VR tweaks shown below.
General VR performance improvement: VR-Mod App by tappi287
(This can be skipped with a QuestPro, you have actual foveated rendering baked in)
This software lets you beside other things, force fixed foveated Rendering into VaM (or any other VR game/app). You should bother setting this up, because it reduces the Pixel density of the outer edges of the VR goggles. Reducing pixel density sounds like an image quality loss, but in real application it isnt - because your actual Eye has a Focus, basically a built in depth of field if you will. Bottom line, it results in an unseeable image quality loss which frees up much needed GPU load when using a VR device. Despite the general perception being that VaM is mostly CPU bound (which isnt wrong for Desktop use), things shift around a bit depending on the Hardware and Settings youre using. For example, Rendering a 2k*2k resoloution image twice in your VR goggles is infinately more demanding on your GPU then rendering a 1920x1080 picture once for your regular Monitor. General information aside, heres a step-by-step on how to set it up:
Download the Installer, install wherever you want. Open the software and hit the little icon in the Top left where you can add Steam-external Apps to it. Now add the Path of the VaM root folder aswell as the VaM.exe to it. Youll see that VaM is now added to the software, click on VaM.exe and it it expands. I recommend you only add the foveated plugin here. Youre already done now. Customize the downscaling rings if you want, but the standart settings will do aswell. Enjoy tons of free'd up GPU load, which you can now use to either push image quality further - by e.g. setting a higher base resoloution in your original VR software - or just roll with the big chunk of FPS you just gained. Pushing for a higher base resoloution, which basically is the holy grail of VR image quality, gets exponentially more effective with foveated rendering. Your image now only gets rendered in full-size in the focus of your eye, which practially takes out 60% (or however much you let the downscaling rings rescale it) of the resoloution to resource cost calculation. With a higher end current Gen GPU, i manage to reach 75-100 VR Fps in a 2 person scene @5152x2608x Resoloution per eye. In my opinion, its very much worth it to play around with the Settings a bit. Depending on your Hardware, you can make VaM almost look like reallife in VR.
Setting up a Shader-Cache: VR is Vram intensive like hell. Helping out your GPU with a shader cache can go a long way, especially if youre using Cards with below 10gigs of Vram. To set this up, go to your Nvidia Control Panel -> 3D Settings -> Shader Cache and set it to 10 gigabyte (or higher).
Finally, restart your PC.
Oculus users, please read this!
Asynchronous Spacewarp, the ugly and way too old sister of DLSS3, is WILDLY capping your FPS below the actual potential of the Hardware youre using. An indicator that your VR enjoyment gets watered down by this, is that you dont see FPS fluctuate smoothly (e.g. jumping between 50-55-60-65-70-75) but gets cut down in huge Chunks (e.g. 80 -> 40).
How to disable it: Open up your OculusDebugTool in the Root folder of your original Oculus Software->Support->Oculus Diagnostics. Set (PC) Asynchronous Spacewarp from Auto to Disable. While youre at it, theres some other things you can disable and configure, especially for a Quest2/3 on a RiftLink-Cable. Do a quick google search for recommended debugtool settings for the hardware youre using, the internet is full with recommended&tested settings for different setups.
Either Repeat this before every VR Session, or use the OculusTrayTool to make the settings permanent. Theres also some manual edits you can do to have it ASW disabled automatically. Take a look at This Forum entry and slightly adjust the following:
In the target box do"C:\Program Files\Oculus\Support\oculus-diagnostics\OculusDebugToolCLI.exe" -f Commands.txt Or whatever your path is.
The imporant bit is the -f Commands.txt needs to specifcally go outside of the quotes, not in like the post says
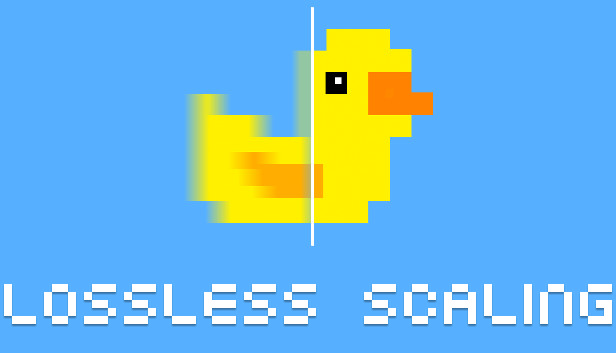
For Desktop: Lossless Scaling (5$ on Steam)
 store.steampowered.com
Theres another Free tool which is called "MagPie". Other than that i wont cover it here because it allegedly has some big issues and the Site looks shady. Use at your own risk
Blaspheratus pointed out that you can manually Set-up NIS via your Nvidia-Drivers. Desktop only.
 nvidia.custhelp.com
Lots of you guys probably know about AMD's upscaling competitor, FSR. It has helped me and so many others to get huge performance boosts in other games with native FSR suppport, unfortunately VaM doesnt have native FSR, DLAA or DLSS support currently (please add that meshed!).
Lossless Scaling, an App available on Steam, adds basically slightly nerfed versions of FSR and other Upscaling tools into every game, app or video you want to enjoy.
This is a very user-friendly tool, you can either just click your preferred settings in the app and let it auto-scale on native resoloution for a big image-quality boost with no FPS-loss, or you can lower VAM's render-scale or native res and let the App rescale it for massive FPS gains
I cant recommend this tool enough, it works with almost all games and even old Videos. You can enjoy some oldie classic games, decade old Animes or TV-shows with modern resoloutions and aspect ratio's.
Have fun with a smoother or better looking VaM. Cheers
General VR performance improvement: VR-Mod App by tappi287
(This can be skipped with a QuestPro, you have actual foveated rendering baked in)
This software lets you beside other things, force fixed foveated Rendering into VaM (or any other VR game/app). You should bother setting this up, because it reduces the Pixel density of the outer edges of the VR goggles. Reducing pixel density sounds like an image quality loss, but in real application it isnt - because your actual Eye has a Focus, basically a built in depth of field if you will. Bottom line, it results in an unseeable image quality loss which frees up much needed GPU load when using a VR device. Despite the general perception being that VaM is mostly CPU bound (which isnt wrong for Desktop use), things shift around a bit depending on the Hardware and Settings youre using. For example, Rendering a 2k*2k resoloution image twice in your VR goggles is infinately more demanding on your GPU then rendering a 1920x1080 picture once for your regular Monitor. General information aside, heres a step-by-step on how to set it up:
Download the Installer, install wherever you want. Open the software and hit the little icon in the Top left where you can add Steam-external Apps to it. Now add the Path of the VaM root folder aswell as the VaM.exe to it. Youll see that VaM is now added to the software, click on VaM.exe and it it expands. I recommend you only add the foveated plugin here. Youre already done now. Customize the downscaling rings if you want, but the standart settings will do aswell. Enjoy tons of free'd up GPU load, which you can now use to either push image quality further - by e.g. setting a higher base resoloution in your original VR software - or just roll with the big chunk of FPS you just gained. Pushing for a higher base resoloution, which basically is the holy grail of VR image quality, gets exponentially more effective with foveated rendering. Your image now only gets rendered in full-size in the focus of your eye, which practially takes out 60% (or however much you let the downscaling rings rescale it) of the resoloution to resource cost calculation. With a higher end current Gen GPU, i manage to reach 75-100 VR Fps in a 2 person scene @5152x2608x Resoloution per eye. In my opinion, its very much worth it to play around with the Settings a bit. Depending on your Hardware, you can make VaM almost look like reallife in VR.
Setting up a Shader-Cache: VR is Vram intensive like hell. Helping out your GPU with a shader cache can go a long way, especially if youre using Cards with below 10gigs of Vram. To set this up, go to your Nvidia Control Panel -> 3D Settings -> Shader Cache and set it to 10 gigabyte (or higher).
Finally, restart your PC.
Oculus users, please read this!
Asynchronous Spacewarp, the ugly and way too old sister of DLSS3, is WILDLY capping your FPS below the actual potential of the Hardware youre using. An indicator that your VR enjoyment gets watered down by this, is that you dont see FPS fluctuate smoothly (e.g. jumping between 50-55-60-65-70-75) but gets cut down in huge Chunks (e.g. 80 -> 40).
How to disable it: Open up your OculusDebugTool in the Root folder of your original Oculus Software->Support->Oculus Diagnostics. Set (PC) Asynchronous Spacewarp from Auto to Disable. While youre at it, theres some other things you can disable and configure, especially for a Quest2/3 on a RiftLink-Cable. Do a quick google search for recommended debugtool settings for the hardware youre using, the internet is full with recommended&tested settings for different setups.
Either Repeat this before every VR Session, or use the OculusTrayTool to make the settings permanent. Theres also some manual edits you can do to have it ASW disabled automatically. Take a look at This Forum entry and slightly adjust the following:
In the target box do"C:\Program Files\Oculus\Support\oculus-diagnostics\OculusDebugToolCLI.exe" -f Commands.txt Or whatever your path is.
The imporant bit is the -f Commands.txt needs to specifcally go outside of the quotes, not in like the post says
For Desktop: Lossless Scaling (5$ on Steam)
Lossless Scaling on Steam
Scaling windowed games to full screen using state-of-the-art spatial scaling algorithms, sharpening algorithms and machine learning.
Theres another Free tool which is called "MagPie". Other than that i wont cover it here because it allegedly has some big issues and the Site looks shady. Use at your own risk
Blaspheratus pointed out that you can manually Set-up NIS via your Nvidia-Drivers. Desktop only.
NVIDIA Support
nvidia.custhelp.com
Lots of you guys probably know about AMD's upscaling competitor, FSR. It has helped me and so many others to get huge performance boosts in other games with native FSR suppport, unfortunately VaM doesnt have native FSR, DLAA or DLSS support currently (please add that meshed!).
Lossless Scaling, an App available on Steam, adds basically slightly nerfed versions of FSR and other Upscaling tools into every game, app or video you want to enjoy.
This is a very user-friendly tool, you can either just click your preferred settings in the app and let it auto-scale on native resoloution for a big image-quality boost with no FPS-loss, or you can lower VAM's render-scale or native res and let the App rescale it for massive FPS gains
I cant recommend this tool enough, it works with almost all games and even old Videos. You can enjoy some oldie classic games, decade old Animes or TV-shows with modern resoloutions and aspect ratio's.
Have fun with a smoother or better looking VaM. Cheers