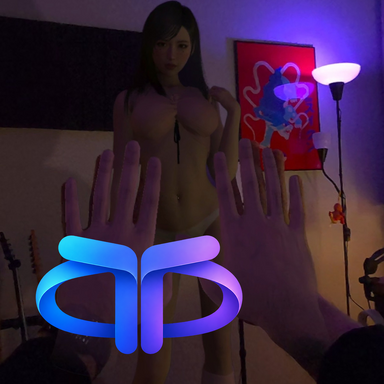
True Through - Native Passthrough Meta Bridge

Plugins + Scripts True Through - Native Passthrough Meta Bridge

Download [48.1 MB]
I'm editing my post because I just found the plugin locations in the included README.txt file (for anyone else that feels lost). The only other issue I have now is that I found that Hand Tracking doesn't work through Air Link (because apparently the native PC client doesn't support hand tracking?) It works fine with the controllers though...
Edit: I should probably add that when I start the test room, I don't see my hands, and I only see black (despite making sure the box that shows your room is on) so passthrough isn't working either...
Edit 2: Thanks for the feedback. Solved it!

Just kidding! Here's a step by step of what I did. Per Rahasa5660 down below, I eventually found some settings in the Meta Horizon Link application that I didn't know about. Here's what I did, hopefully it saves future users multiple hours of troubleshooting:
First you need to turn your account into a developer account:
1. After following the installation instructions in the plugin description, I went to the Meta Horizon homepage on a web browser and logged in using my Meta account (note: Meta and Facebook have different homepages from the Meta Horizon homepage).
2. Go to your profile icon in the very upper right corner of the page when you login and click on it to open a drop down menu. Click on "Creator Tools"
3. It will ask if you want to share essential data only or share everything, that's up to you. Once that screen goes away, it will say "Log in to the Meta Horizon Developer Dashboard to continue." with a blue Log In. Click it and use the same username and password as your Meta Horizon account,
4. You'll be logged into the developer page, and you'll have a default "team". You may need to activate 2FA and verify your email, but otherwise, you now have a developer account!

Next is on the Meta Horizon mobile app:
5. Open the Meta Horizon app on your phone (there may be other ways to activate developer mode on your headset, but this is the way I know), tap the middle icon on the bottom, with your profile picture.
6. Tap the icon with the three stacked lines in the upper right.
7. Under "Device Management", tap "Devices"
8. Select your headset.
9. At the very bottom, select "Headset Settings" (the green icon)
10. Select "Developer Mode" (third down)
11. Hit the toggle button to turn on Developer Mode. This is only available after you've signed in and activated a "developer account"

Almost done! The next part is on the Meta Horizon Link application on your PC!
12. As rahasa5660 suggested, make sure Hand Tracking is enabled in settings. This one is pretty easy to google...
13. In Meta Horizon Link, in the left hand menu, select "Settings" at the bottom.
14. You should have three tabs now, Account, General AND Developer. Click Developer.
15. Enable "Developer Runtime Features"
16. Turn on "Passthrough Over Meta Horizon Link"
17. I'm not sure if the rest are necessary or optional, but I also enabled "Passthrough Camera API Permissions" and "Spatial Data Over Meta Horizon Link"
After this, I was able to connect my Quest 3 via Air Link, turn on True Through and the passthrough was working in VaM and it's AMAZING
If you're looking for the included plugins, they're not in a VAR package. The exact folder location is explained in the README.txt file that's included with the download.
I just took a break for two days and here we go XD I'm glad you solved that issues and yes, meta is crazy with all that things. But now it works, gj! Wait until updates hehe. There are so many cool things coming.
 
I just took a break for two days and here we go XD I'm glad you solved that issues and yes, meta is crazy with all that things. But now it works, gj! Wait until updates hehe. There are so many cool things coming.
Thanks! But I have to bug you again, I haven't been able to figure out how to use this calibration feature you mentioned. I end up having to edit each wall and floor every time I open the scene. I looked in the various plugin files that were installed, and I can't find anything in the RoomBuilder?
 
Thanks! But I have to bug you again, I haven't been able to figure out how to use this calibration feature you mentioned. I end up having to edit each wall and floor every time I open the scene. I looked in the various plugin files that were installed, and I can't find anything in the RoomBuilder?
Poor guy! I certainly didn't expect you to have to move the walls every single time—no way! So, here are the steps:

- Create an empty object and name it "Room Root."
- Attach the plugin for building walls and floors to it;
- Set the player height to 0 (click for more options - Player Height Adj.) and lock movement so you don't accidentally mess up the room's orientation (User preferences - Navigation - Disable all navigation).
- Now, create the walls and the floor.
- Add lights that correspond to the actual light fixtures in your room—I recommend giving them clear names so you don't get confused later. Set the "Room Root" as the parent for these lights.

Once the walls and lights are set up and in place, proceed to calibration.

- Add the `RoomCalibrationSimple` plugin (found in the `Custom/Scripts/TrueThroughRoomCalibration` folder) to the "Room Root."
- Next, you’ll need to create a calibration reference. Select a "Probe hand"—this refers to the specific controller you will be placing down during the calibration process.
- In the TT menu, disable simultaneous input for hands and controllers to avoid confusing the calibration tool.
- Click "Begin reference setup," place the chosen controller (the "probe hand") in a specific spot, and take note of its position.
- While the controller remains in that spot, use the other controller to click "Capture next point."
- Then, move the first controller to a different location and repeat the process—do this one more time (3 points in total).
- Finally, click "Commit reference point" and save your scene.
Done!

The controller positions should form a large triangle spanning the room to ensure an accurate calibration.

Next time you enter the scene within this same plugin:
- Click "Begin calibration," place the controller on the first point, and select "Capture next point" — then repeat this for the second and third points.

That’s it! Everything that is a child of the "room root" will be calibrated to the position you saved when creating the reference.

Let me know if it helps
 
Back
Top Bottom