This guide provides an explanation in how to apply the fantastic VFX Editor tool developed by @hazmhox. As we shall see in this guide, this plugin is included in a tool folder in the VAMStory resource, and this plugin editor provides a means to change a number of settings for particle effects. This tool can control particle color, individual particle size, opacity and overall scale. However, as @hazmhox points out, this effect may not work for all particle effects, and at times, some of the settings, such as particle size, may need to be adjusted in order to return the particle effect to its original appearance.
A demo scene is provided that includes slider bars that have been configured to adjust the settings within the VFX Editor. Make sure that you have VAMStory in your addonpackages folder and then load up the demo scene included with this guide. There is one particle effect at the top of the scene that does not yet have the plugin installed. That top effect would then be a good particle effect to use in this tutorial. The rest of this narrative explains the steps for installing and configuring the plugin.
First, select the particle effect that you want to edit, and then select the plugin tab on the VAM Menu. Your view should look similar to the image below. Click "select file."
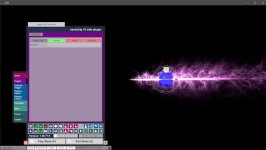
You will next see the main directory menu for VAM. On the left side, select "AddonPackages Filtered," then type VAMStory in the upper right search bar, and your screen will look something like so.
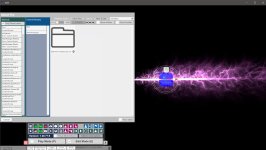
When you click on the VamStory folder, you will go to the directory structure of the VAMStory resource as seen below. Select the "tools" folder.
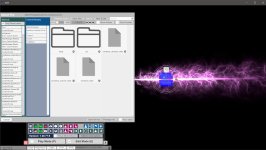
After you have selected the tools folder, you should see the directory as indicated below. Now select the "vams_vfxeditor_cslist" file.
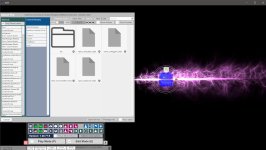
After performing the previous step the plugin will be added to your CUA and you will see the menu below. Now click on "Open Custom UI."
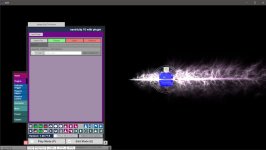
Now you will be in the custom interface for this plugin, as illustrated below. In this example, the default settings for VFX Scale, Particles Opacity, and Particles Size work just fine. On the bottom of the GUI, there is the typical color adjustment box. Try changing the settings to see what happens. One thing to note, if you are working with a particle effect with the plugin attached, and you decide to change to a different particle effect for that CUA, you will likely need to delete and reload the VFX Editor plugin for the change to work properly. My thanks to @CheersMate for pointing this out.
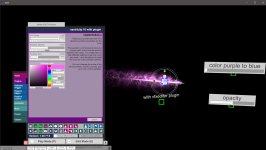
Please feel free to analyze the demo scene included in the guide and test out the various settings. Have fun!
Warm regards,
Farger
A demo scene is provided that includes slider bars that have been configured to adjust the settings within the VFX Editor. Make sure that you have VAMStory in your addonpackages folder and then load up the demo scene included with this guide. There is one particle effect at the top of the scene that does not yet have the plugin installed. That top effect would then be a good particle effect to use in this tutorial. The rest of this narrative explains the steps for installing and configuring the plugin.
First, select the particle effect that you want to edit, and then select the plugin tab on the VAM Menu. Your view should look similar to the image below. Click "select file."

You will next see the main directory menu for VAM. On the left side, select "AddonPackages Filtered," then type VAMStory in the upper right search bar, and your screen will look something like so.

When you click on the VamStory folder, you will go to the directory structure of the VAMStory resource as seen below. Select the "tools" folder.

After you have selected the tools folder, you should see the directory as indicated below. Now select the "vams_vfxeditor_cslist" file.

After performing the previous step the plugin will be added to your CUA and you will see the menu below. Now click on "Open Custom UI."

Now you will be in the custom interface for this plugin, as illustrated below. In this example, the default settings for VFX Scale, Particles Opacity, and Particles Size work just fine. On the bottom of the GUI, there is the typical color adjustment box. Try changing the settings to see what happens. One thing to note, if you are working with a particle effect with the plugin attached, and you decide to change to a different particle effect for that CUA, you will likely need to delete and reload the VFX Editor plugin for the change to work properly. My thanks to @CheersMate for pointing this out.

Please feel free to analyze the demo scene included in the guide and test out the various settings. Have fun!
Warm regards,
Farger


